
How to Generate WooCommerce API Keys for Chatbot Studio?
Step 1: Open the REST API Settings
In your WordPress admin, go to WooCommerce → Settings → Advanced → REST API, then click Add key.
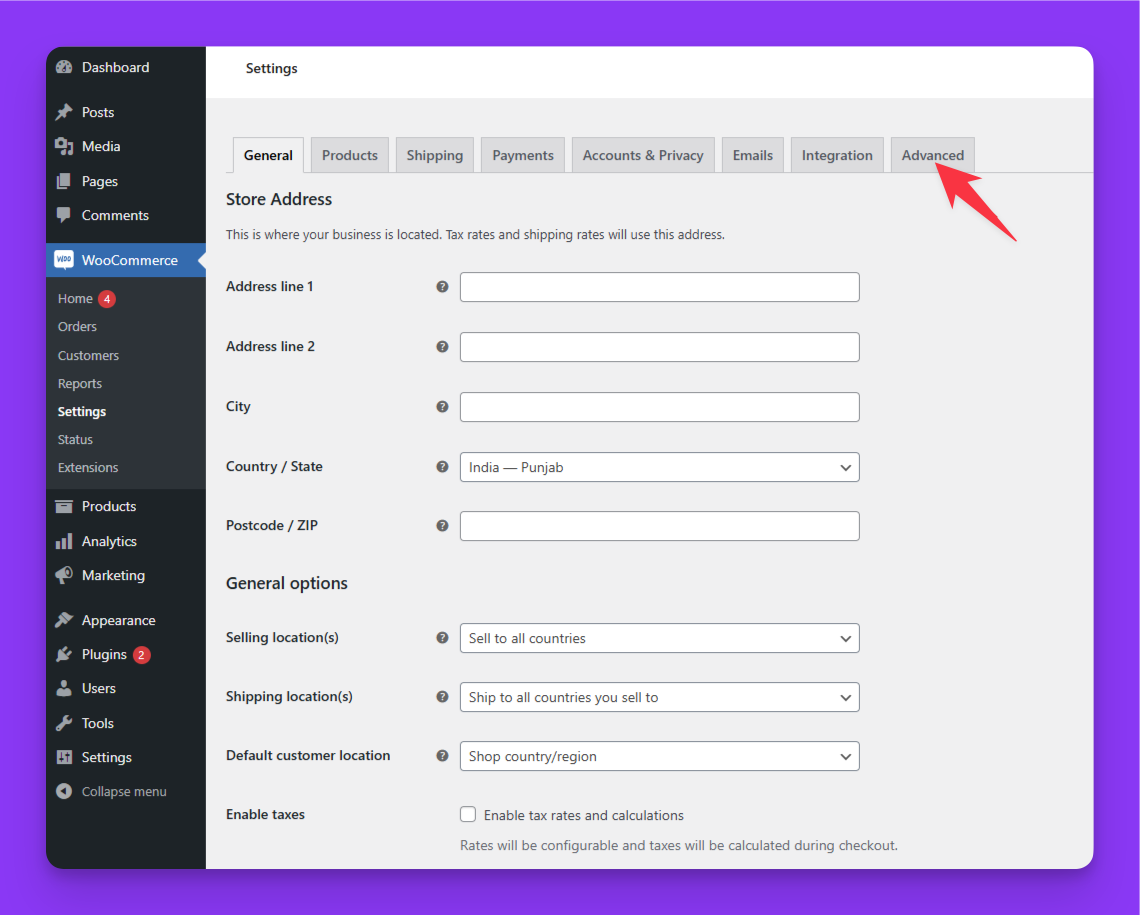
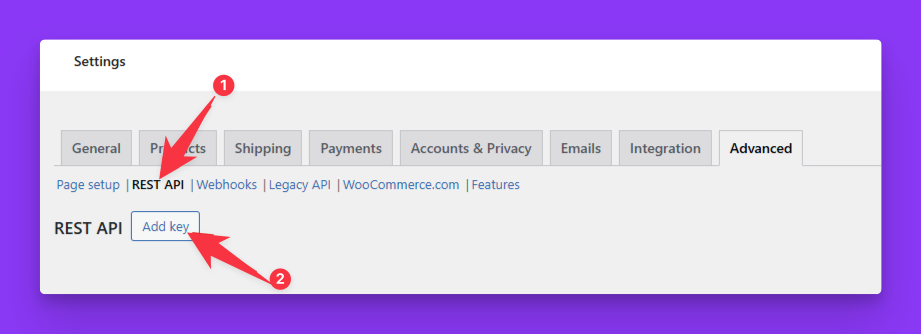
Step 2: Create the Key
Give it a description (for example, "YourGPT Chatbot"), choose a user with admin access, and set Permissions to Read. Then click Generate API key.
Read access is enough for looking up products and orders. Only choose Read/Write if your flow needs to change data in your store.
Step 3: Copy Your Keys
WooCommerce now shows your Consumer Key and Consumer Secret.
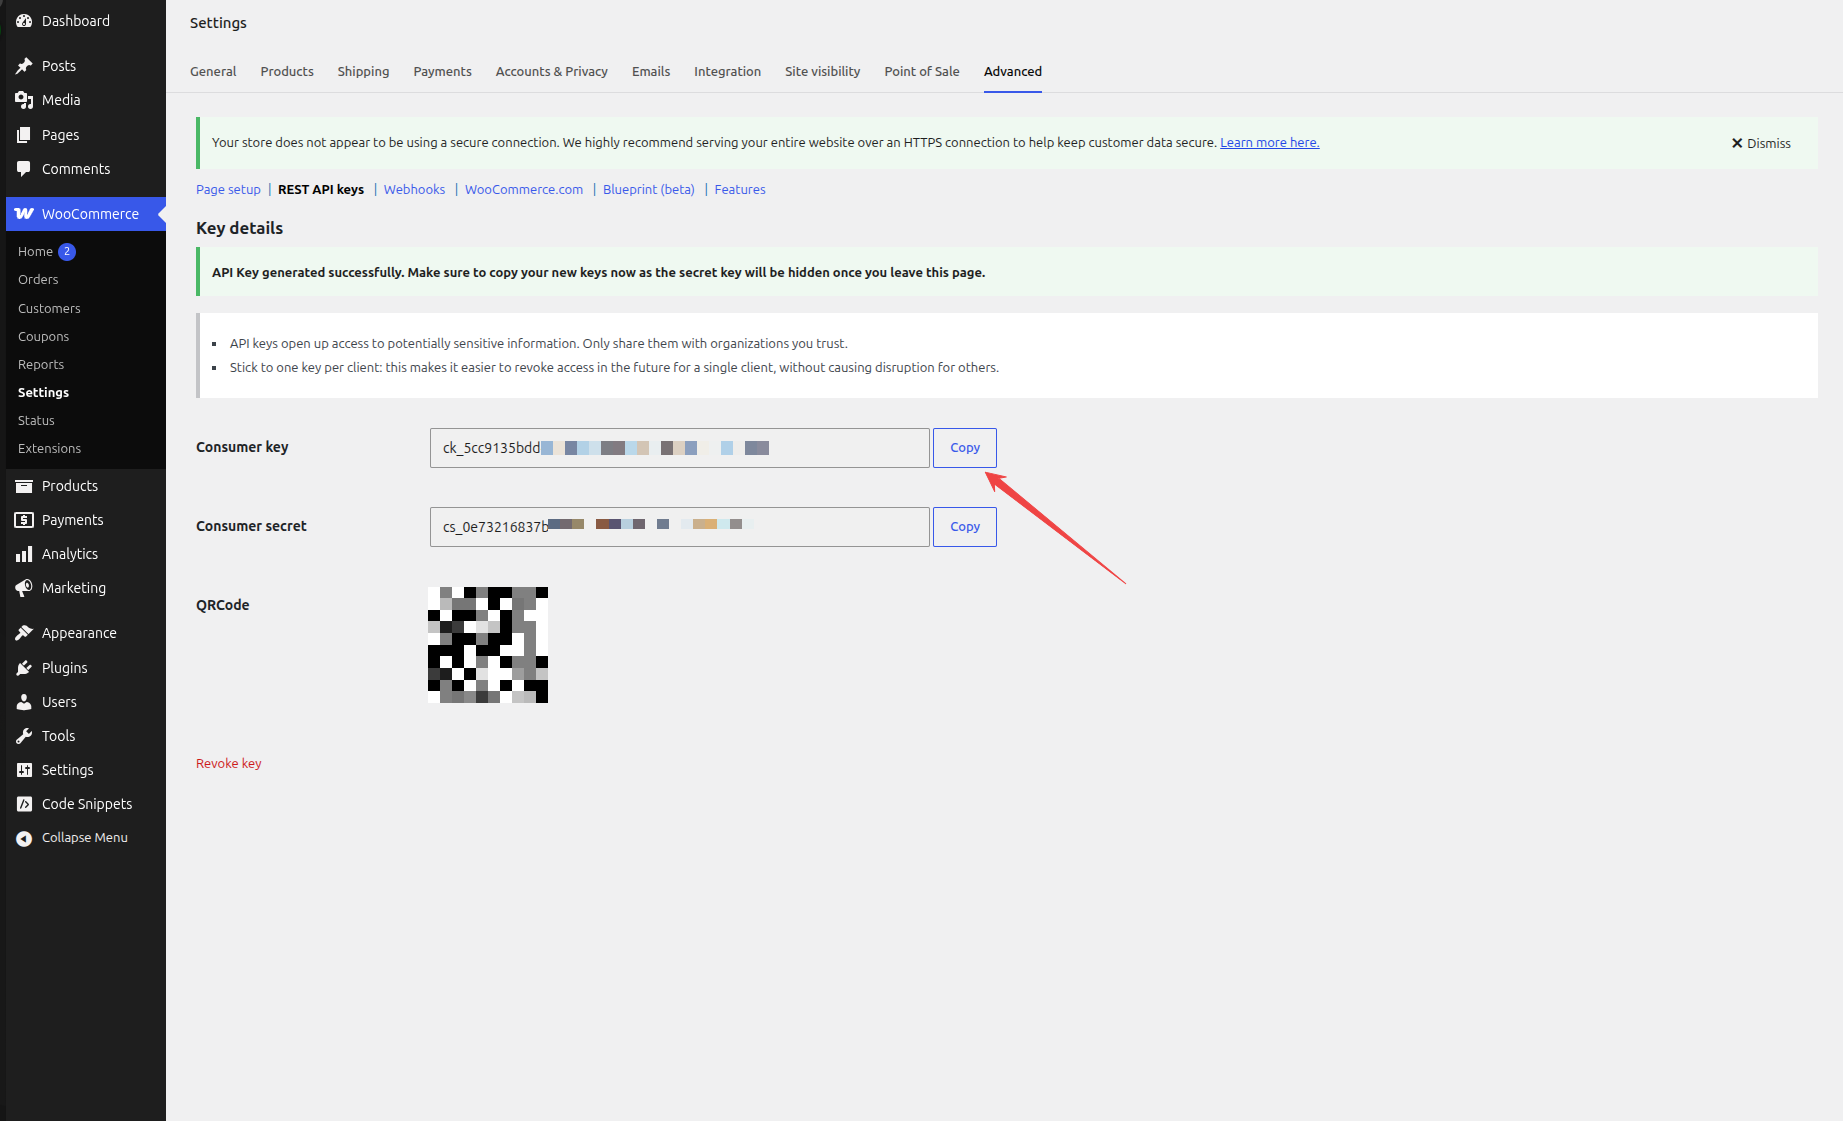
Copy both now — the secret is only shown once, and you won't be able to see it again after leaving this page.
Keep these keys secure. They grant access to your store's data, so store them somewhere safe and don't share them.
Step 4: Add Them to Your Studio Flow
In AI Studio, open your WooCommerce template and add these as configuration variables:
WOOCOMMERCE_STORE_URL— your store address, for examplehttps://yourstore.comWOOCOMMERCE_CONSUMER_KEYWOOCOMMERCE_CONSUMER_SECRET
Publish the flow, and your chatbot can start answering from your WooCommerce data.
Related Articles
How to Install the YourGPT Chatbot on WooCommerce?
Add the YourGPT AI chatbot to your WooCommerce store in a few steps. WooCommerce runs on WordPress, so you have two options — use our WordPress plugin, or paste the widget script into your site.
Sync WooCommerce with YourGPT Using Webhooks
Automatically Update Product and Customer Data Between Your WooCommerce Store and YourGPT
How to Use AI Copilot Actions for WooCommerce
If your website runs on WooCommerce, your chatbot can turn into a real shopping assistant—searching your catalog, showing product cards, and adding items to a shopper's actual cart, all without leaving the chat.