
Building a Payment and Subscription Flow in Your AI Chatbot
Setting up payments inside your chatbot creates a frictionless way for users to subscribe, upgrade plans, or make purchases directly in chat—no redirects or forms needed.
With YourGPT Chatbot, you can deploy these payment-enabled experiences across any platform, including WhatsApp, Telegram, websites, and more. Whether users are on mobile or desktop, they can complete transactions without ever leaving the conversation.
This guide will walk you through how to:
Prompt users to upgrade or subscribe.
Verify user identity (optional).
Create flows to detect subscription status.
Trigger payment link generation and listen for confirmation.
Manage responses based on whether a user is subscribed or not.
Pre-requisites
Before setting up the payment flow, make sure you have:
✅ Basic Understanding of How AI Studio Works, Learn from here
✅ An account with a payment gateway like Stripe, Lemon Squeezy, or Paddle.
✅ Access to your backend or API services to:
Verify users and their subscription status
Generate payment links
Step 1: Create a Payment Intent
Start by creating a new intent in your chatbot flow builder. This intent will be used to trigger the payment process when users express interest in subscribing or upgrading.
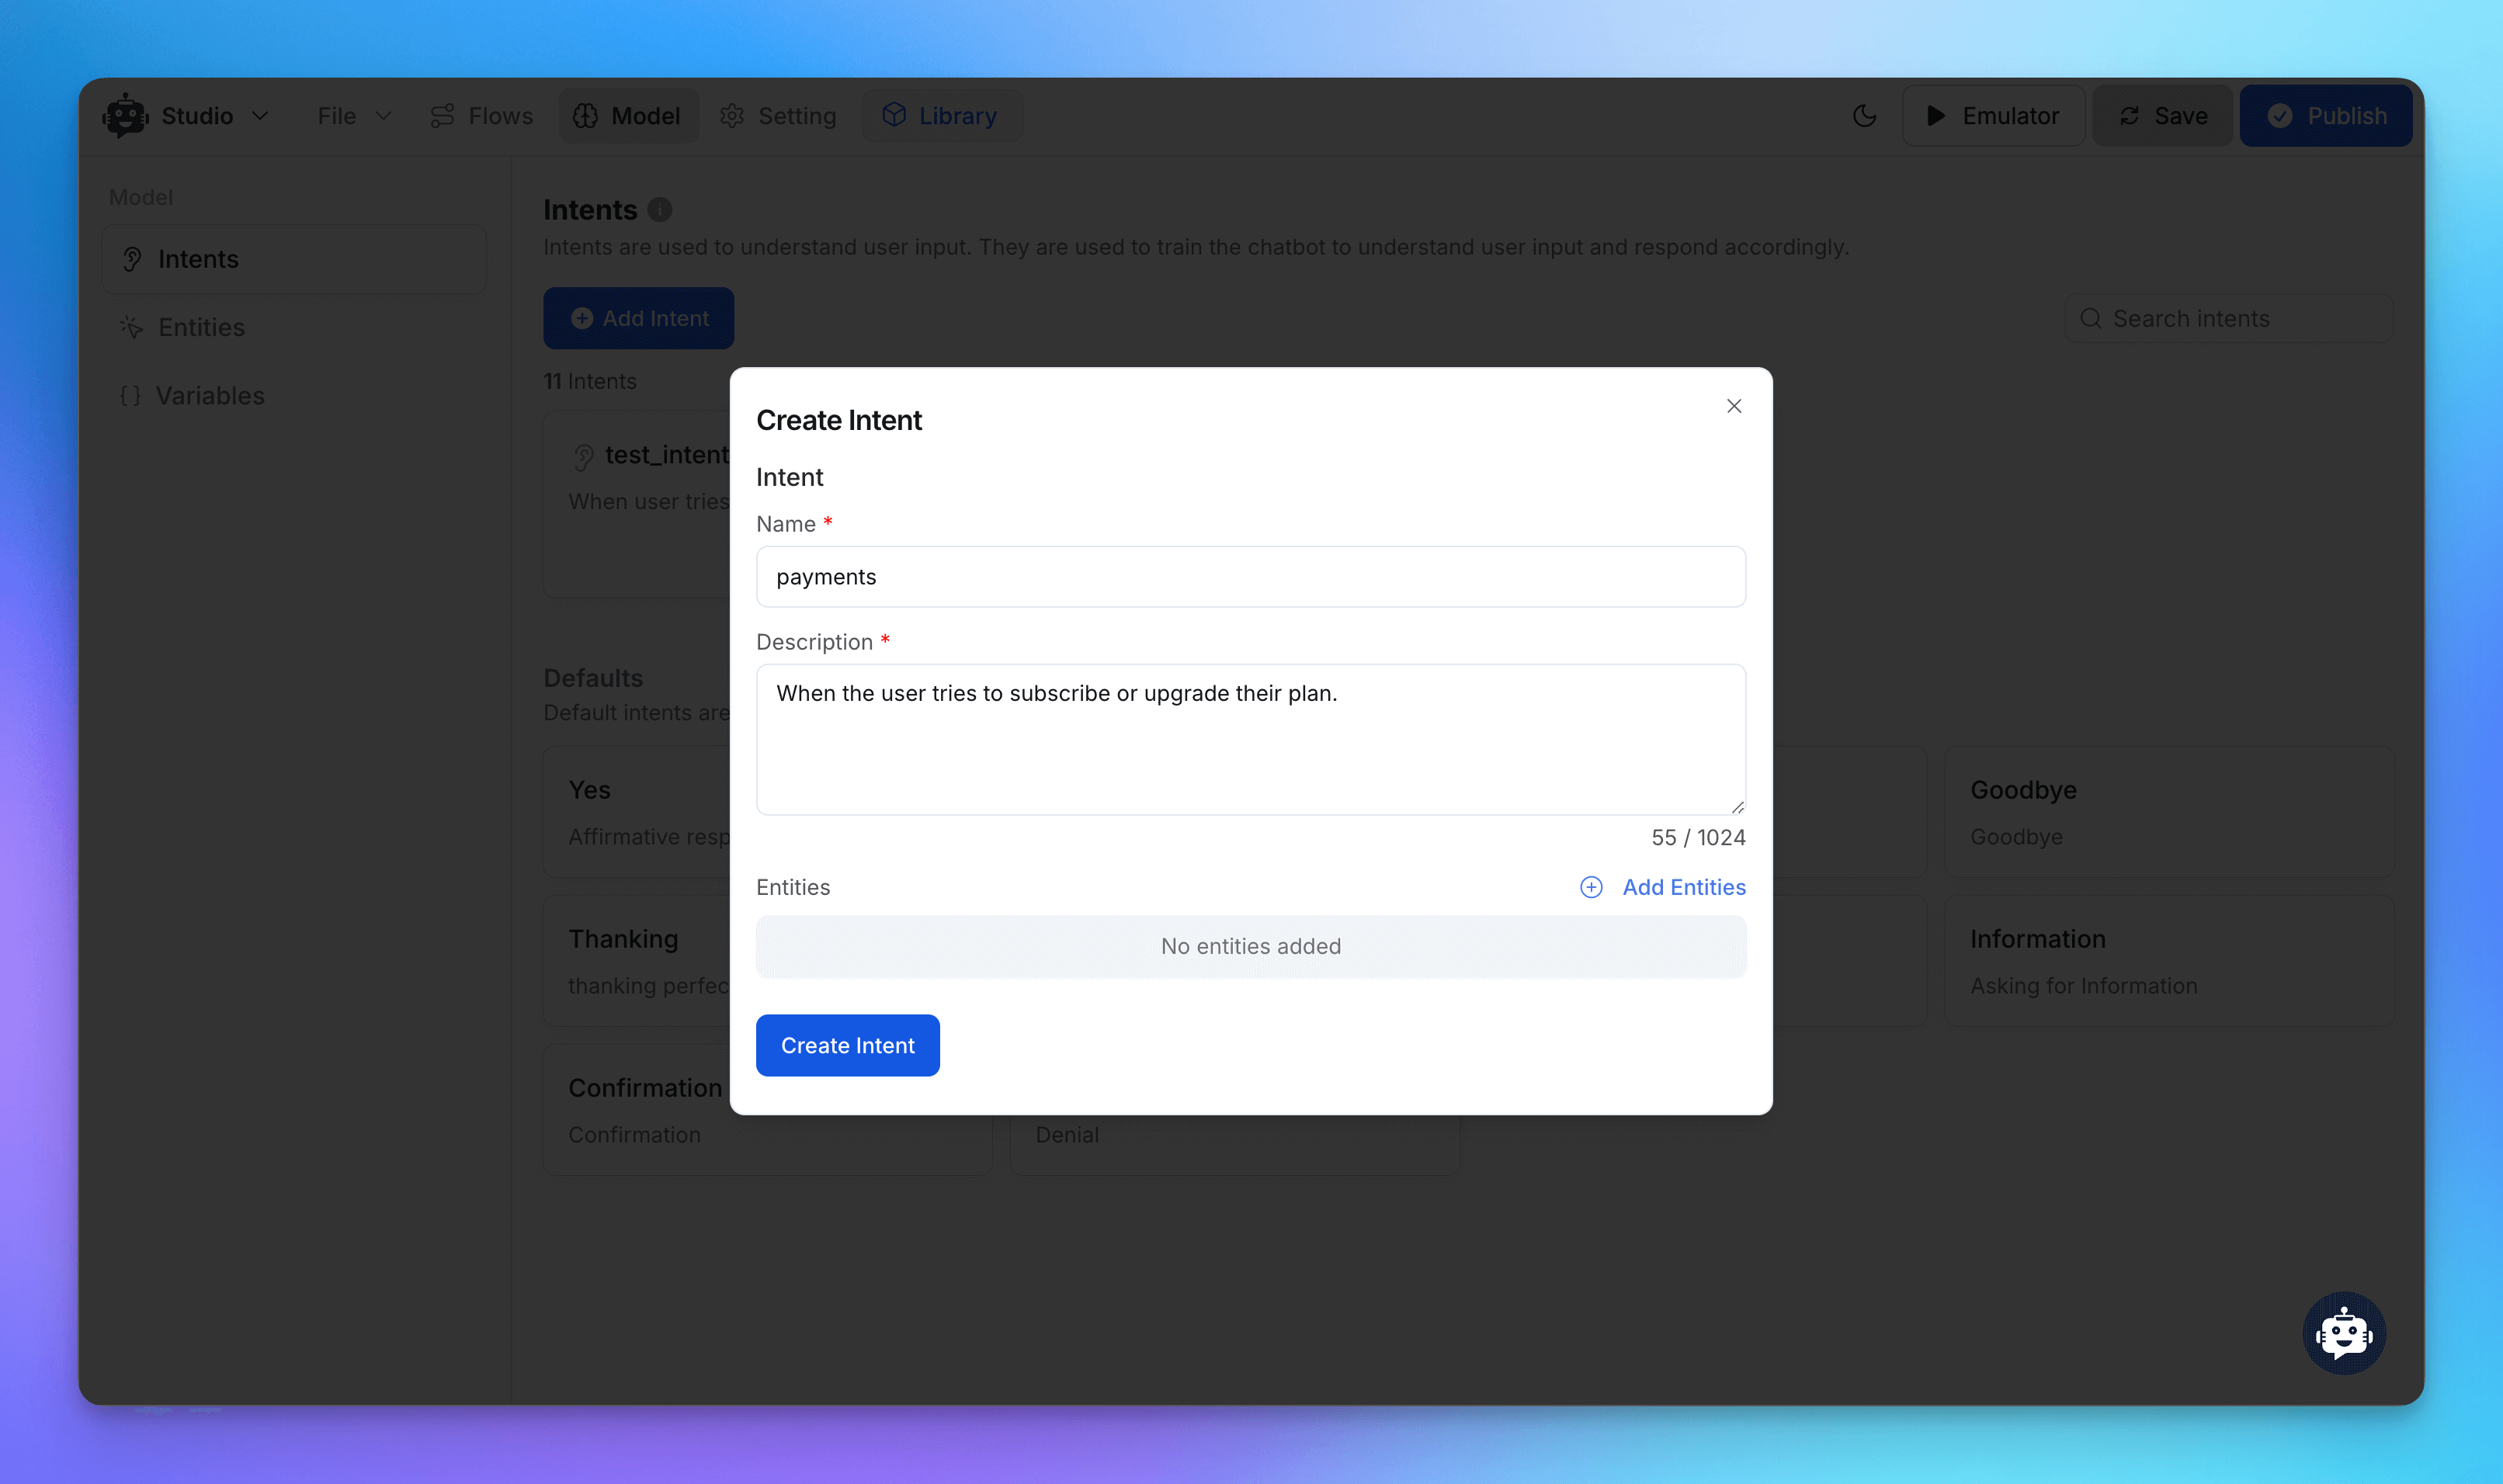
Intent Name:
paymentsDescription: "When the user tries to subscribe or upgrade their plan."
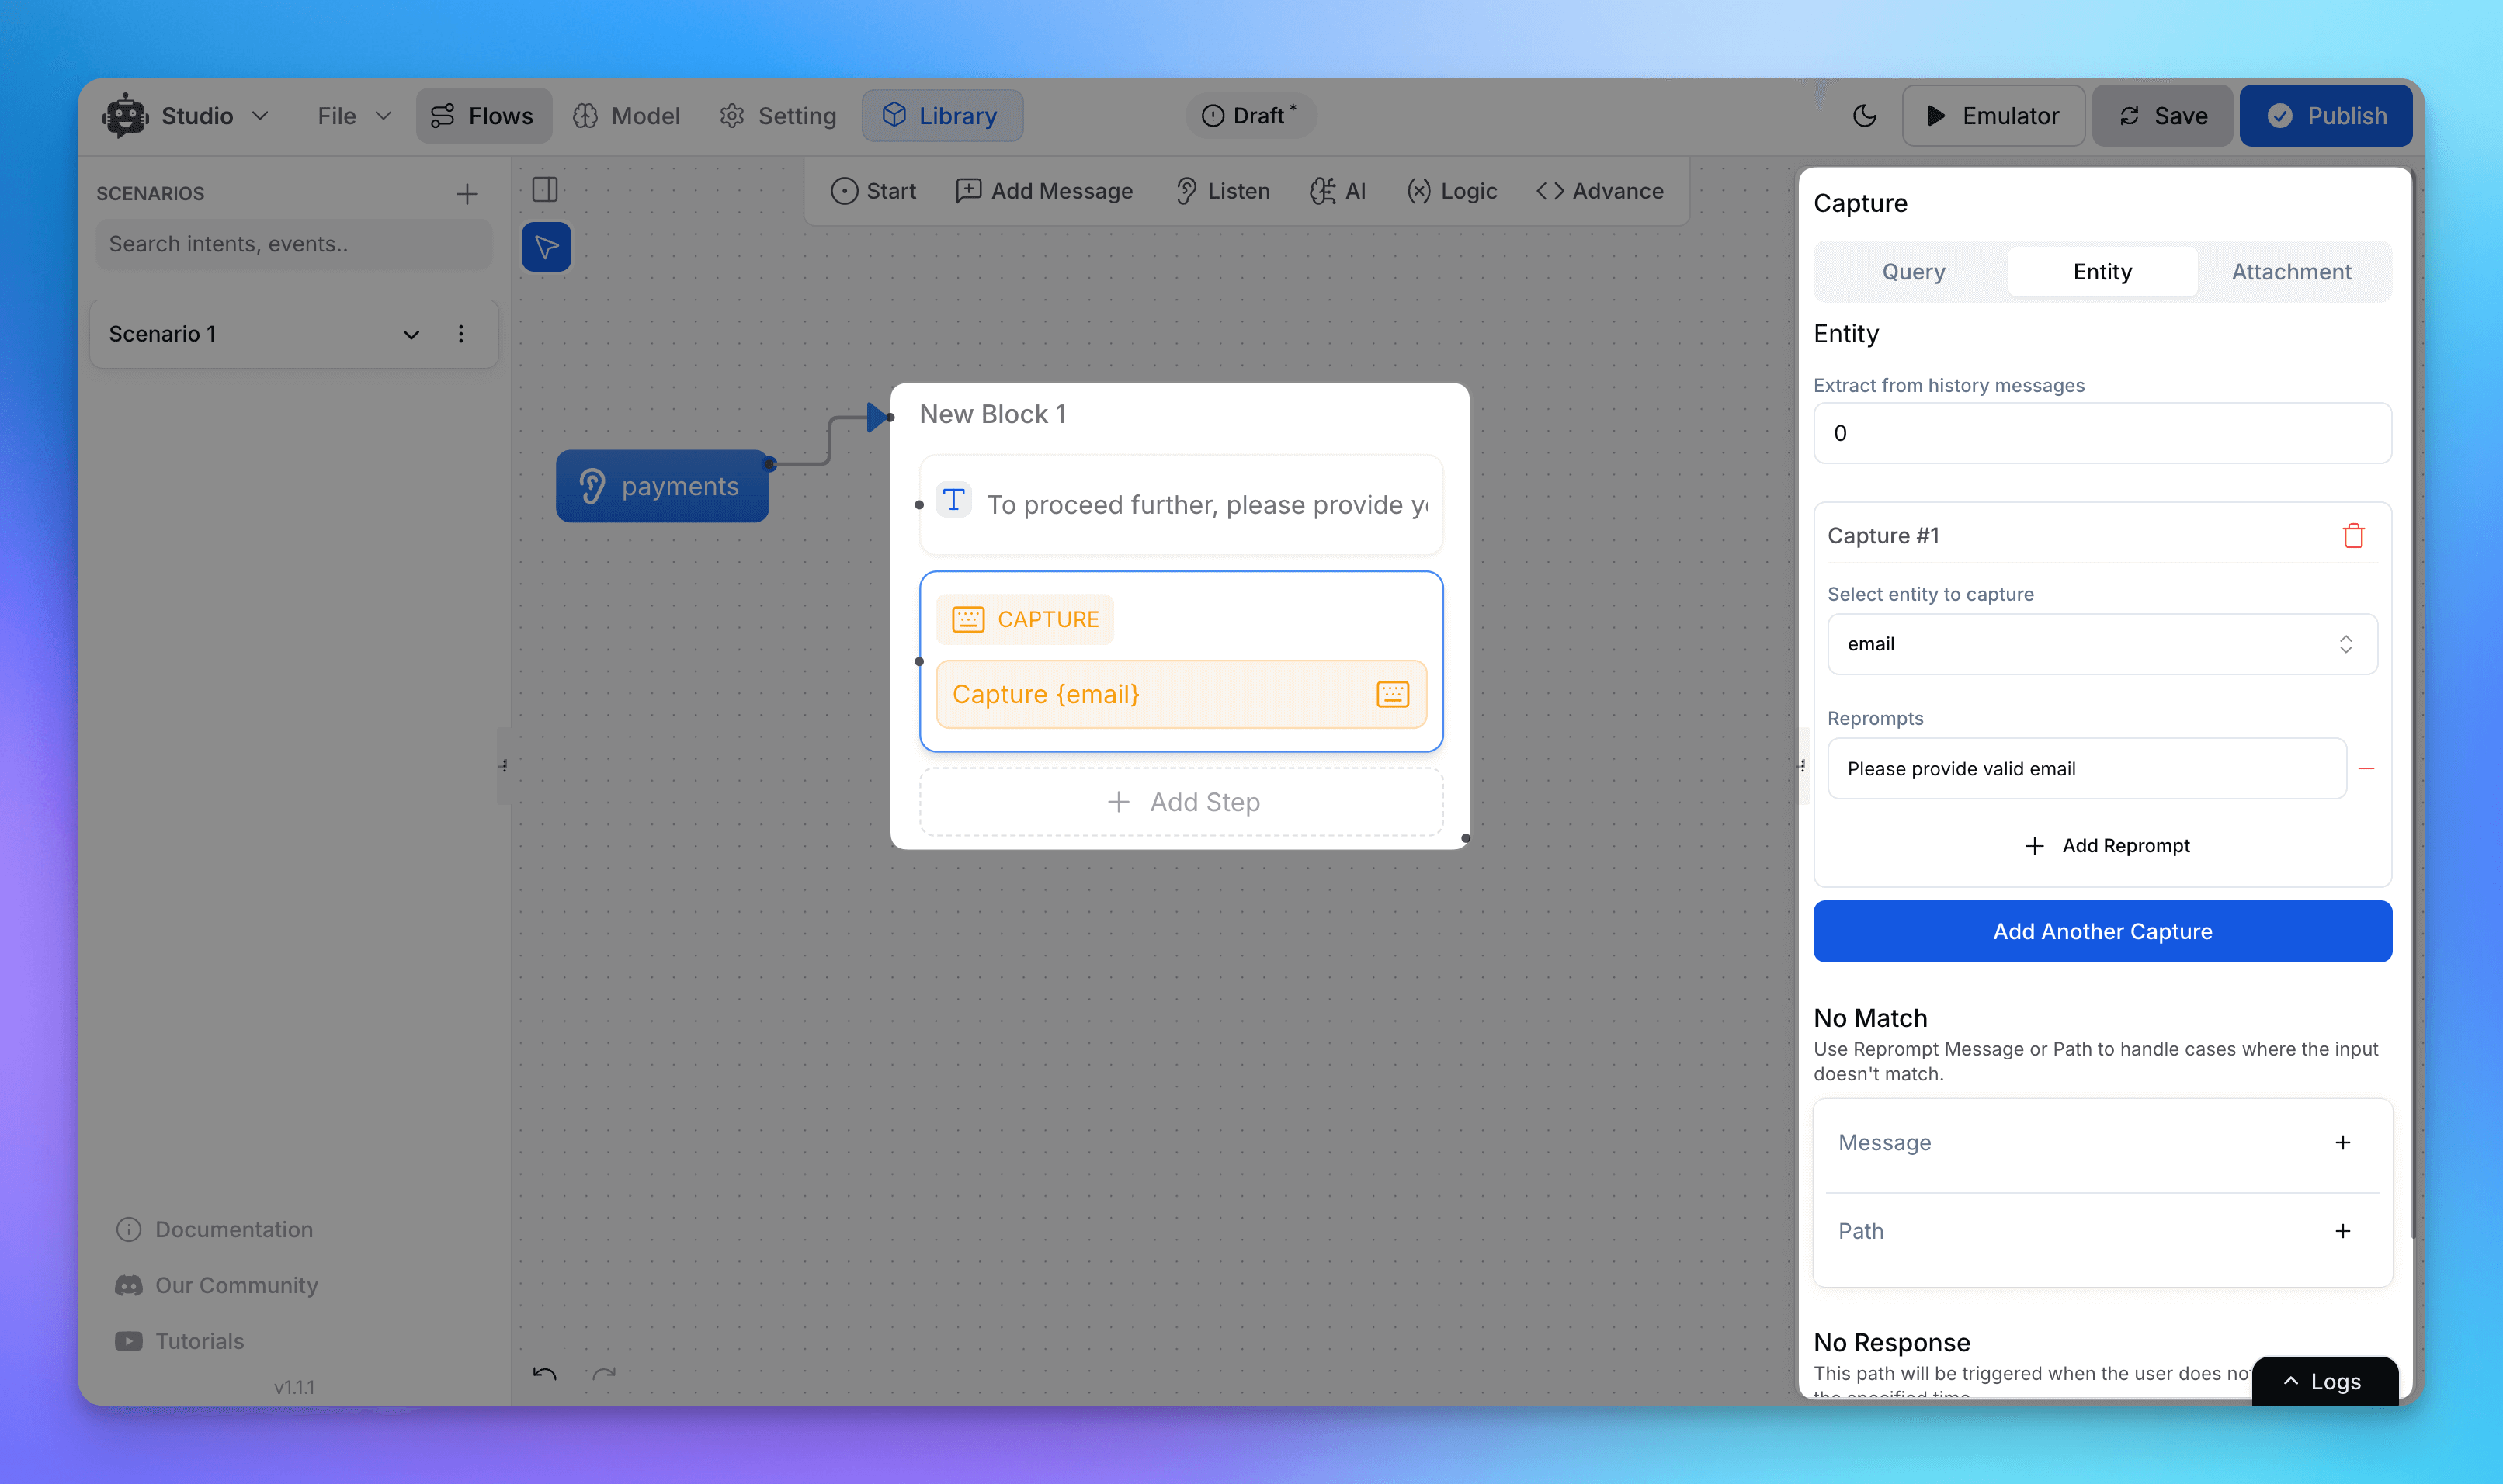
Step 2: Build the Flow to Capture User Email
Create a flow connected to your payments intent. Prompt users to enter their email address so you can identify their current subscription status.
🔒 Optional Step: Verify Email with OTP
To prevent misuse or spam, you can verify the user’s email by sending a One-Time Password (OTP). Here's how:
After receiving the email, send an OTP to the user’s inbox using your backend/API.
Ask the user to enter the OTP in chat.
Validate the OTP using a code execution block.
Only proceed to the next step if the OTP is correct.

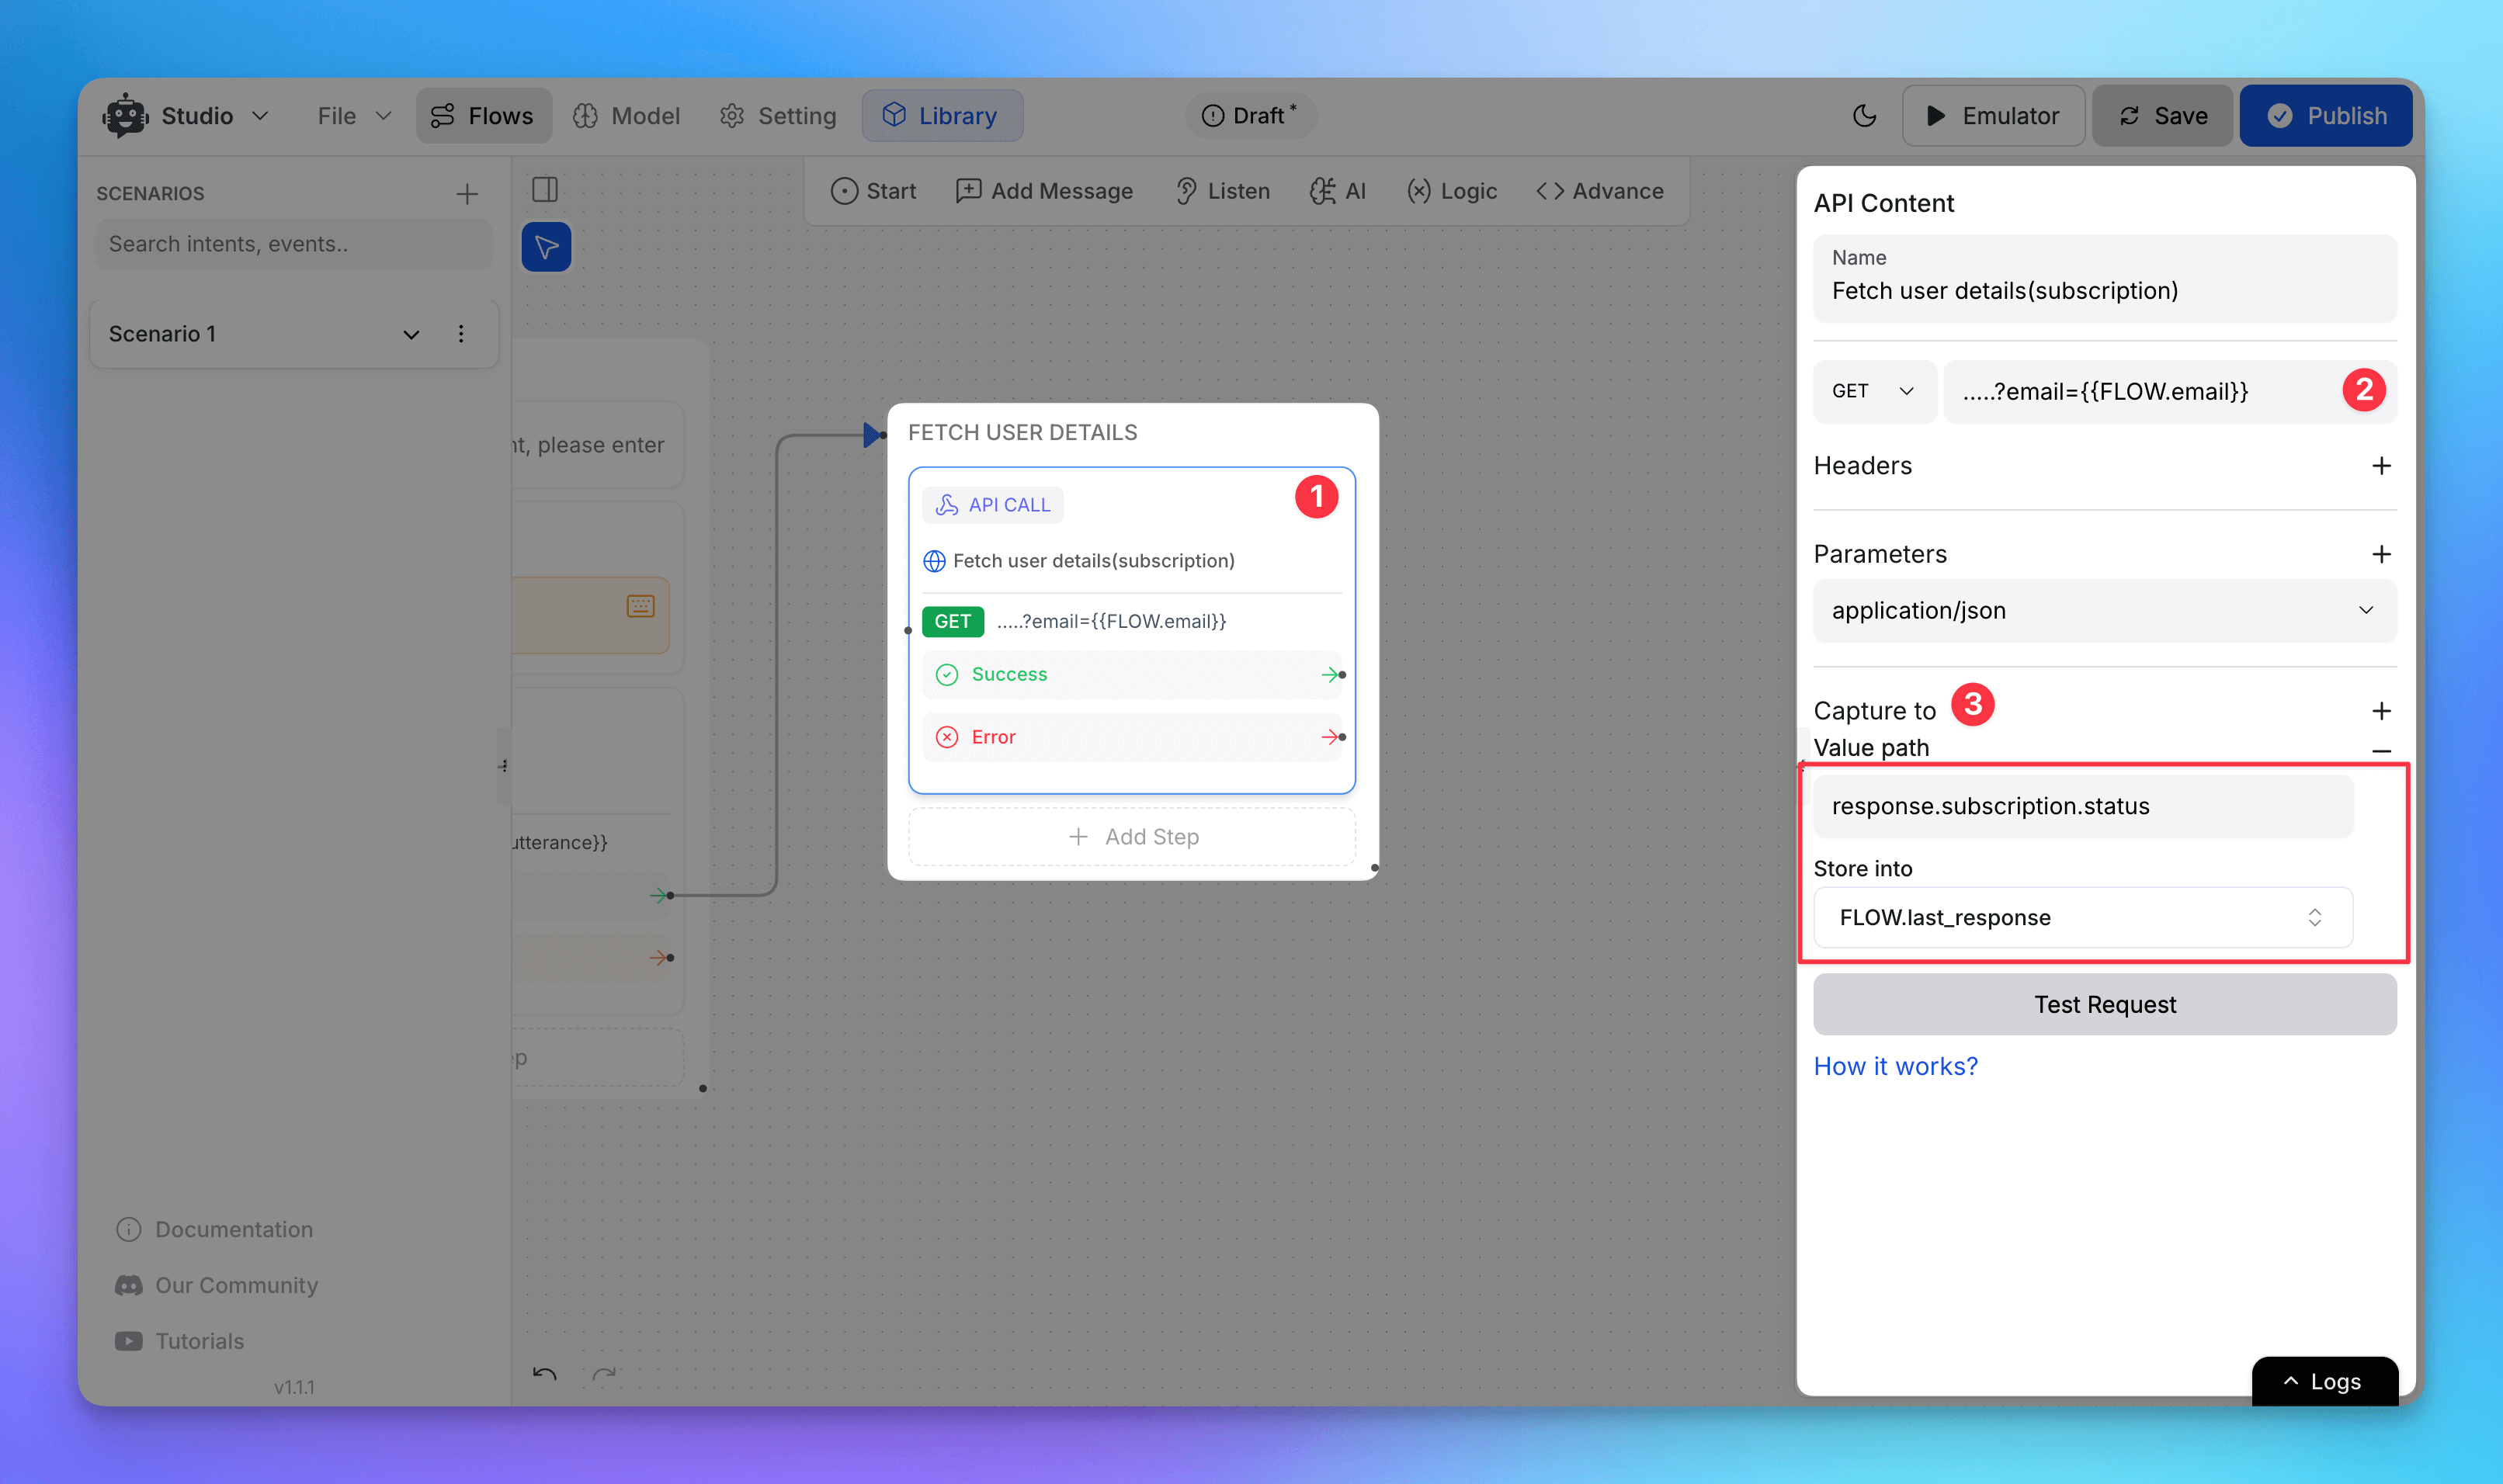
Step 3: Fetch User Details
Once the email is verified (or skipped), add a code block to fetch the user’s data from your backend or database. This helps determine their subscription status.
Send a request using the user’s email.
Capture data like:
Whether they have an active subscription
Subscription tier or plan
Payment history (optional)
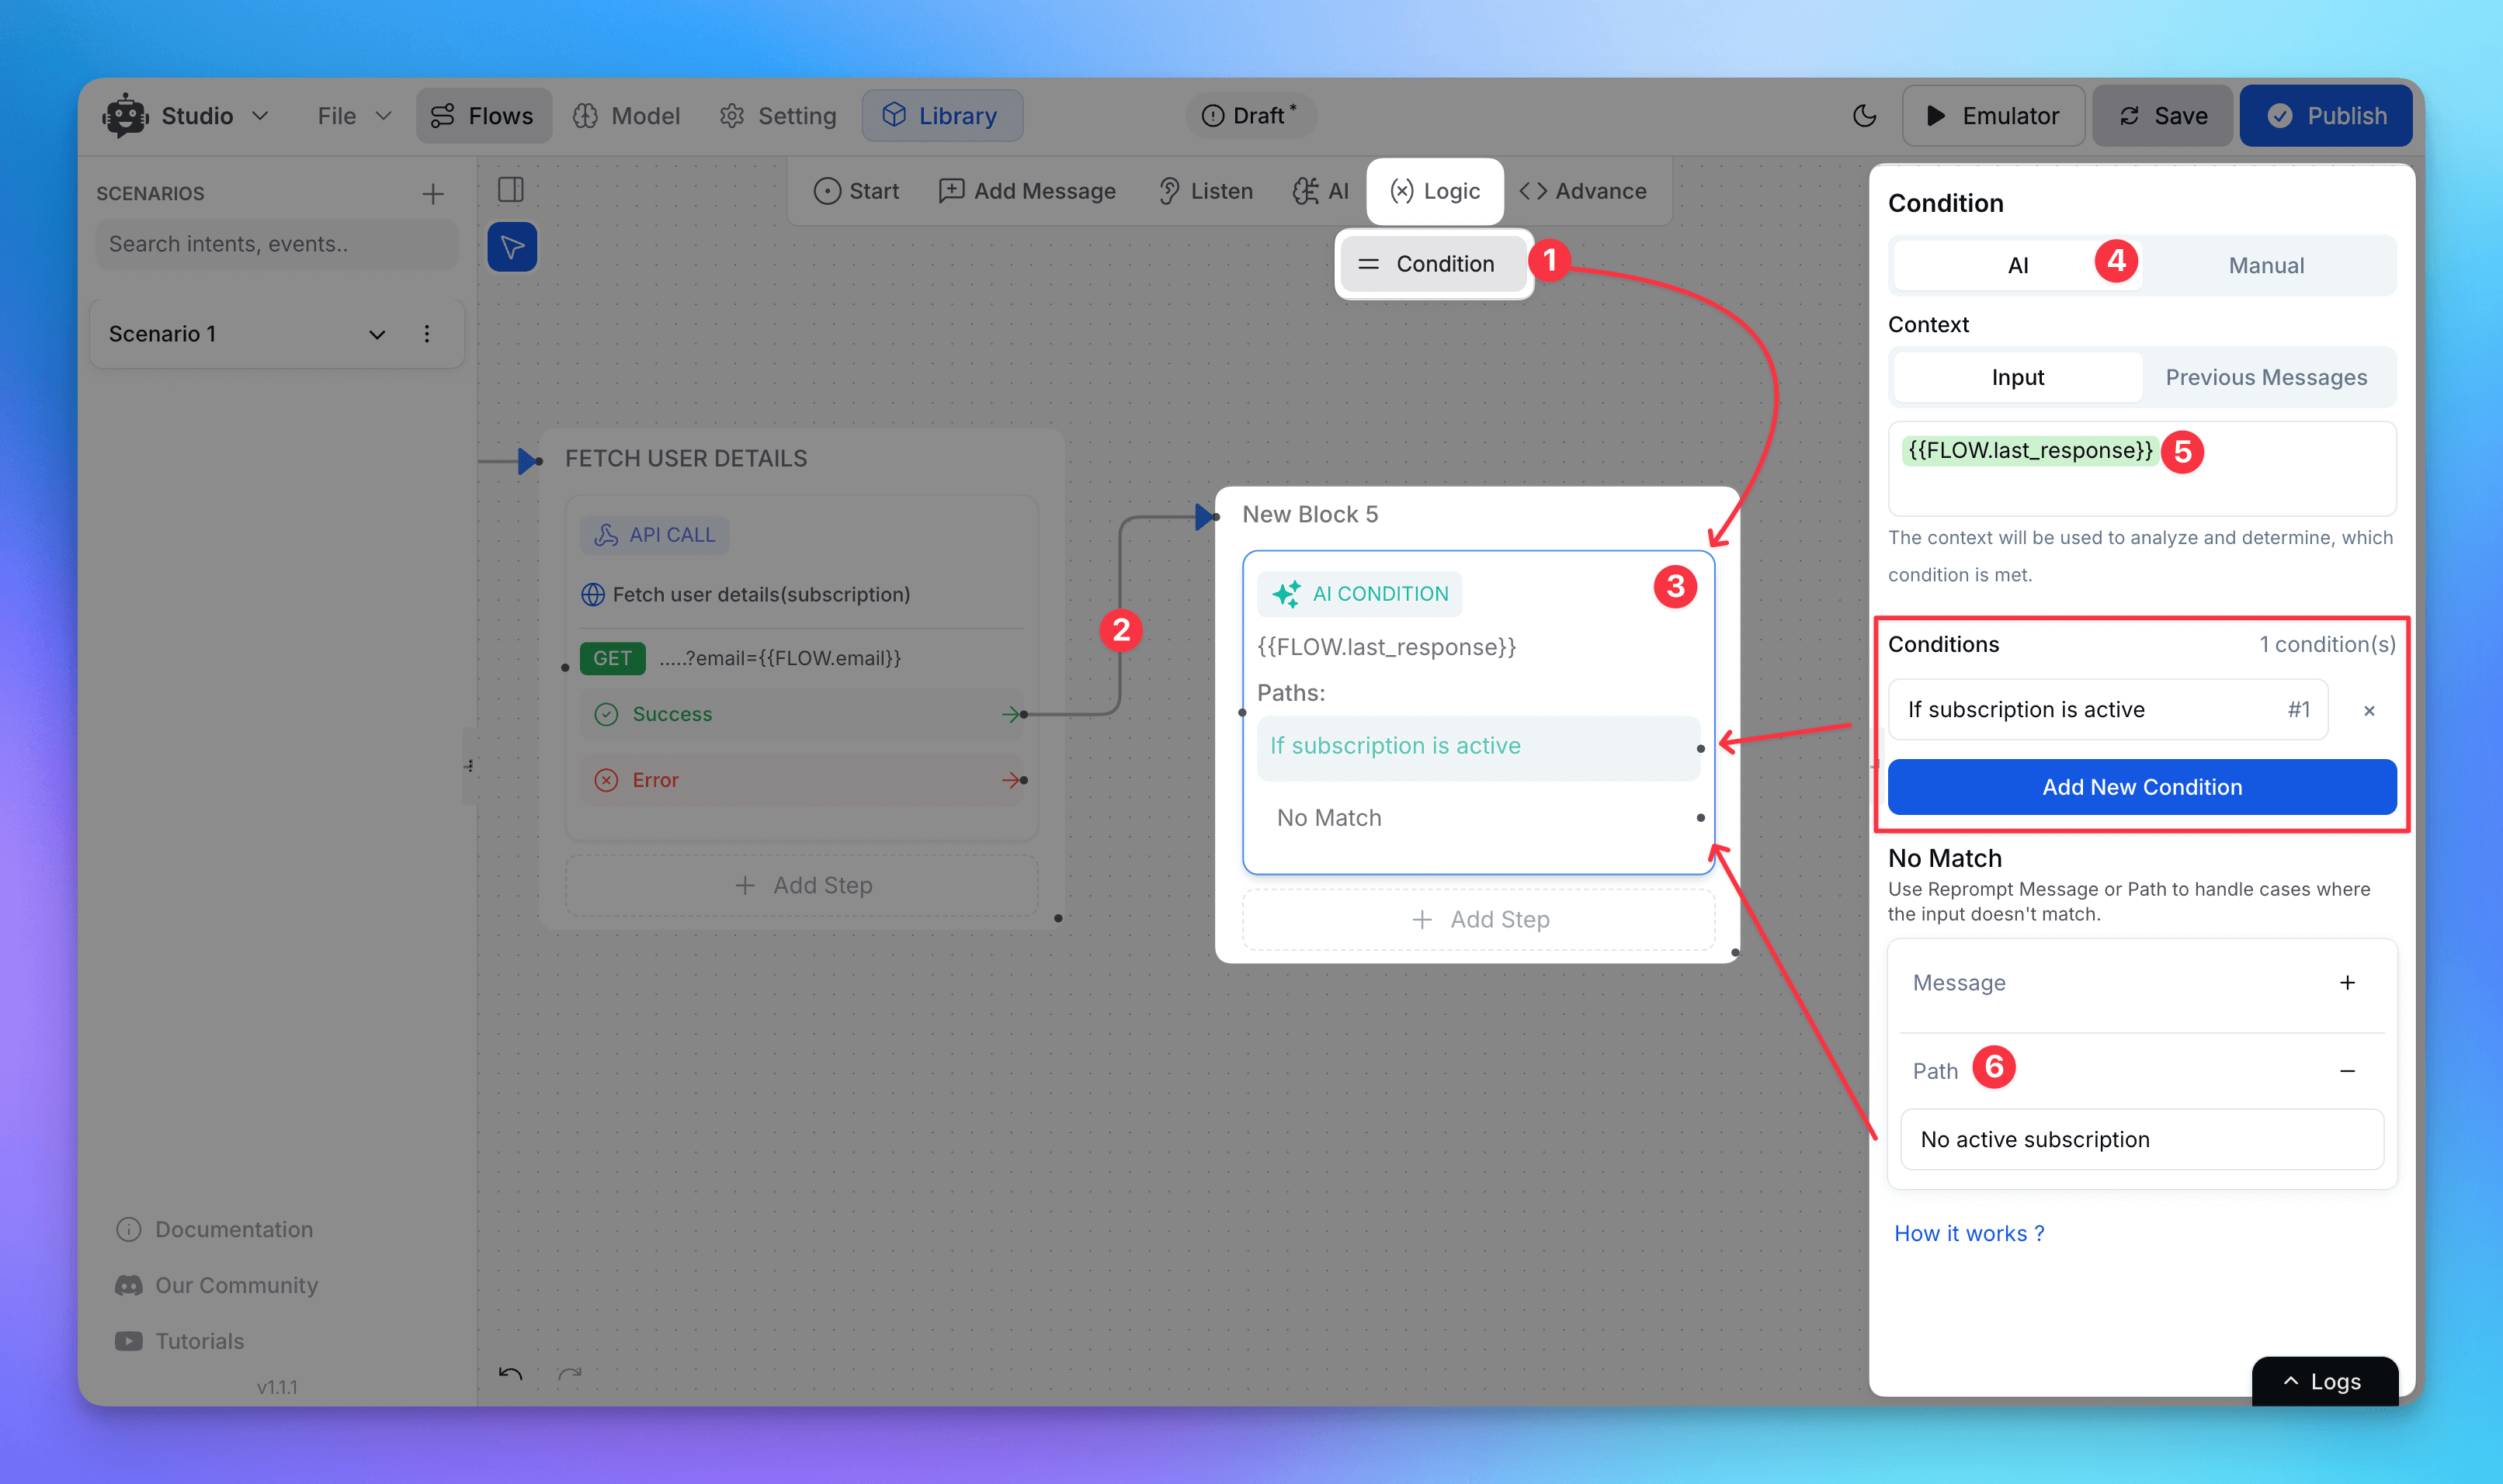
Step 4: Branch the Flow Based on Subscription Status
With the user's subscription info, split the flow into two paths:
Active subscription: Show options for managing/upgrading their plan.
No subscription: Continue to the signup and payment flow.
Step 5: Handle Users Without a Subscription
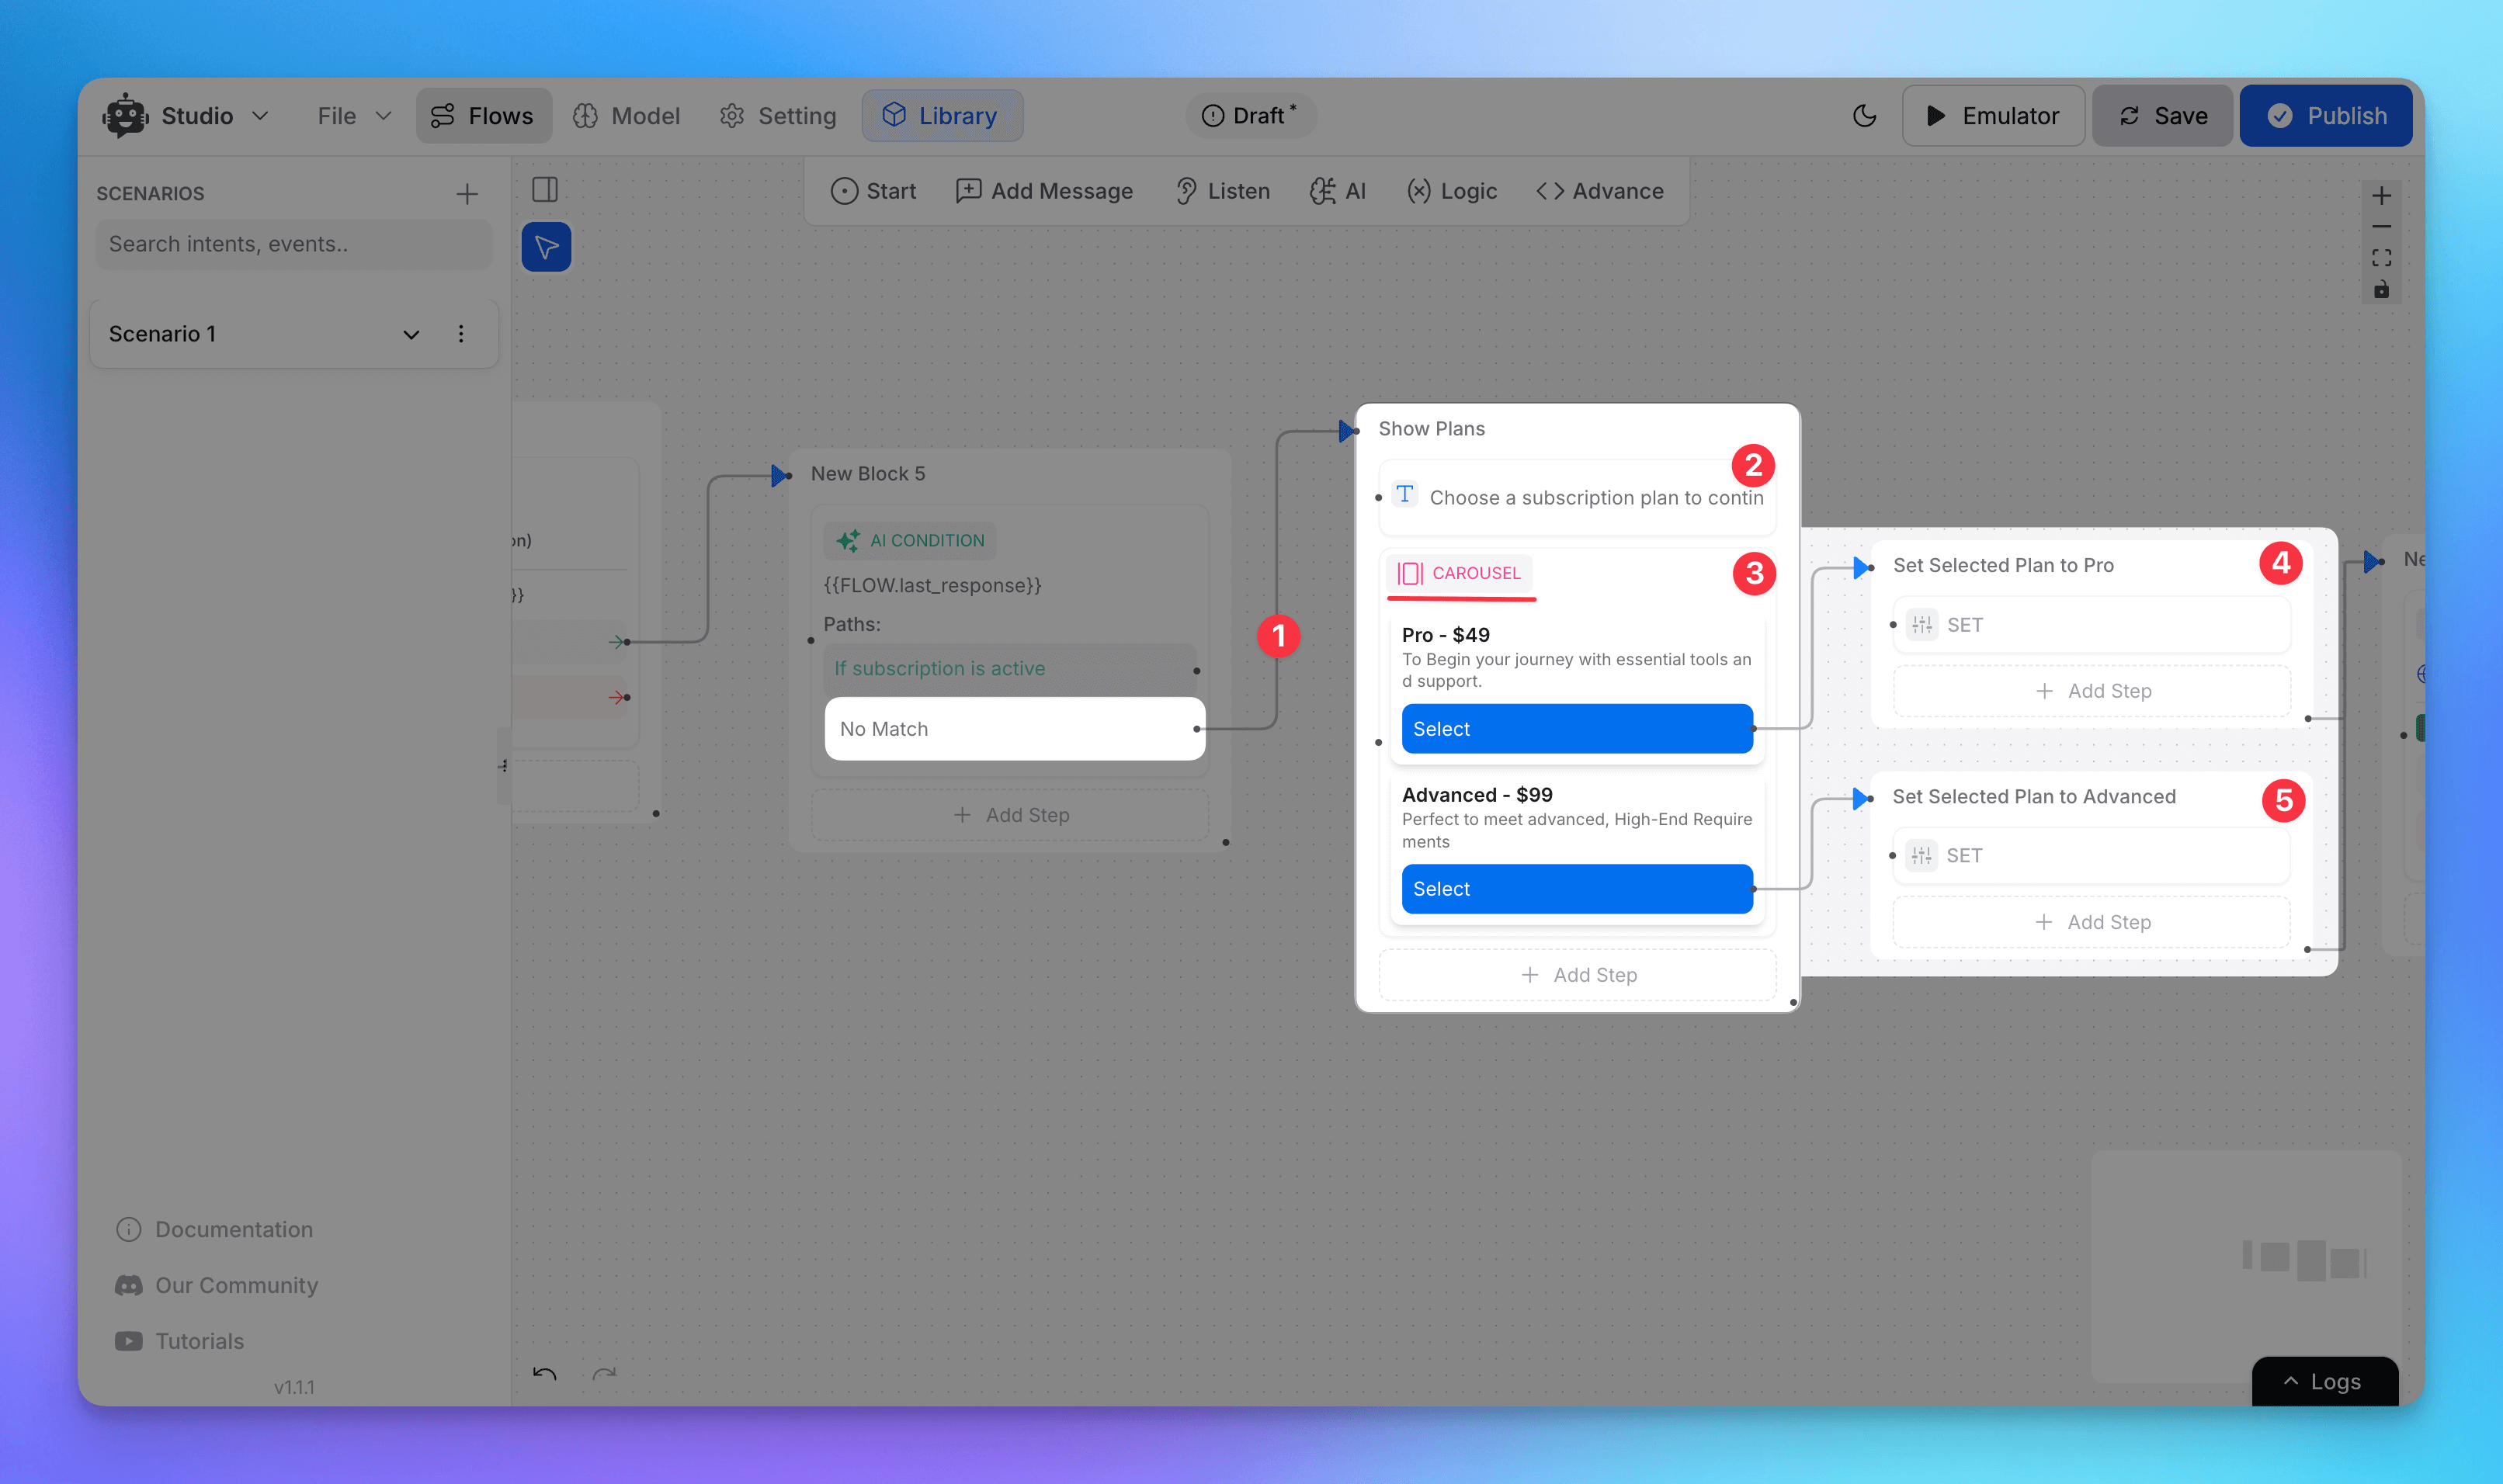
In the "no subscription" branch, show the user a list of available plans.
Use Card or Carousel blocks to present plan options.
Include pricing, features, and CTA buttons.
Step 6: Listen for Plan Selection
Use buttons or a message listener to detect which plan the user selects.
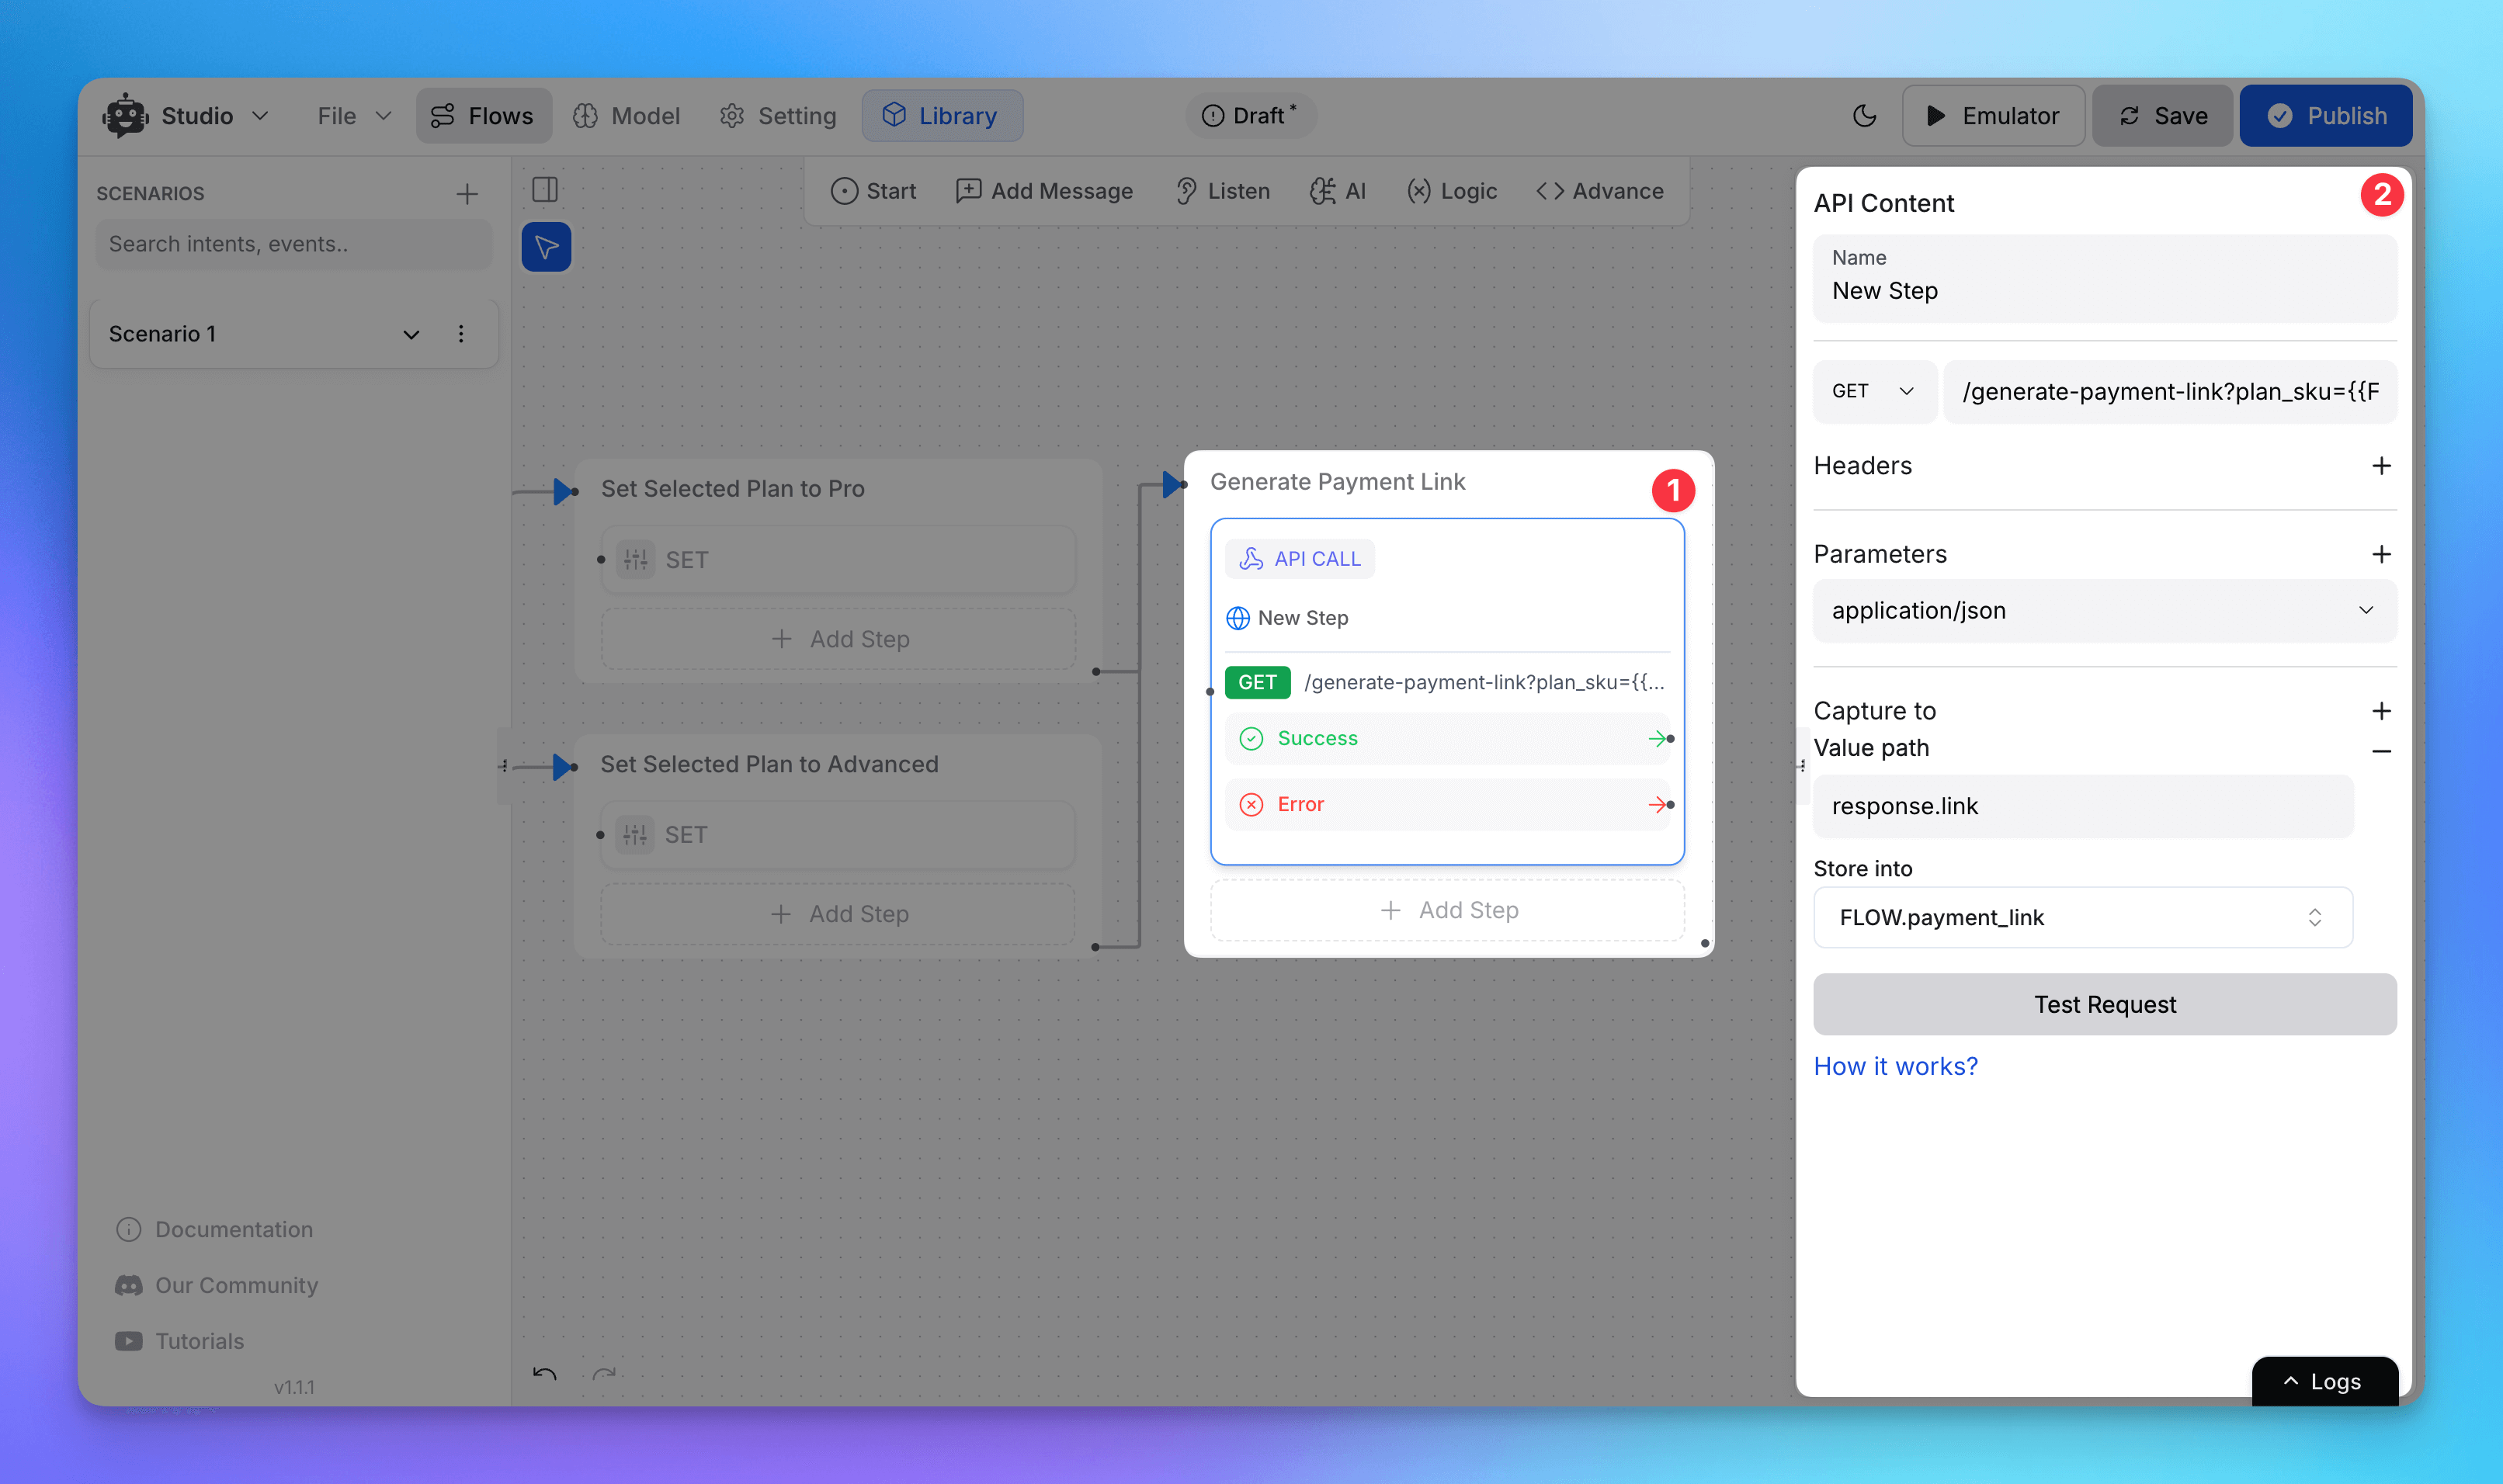
Step 7: Generate a Payment Link
Add a code execution block to call your payment provider’s API and generate a link.
Include:
User’s email
Selected plan ID
Chat session ID (to track payment event later)
Step 8: Send Payment Link to the User
Share the payment link in the chat with a simple message:
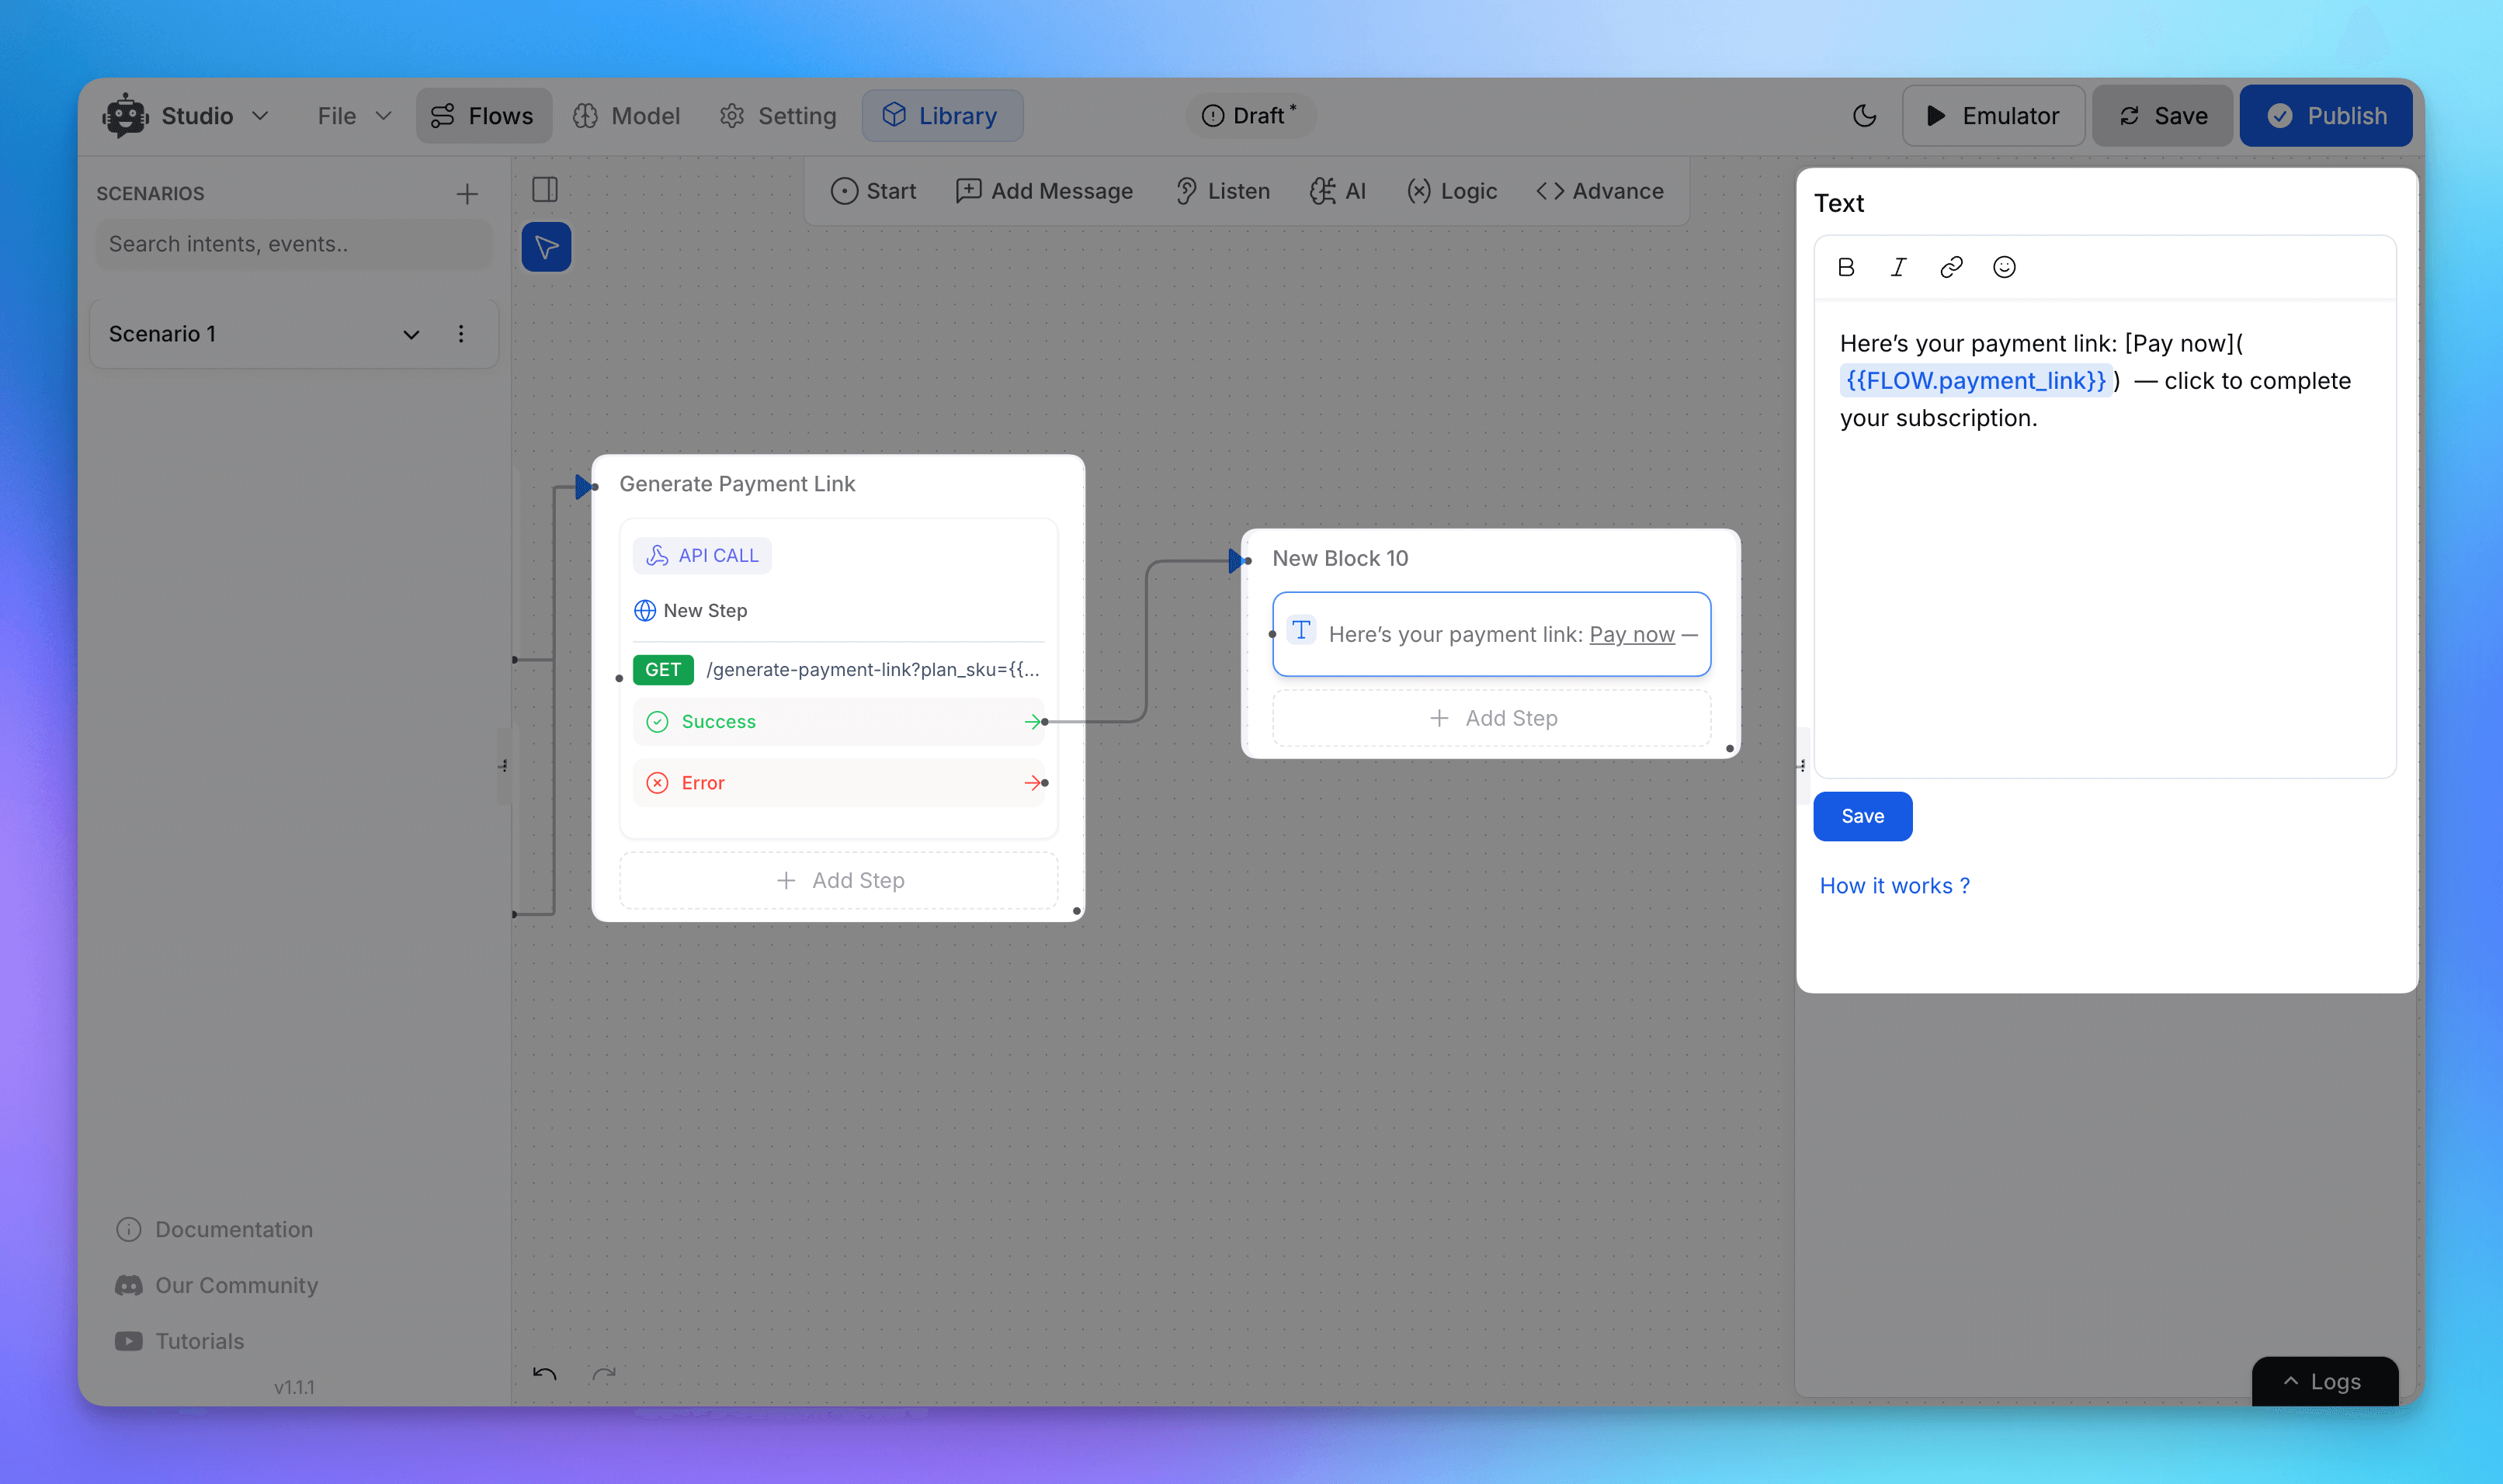
“Here’s your payment link: [link] — click to complete your subscription.”
Step 9: Add Webhook Listener for Payment Status
Use your payment platform’s webhook system (e.g., Stripe Webhooks) to listen for:
payment_successpayment_failed
Configure a Webhook Event Node in your flow.
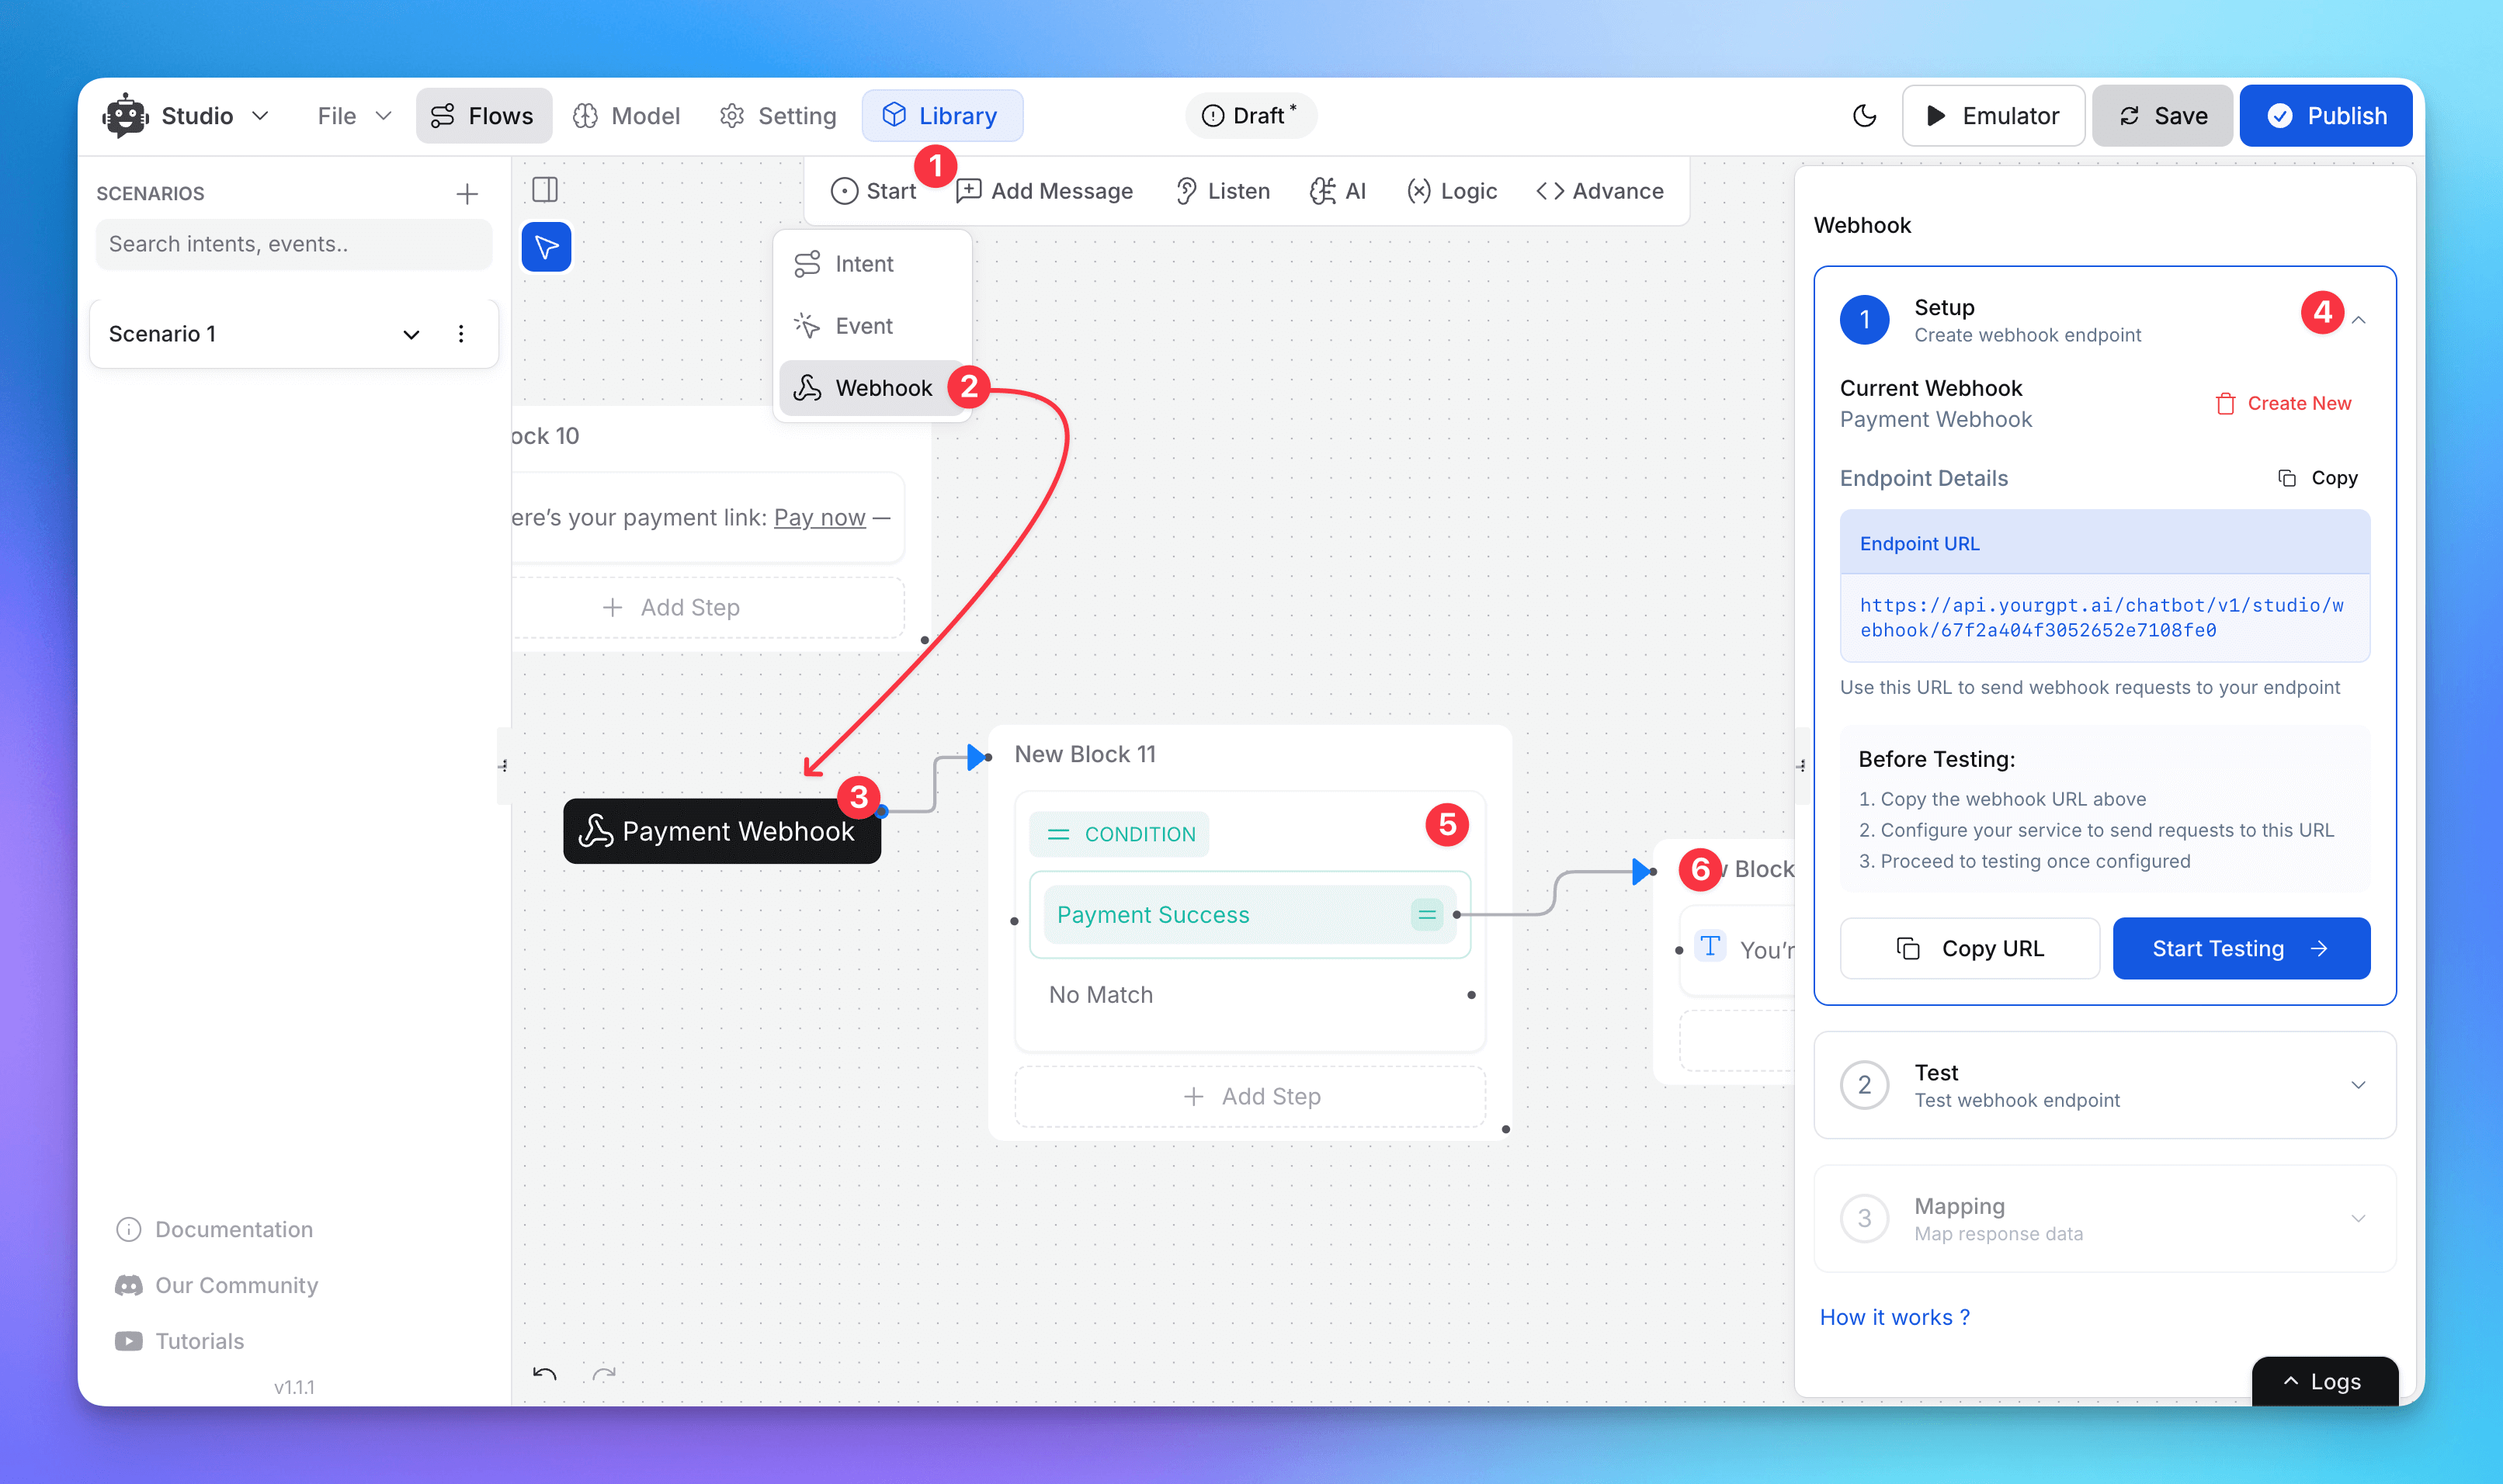
Step 10: Show Payment Status to the User
Based on the webhook response:
✅ Show success message: “You’re now subscribed!”
❌ Show failure message: “Payment failed. Please try again.”
Advanced: Identify Users with SDK
To personalize and skip redundant steps for logged-in users, use the User Identification SDK.
It allows you to:
Detect returning users automatically
Pre-fill email or subscription data into the flow
Dynamically adjust the chatbot experience
What’s Next?
You can extend this setup to support:
Plan upgrades
Subscription renewals
Cancellation flows
All managed through your GPT chatbot, keeping the process inside the conversation.