
How to create and use forms in AI Studio?
Forms allow you to collect structured user input within agents flows. This guide provides a step-by-step approach to creating and configuring forms efficiently.
1. Adding a Form in the Flow Builder
To collect user input, a Form block can be added to the chatbot flow.
Steps to Add a Form Block:
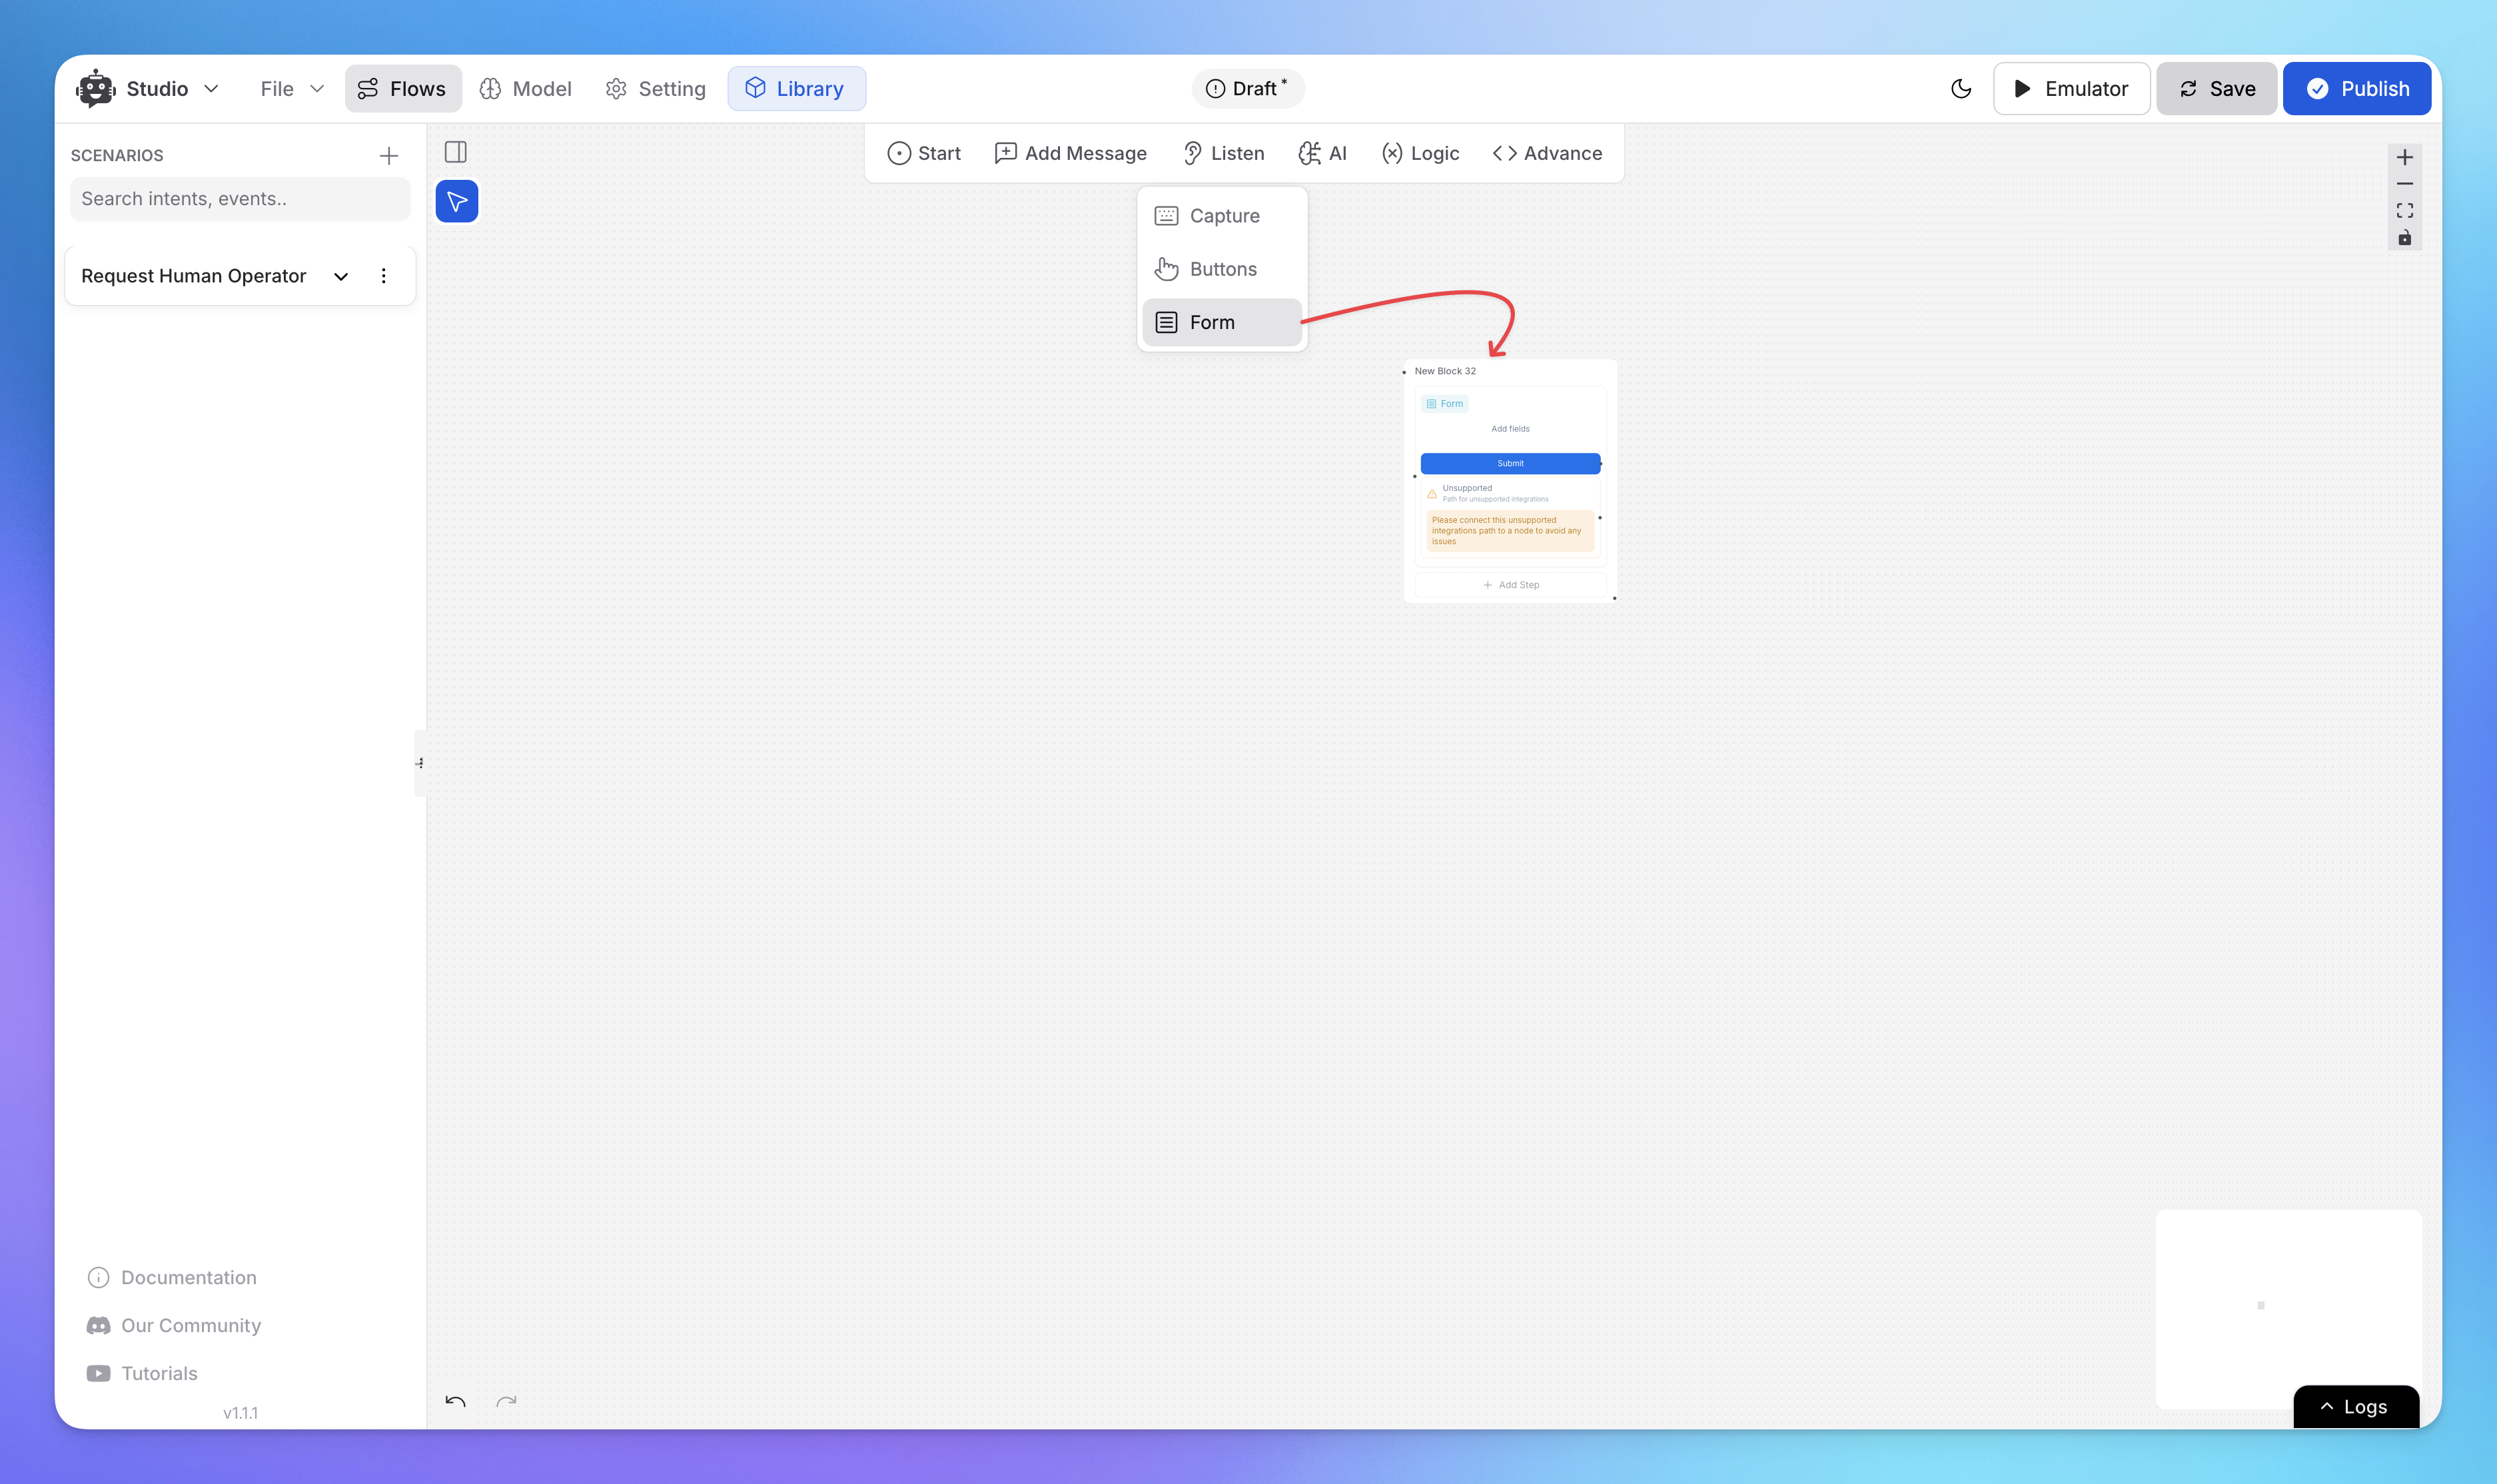
Go to the Studio.
Click "Add Message" and select "Form".
A new form block will appear in the flow.
Click the form block to configure its fields.
2. Adding Fields to the Form
A form consists of various field types to capture specific user inputs.
Steps to Add Fields:
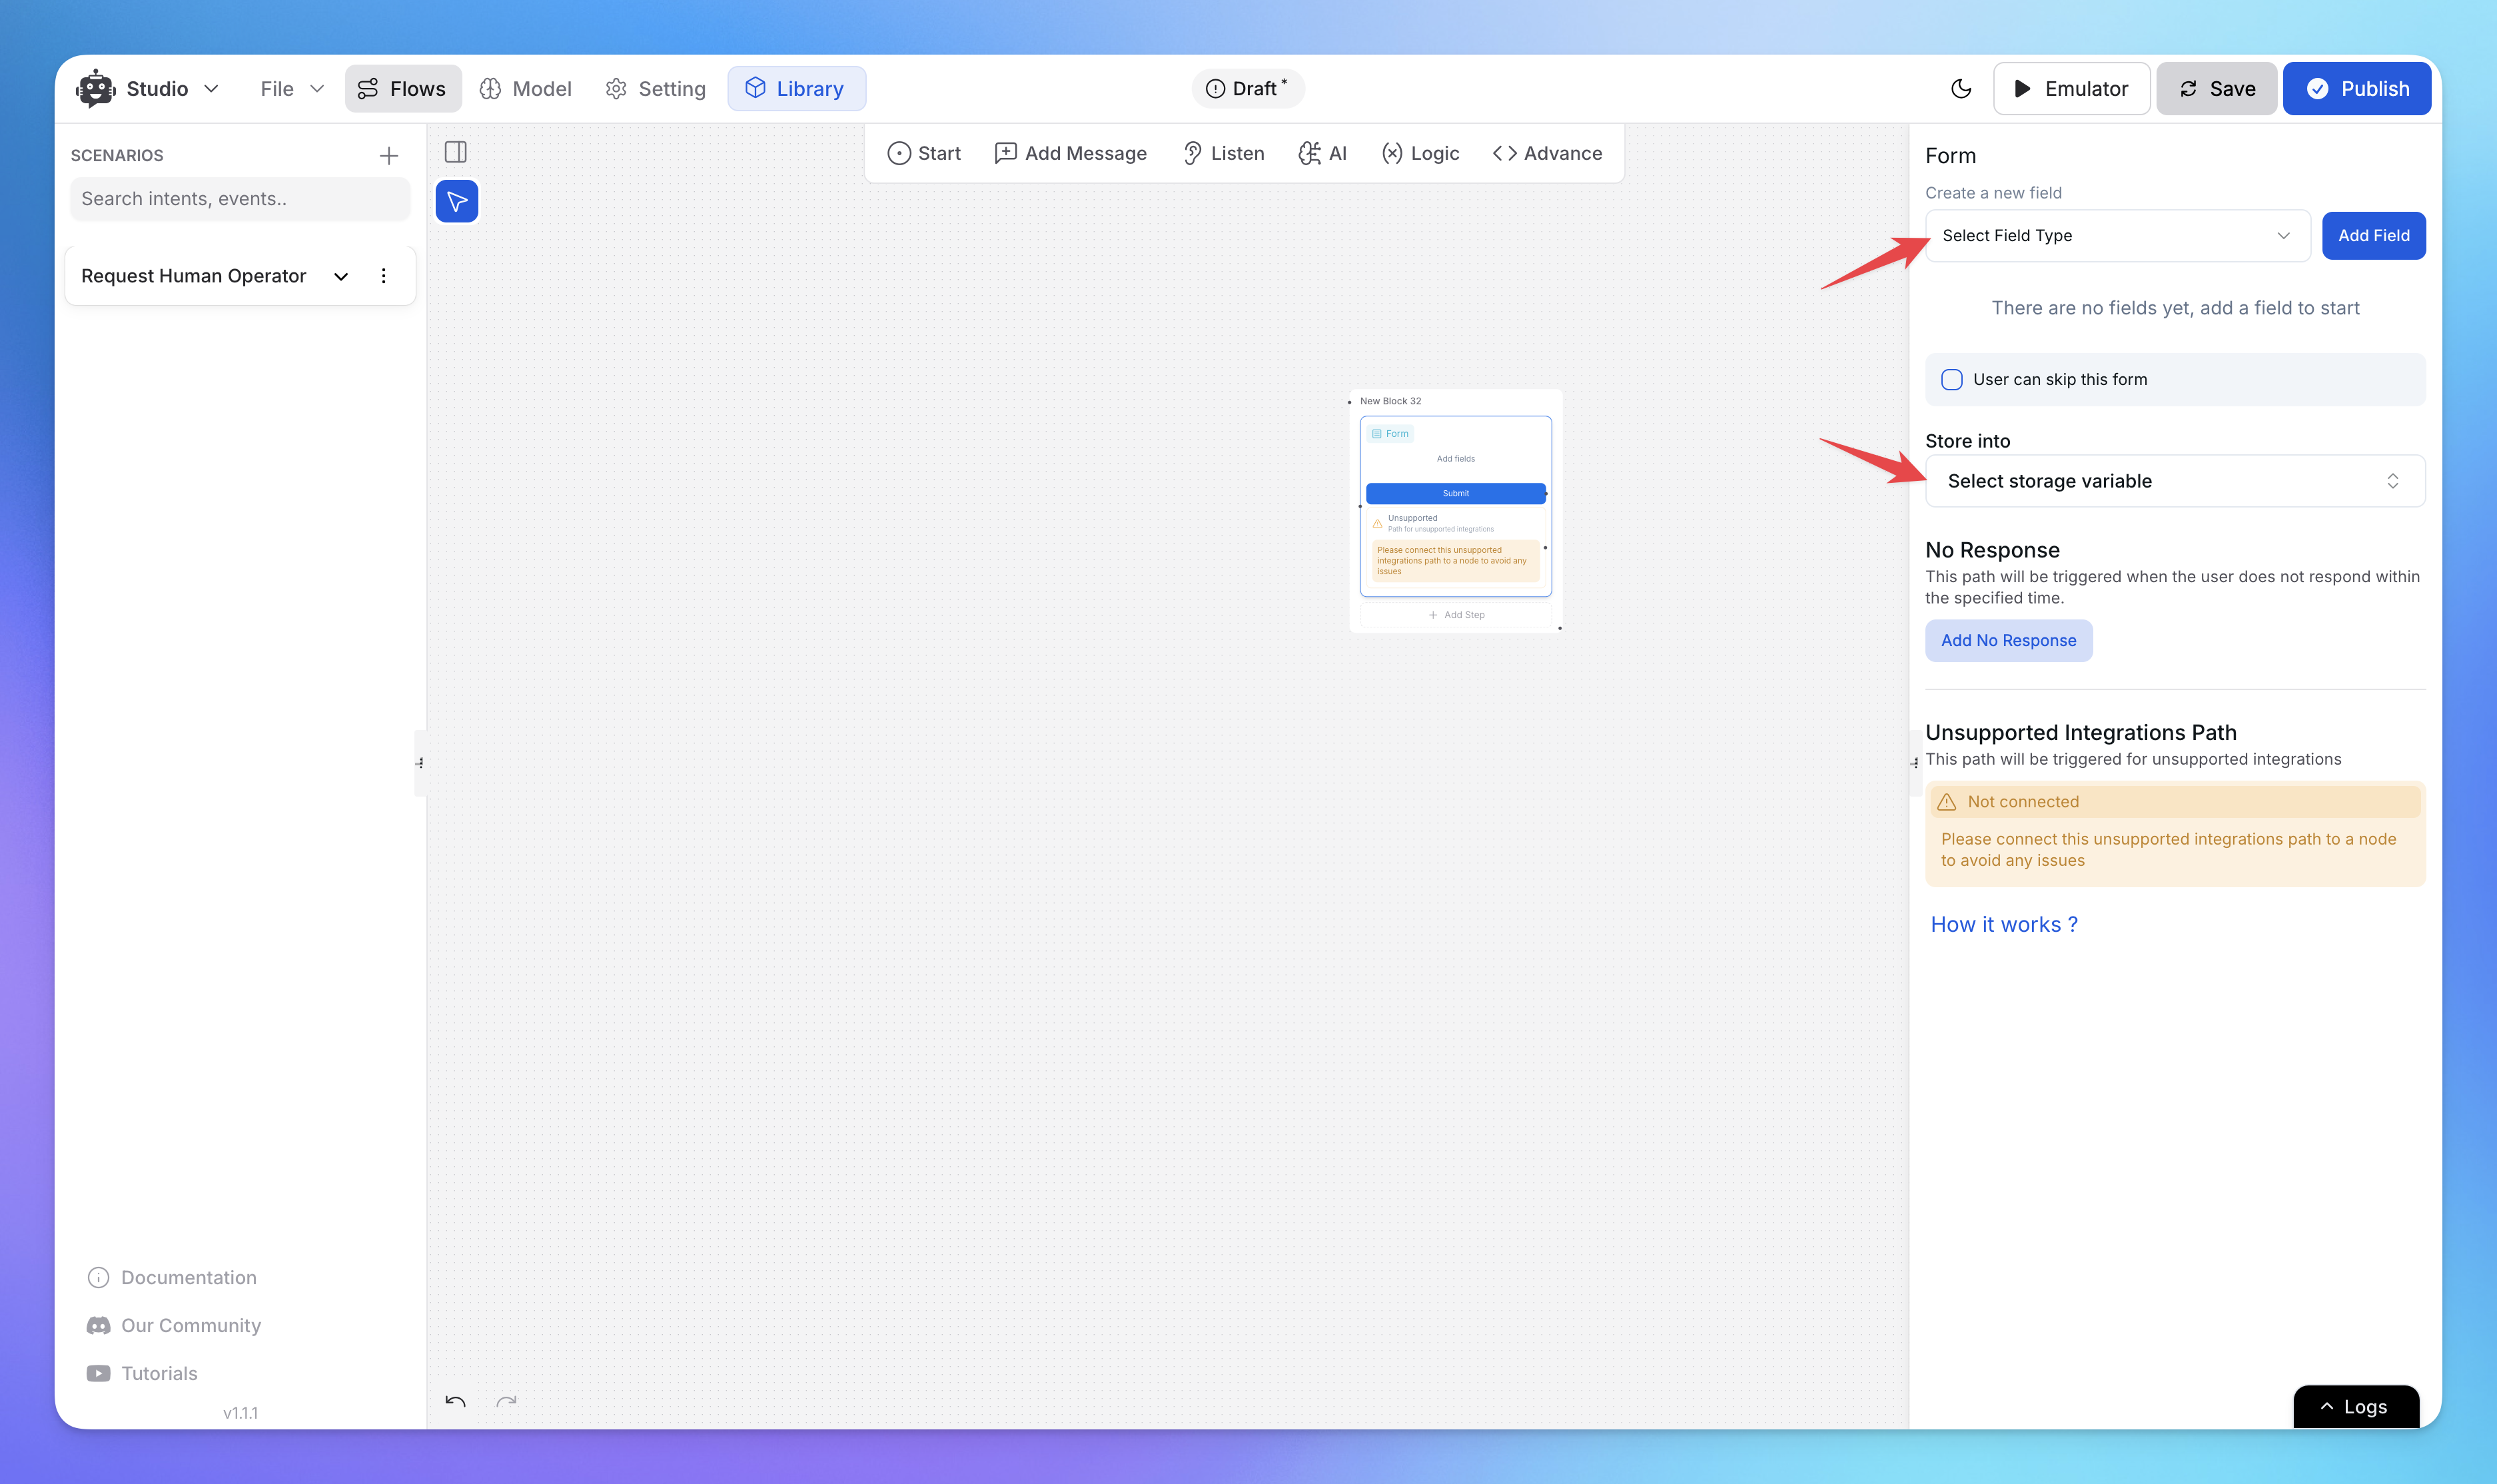
Click "Select Field Type" in the form settings panel.
Choose the appropriate field type from the available options:
Single Line Text – Short text responses.
Multi-Line Text – Longer user inputs.
Number – Numeric values only.
Email – Captures valid email addresses.
Phone – Stores contact numbers.
Checkbox – For multiple selections.
Radio – For single-choice options.
Select – Dropdown menu selection.
Range – Captures numeric ranges.
Date – Accepts date input.
File – Allows users to upload files.
Password – Hides input for secure data entry.
Click "Add Field" to insert the selected field. Repeat the process for multiple fields.
To make forms skippable, simply select the "Skip" checkbox.
3. Configuring Form Storage
Once fields are added, the form responses need to be stored for future use.
Steps to Store Form Data:
Under the "Store Into" section, select the appropriate storage variable.
Assign a variable that corresponds with the expected data type.
Ensure variables are properly mapped to avoid data loss.
4. Handling No Response and Unsupported Paths
To ensure seamless form handling, configure response paths for different scenarios.
Handling No Response:
Click "Add No Response" to define the bot’s behavior when a user does not respond.
Unsupported Integrations Path:
Forms are only supported in our widget
For other integration you can use the "Unsupported Integrations Path" to a continuous flow execution.
Related Articles
How to use Intents in Chatbot Studio?
This guide walks you through creating and using Intents to enhance your chatbot’s capabilities.
Flow : Scenarios, Blocks, Steps & Connections
This article fully details how steps/nodes and blocks work, how to configure them, create paths and connections.
How to capture and store a user’s response?
This article provides a complete guide on capturing user responses, such as name, email, and more, and shows how to store and utilize them in your chatbot to create personalized and engaging experiences.
How to Add & Configure Text, Image, and File Messages in Studio
Learn how to send text, images, and files with your ai agent using studio.
How to Debug Flows and View Execution Logs in Chatbot Studio?
Learn how to debug your flows, check flow execution logs, and view logs within the Chatbot Studio
How to Set Up Conditions in AI Studio
Set Conditions to Understand What Information Users Are Looking For