
How to Import Confluence Docs into YourGPT
Sync your Confluence workspace with YourGPT in minutes. Let your AI learn from your existing docs and answer customer queries smartly.
You can import your Confluence knowledge base into YourGPT in just a few steps. Here’s how to do it:
🔑 Step 1: Log in to Atlassian
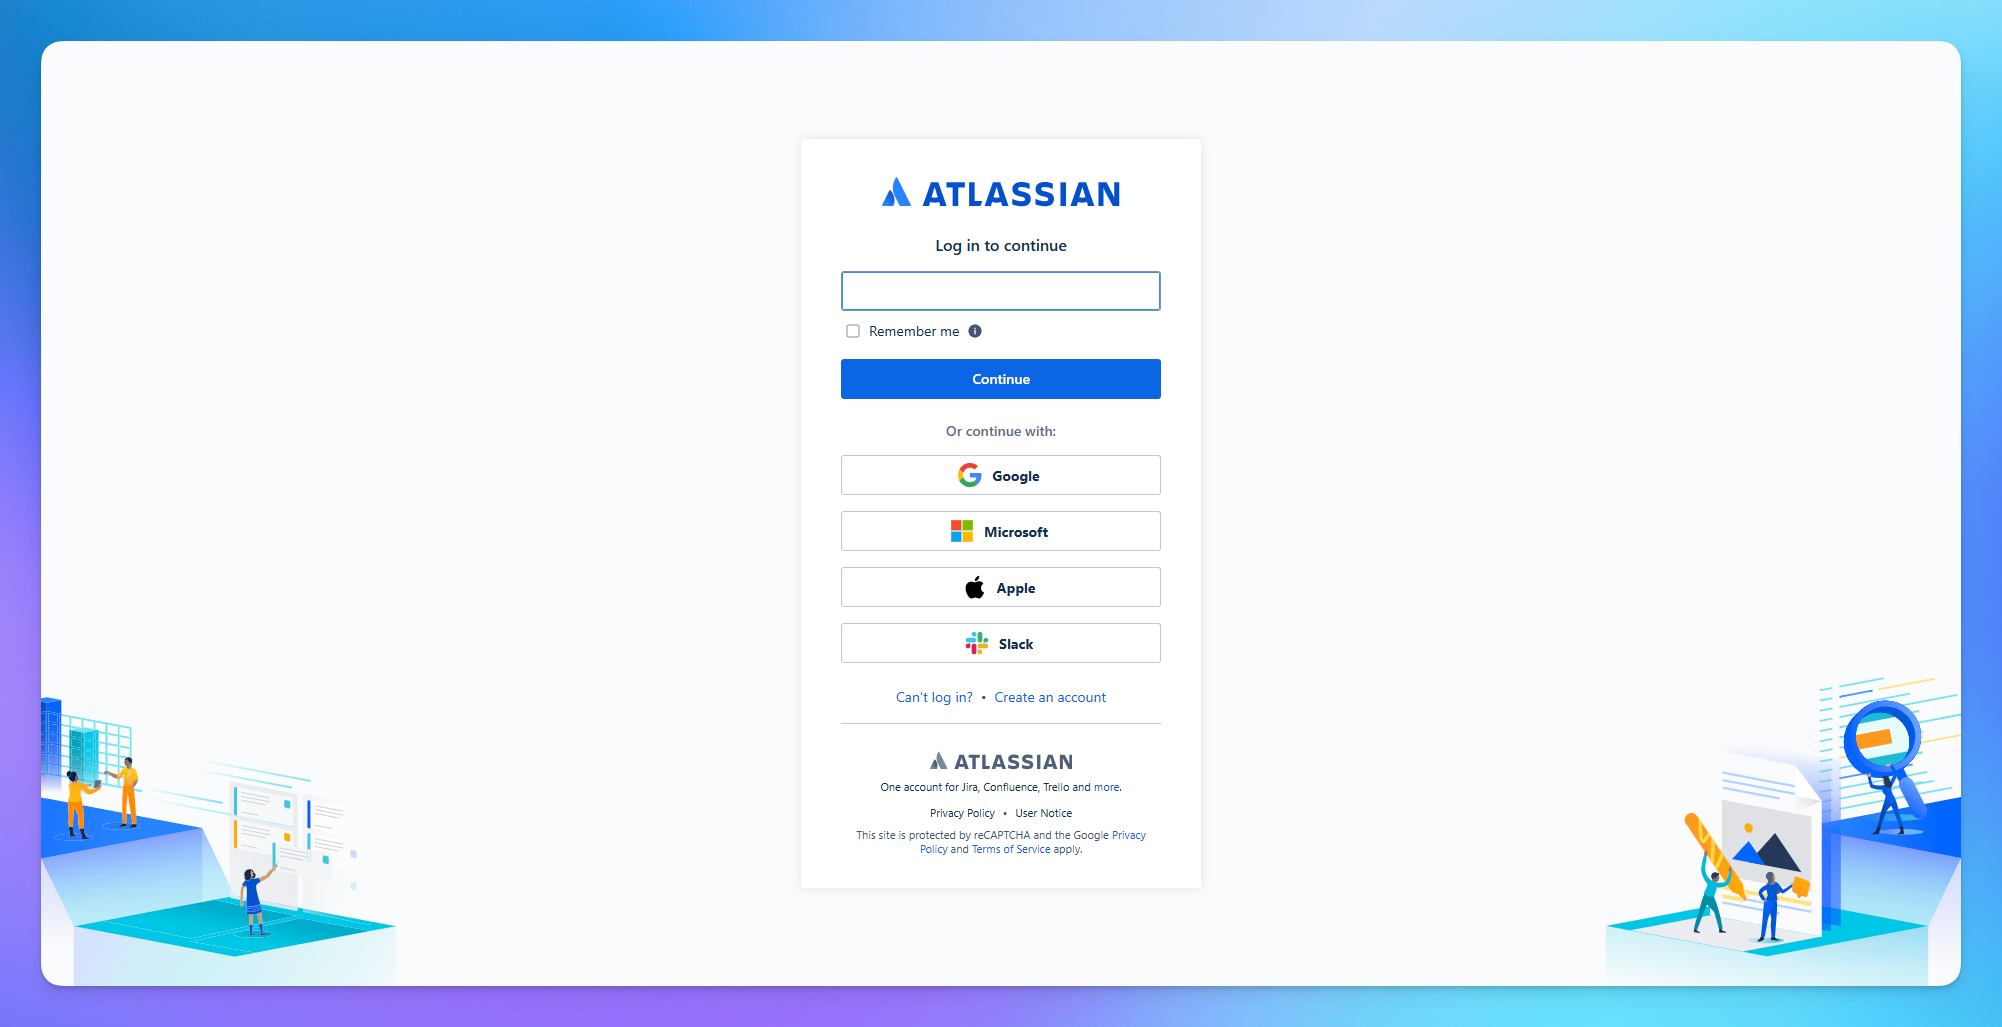
Go to Atlassian and log in to your account.
If you don’t have one, click Sign Up and create a new account.
🔓Step 2: Access Confluence
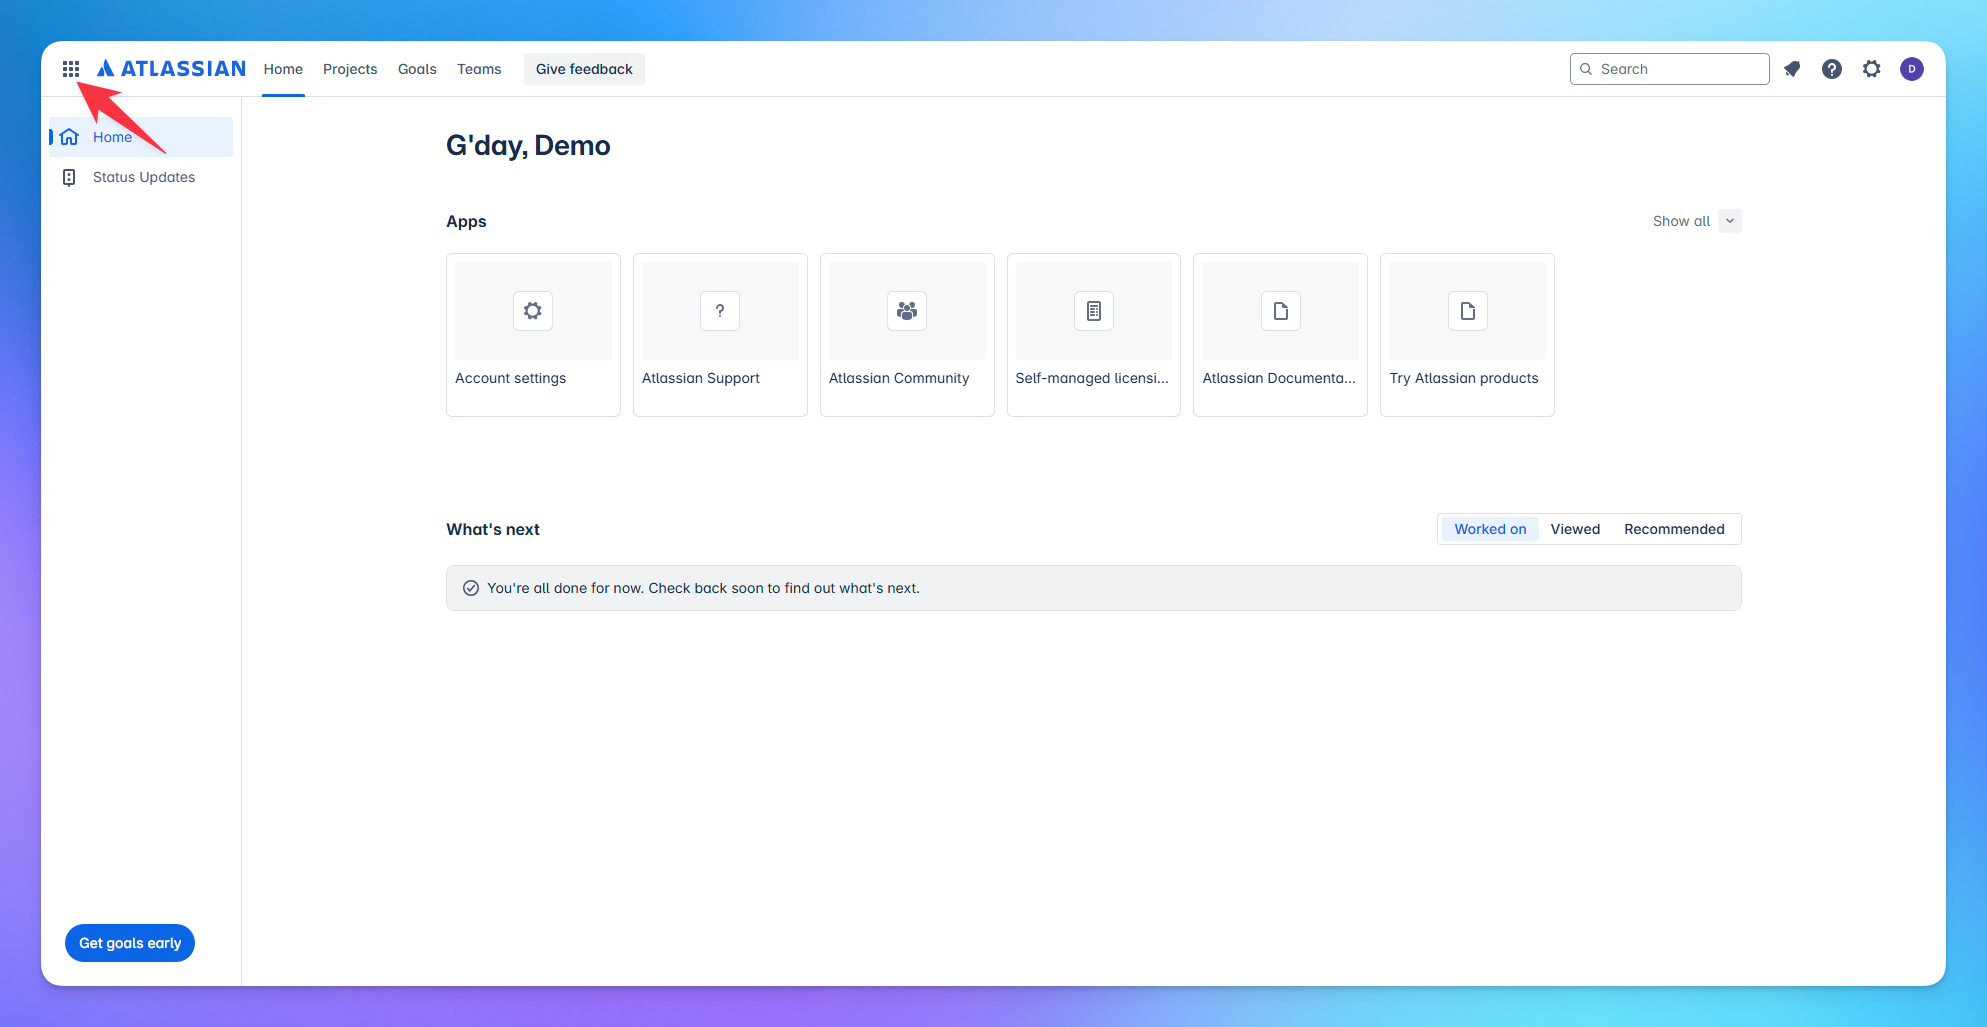
Once logged in, go to the home screen.
Click on the “space menu” icon located on the left-hand sidebar.
Select the option “Explore the product.”
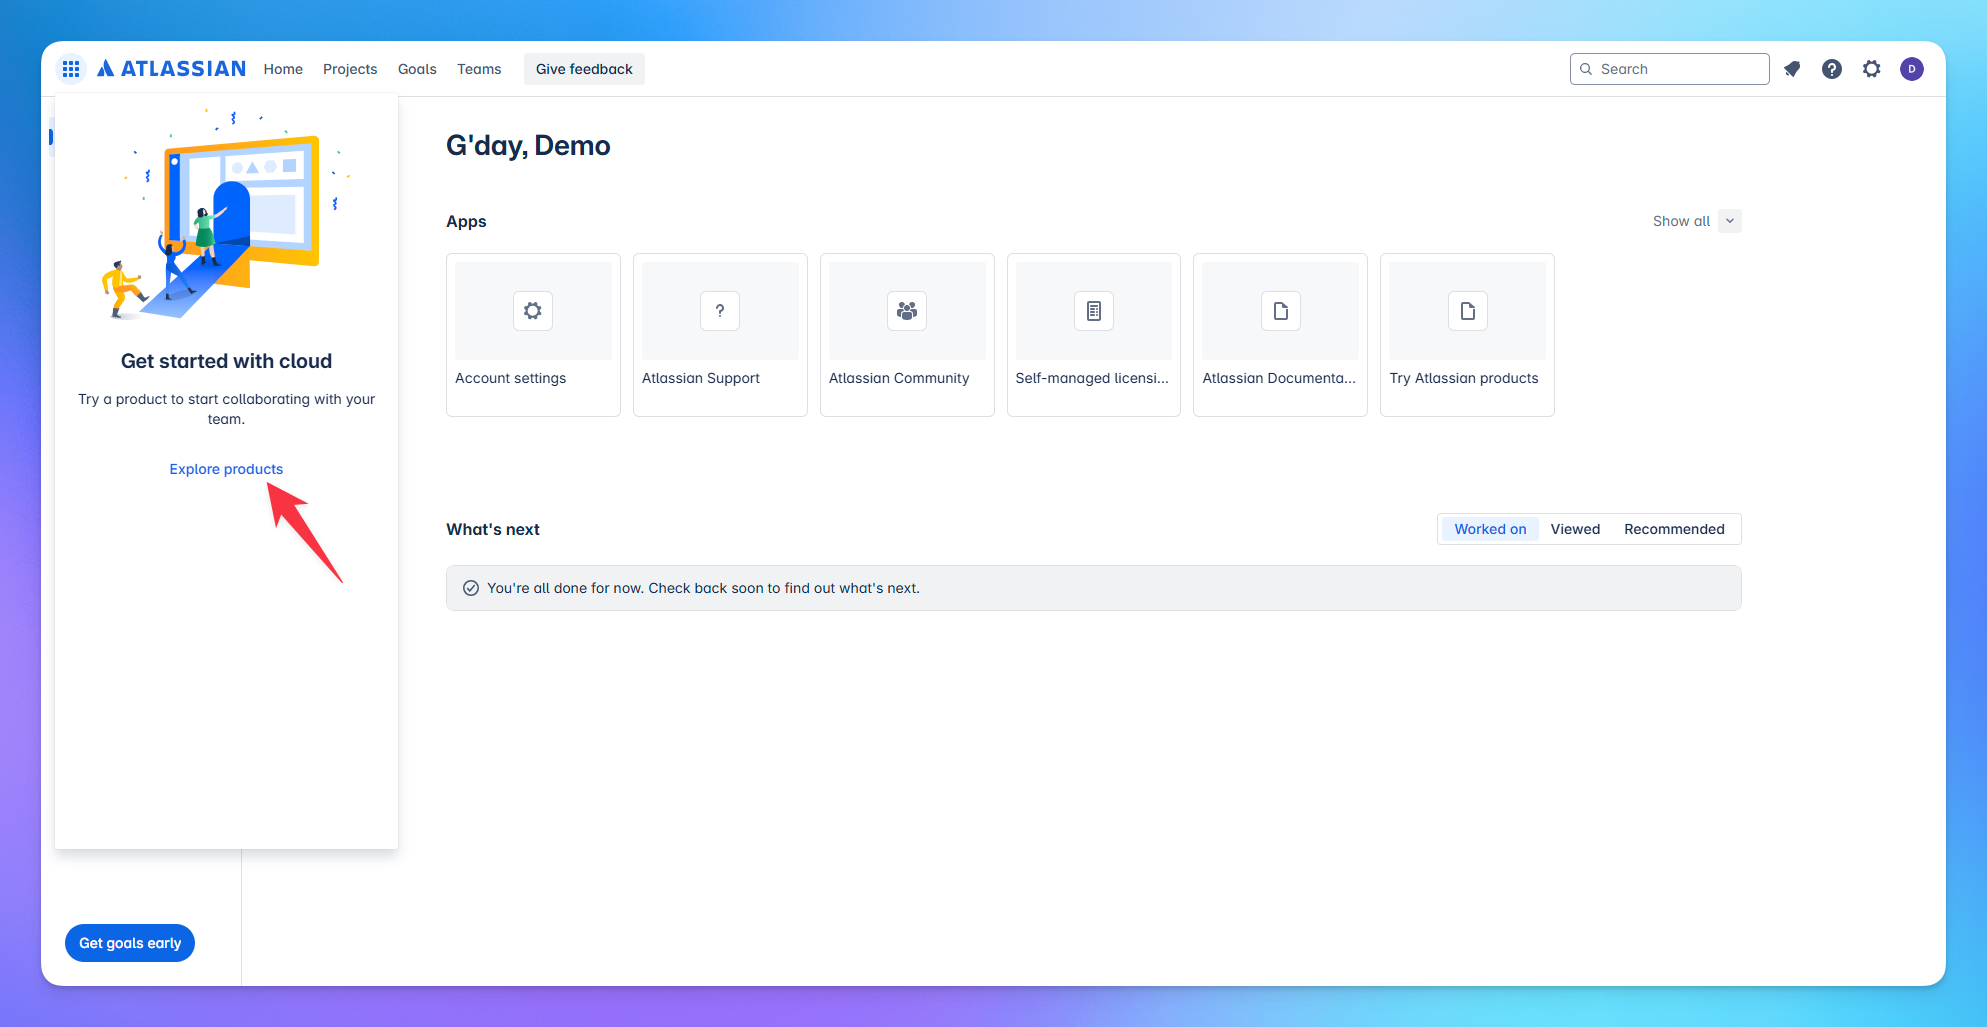
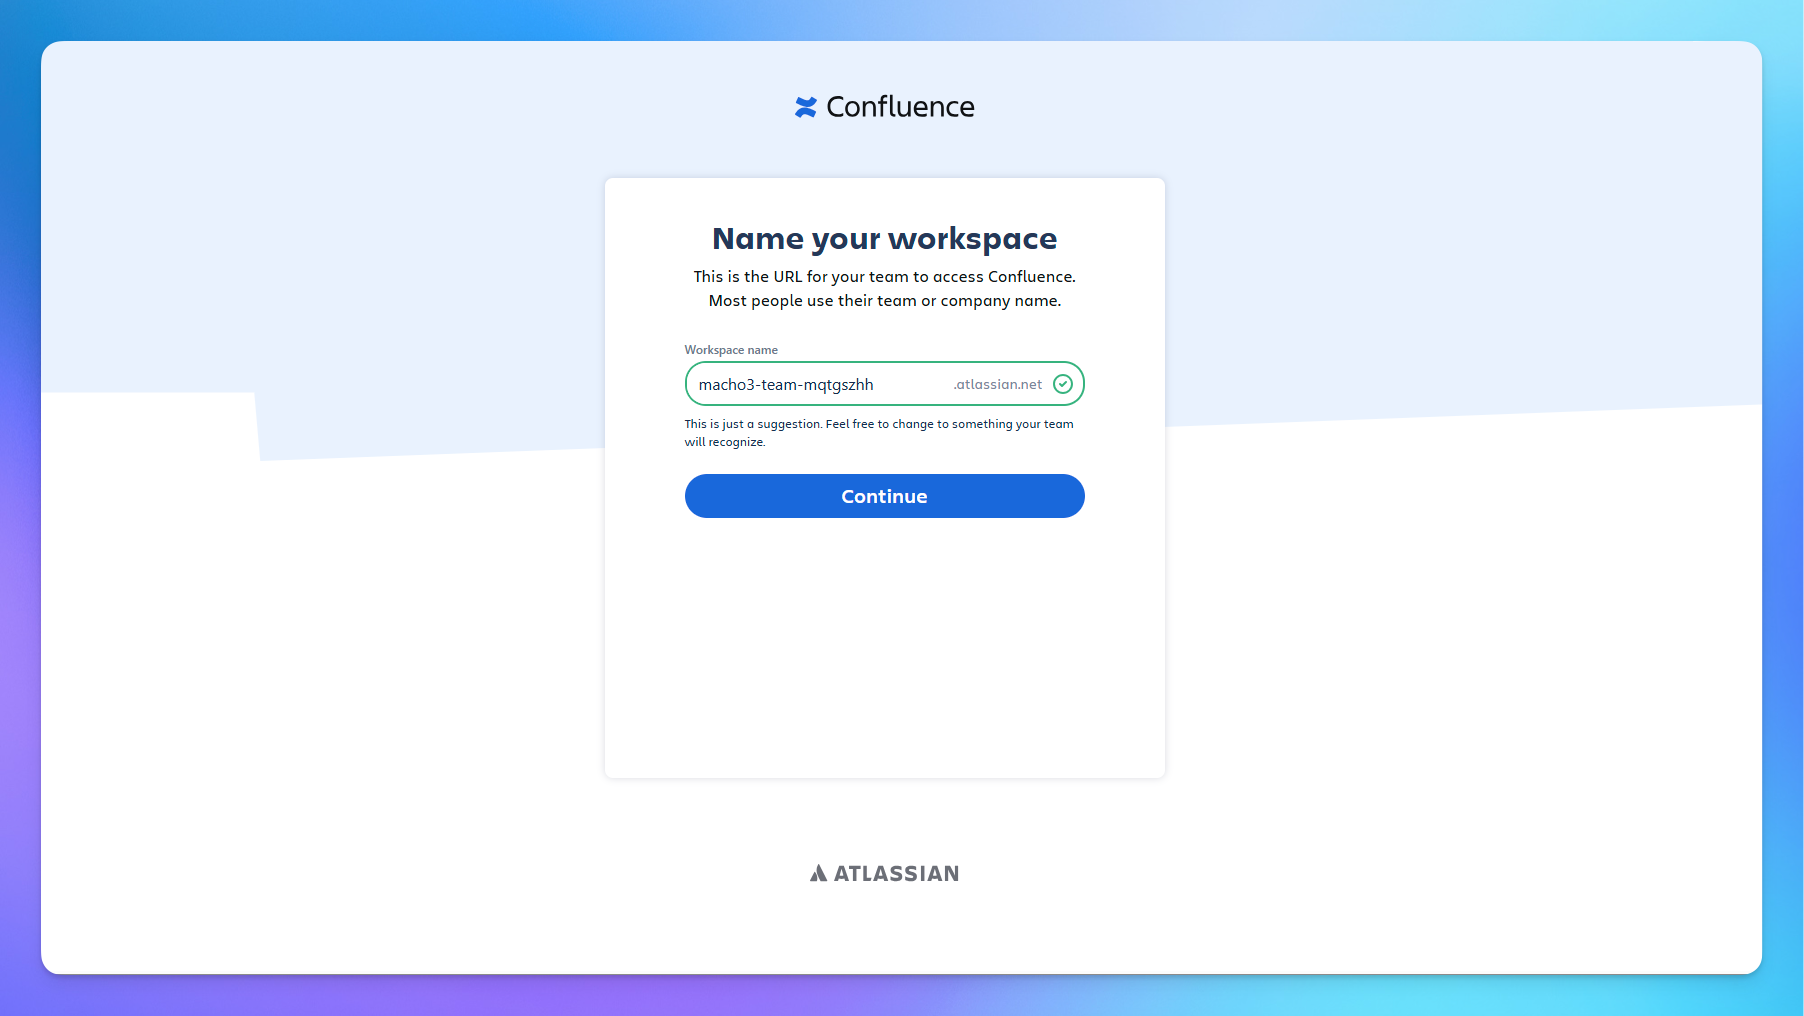
🏗 Step 3: Set Up Your Workspace
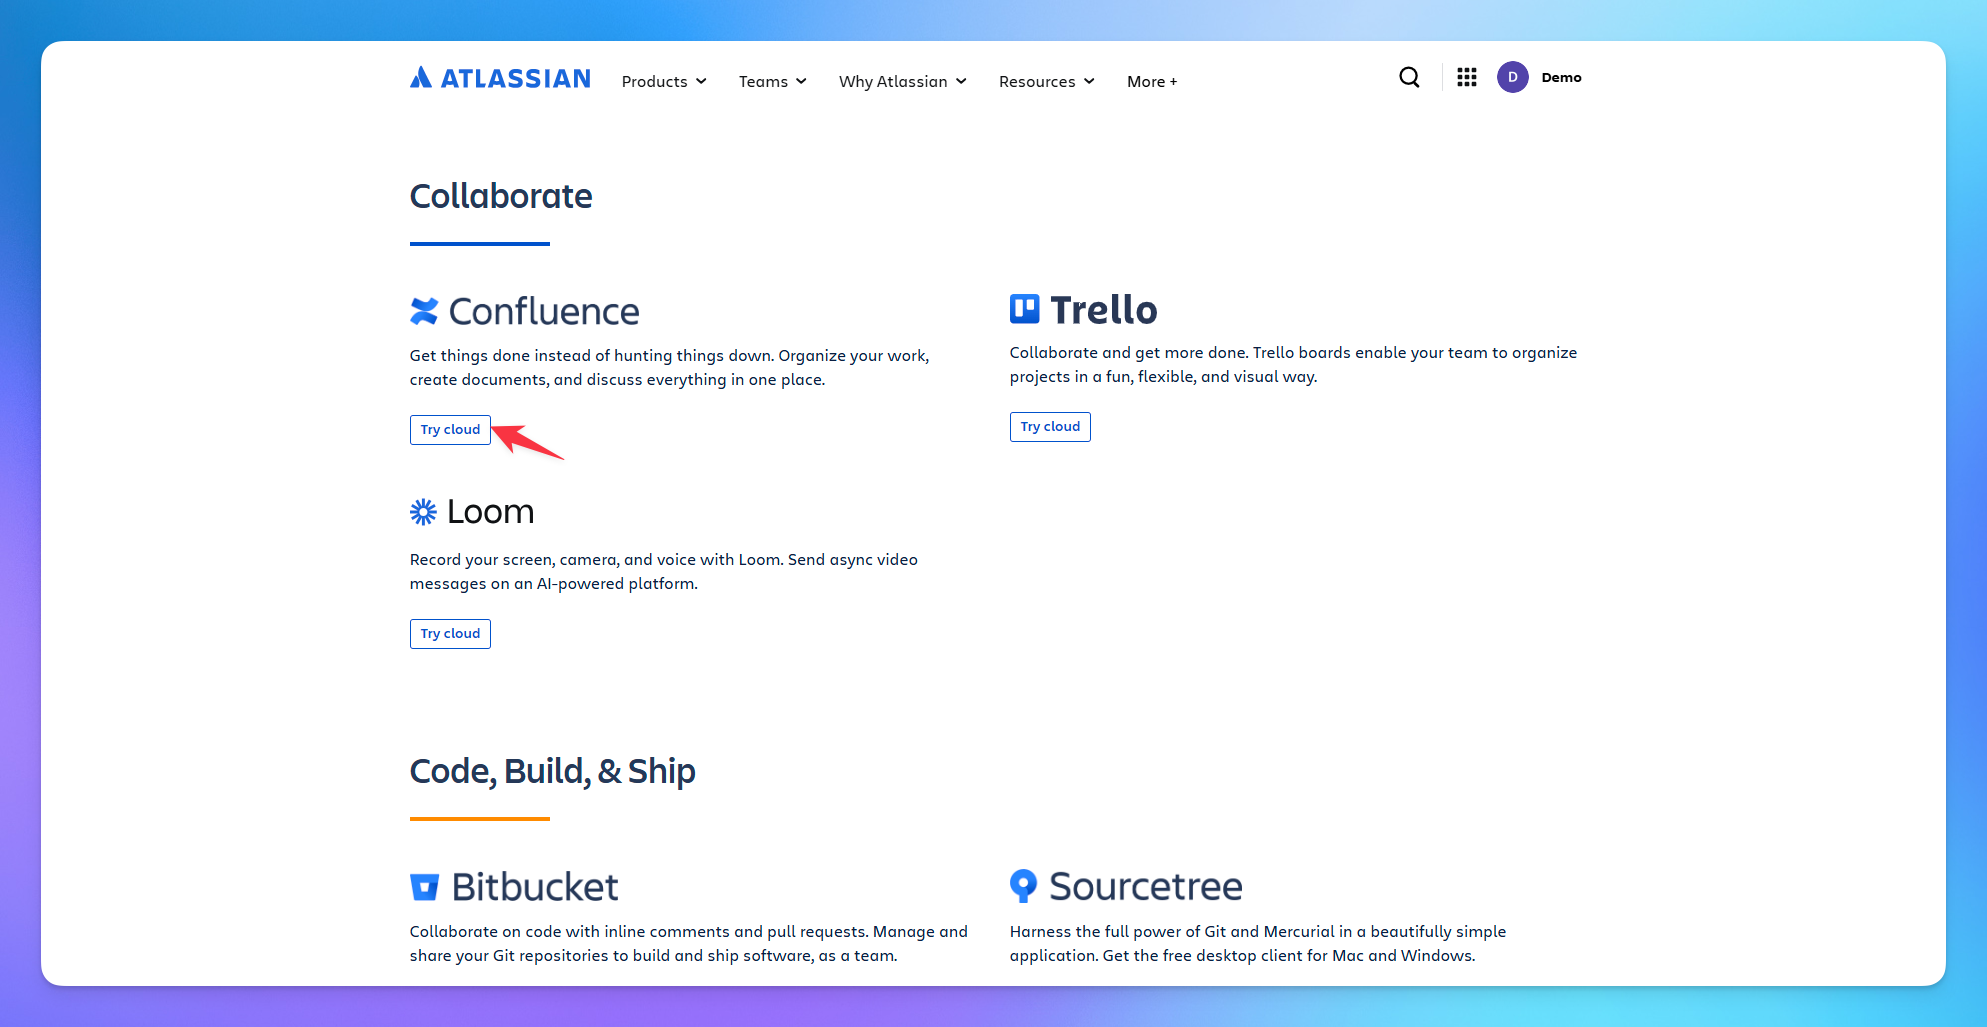
Scroll down to find Confluence.
Click on it and create a new workspace.
Complete the setup by entering the required details.
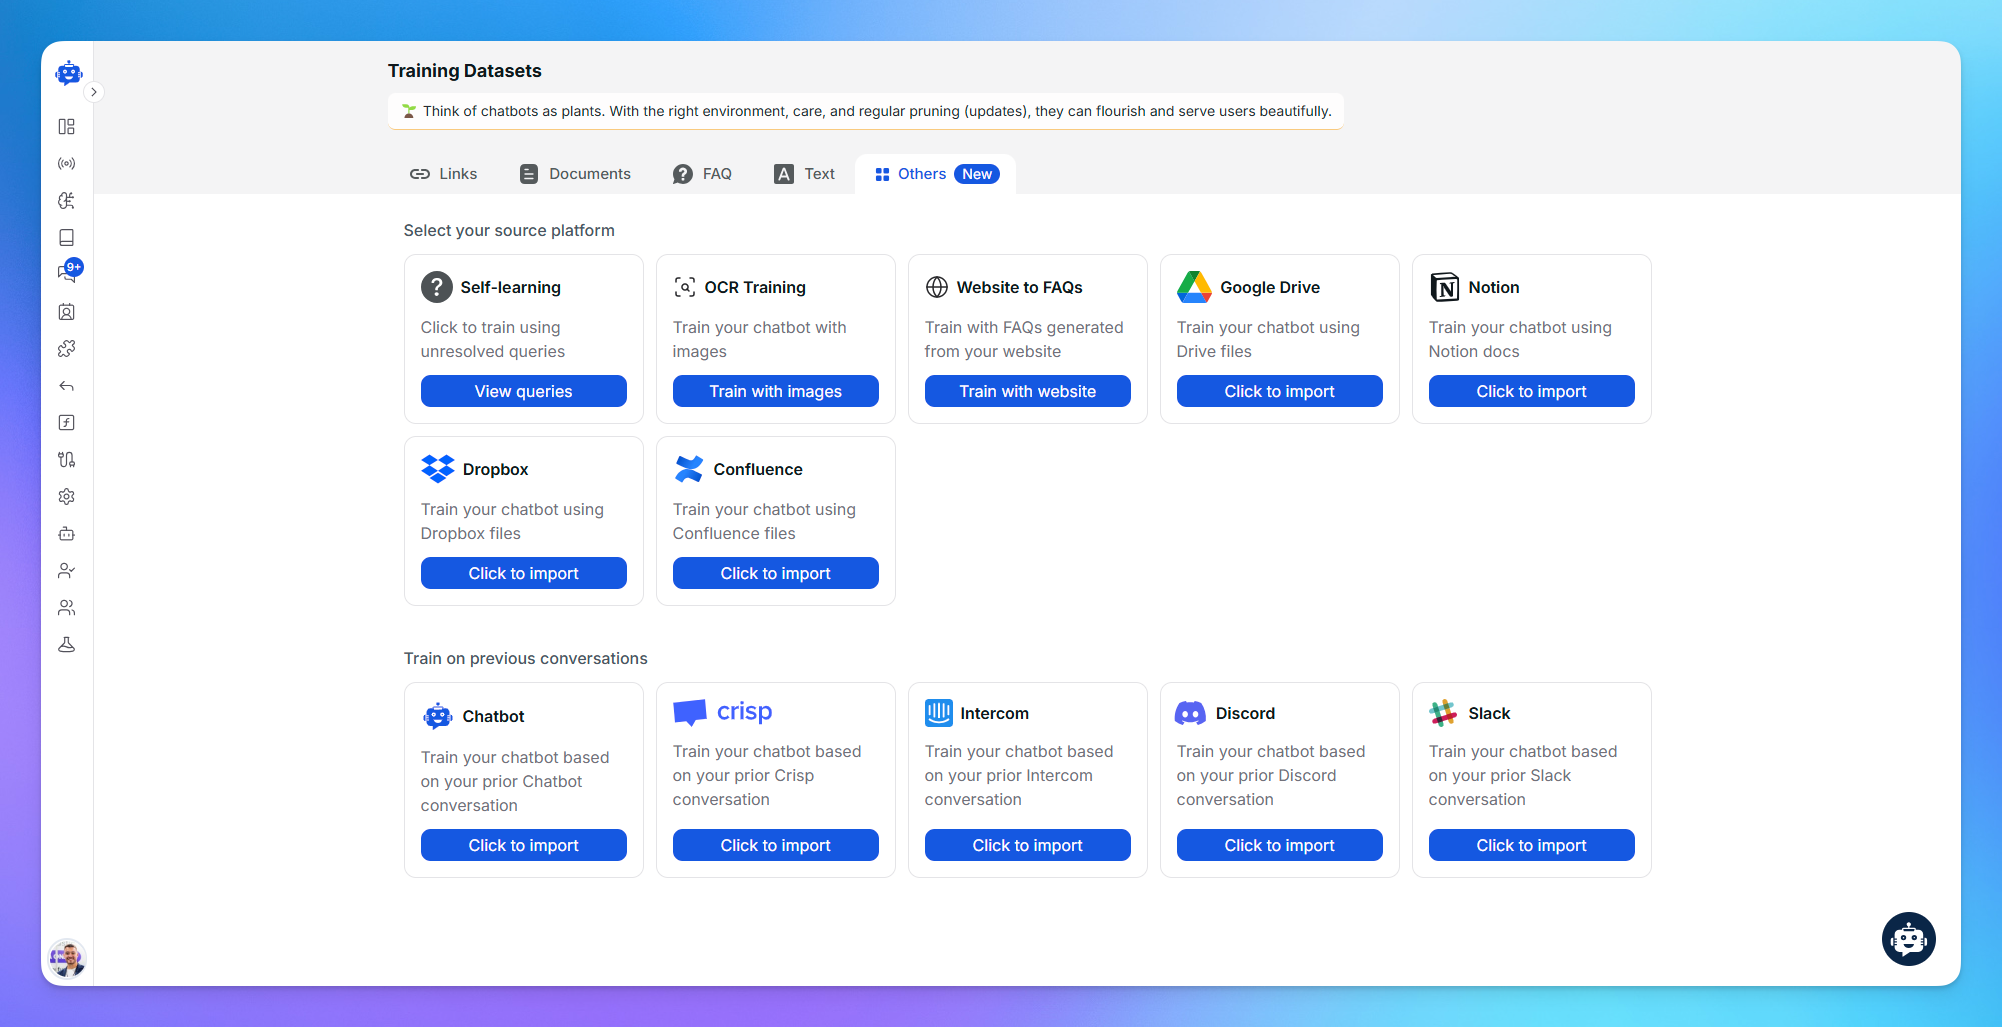
🔄 Step 4: Import to YourGPT
Go to your YourGPT Dashboard.
Click on the Training section in the sidebar.
Select Confluence as your data source.
Click on Import and follow the prompts.
✅ Step 5: Finish Import
Set up the workspace inside YourGPT as needed.
Wait for the files to process.
Once completed, you’ll see a confirmation that your Confluence files were successfully imported.
Check if your Confluence workspace is public or shared with your integration account. For private pages, ensure access is granted.
Related Articles
How to Train AI From OneDrive Files
Step-by-step guide to training AI with OneDrive
How to Setup and Use Training Tags?
This guide help you to segment your training data using training tags/
How to Training AI chatbot with Slack
Train your AI chatbot from previous Slack Conversations
How to Train Chatbot with Dropbox documents?
Training AI chatbot using Dropbox documents
How to Training chatbot with Google docs?
Train AI chatbot from google files
How to Train Chatbots Using Unresolved Queries?
Train the chatbot to handle previously unable to answer queries using self-learning