How to Use YourGPT Template Functions for Personalization and Dynamic Responses
Template functions enable you to add dynamic functionality within Text Messages in Studio, automated responses, Base Prompts, and Restriction Texts by using default variables and helper methods
[Use Case 1] Business Hours Availability Based on Current Day and Time
Display Business Hours and Availability with YourGPT's Template Functions. Use YourGPT's Template Functions to add your operating schedule and show real-time availability in your chatbot responses.
Scenario
You want your chatbot to inform users about your business hours and whether your team is currently available. For example, if a user asks, "Is Team available now?" the AI respond based on the current time and the schedule you provided.
Implementation
Access Model Settings.
Insert the Business Hours Template Function:

Use the
{{date}}function with your desired format. For example, to display your business hours and the current date and time in your timezone like `Asia/Calcutta` for us:Our Team Work From Monday to Friday from 10AM-7PM. Today is: {{date format='dddd, MMMM Do YYYY, h:mm:ss a' timezone='Asia/Calcutta'}}
Save and Test your changes and interact with your chatbot to ensure the time displays correctly.
Other Available Time Formats
24-Hour Format:
{{date format="HH:mm:ss"}}Example Output: 14:30:45
12-Hour Format with AM/PM:
{{date format="hh:mm:ss A"}}Example Output: 02:30:45 PM
Time with Timezone:
{{date format="HH:mm:ss" timezone="America/New_York"}}Example Output: 14:30:45
Day Format:
{{date format="dddd"}}
Example Output: Thursday
[Use Case 2] Personalizing Interactions with Contact Names
Using YourGPT's Template Functions, you can insert contact names into responses to make interactions more personalized and improve engagement.
Use Case: Automatically Inserting Contact Names in Responses
Scenario:
You want your AI chatbot to address each user by their name, if it's available in the contact information. This personalization helps create a more engaging and customized interaction for each individual.
Implementation:
Go to General Settings and click on Leads.
Enable the Lead Form and activate the fields you need, such as Name and Email.
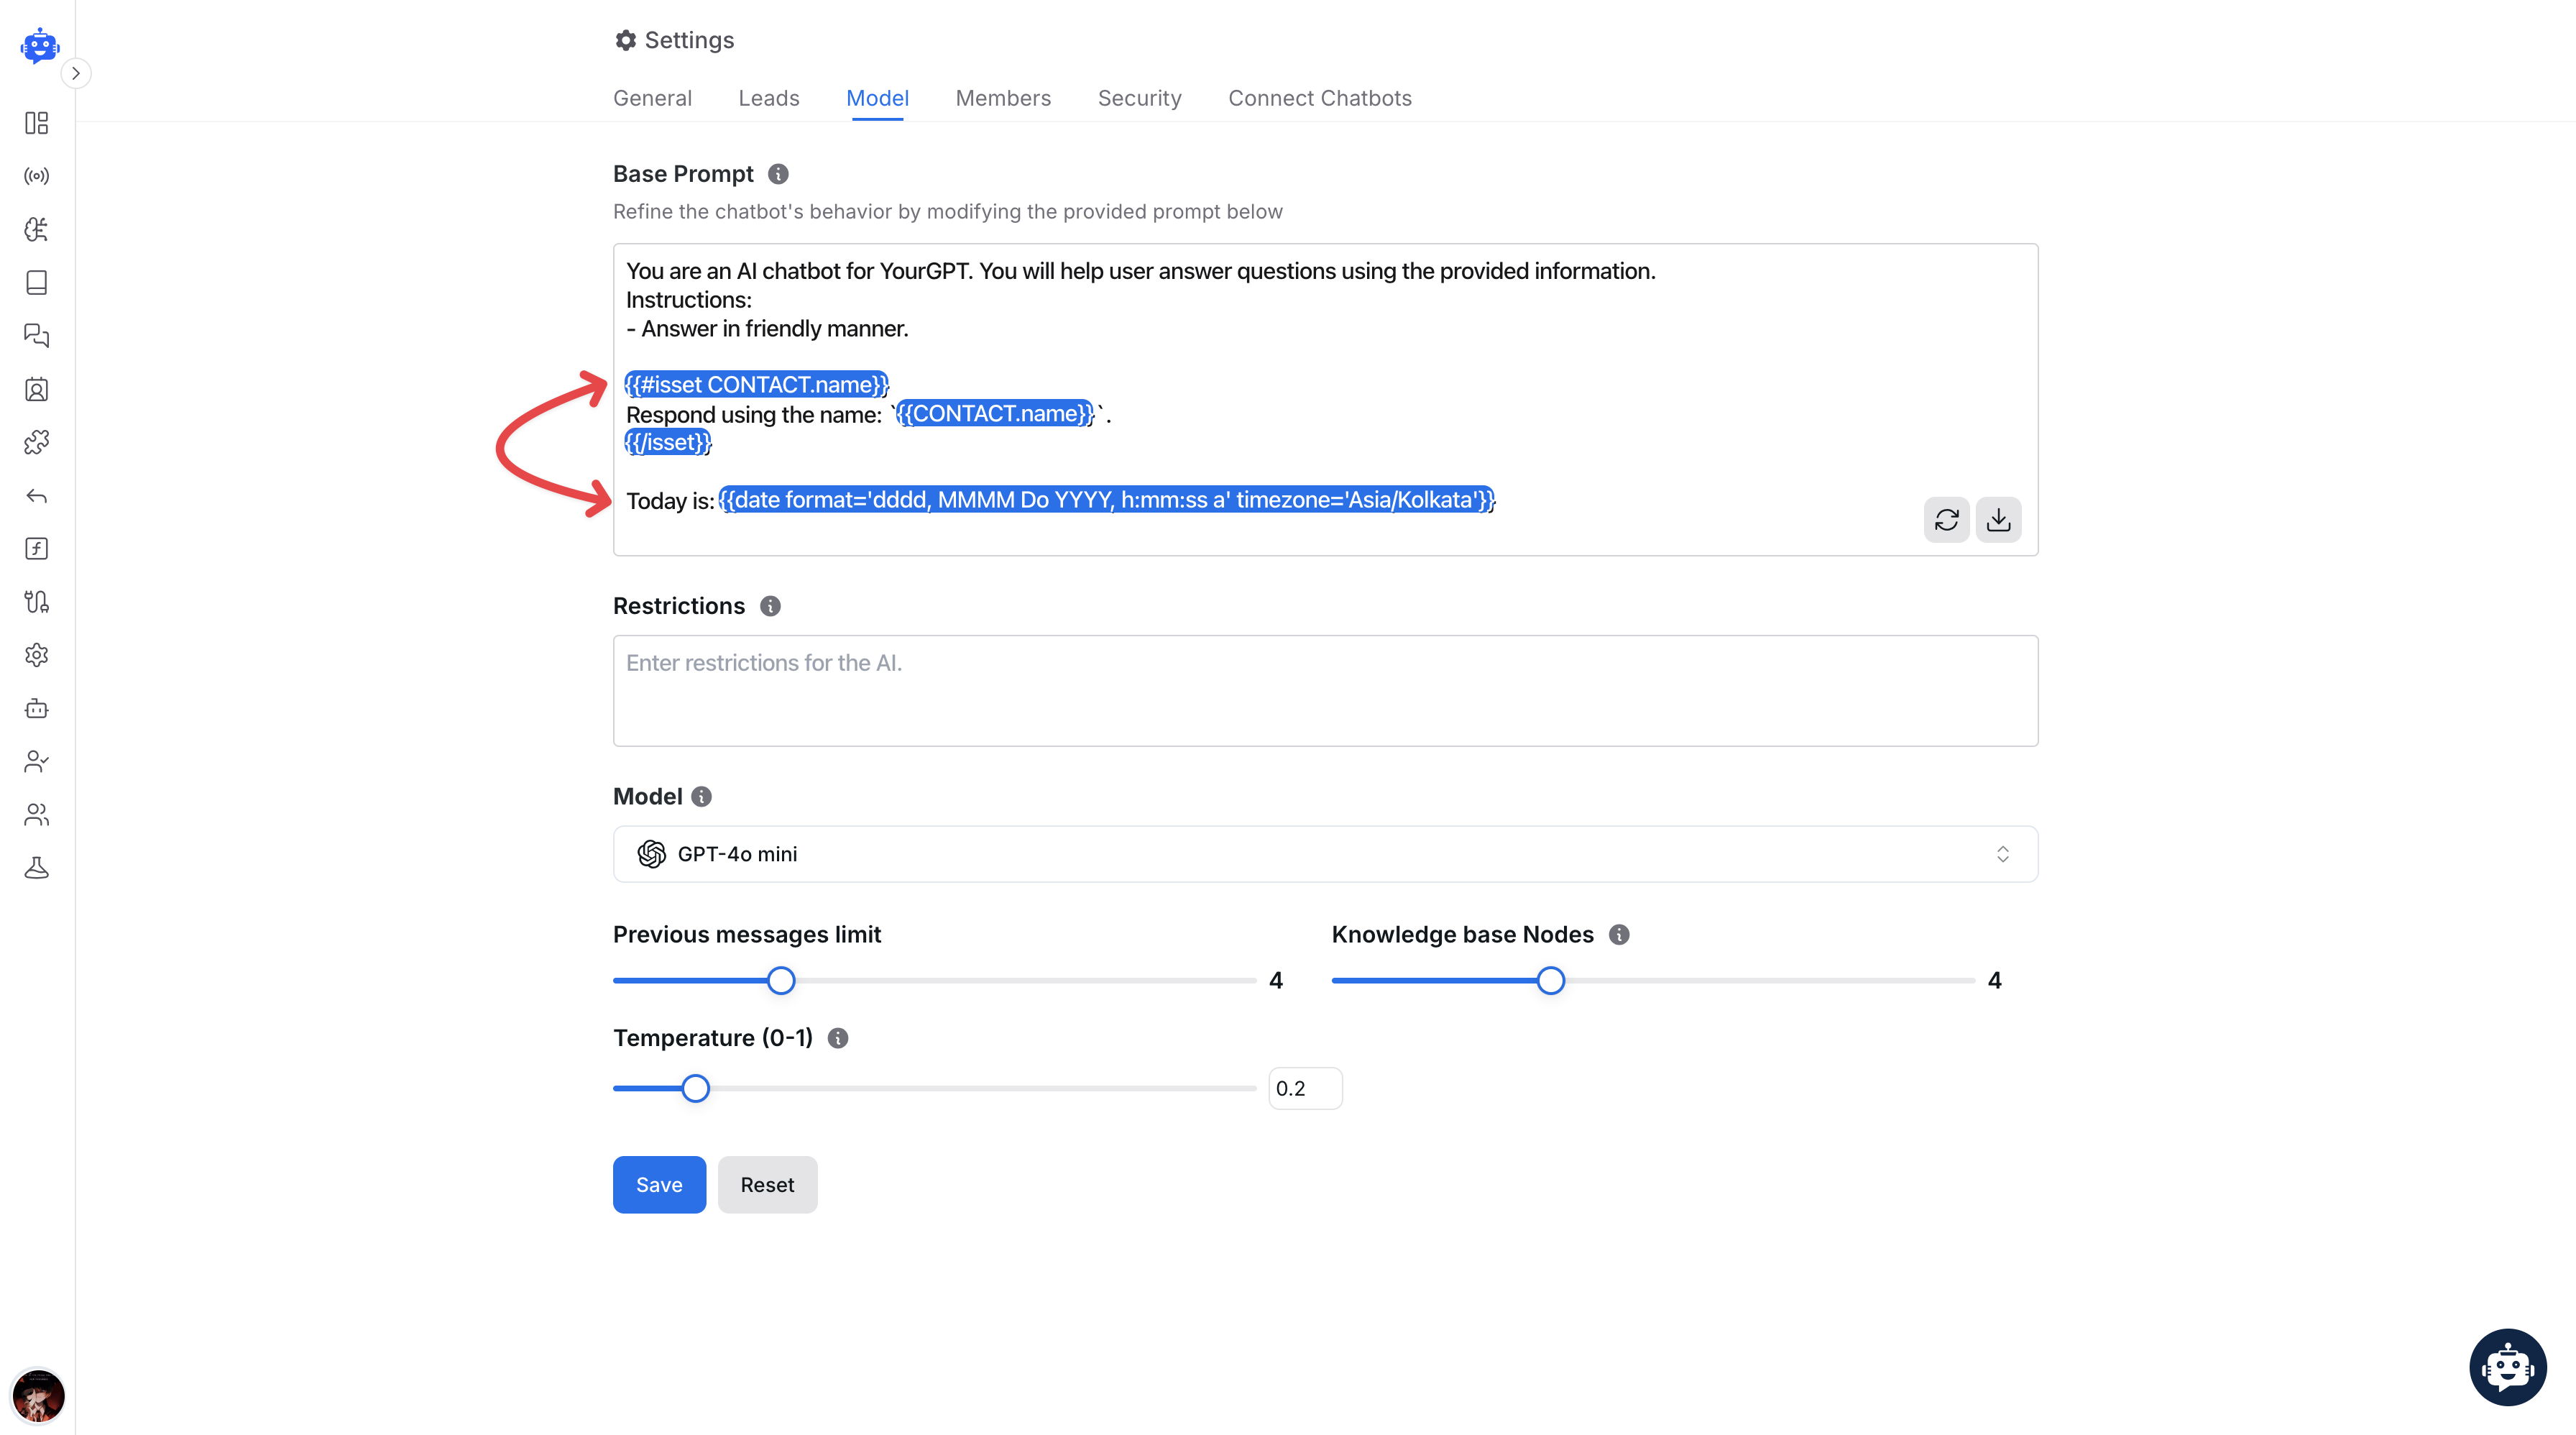
Now go the Model Settings, and add the function template, like shown in this below image👇

{{#isset CONTACT.name}}
  Hello, {{CONTACT.name}}! How can I assist you today?
{{/isset}}
Explanation:
{{#isset CONTACT.name}}: Checks if thenameproperty exists within theCONTACTobject, if exists it continues.{{CONTACT.name}}: Inserts the contact's name into the message.The block ensures that the name is only inserted if it exists, preventing potential errors or awkward placeholders.
For more more information template functions, refer to the YourGPT Templates Functions Guide.
Related Articles
How to invite Team Members to Your AI Agent?
Add teammates, assign roles, and collaborate from chatbot settings.
What is the Difference Between Chat Mode & Agent Mode?
A Practical Guide to choose between Chat Mode and Agent Mode in YourGPT
How to Add an AI Helpdesk to Your Website Widget With Optional Password Access
Embed an AI Helpdesk in Your Widget and Secure It in Minutes
Anywhere, Anytime Access to YourGPT Support Inbox
Instant Live Support from Your Phone with the YourGPT Mobile App
How to Clone Your AI Agent
Set Up Separate Bots for Staging, Production with Duplicate Bot
Understanding & Implementing Session Resolved Event and Auto-Close Sessions
how the "Session Resolved" event works in studio and how to configure auto-close timeouts for inactive sessions.
Choosing the Right AI Model for Your AI Agent
Compare models by performance, cost, reasoning ability, and use case fit
