
How to invite Team Members to Your AI Agent?
To add members, follow these steps:
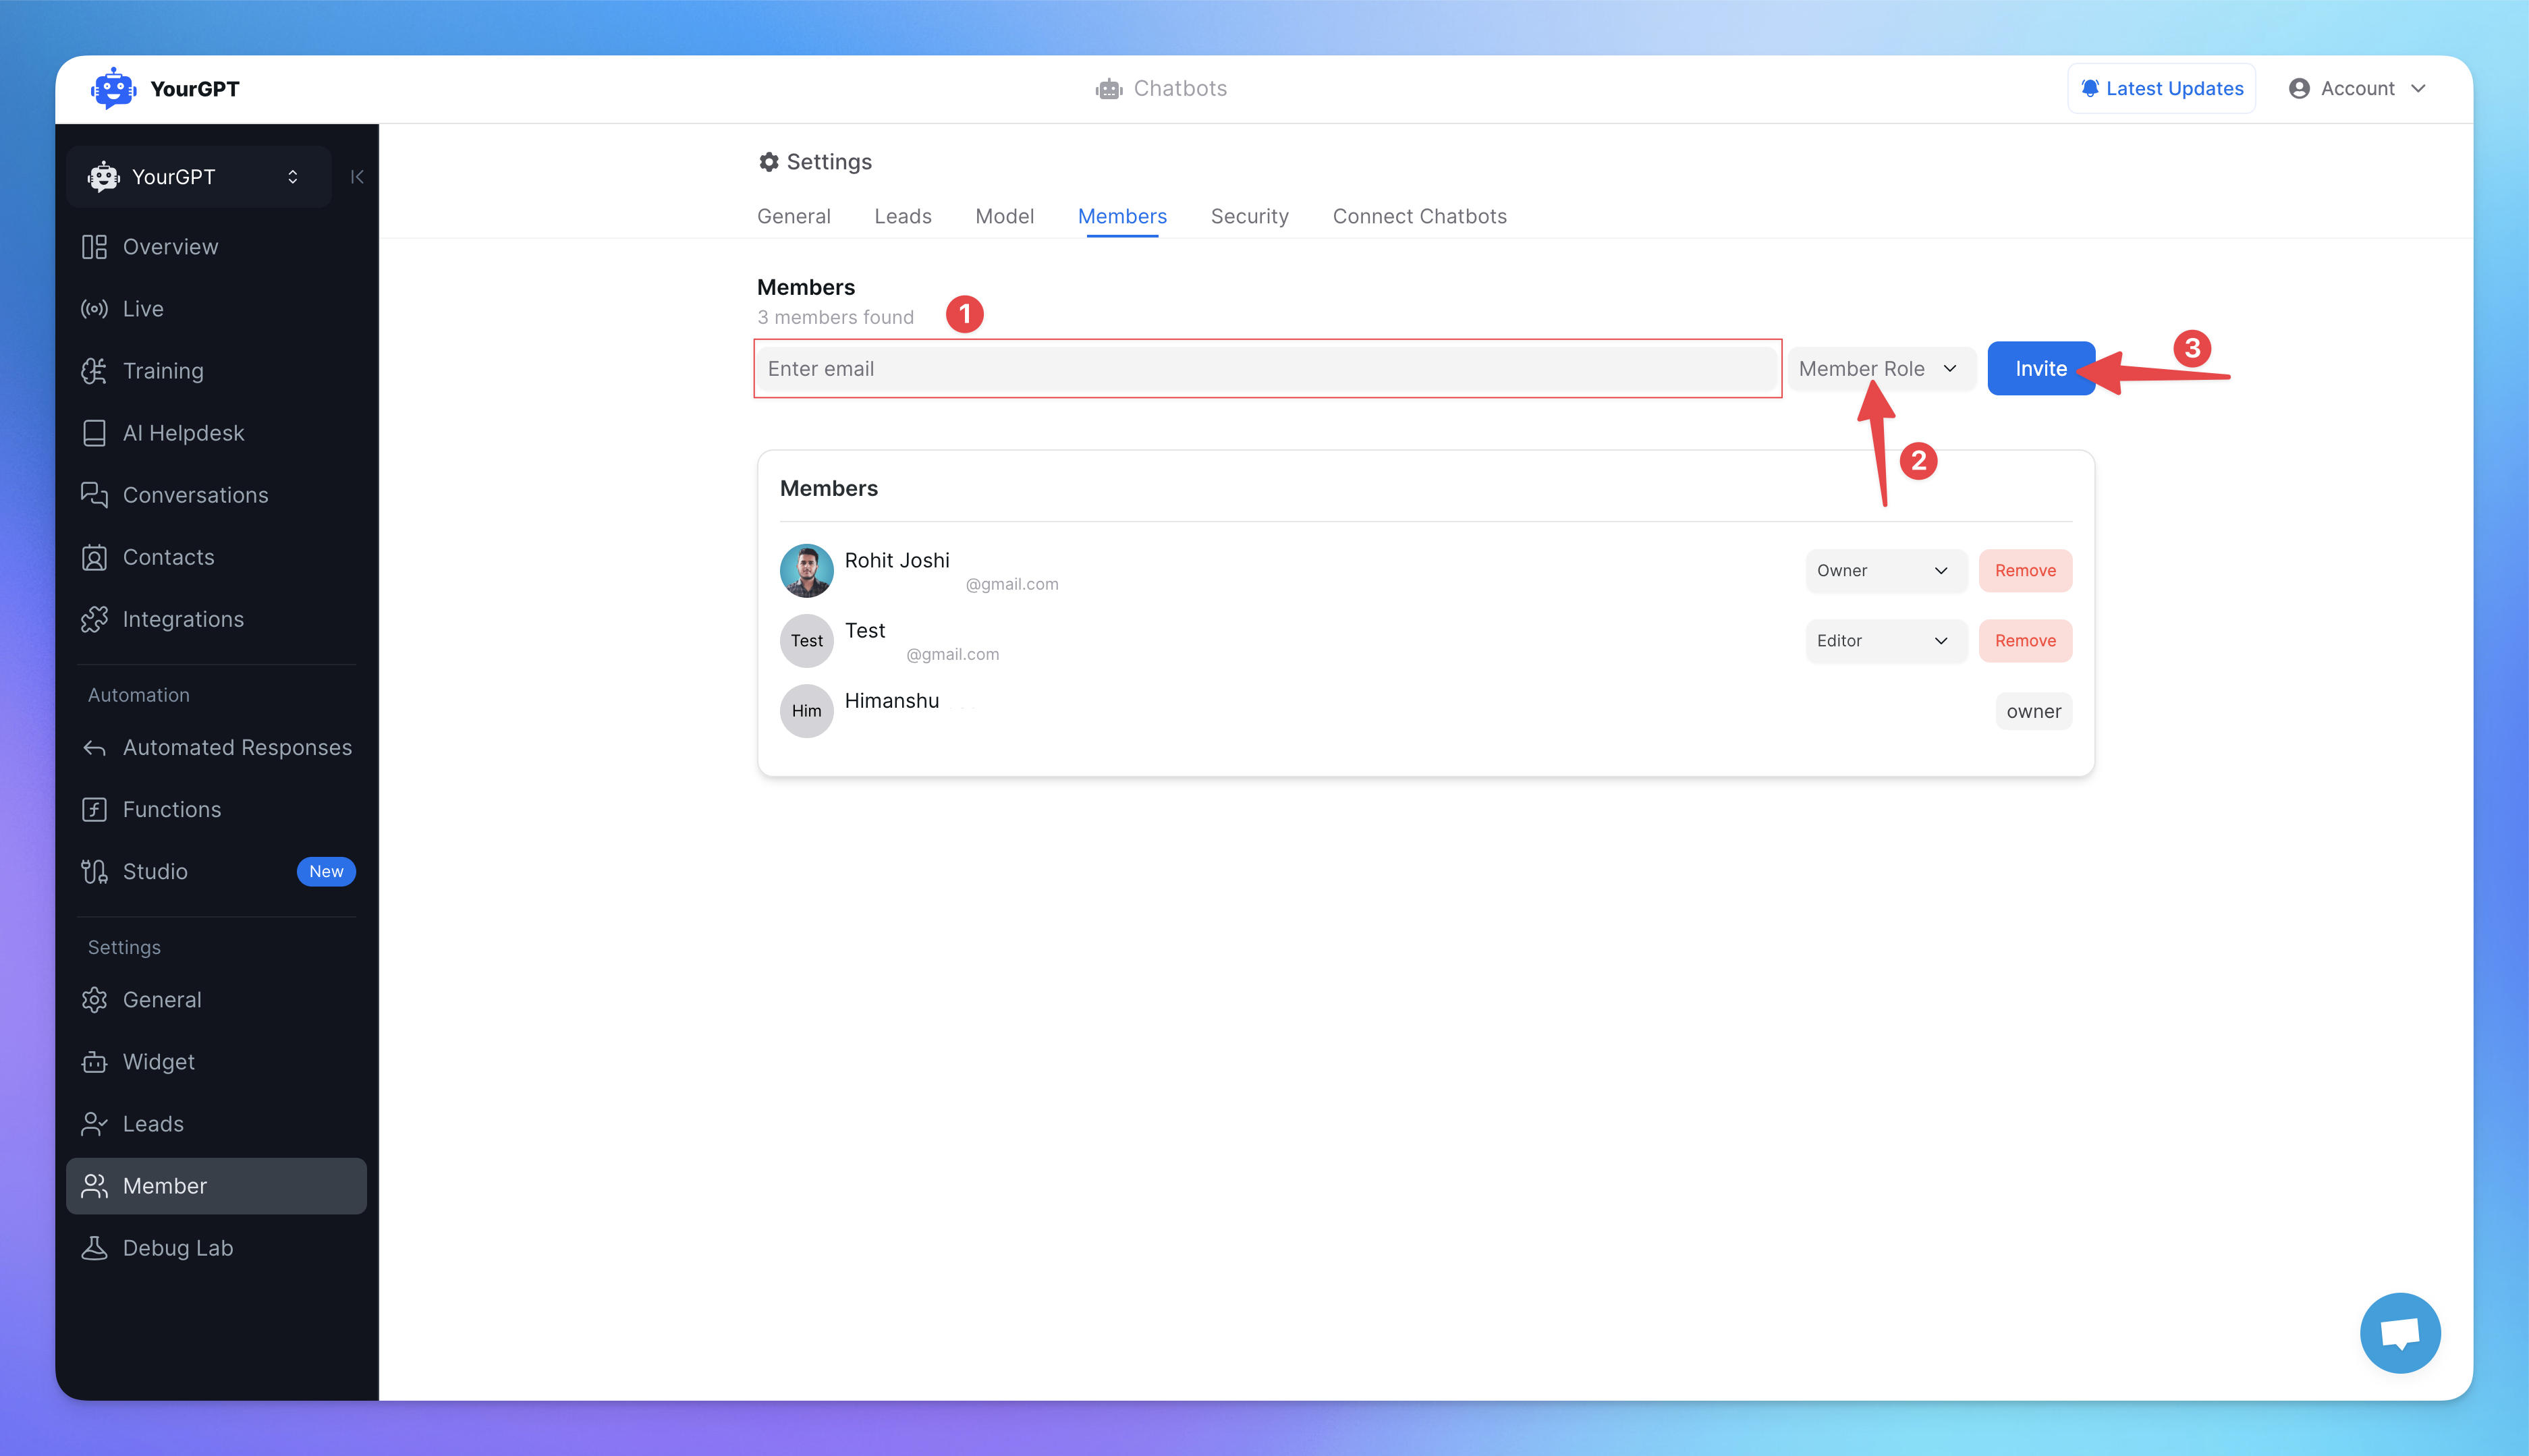
Go to the General Settings.
Click on "Members".
Enter the email address of the person you want to add.
Choose a role from the available options:
Owner: Has full control over the project.
Editor: Can modify content but has limited control.
Viewer: Can only view the content without making changes.
Operator: Can perform specific tasks but has restricted access.
Click on "Invite" to send invitations.
Note: Make sure you enter the correct email. If you enter the wrong email. The invitation will not be sent.
Also, check the spam folder to see the invitation.
Member need to open the email And accept the invitation.
After successfully accepted invitation.
New member will appear in the member section with the role description.
Related Articles
How to Install YourGPT with Google Tag Manager
Learn how to easily add the YourGPT widget to your website using Google Tag Manager.
How to Temporarily Disable AI Responses
Disable bot responses for maintenance, testing, or manual handling
How To enable Image Understanding for Your AI
AI agent to process images and answer on them
What is the Difference Between Chat Mode & Agent Mode?
A Practical Guide to choose between Chat Mode and Agent Mode in YourGPT
How to Add an AI Helpdesk to Your Website Widget With Optional Password Access
Embed an AI Helpdesk in Your Widget and Secure It in Minutes
Anywhere, Anytime Access to YourGPT Support Inbox
Instant Live Support from Your Phone with the YourGPT Mobile App