
How to Execute Code in Your Chatbot
The Code Execution Node lets you run custom code within your chatbot flow. This is useful for adding complex logic, performing calculations, calling third-party APIs, or executing advanced functions.
Currently, the Code Execution Node supports JavaScript and Python, allowing you to write and run code in either language.
Additionally, it includes an AI-powered code generation feature, which can help you write or fix your code with simple instructions.
Step-by-Step Guide to Using the Code Execution Node
Add the Code Execution Node
Navigate to Advanced Tools, then drag and drop the Code Execution Node onto the canvas or inside any block where you want to execute the code.

Open the Code Execution Editor
Click on the Code Execution Node to open its settings. Here, you’ll see an option to select your programming language (JavaScript or Python). Once selected, click on Edit Code to open the Code Editor.

Writing Code in the Editor

The Code Editor is where you’ll write and execute your code. It includes:
• Syntax highlighting for better readability
• AI-powered code generation for quick code creation and fixes
Pre-Imported Libraries & Packages:You can use several built-in libraries without importing them manually:
• JavaScript: moment-timezone, node-fetch, axios, etc.
• Python: requests, pytz, etc.
Generate Code with AI:
With the AI Code Generation feature, you can instruct the AI to generate code for you. After generation, you’ll have options to accept or reject the AI-generated code.

Accessing Variables:
The editor gives you access to key chatbot variables such as FLOW, SESSION, and CONTACT. You can read, update, or store values dynamically, such as API responses or calculations.

Writing a Sample Code: Fetching Pokémon Data
Let’s instruct the AI to generate a function that calls a REST API to fetch a list using axios. Once the AI generates the function, we can accept it and modify it as needed. We will store the API response inside the FLOW.pokemons variable for later use.

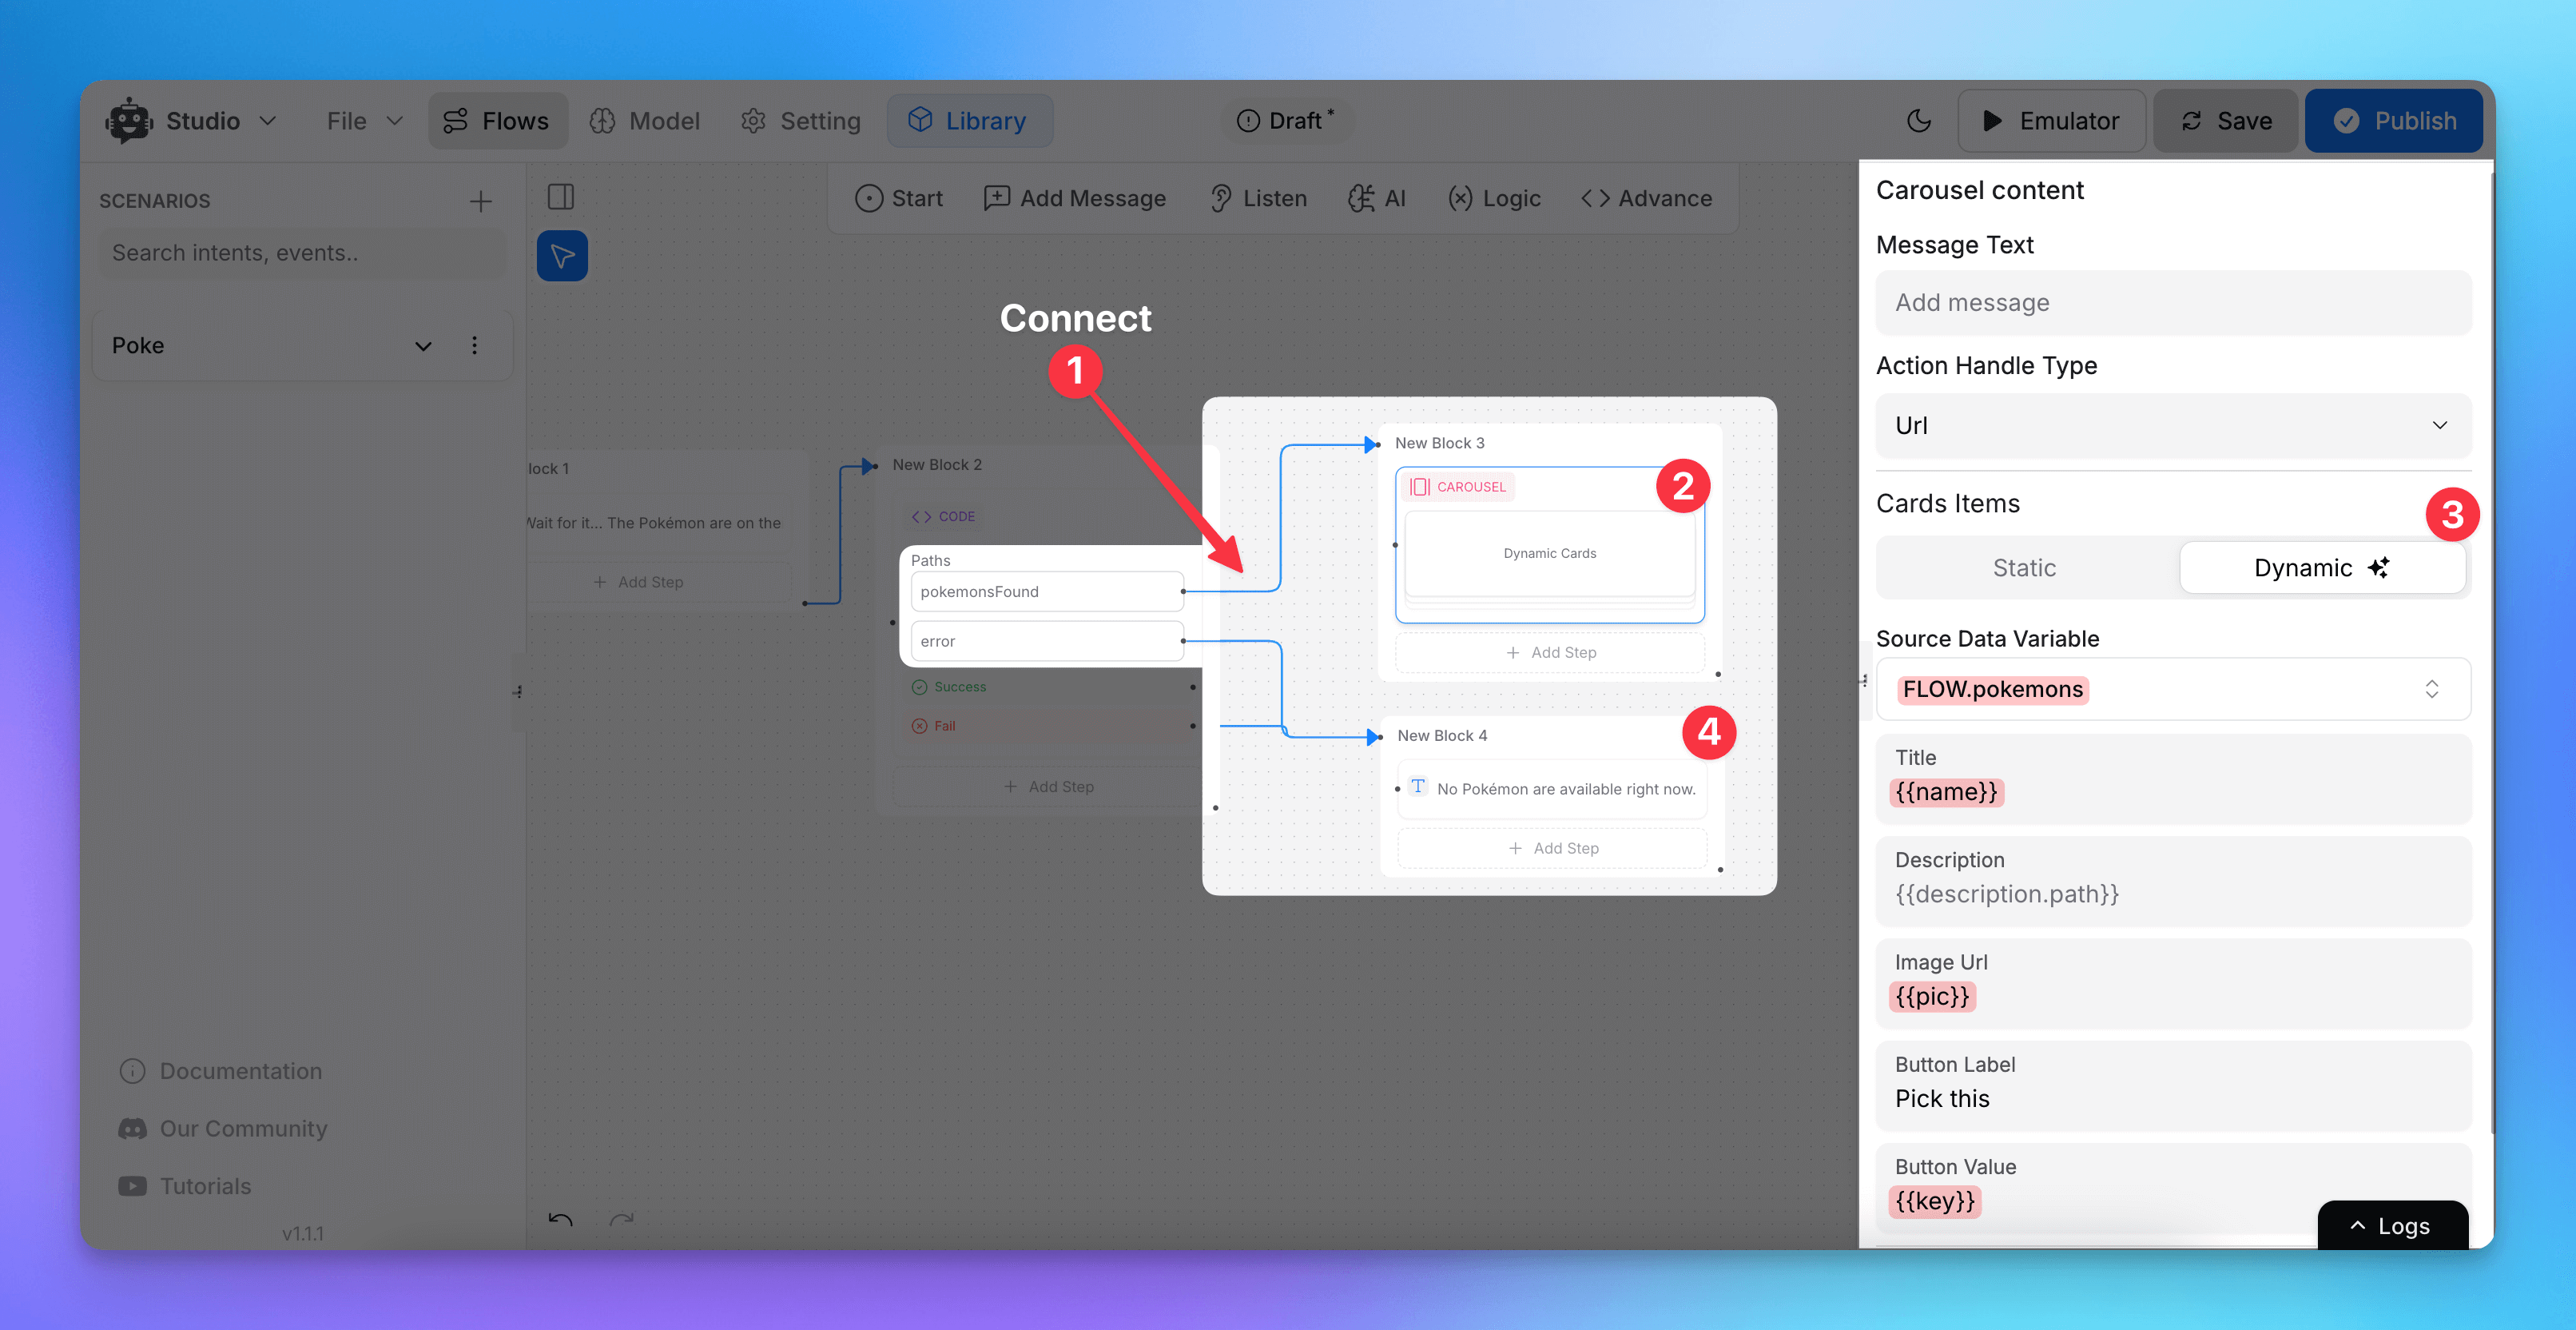
Returning Dynamic Paths for Flow Control
Now that we’ve stored the results, the next step is to add dynamic paths. Using the return statement, we can return unique path names that can be mapped to different flows.
Let’s add paths:
• "pokemonsFound" → If the API call is successful
• "error" → If something goes wrong

Using Dynamic Paths for Flow Execution
We can now use these path identifiers to control the chatbot’s flow dynamically. Instead of just a success or fail path, we can create multiple branches based on the execution results.

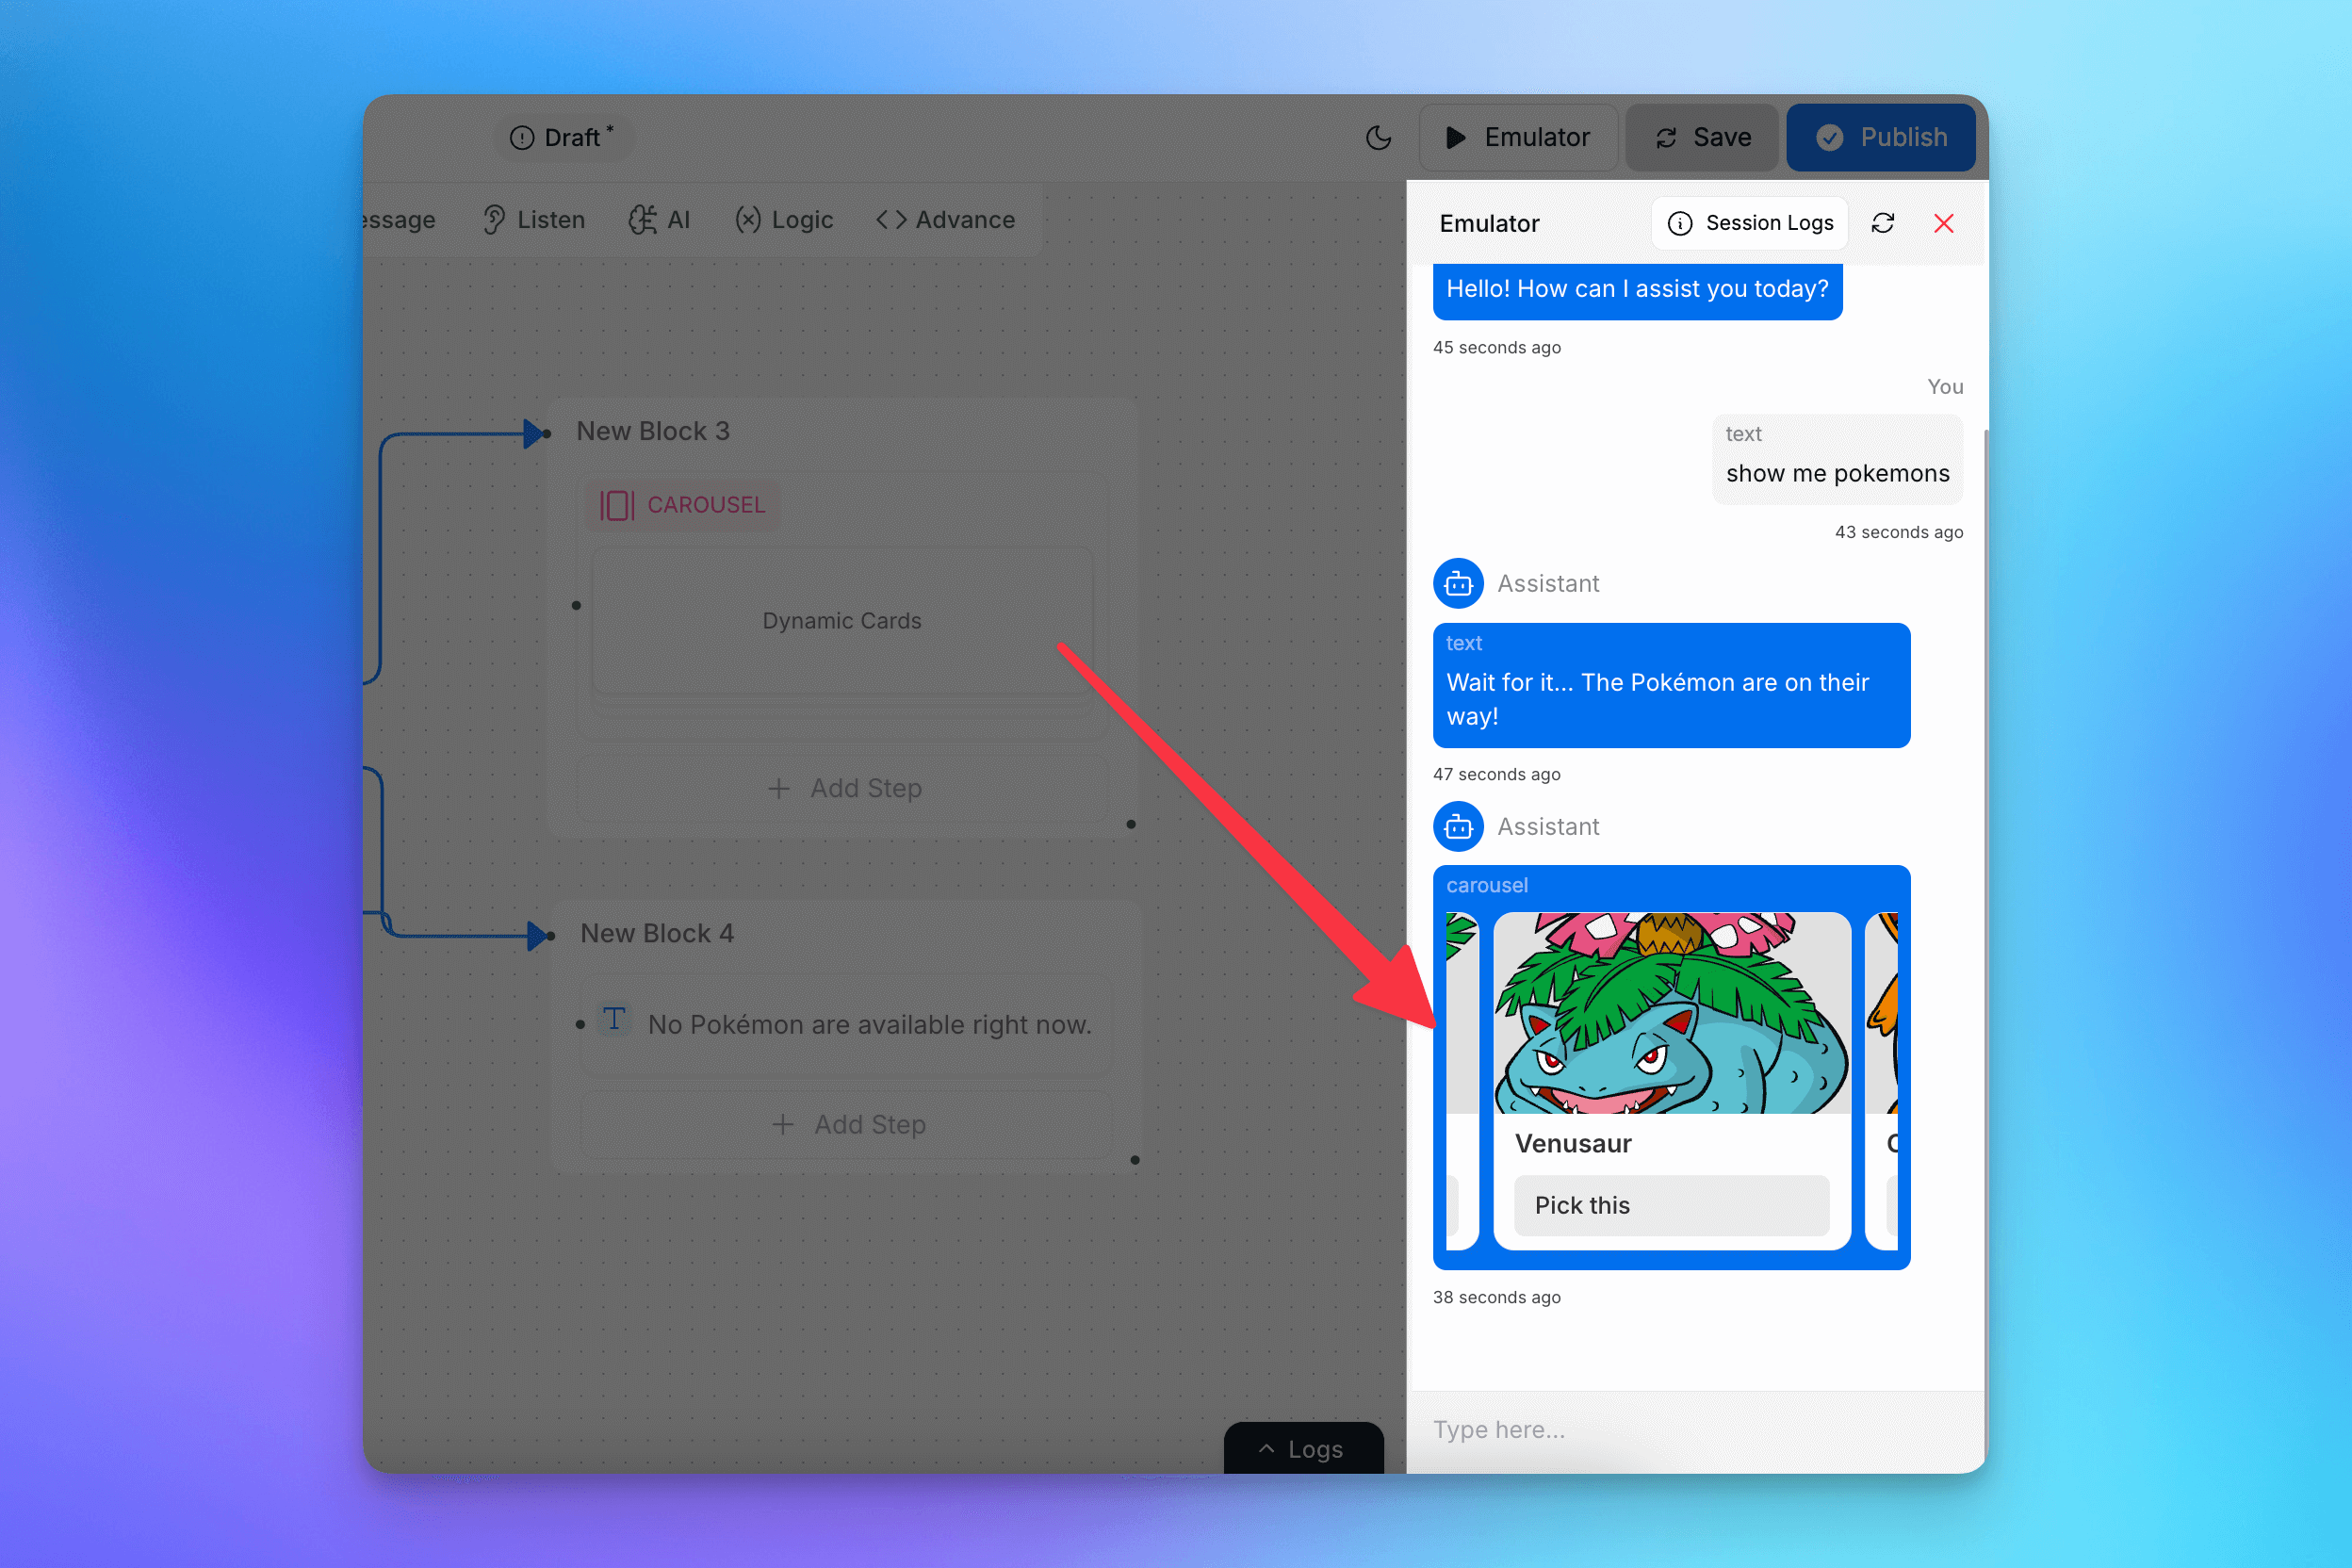
Displaying Data in the Chatbot
After processing the API response, we can display the stored Pokémon data using a carousel or other UI elements. We also handle the error case properly.
Conclusion:
This example demonstrates how to:
✅ Use the Code Execution Node
✅ Connect to a third-party API/Service
✅ Store and manipulate flow variables
✅ Dynamically control the chatbot flow
With the Code Execution Node, you can build powerful, dynamic AI agents for endless possibilities! 🚀
Related Articles
How to use Intents in Chatbot Studio?
This guide walks you through creating and using Intents to enhance your chatbot’s capabilities.
Flow : Scenarios, Blocks, Steps & Connections
This article fully details how steps/nodes and blocks work, how to configure them, create paths and connections.
How to capture and store a user’s response?
This article provides a complete guide on capturing user responses, such as name, email, and more, and shows how to store and utilize them in your chatbot to create personalized and engaging experiences.
How to Add & Configure Text, Image, and File Messages in Studio
Learn how to send text, images, and files with your ai agent using studio.
How to Debug Flows and View Execution Logs in Chatbot Studio?
Learn how to debug your flows, check flow execution logs, and view logs within the Chatbot Studio
How to Set Up Conditions in AI Studio
Set Conditions to Understand What Information Users Are Looking For
How to create and use forms in AI Studio?
This guide will walk you through the process of creating and using forms to improve the user experience with your AI agent