
How to Set Up AI Responses in Studio
You can configure AI response blocks in Studio with either text, JSON outputs or knowledge base outputs.
Setting Up AI Response Node
AI Response blocks in Studio let you create structured outputs using JSON Schema. Here's how to set it up:
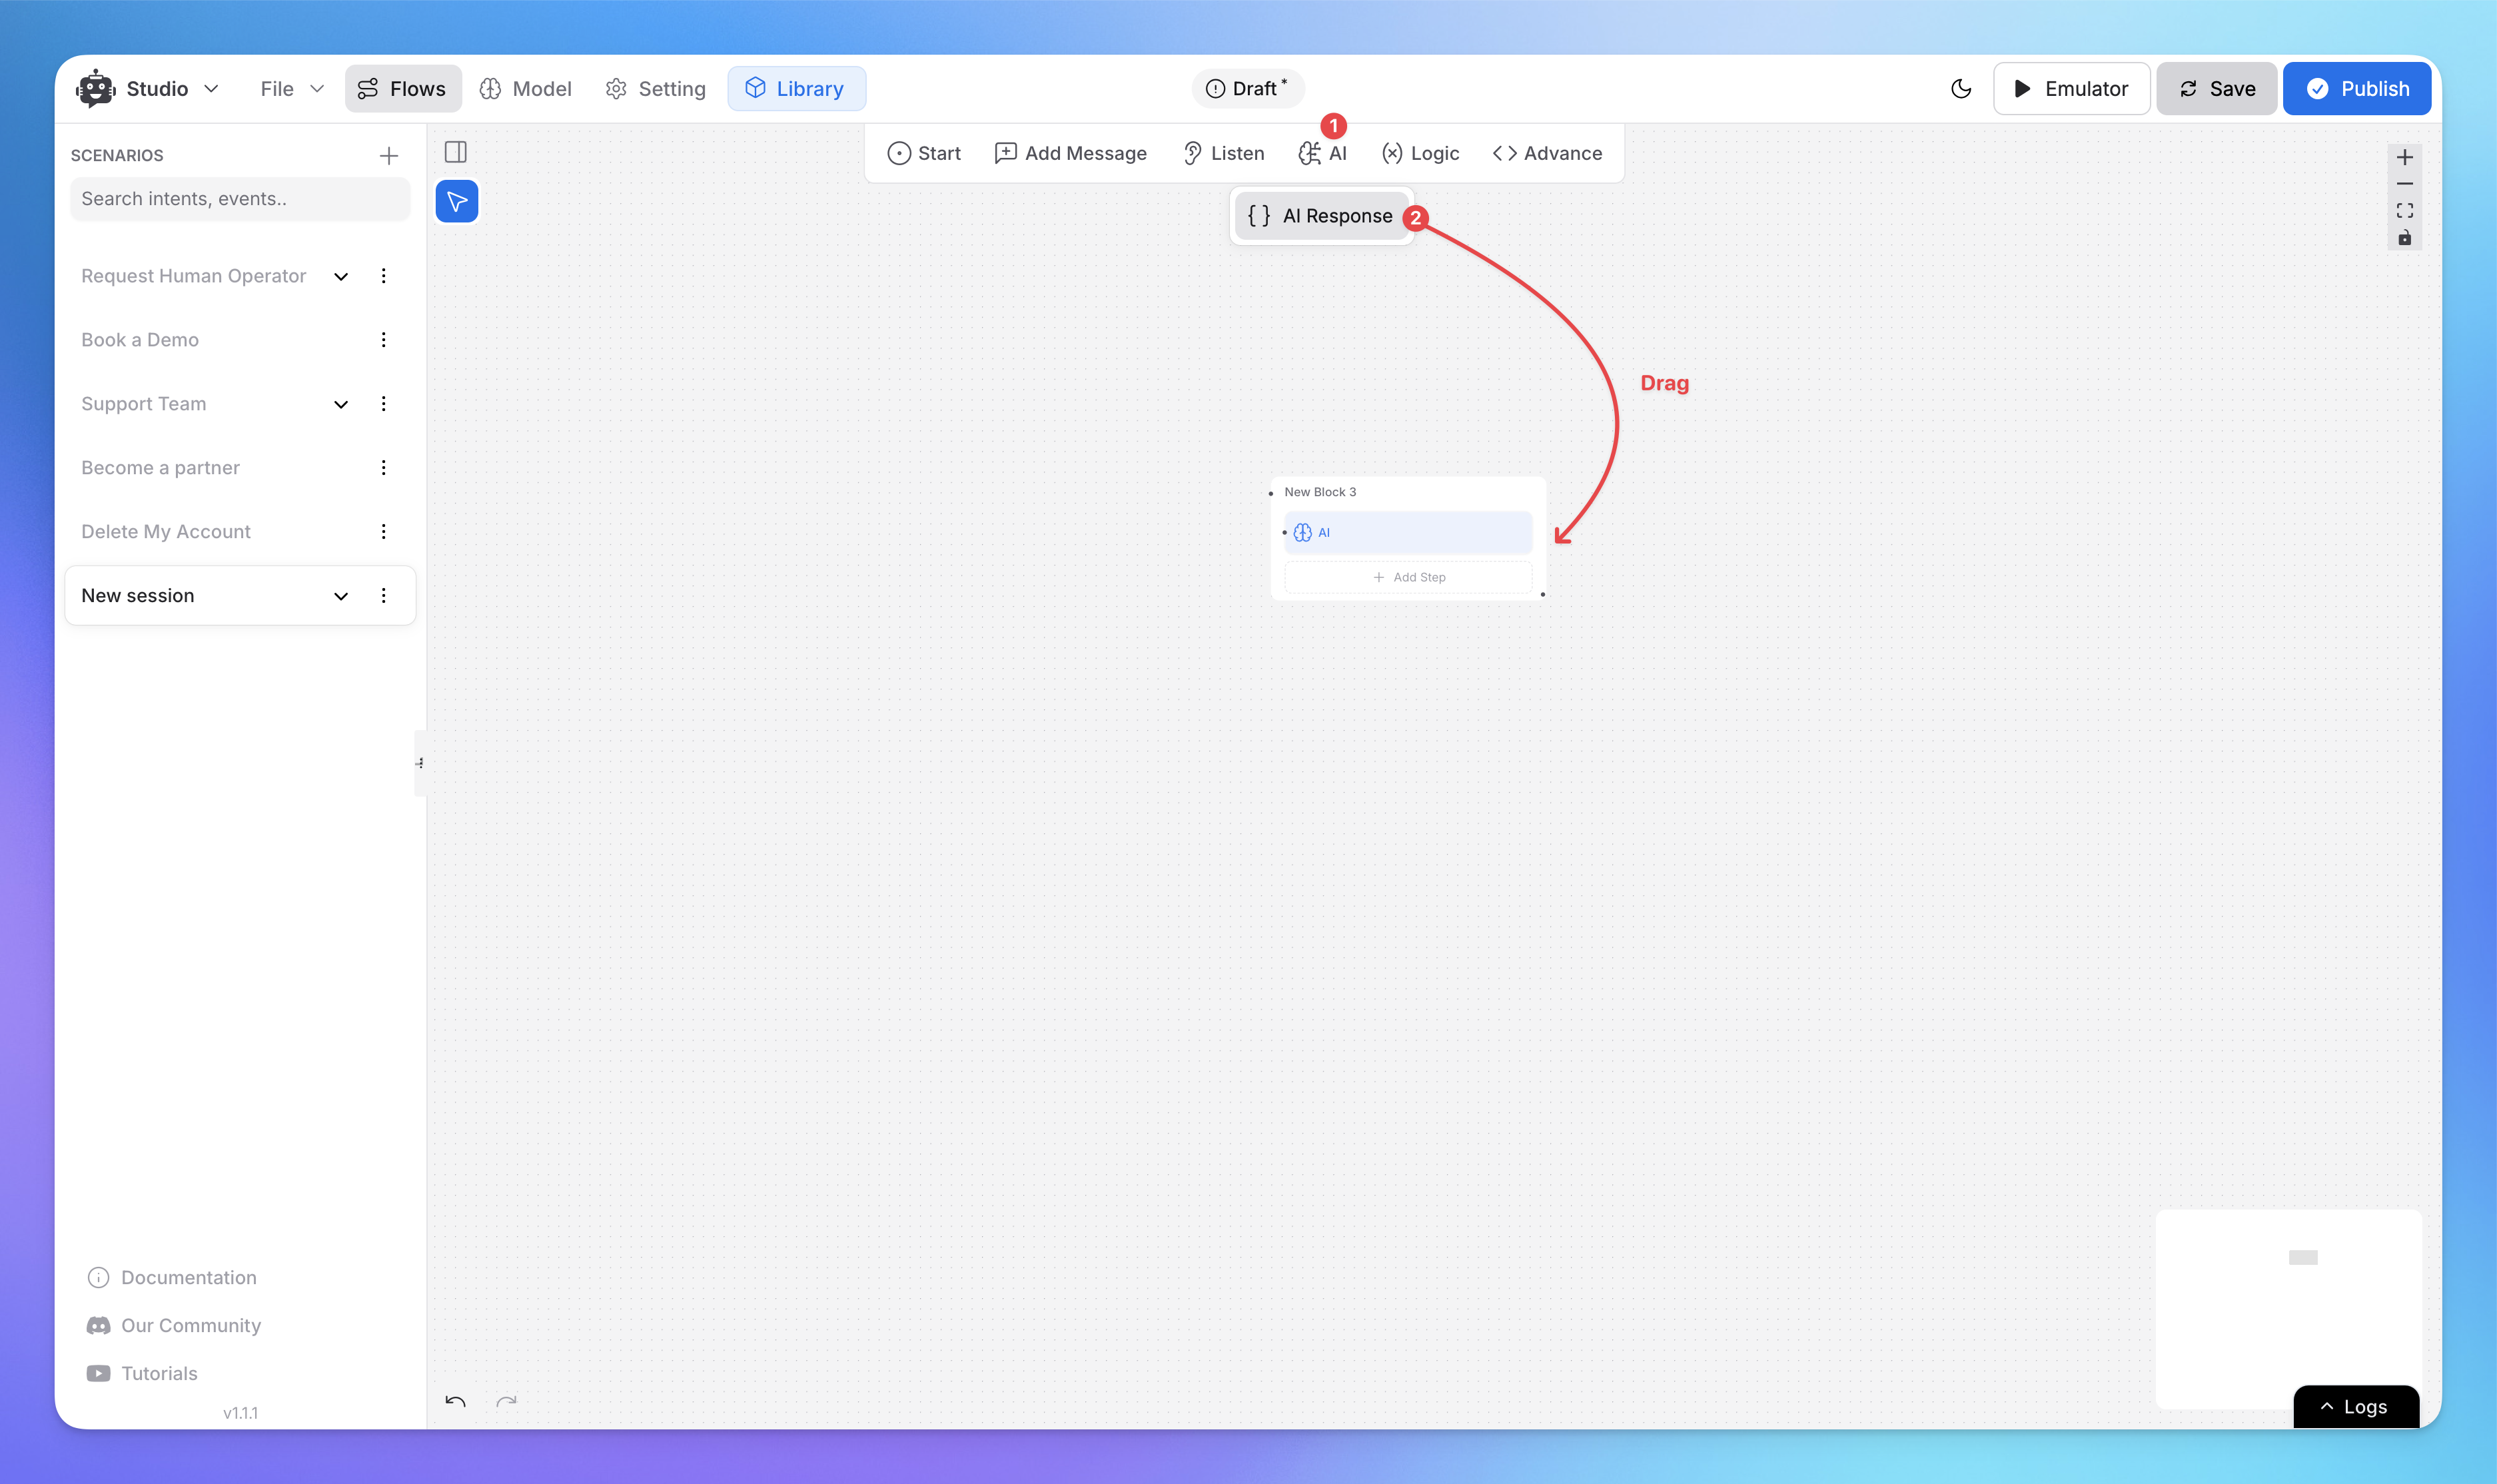
From your flow, click the "AI" option in the top toolbar
Drag an "AI Response" block into your flow
Configure the response settings in the right panel
Choose between Text or JSON response types
We'll focus on JSON Schema configuration below
What is an AI Response?
AI Response is a reply generated based on AI models (LLM). It processes the input (such as a user query) and generates a response using its trained knowledge, context from the prompt, and previous chat history if provided.
AI Response in Studio:
AI Response blocks allow structured responses in either text or JSON format.
It uses pre-trained AI models to generate replies.
The response can be customized using prompt, temperature, max tokens, and previous chat count.
AI responses do not rely on external data sources—they work based on the model’s training data and the provided prompt.
Example Use Case:
A AI responding to customer queries dynamically using AI-generated text or creating a structured JSON outputs.
How to Configure Text AI Response Settings in Studio?
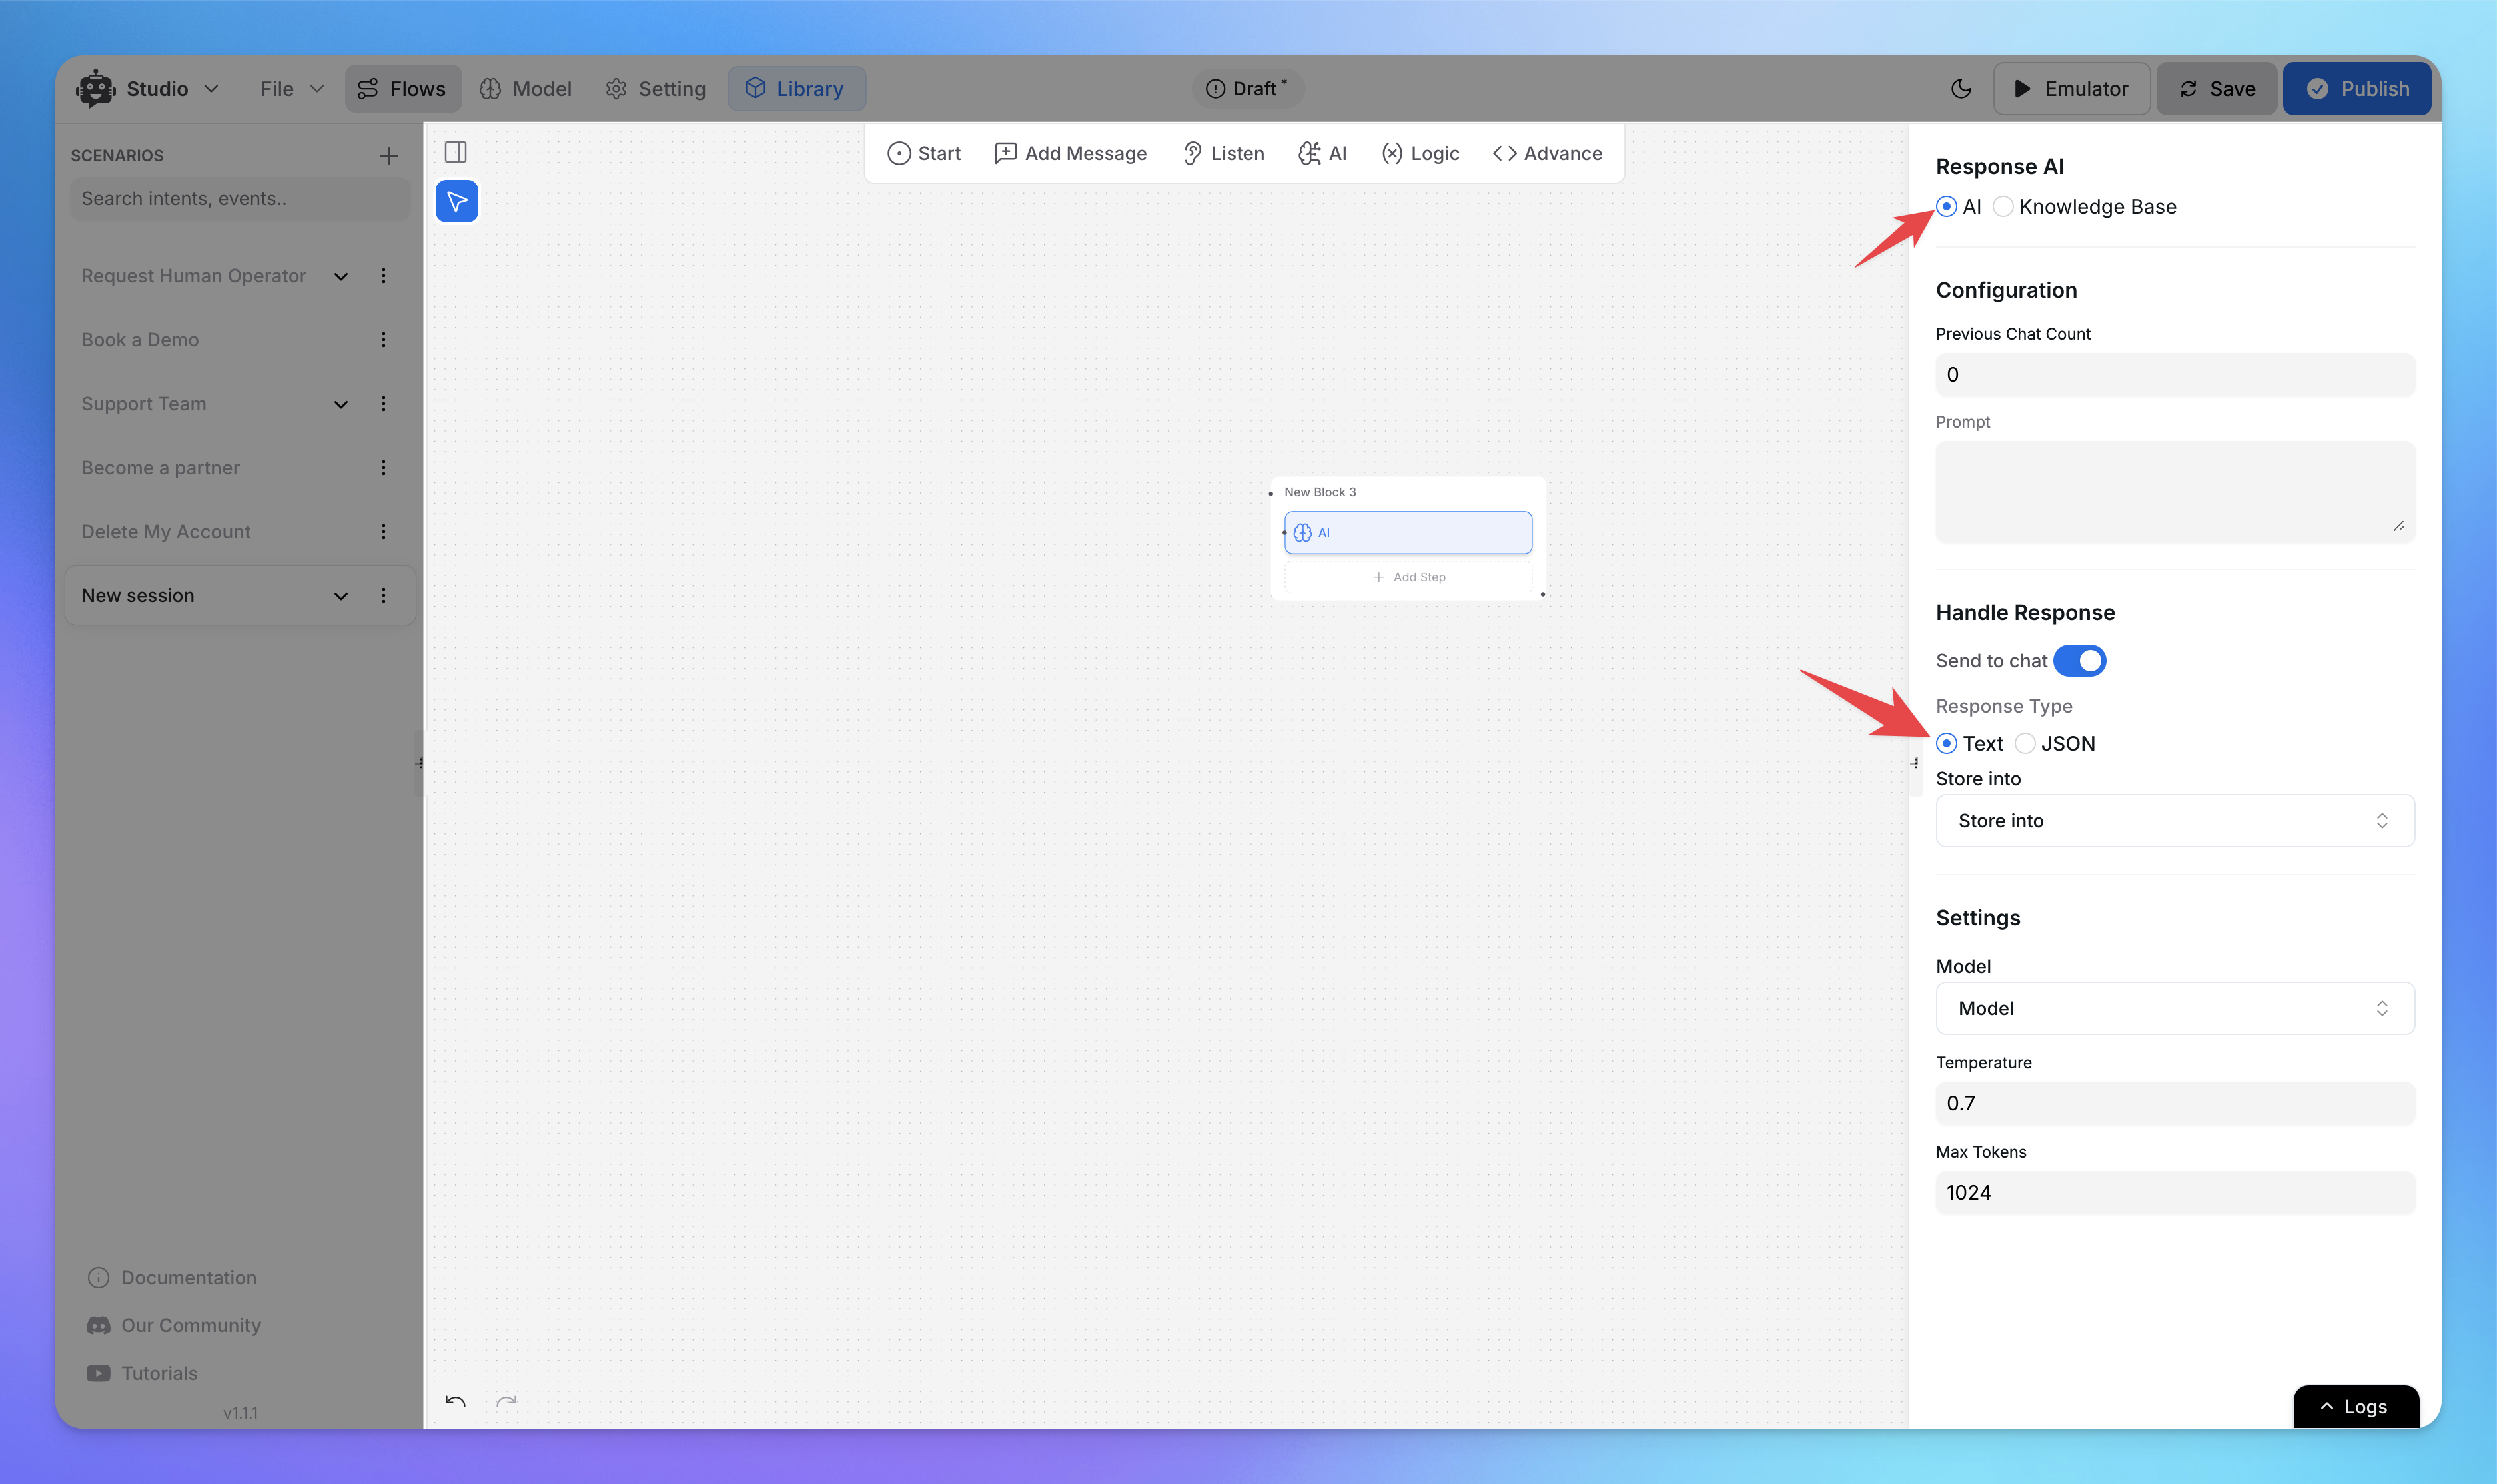
First, let’s set up the Text AI in the right panel. This AI uses the knowledge from the model and the context you provide in the prompt, along with any of the previous chat count provided.
Select AI (not Knowledge Base) in the Response AI section.
If you want the AI to consider previous messages, add the Previous Chat Count.
Provide a Prompt to guide the AI on what to do in the conversation.
To make the AI respond based on the user's last query, use 'Previous Chat Count' or
{{FLOW.last_utterance}}to include the context.
Enable Send to Chat to directly send response to the chat, depending on your needs.
Keep Text as the Response Type.
You can also store the response into variable using store into.
Choose the appropriate AI Model based on your requirements.
Set the Temperature to adjust the creativity level (adjust as needed).
Adjust the Max Tokens (default is 1024).
Once these steps are done, you’re all set!
Learn more about Temperature, Tokens, and Previous Chat in our helpdesk guide: What are Tokens, Max Tokens, Context Limits, Knowledge Nodes, and Temperature in AI?
How to Define Your JSON Schema in AI Response Studio?

First, let’s set up the JSON AI response in the right panel. This AI uses the knowledge from the model and the context you provide in the prompt, along with the if any previous chat count provided.
Select AI (not Knowledge Base) in the Response AI section.
If you want the AI to consider previous messages, add the Previous Chat Count.
Provide a Prompt to guide the AI on what to do in the conversation.
Enable Send to Chat to directly send response to the chat, depending on your needs.
Select JSON as the Response Type.
Click Edit JSON Schema to define the response structure.
Specify the expected fields, data types, and format required in the JSON output.
Store the response into a variable using Store Into.
Choose the appropriate AI Model based on your requirements.
Set the Temperature to adjust the creativity level (adjust as needed).
Adjust the Max Tokens (default is 1024).
Once these steps are done, you’re all set!
What is a Knowledge Base Response?
A Knowledge Base Response pulls information from a custom database of uploaded content rather than relying on AI’s general training data. It ensures responses are fact-based and derived from pre-defined sources.
Knowledge Base Response in Studio:
Uses your own knowledge sources (documents, FAQs, or articles).
Ensures consistent and accurate replies based on stored data.
Allows restricted queries by setting rules to control what the AI can access.
Responses can be stored in variables and adjusted using temperature and token limits.
Example Use Case:
A customer support AI agent retrieving answers from an FAQ document rather than generating responses freely. It first retrieves the nodes based on the user query and then generates a response.
How to Configure Knowledge Base AI Response Settings in Studio?
Learn how to set up Knowledge Base responses for your AI conversations
Setting Up Knowledge Base Response
The Knowledge Base response in Studio lets you create AI responses based on your custom knowledge sources. Here's how to configure it:
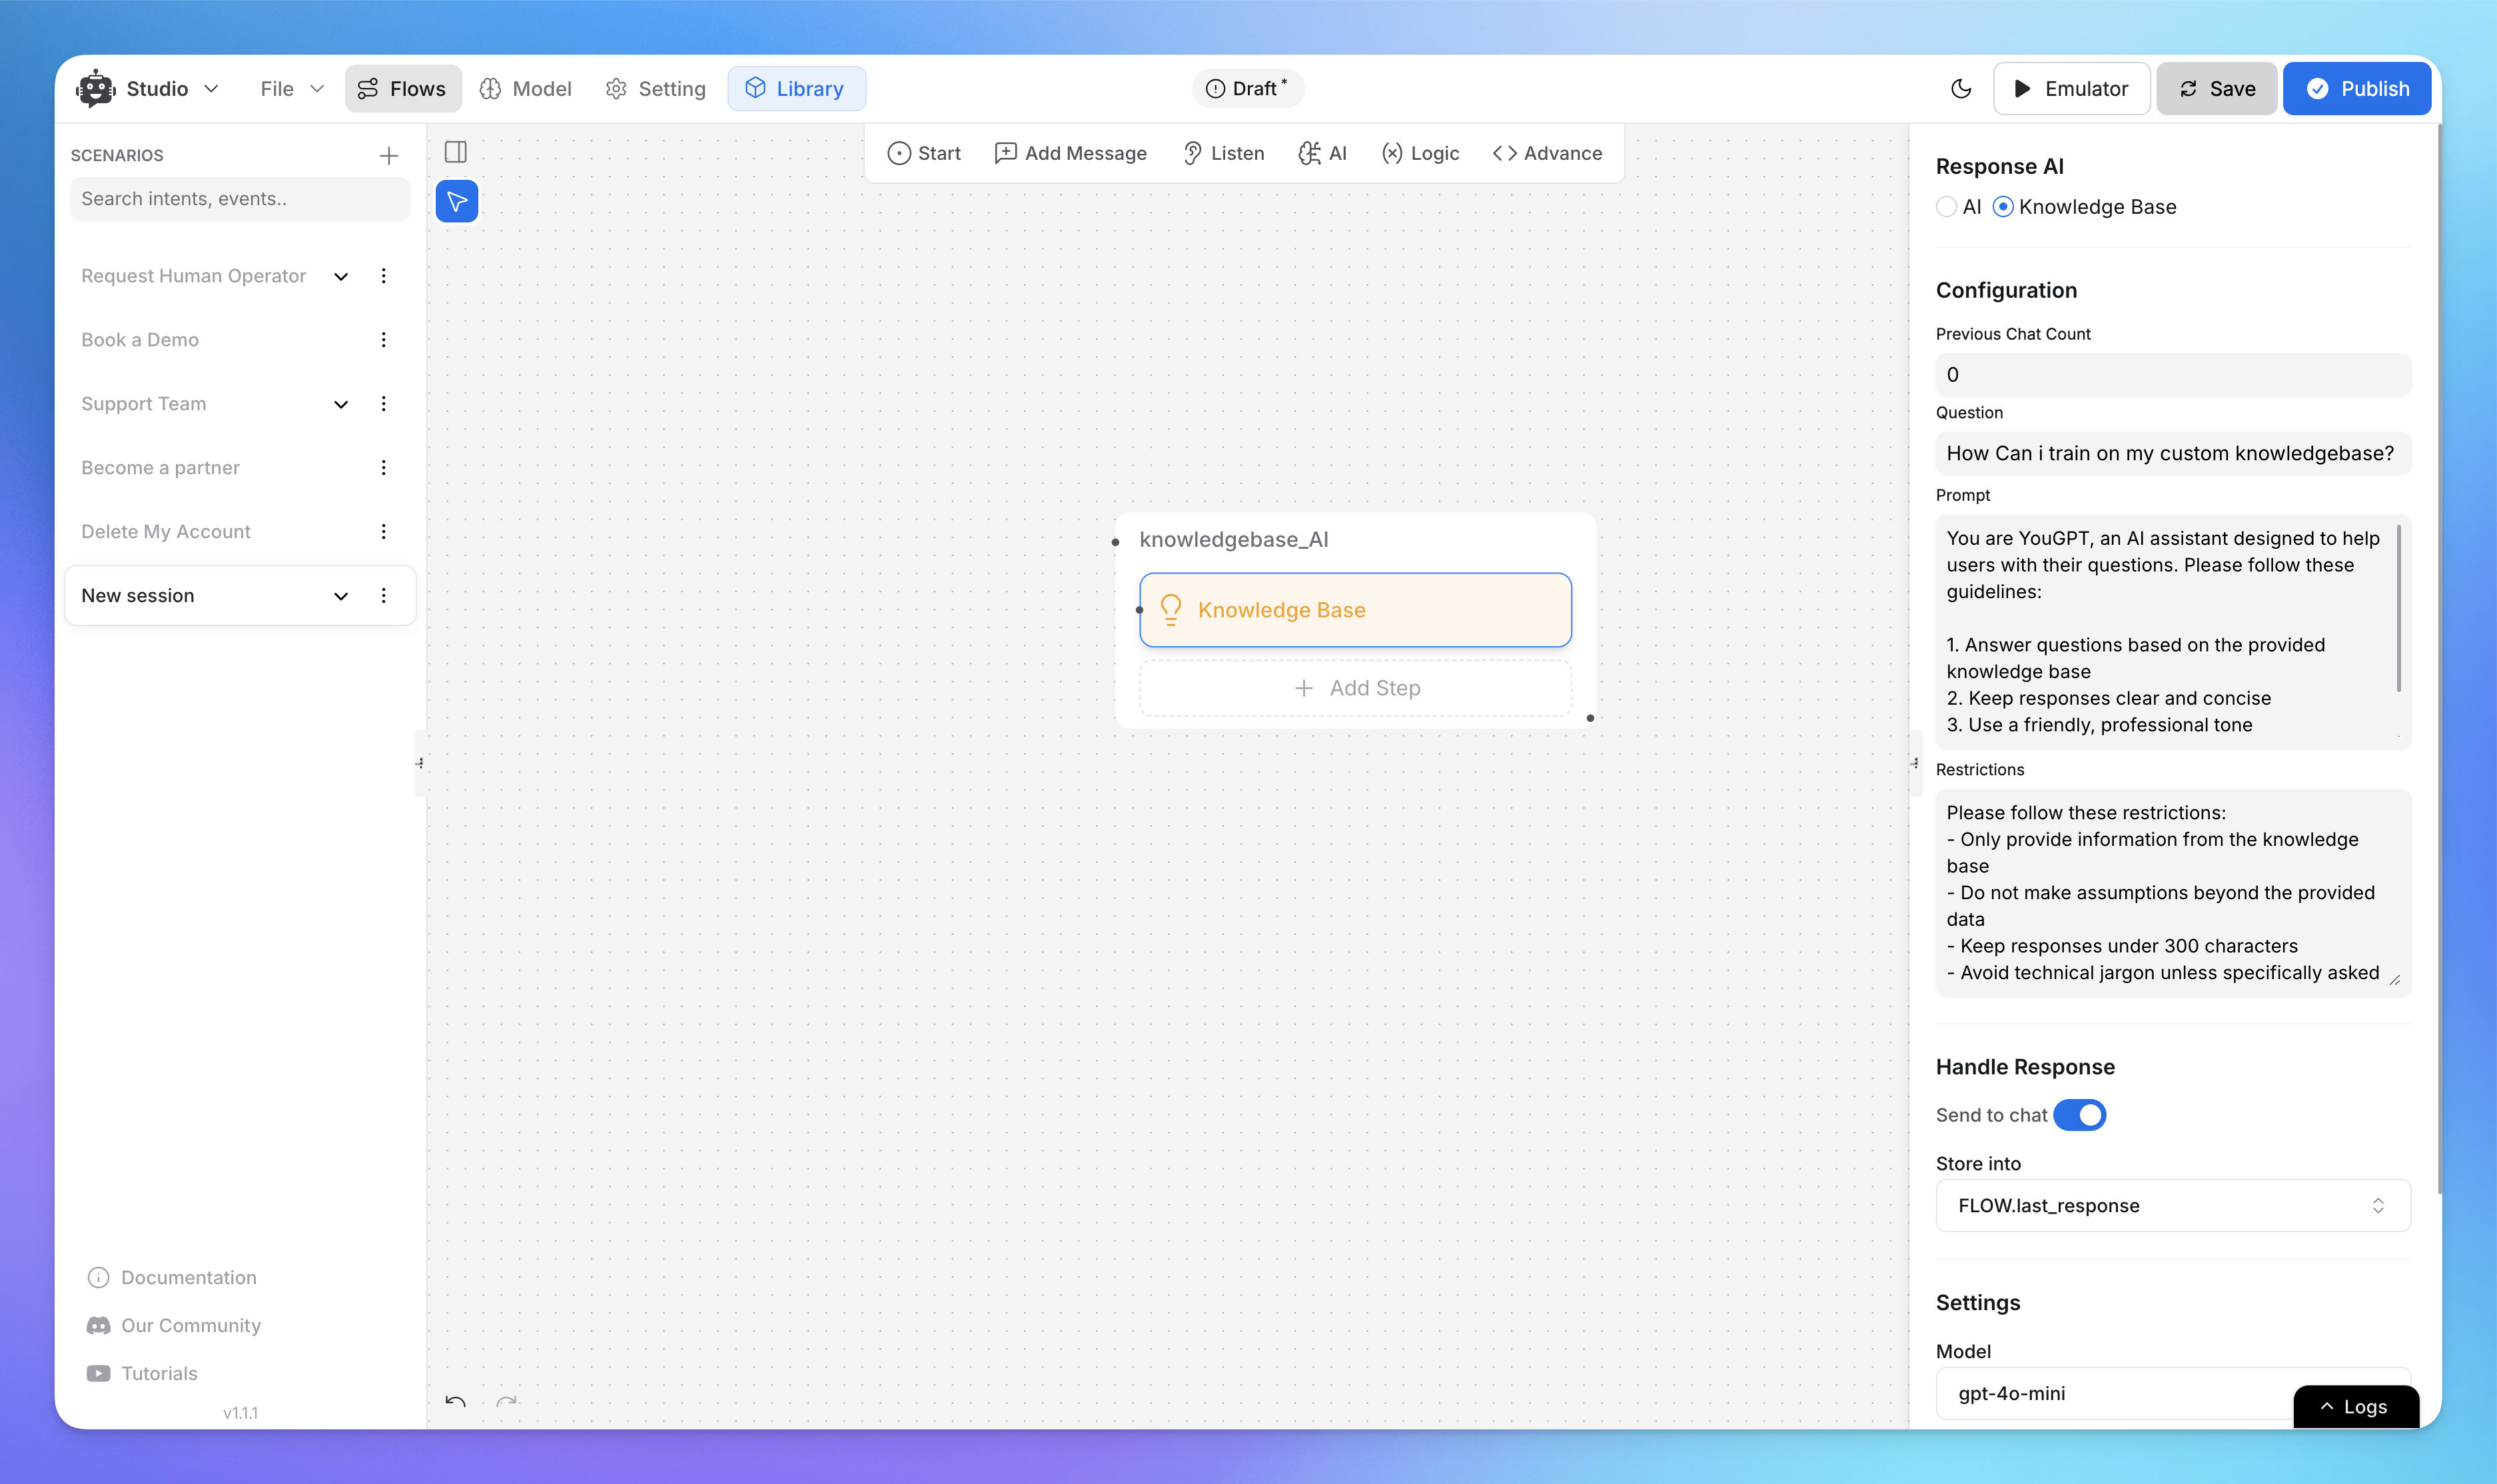
First, let's set up the Knowledge Base in the right panel:
Select Knowledge Base in the Response AI section
Enter your Question in the provided field
If need Set Previous Chat Count (0 is default)
Add any specific Prompt to guide the response
Include Restrictions if needed to limit the scope
Enable Send to Chat if you want responses in the chat
Use Store into to save responses to variables
Choose your preferred Model from the dropdown
Adjust Temperature (0.7 is default)
Set Max Tokens (1024 is default)
Remember: Knowledge Base responses are based on your uploaded knowledge sources, unlike regular AI responses which use the model's general knowledge.
Related Articles
How to use Intents in Chatbot Studio?
This guide walks you through creating and using Intents to enhance your chatbot’s capabilities.
Flow : Scenarios, Blocks, Steps & Connections
This article fully details how steps/nodes and blocks work, how to configure them, create paths and connections.
How to capture and store a user’s response?
This article provides a complete guide on capturing user responses, such as name, email, and more, and shows how to store and utilize them in your chatbot to create personalized and engaging experiences.
How to Add & Configure Text, Image, and File Messages in Studio
Learn how to send text, images, and files with your ai agent using studio.
How to Debug Flows and View Execution Logs in Chatbot Studio?
Learn how to debug your flows, check flow execution logs, and view logs within the Chatbot Studio
How to Set Up Conditions in AI Studio
Set Conditions to Understand What Information Users Are Looking For
How to create and use forms in AI Studio?
This guide will walk you through the process of creating and using forms to improve the user experience with your AI agent