
How to use Actions in AI Studio?
Actions are built-in tools that allow your ai agent to perform specific tasks quickly—without writing code. Whether it’s routing a chat to a human agent or updating customer data, actions help automate repetitive steps inside your conversation flow.
What Are Actions?
Actions are nodes that trigger a defined behaviour. You can place them anywhere in your flow based on the logic of the conversation.
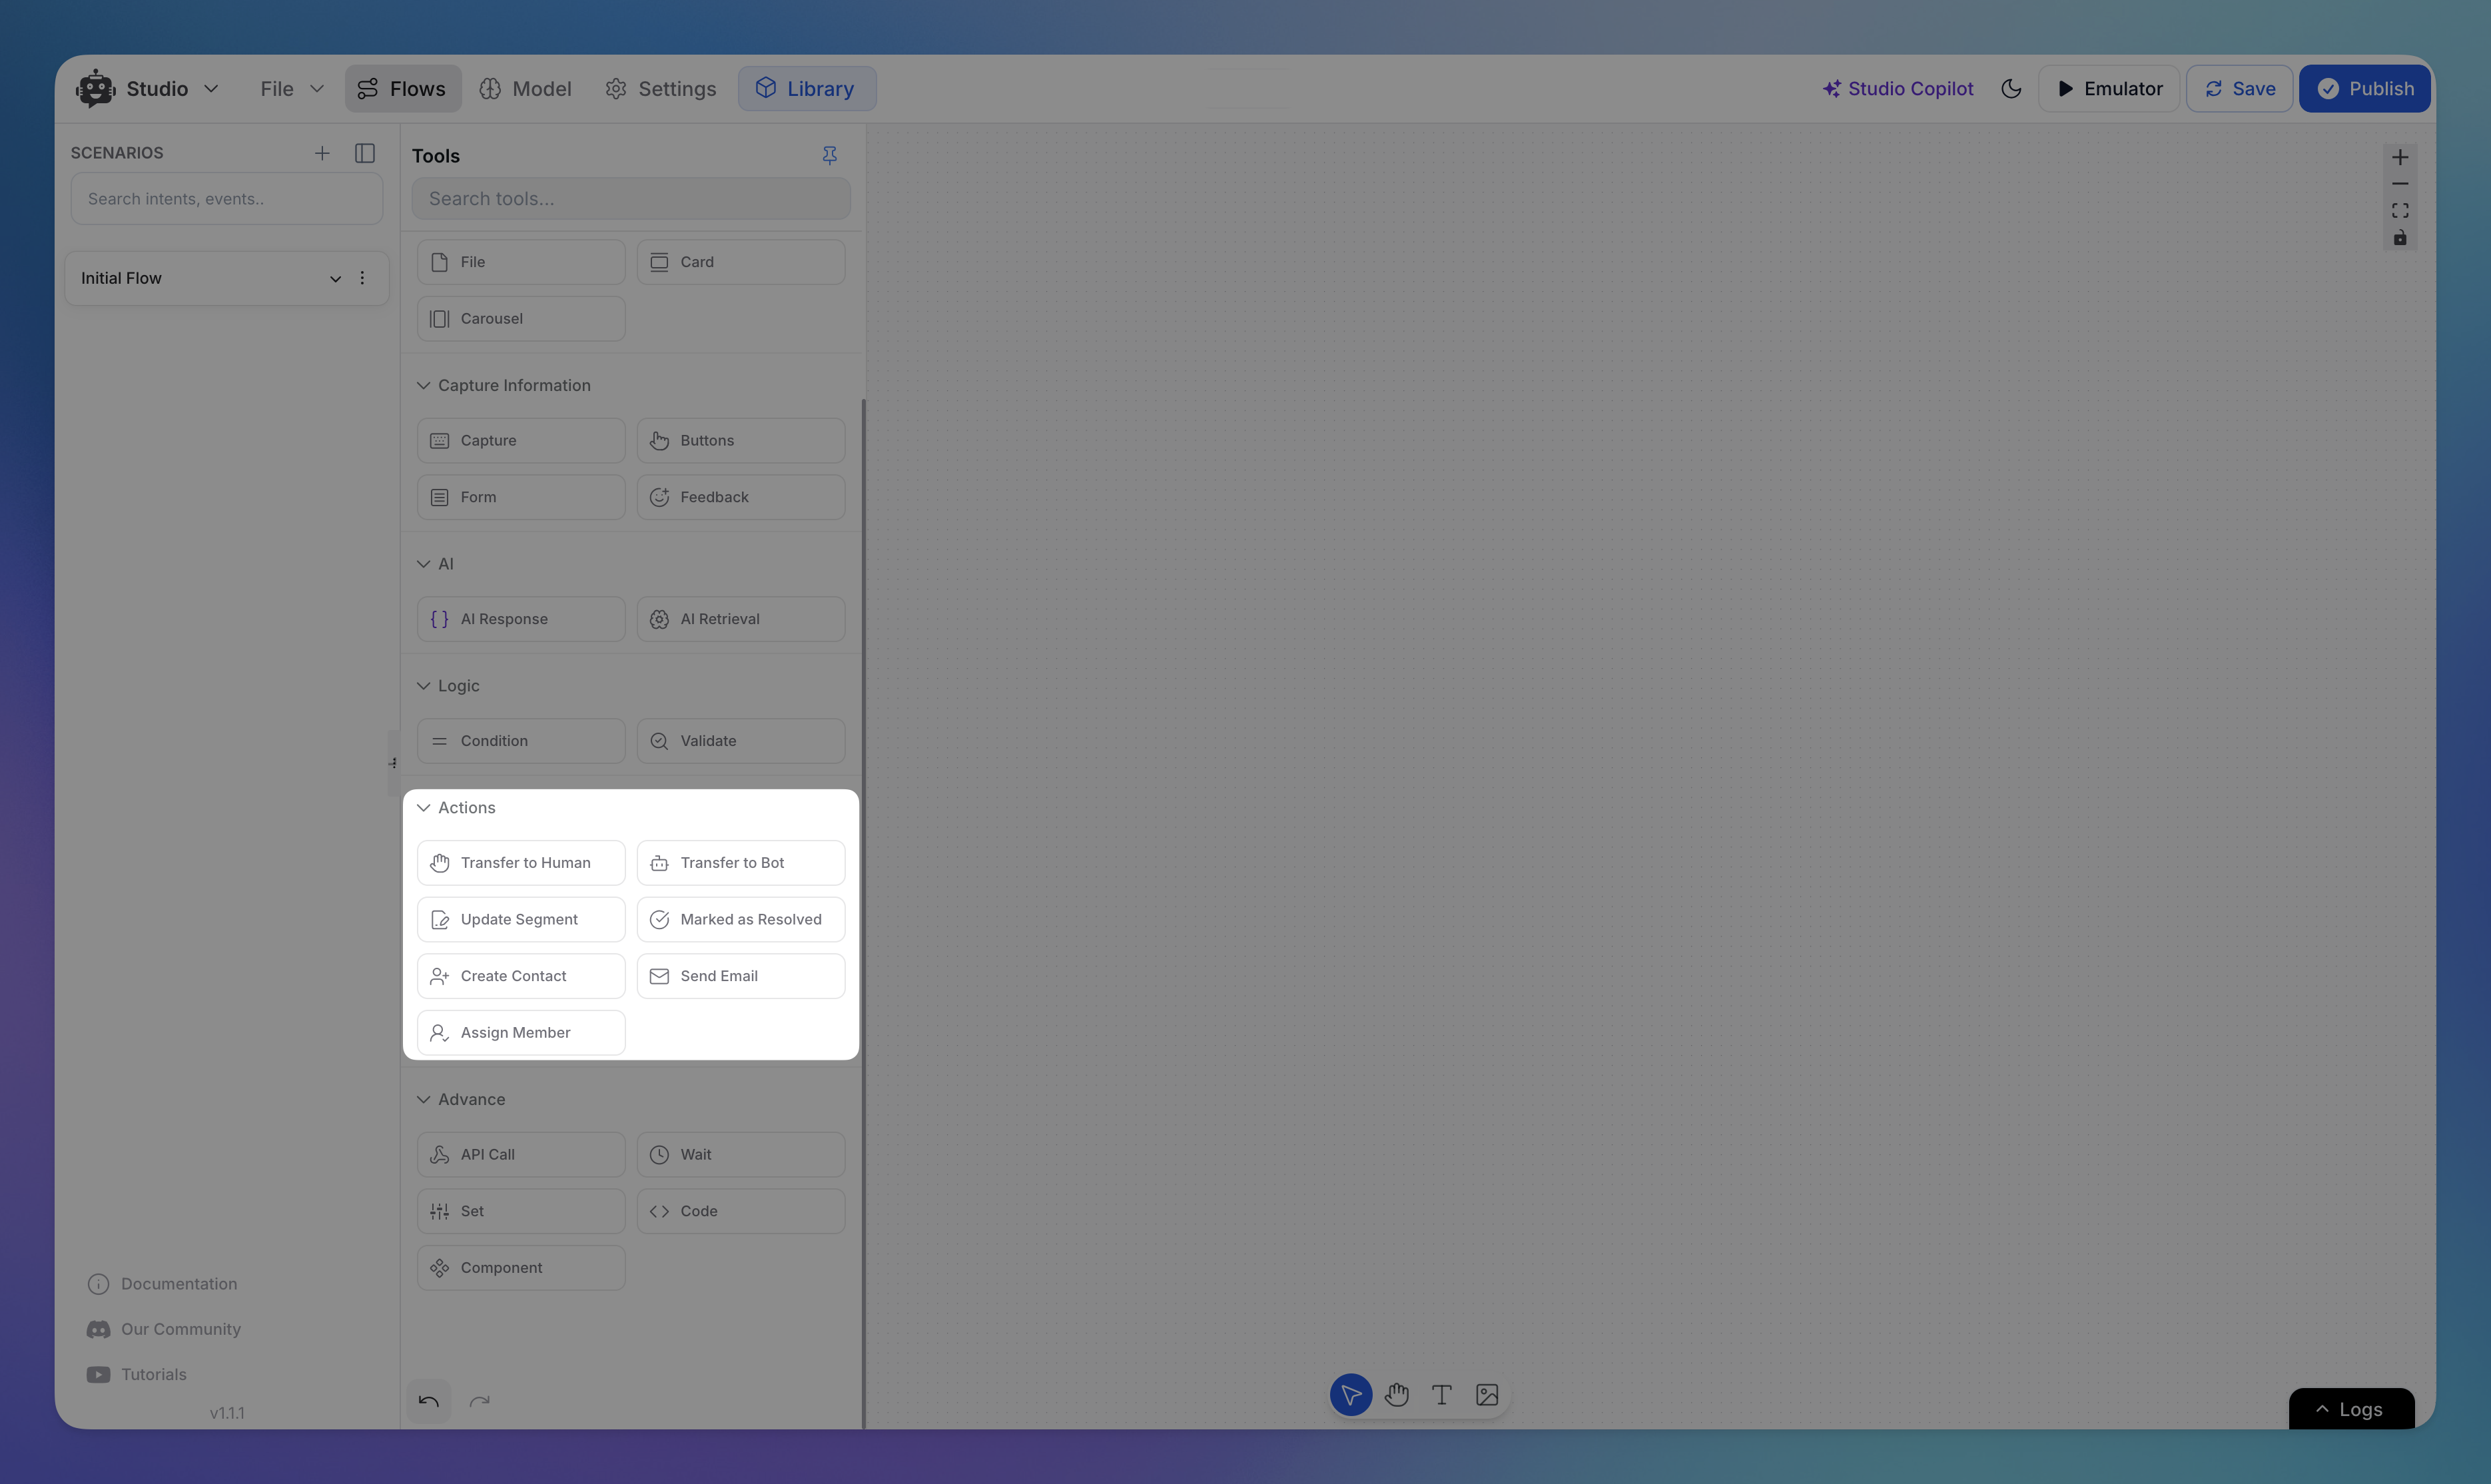
Common action types include:
Escalate to Human – Transfer the chat to a human agent.
Transfer to Bot - Will transfer the Chat back to AI.
Create Contact – Save a new contact with relevant user info.
Update Segment – Tag or route the user into a specific group.
Mark as Resolved – Close the conversation formally.
Send Email – Trigger an automated email from the bot.
Assign Member - This allows to assign the chat to specific team member
How To Use Esclate Human Action?
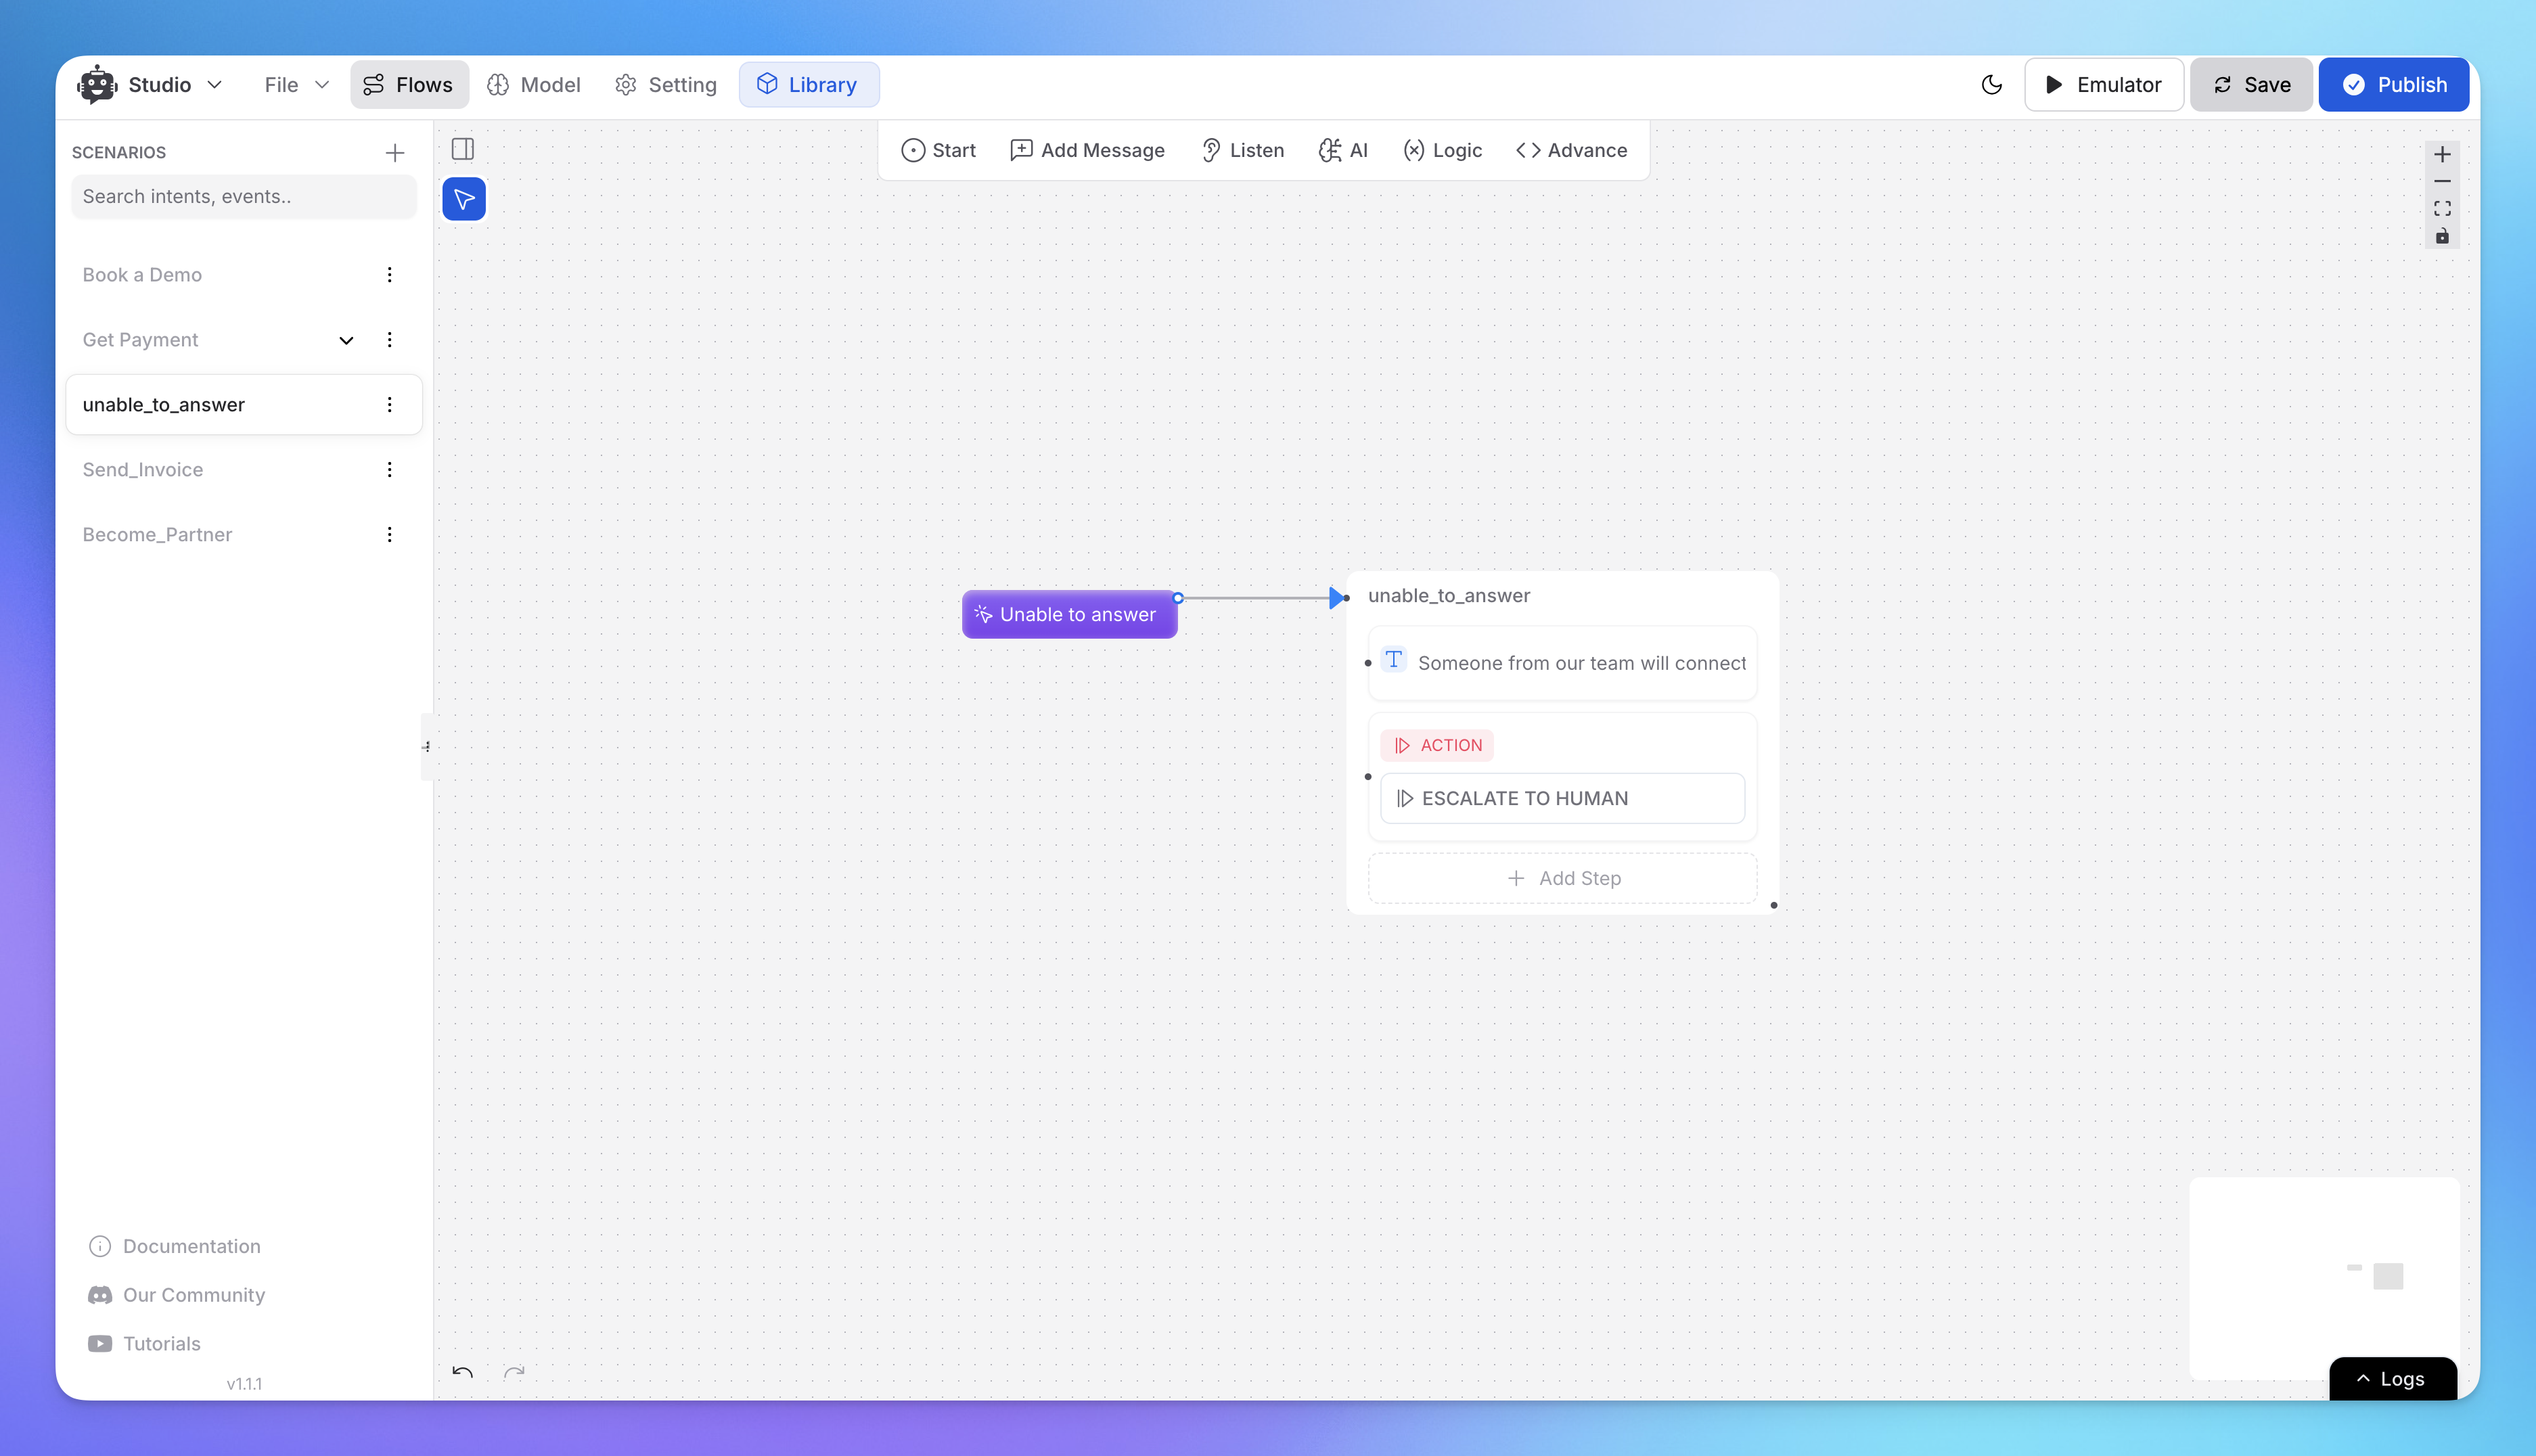
Use Case: AI agent not able to answer a user's query then Escalate the chat back to Human Agent.
How to Setup:
Go to Studio
Add the “Unable to Answer” event
Add the Escalate to Human action Node.
The conversation is immediately transferred to a live human agent (or queued if unavailable). This is useful in customer support flows where human intervention is needed for high-priority issues.
How To Use Transfer to Bot?
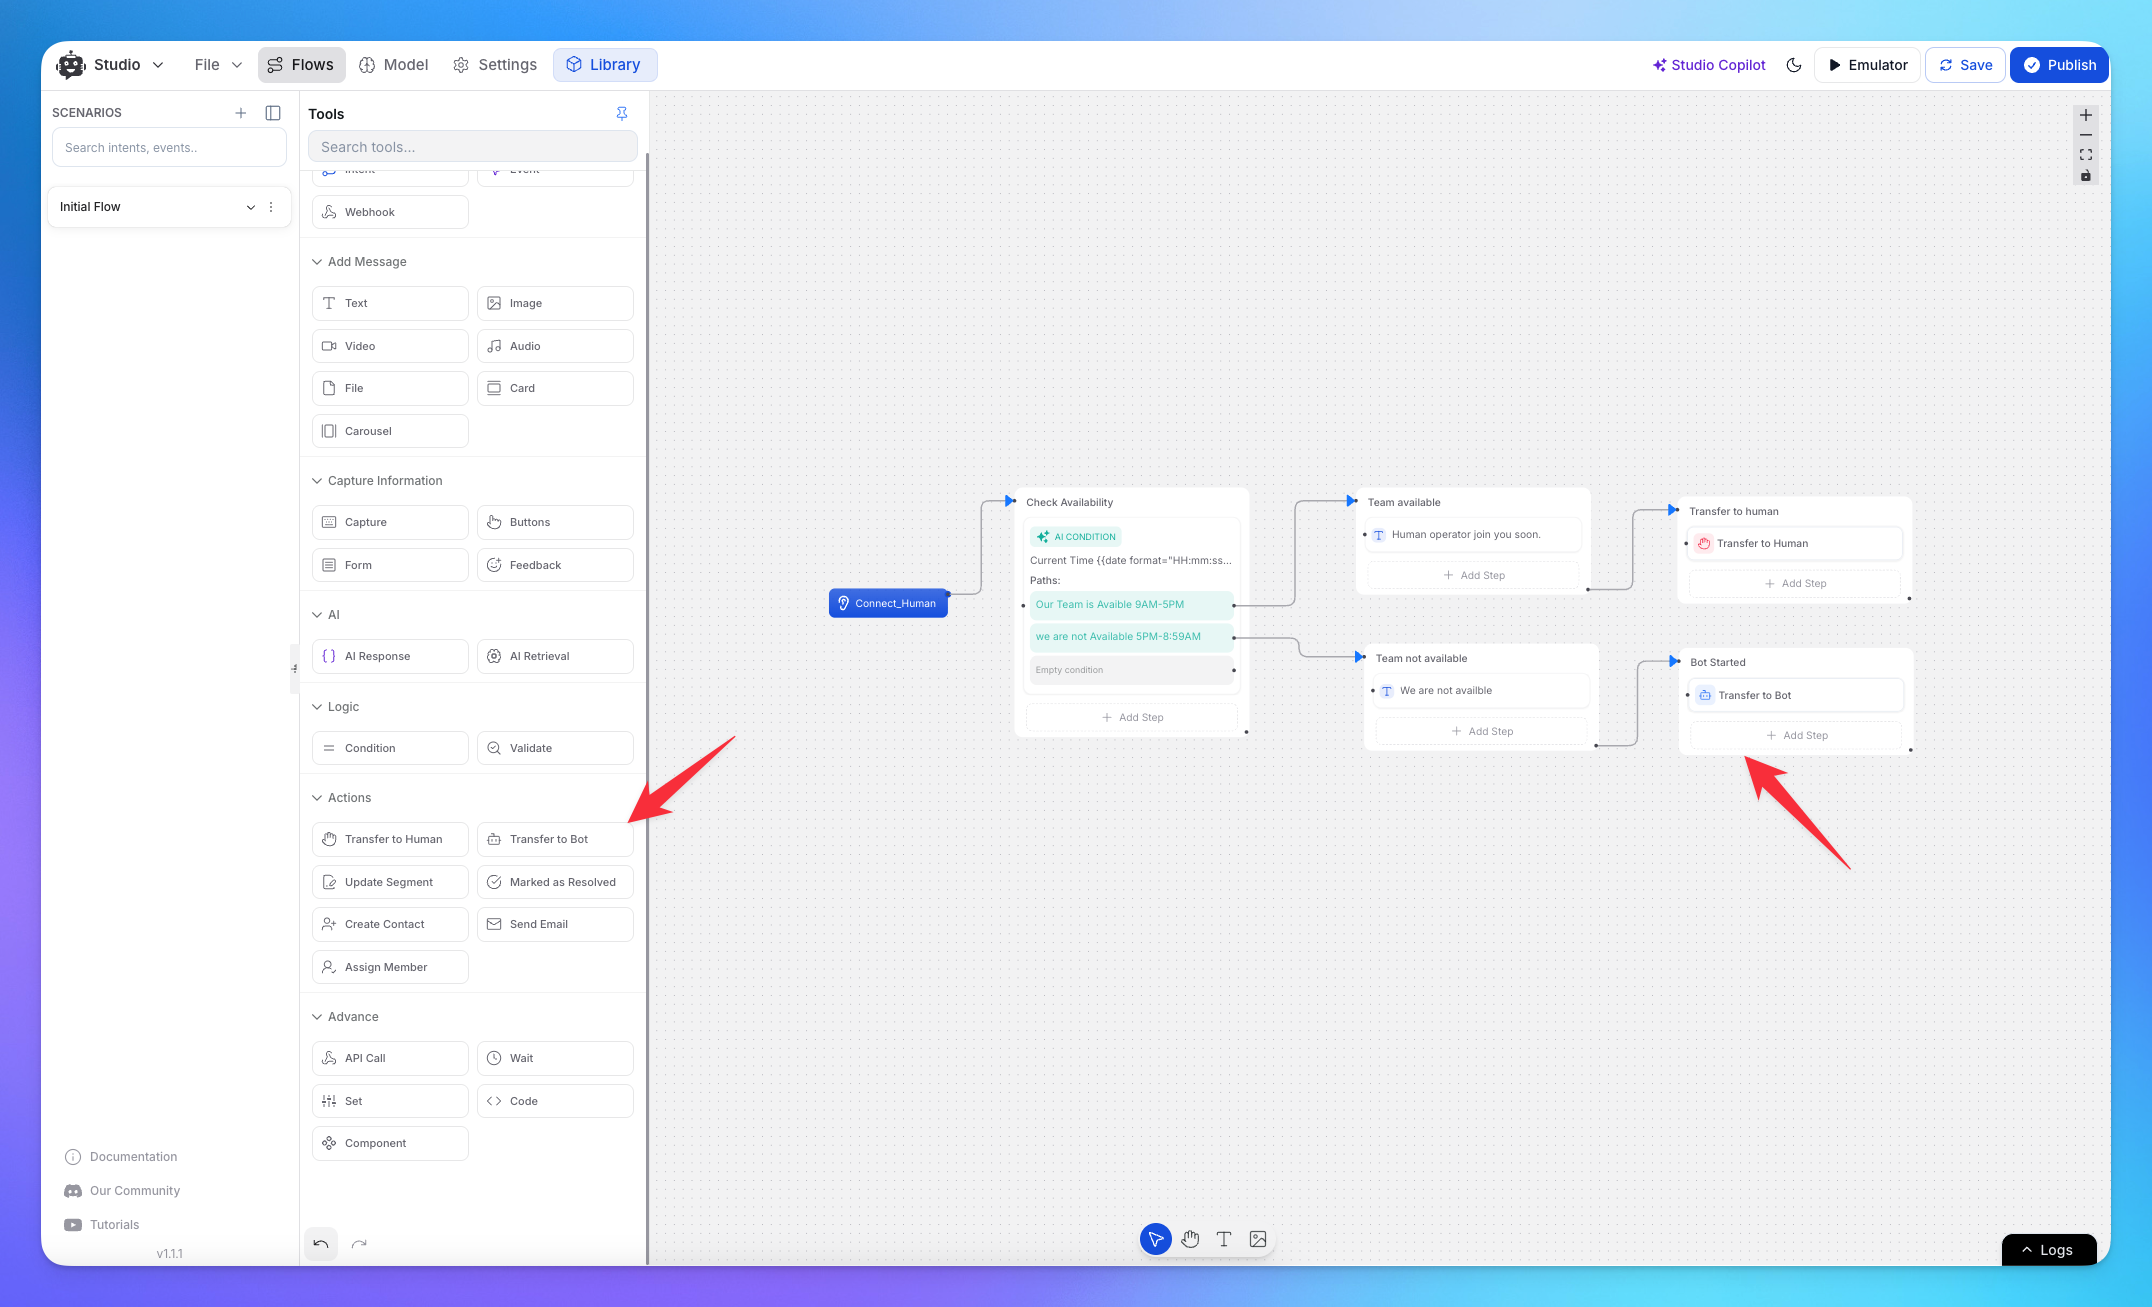
Use Case: When a user asks to speak with a human operator, the system checks if the team is available:
If the team is available: A human operator will join the conversation soon.
If the team is not available: The chat is transferred back to the bot, allowing the AI to continue assisting the user.
This flow helps make sure users get human help when it's possible, but are quickly routed back to the bot for support if agents aren’t online.
How to Setup:
Go to Studio.
Set up a Condition node to check if the team is available. (If available: so the message “A human operator will join you soon. Else Transfer to Bot action.
The bot resumes the conversation and continues to assist the user.
The chat session is smoothly handed over from the Live Agent to the bot. This allows the bot to continue handling the conversation for FAQs, workflows, or any automated flow.
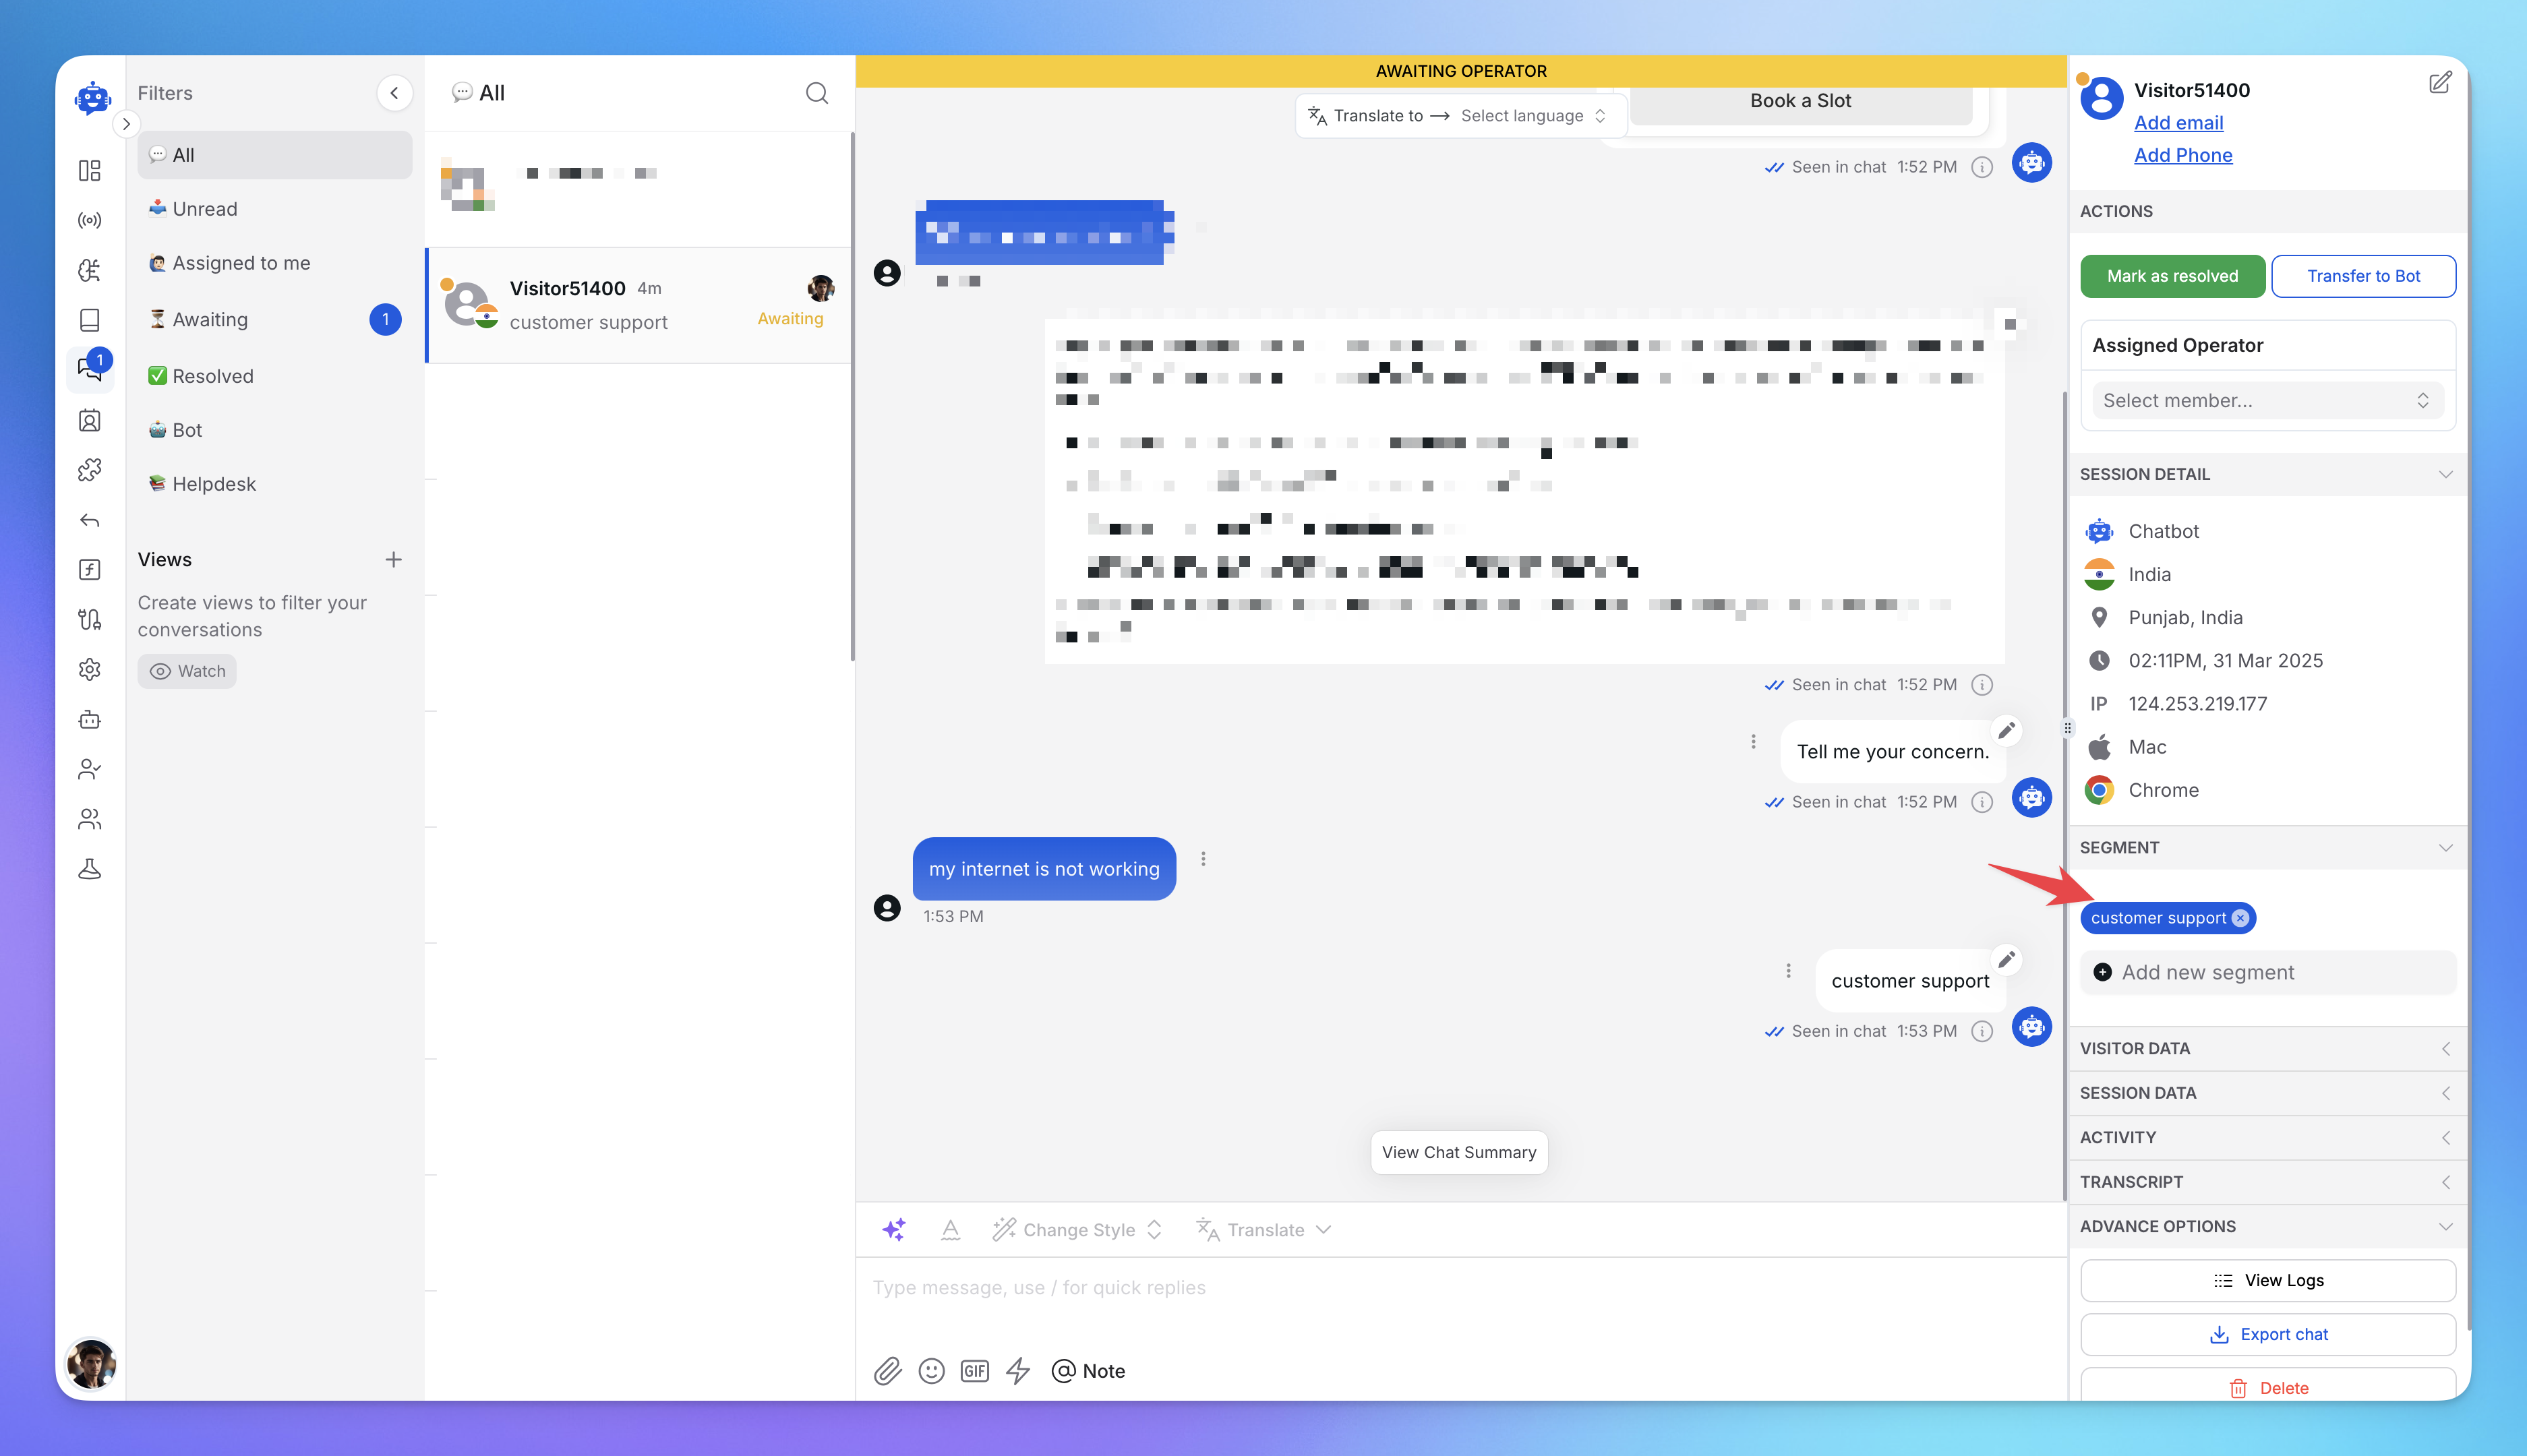
How To Use Update Segment Action?
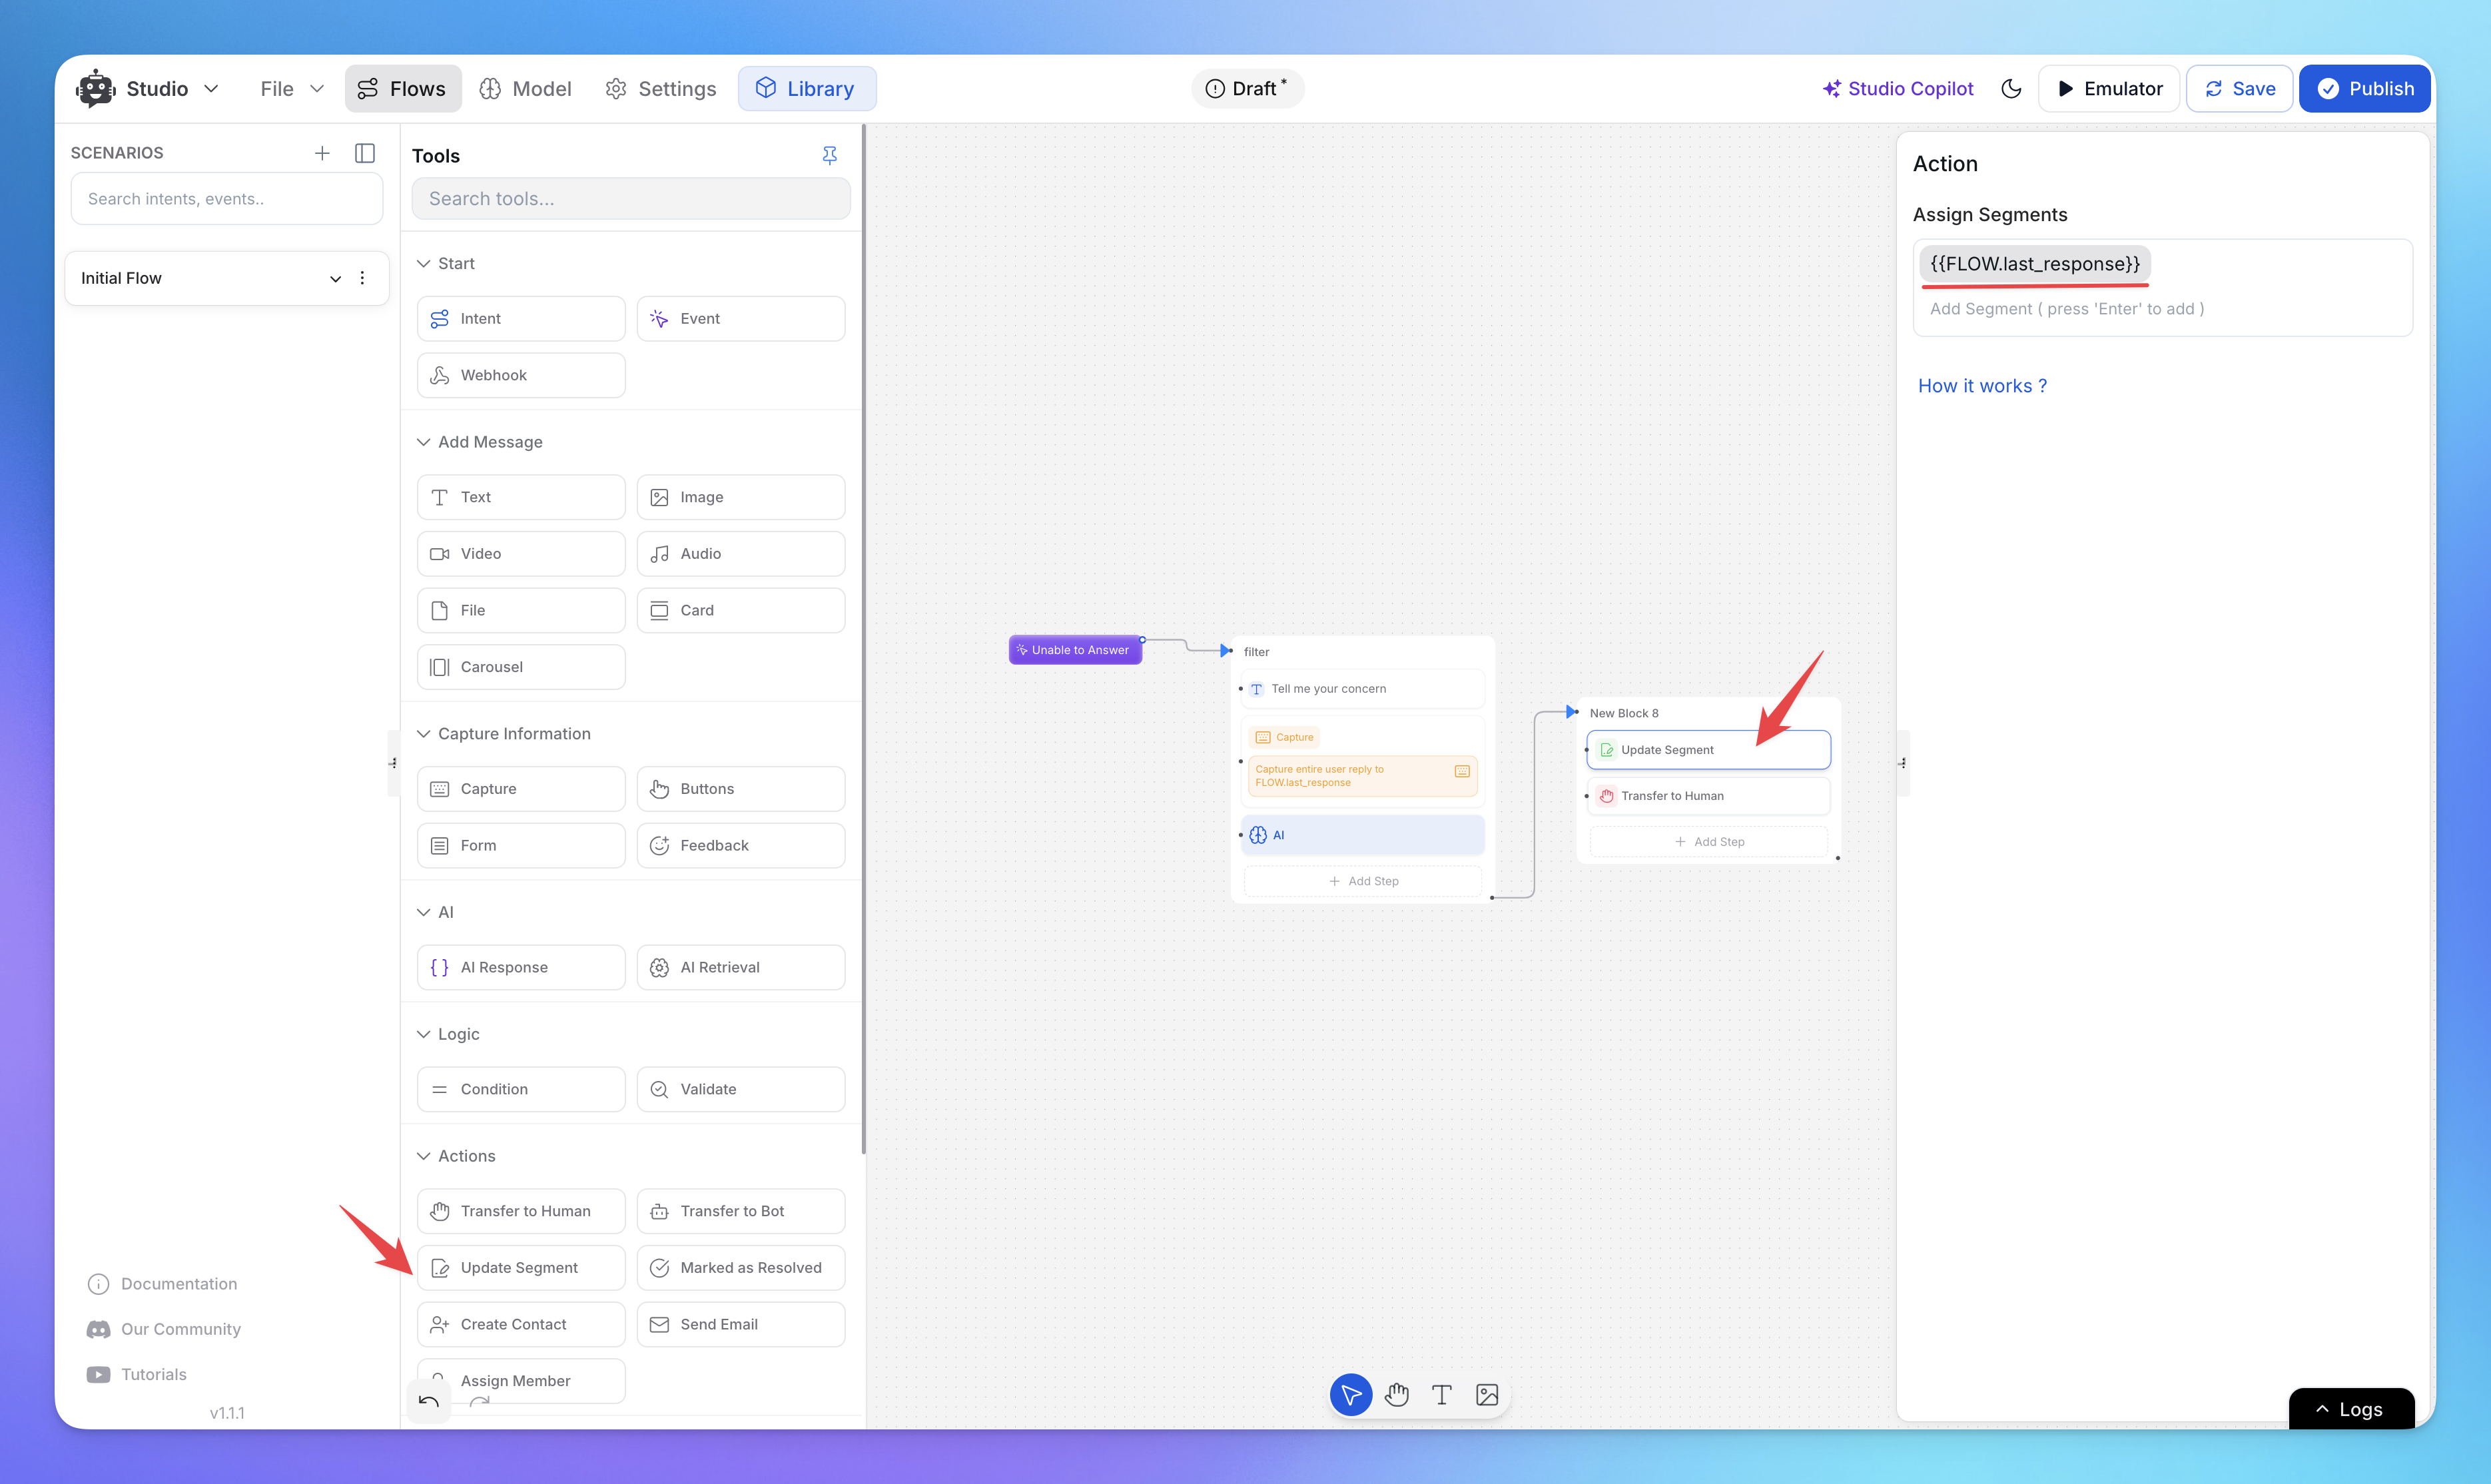
Use Case: User query needs to be routed to a specific department like Billing or Support.
How to Setup:
Go to Studio
Add a AI response node to check the user’s issue (e.g., “billing” keyword)
Add an Update Segment Action Node.
AI will automatically segment queries to the right department. This makes it easier for your team to view and filter chats by department.
How to Use Create Contact Action?
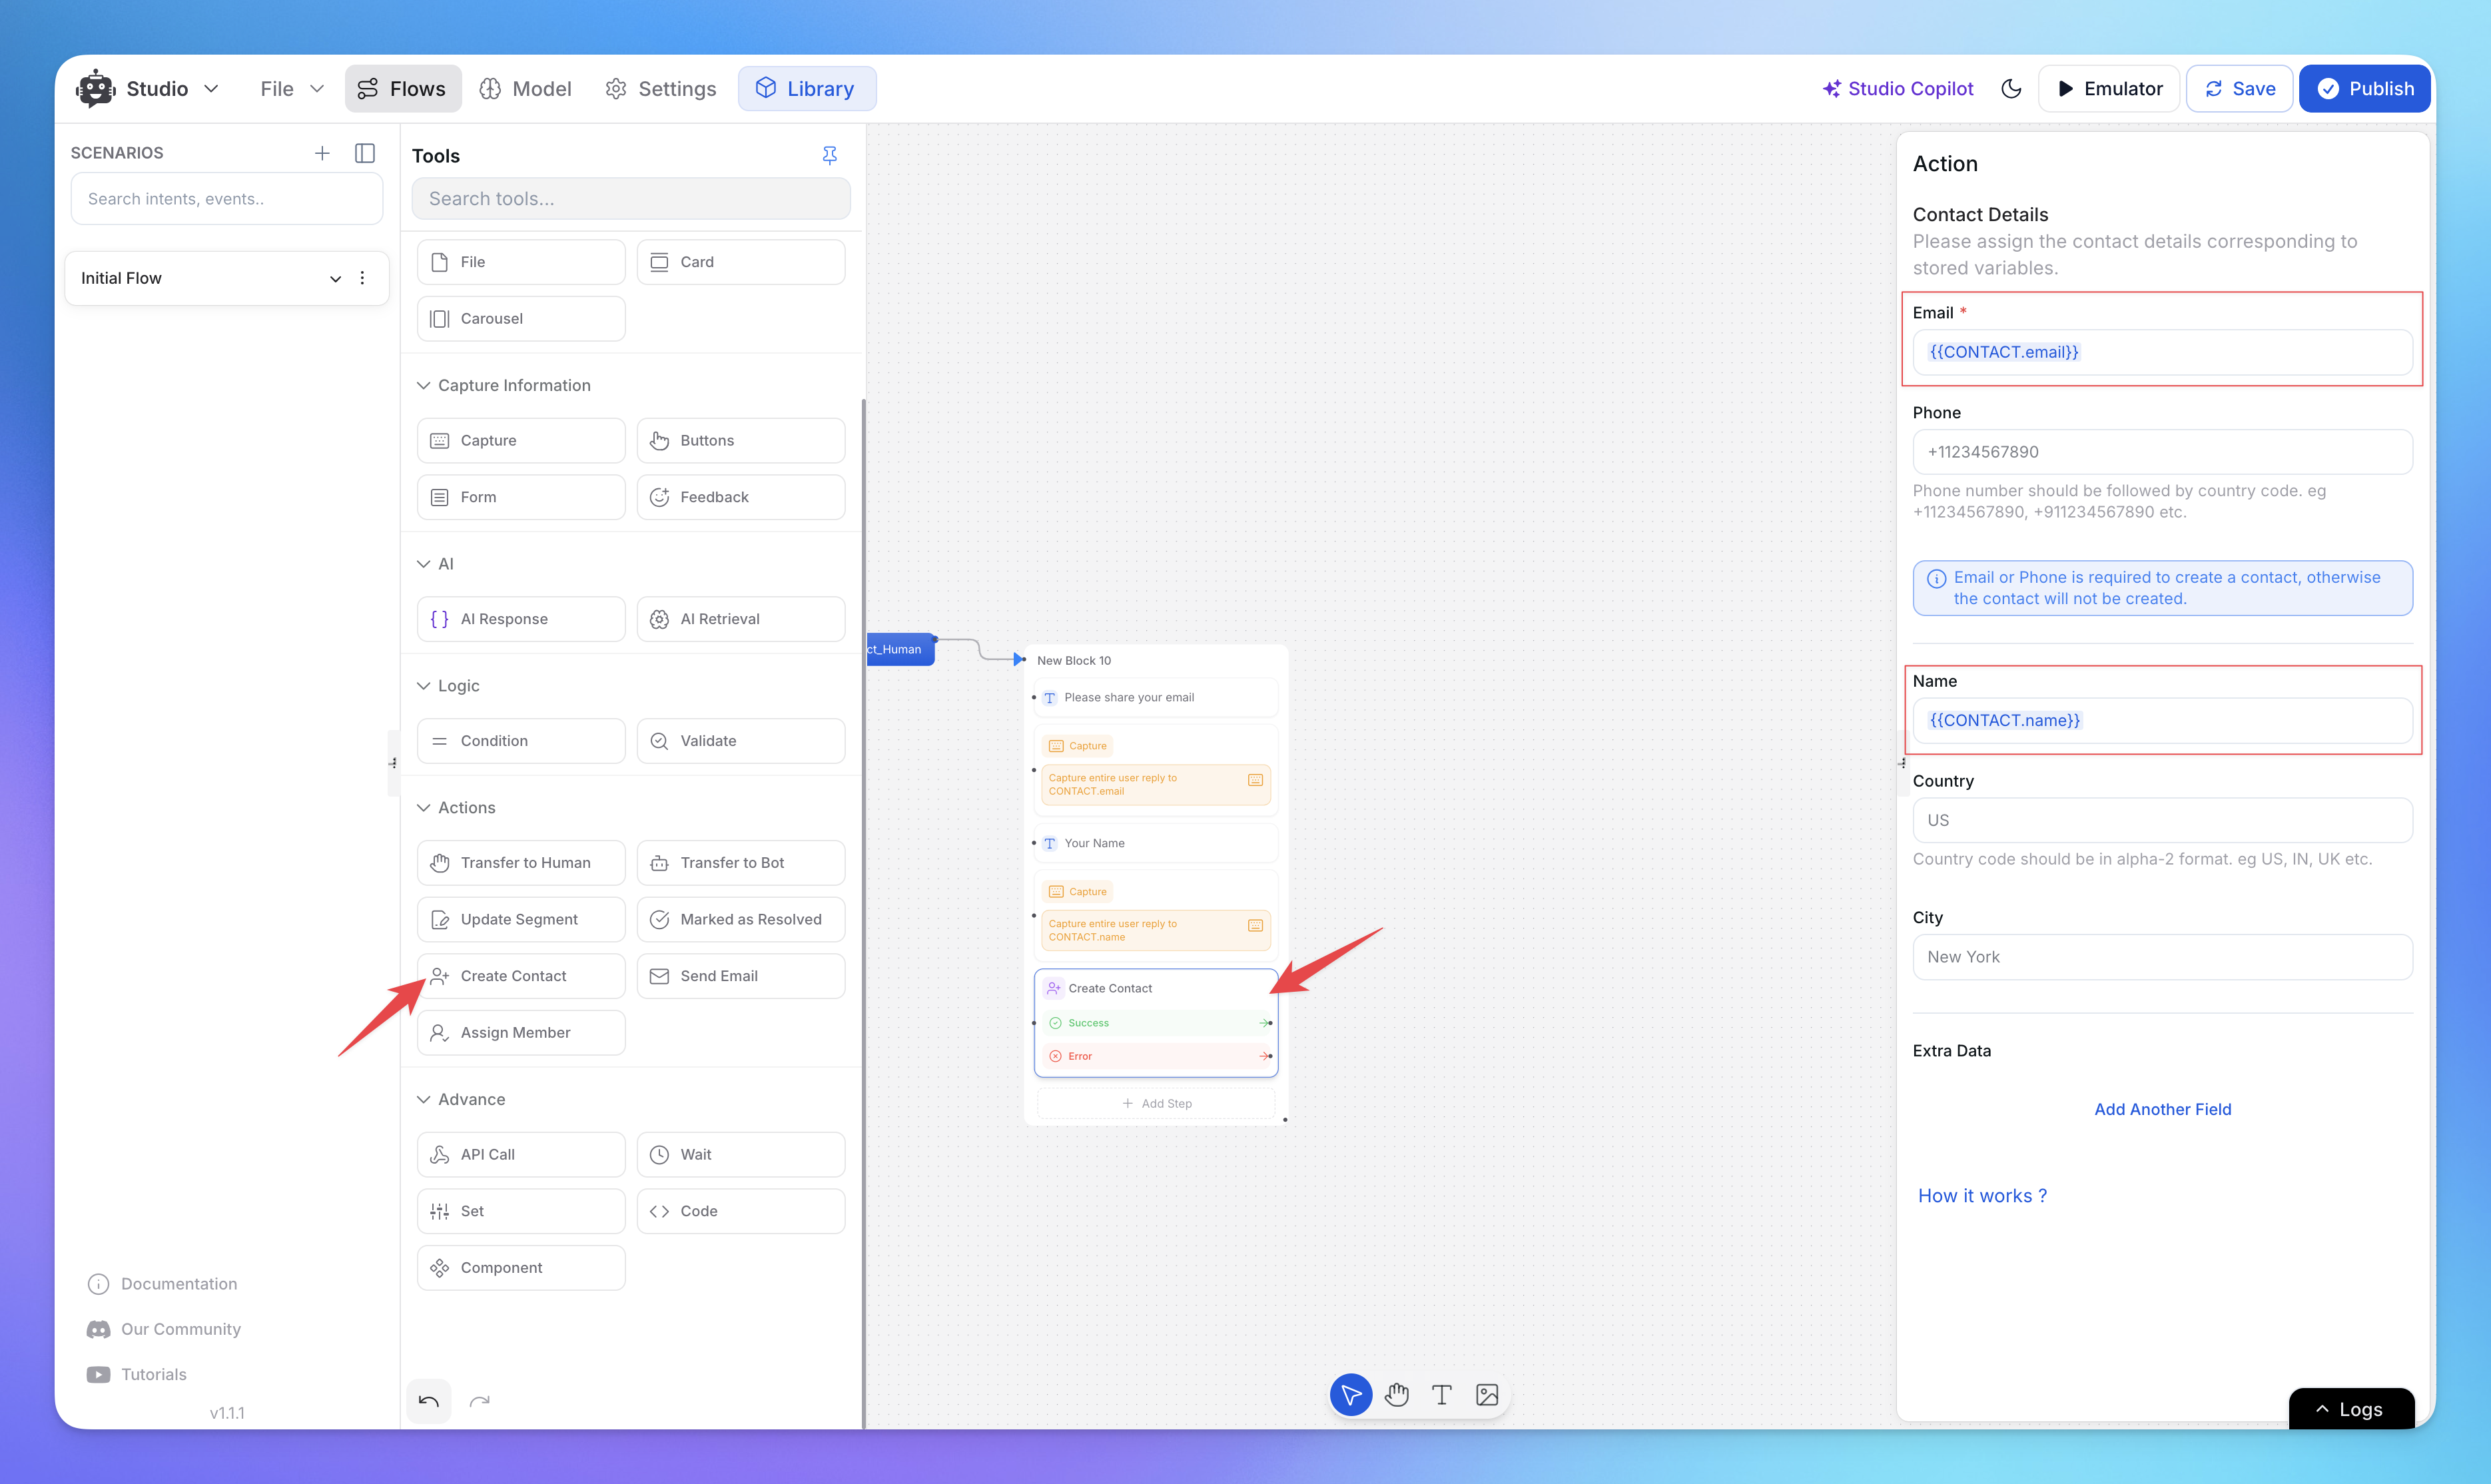
Use Case: User shares their contact details and you want to save them as a new contact in your CRM.
How to Setup:
Go to Studio
Add input blocks to collect name, email, and phone number
Add the Create Contact action node.
Now, using the contact details, make an API call or use a code execution node to sync the data with your CRM
This action stores the user’s info in your database, useful for sales inquiries or support registration.
How to Use Mark as Resolved Action?
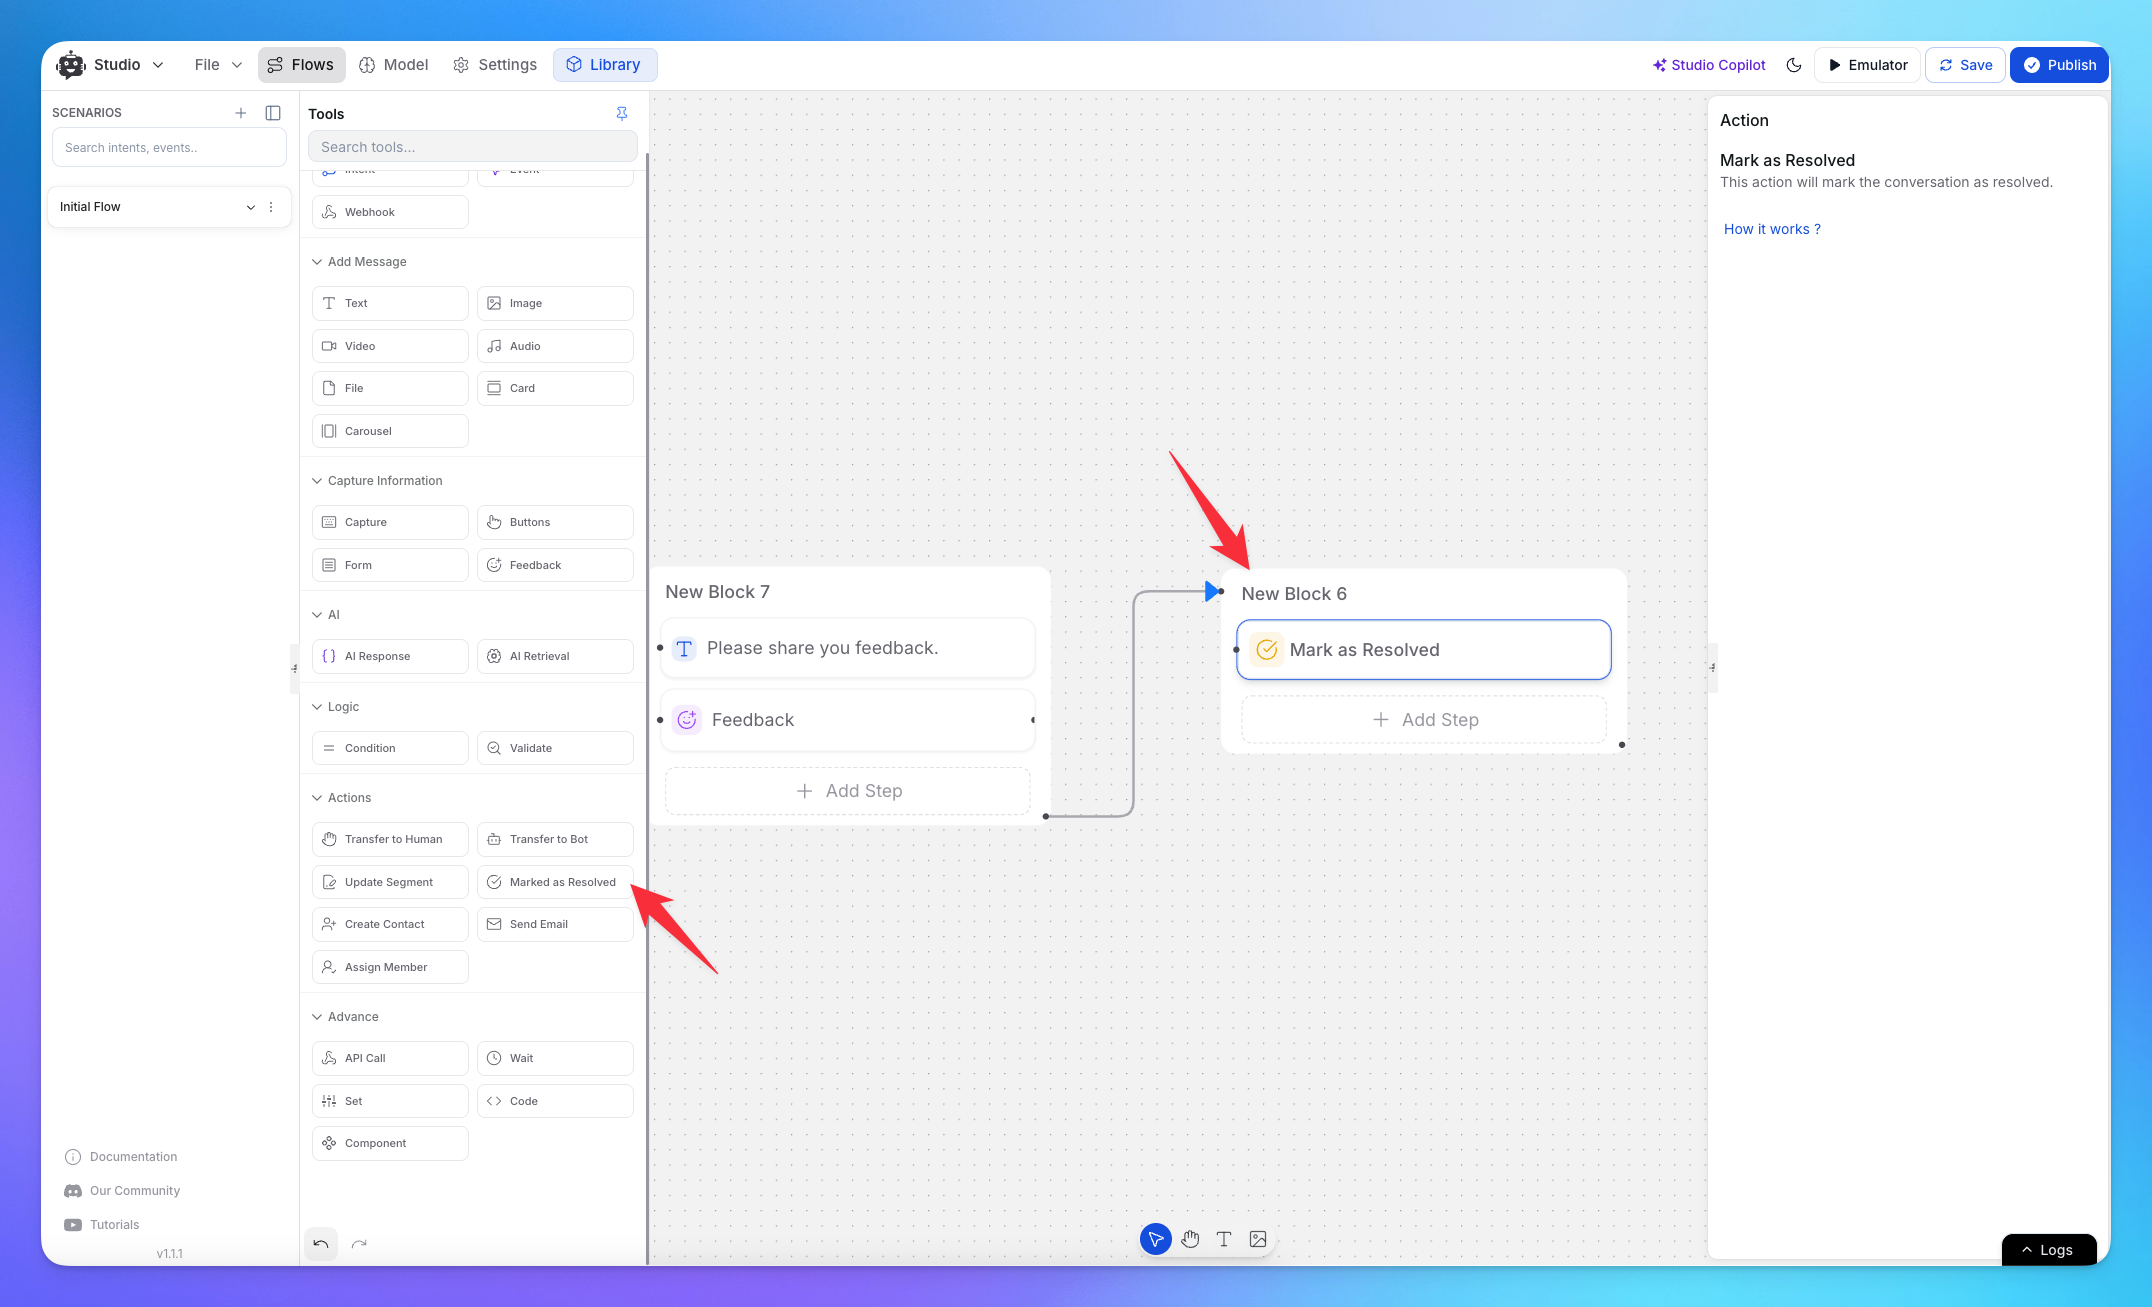
Use Case: Issue is resolved and the chat should be marked as closed.
How to Setup:
Go to Studio
add the Mark as Resolved as an Action Node
You can also use Feedbacks to get user feedback
This updates the chat status so your team knows no further action is needed.
How to Use Send Email Action?
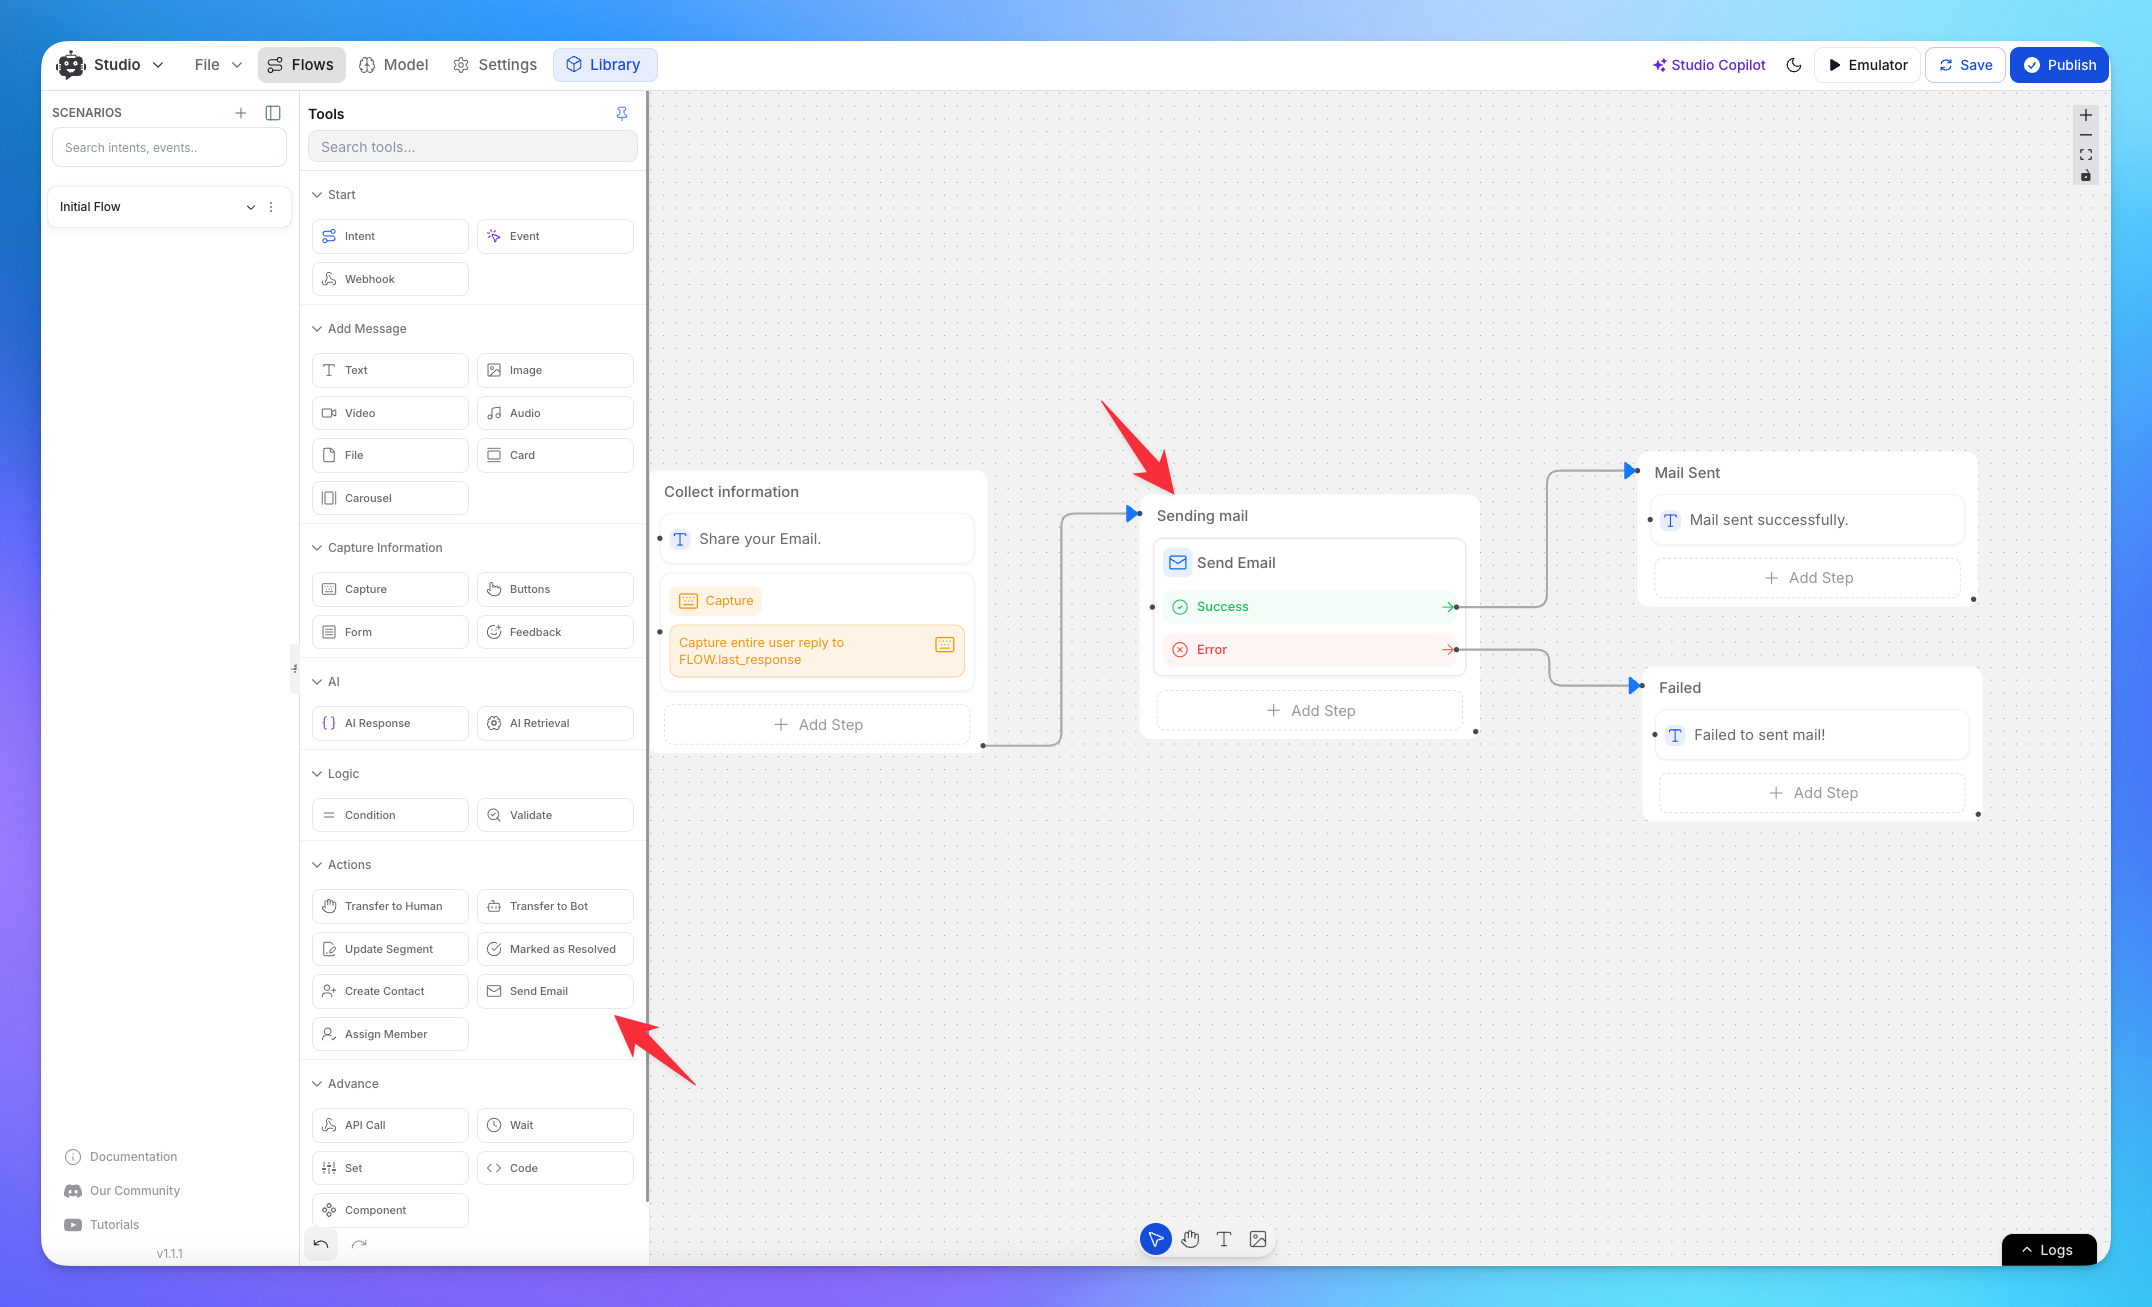
Use Case: After a user books a demo, you send an automatic confirmation email with the date, time, and contact information using this action.
1. Open AI Studio
Go to Studio
Create a new flow or open an existing one
Add Send Email from the action type
2. Choose the Email Method
Under Email Method, select:
✅ Email Integration (recommended): Uses your pre-configured email service
OR
🔧 Email Credentials: Use SMTP details manually
Make sure the status shows "Configured" before proceeding.
3. Fill Out Email Details
Subject: Enter a relevant subject line (e.g. “Your Booking Confirmation”)
From Name: The name that should appear in the user's inbox (e.g. “Support Team”)
From Email: The sender's email address (must be part of the configured integration)
Recipients: Enter the user's email address directly or use a variable (e.g.
{{user_email}})
Optional:
➕ Add CC, BCC, or Reply-To addresses if required
4. Compose the Email Body
Choose Content Type: Plain Text or HTML
Write your message in the Email Body section
Use variables for dynamic content (e.g.
{{user_name}},{{booking_date}})
5. Send Test email
How to Use Assign Member?
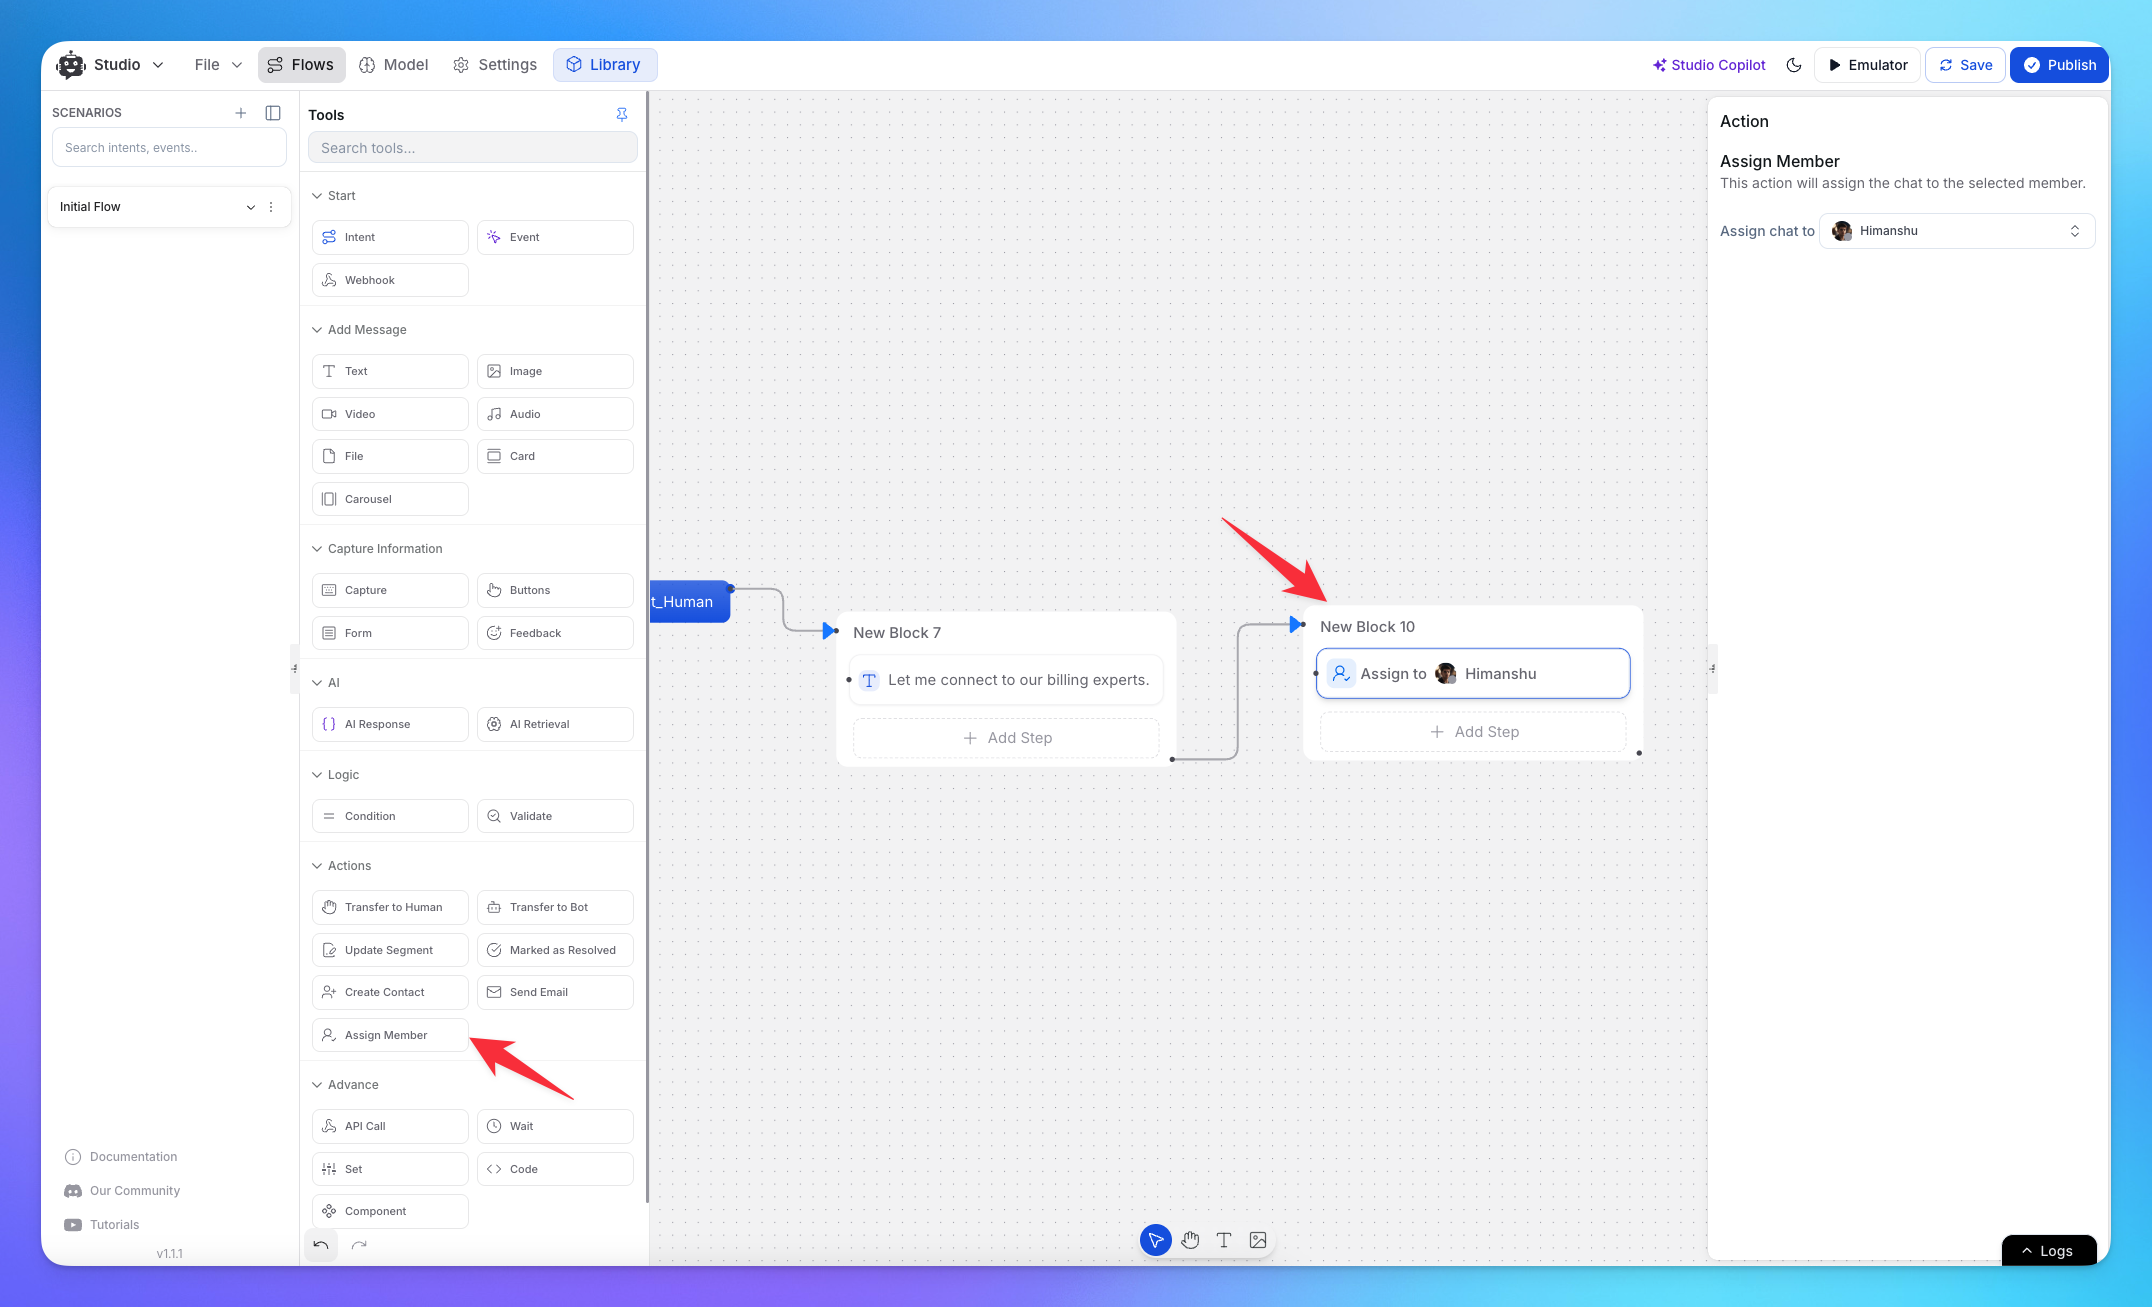
Use Case: Assign a chat to a specific team member for follow-up or resolution.
How to Setup:
Go to Studio
add the Assign Member action
Click on Assign Member from the list of available actions
Choose the team member you want to assign the chat to
The chat will now be routed to that member for handling
This ensures responsibility is clear and the right team member follows up with the customer.
How to Use Mark Chat as Closed 
Use Case: You want to hard-close a conversation so no further messages can be sent in that chat. The visitor must start a new session to continue.
How to Setup: 
1. Go to Studio.
2. Add the Mark Chat as Closed Action Node.
Behavior: 
- Visitor messages are disabled in the closed chat sessions;.
Related Articles
How to use Intents in Chatbot Studio?
This guide walks you through creating and using Intents to enhance your chatbot’s capabilities.
Flow : Scenarios, Blocks, Steps & Connections
This article fully details how steps/nodes and blocks work, how to configure them, create paths and connections.
How to capture and store a user’s response?
This article provides a complete guide on capturing user responses, such as name, email, and more, and shows how to store and utilize them in your chatbot to create personalized and engaging experiences.
How to Add & Configure Text, Image, and File Messages in Studio
Learn how to send text, images, and files with your ai agent using studio.
How to Debug Flows and View Execution Logs in Chatbot Studio?
Learn how to debug your flows, check flow execution logs, and view logs within the Chatbot Studio
How to Set Up Conditions in AI Studio
Set Conditions to Understand What Information Users Are Looking For
How to create and use forms in AI Studio?
This guide will walk you through the process of creating and using forms to improve the user experience with your AI agent