
How To Create a AI Helpdesk?
Setting up your AI Helpdesk is quick and simple. Follow these steps to create an effective support system for your customers:
1. Go to the Chatbot Section
Log in to your YourGPT Dashboard.
From the main menu, click on Chatbot.
This is your starting point for managing all AI support systems.
2. Select 'AI Helpdesk'
On the left sidebar, click on AI Helpdesk.
This will open the dedicated workspace to manage your helpdesk setup.
3. Add a Name for Your Helpdesk
Provide a clear and recognisable name. This name helps your customers identify your helpdesk easily.
4. Choose a Pre-built Template
Select from the available pre-built templates tailored for various business requirements.
5. Customise Your Helpdesk
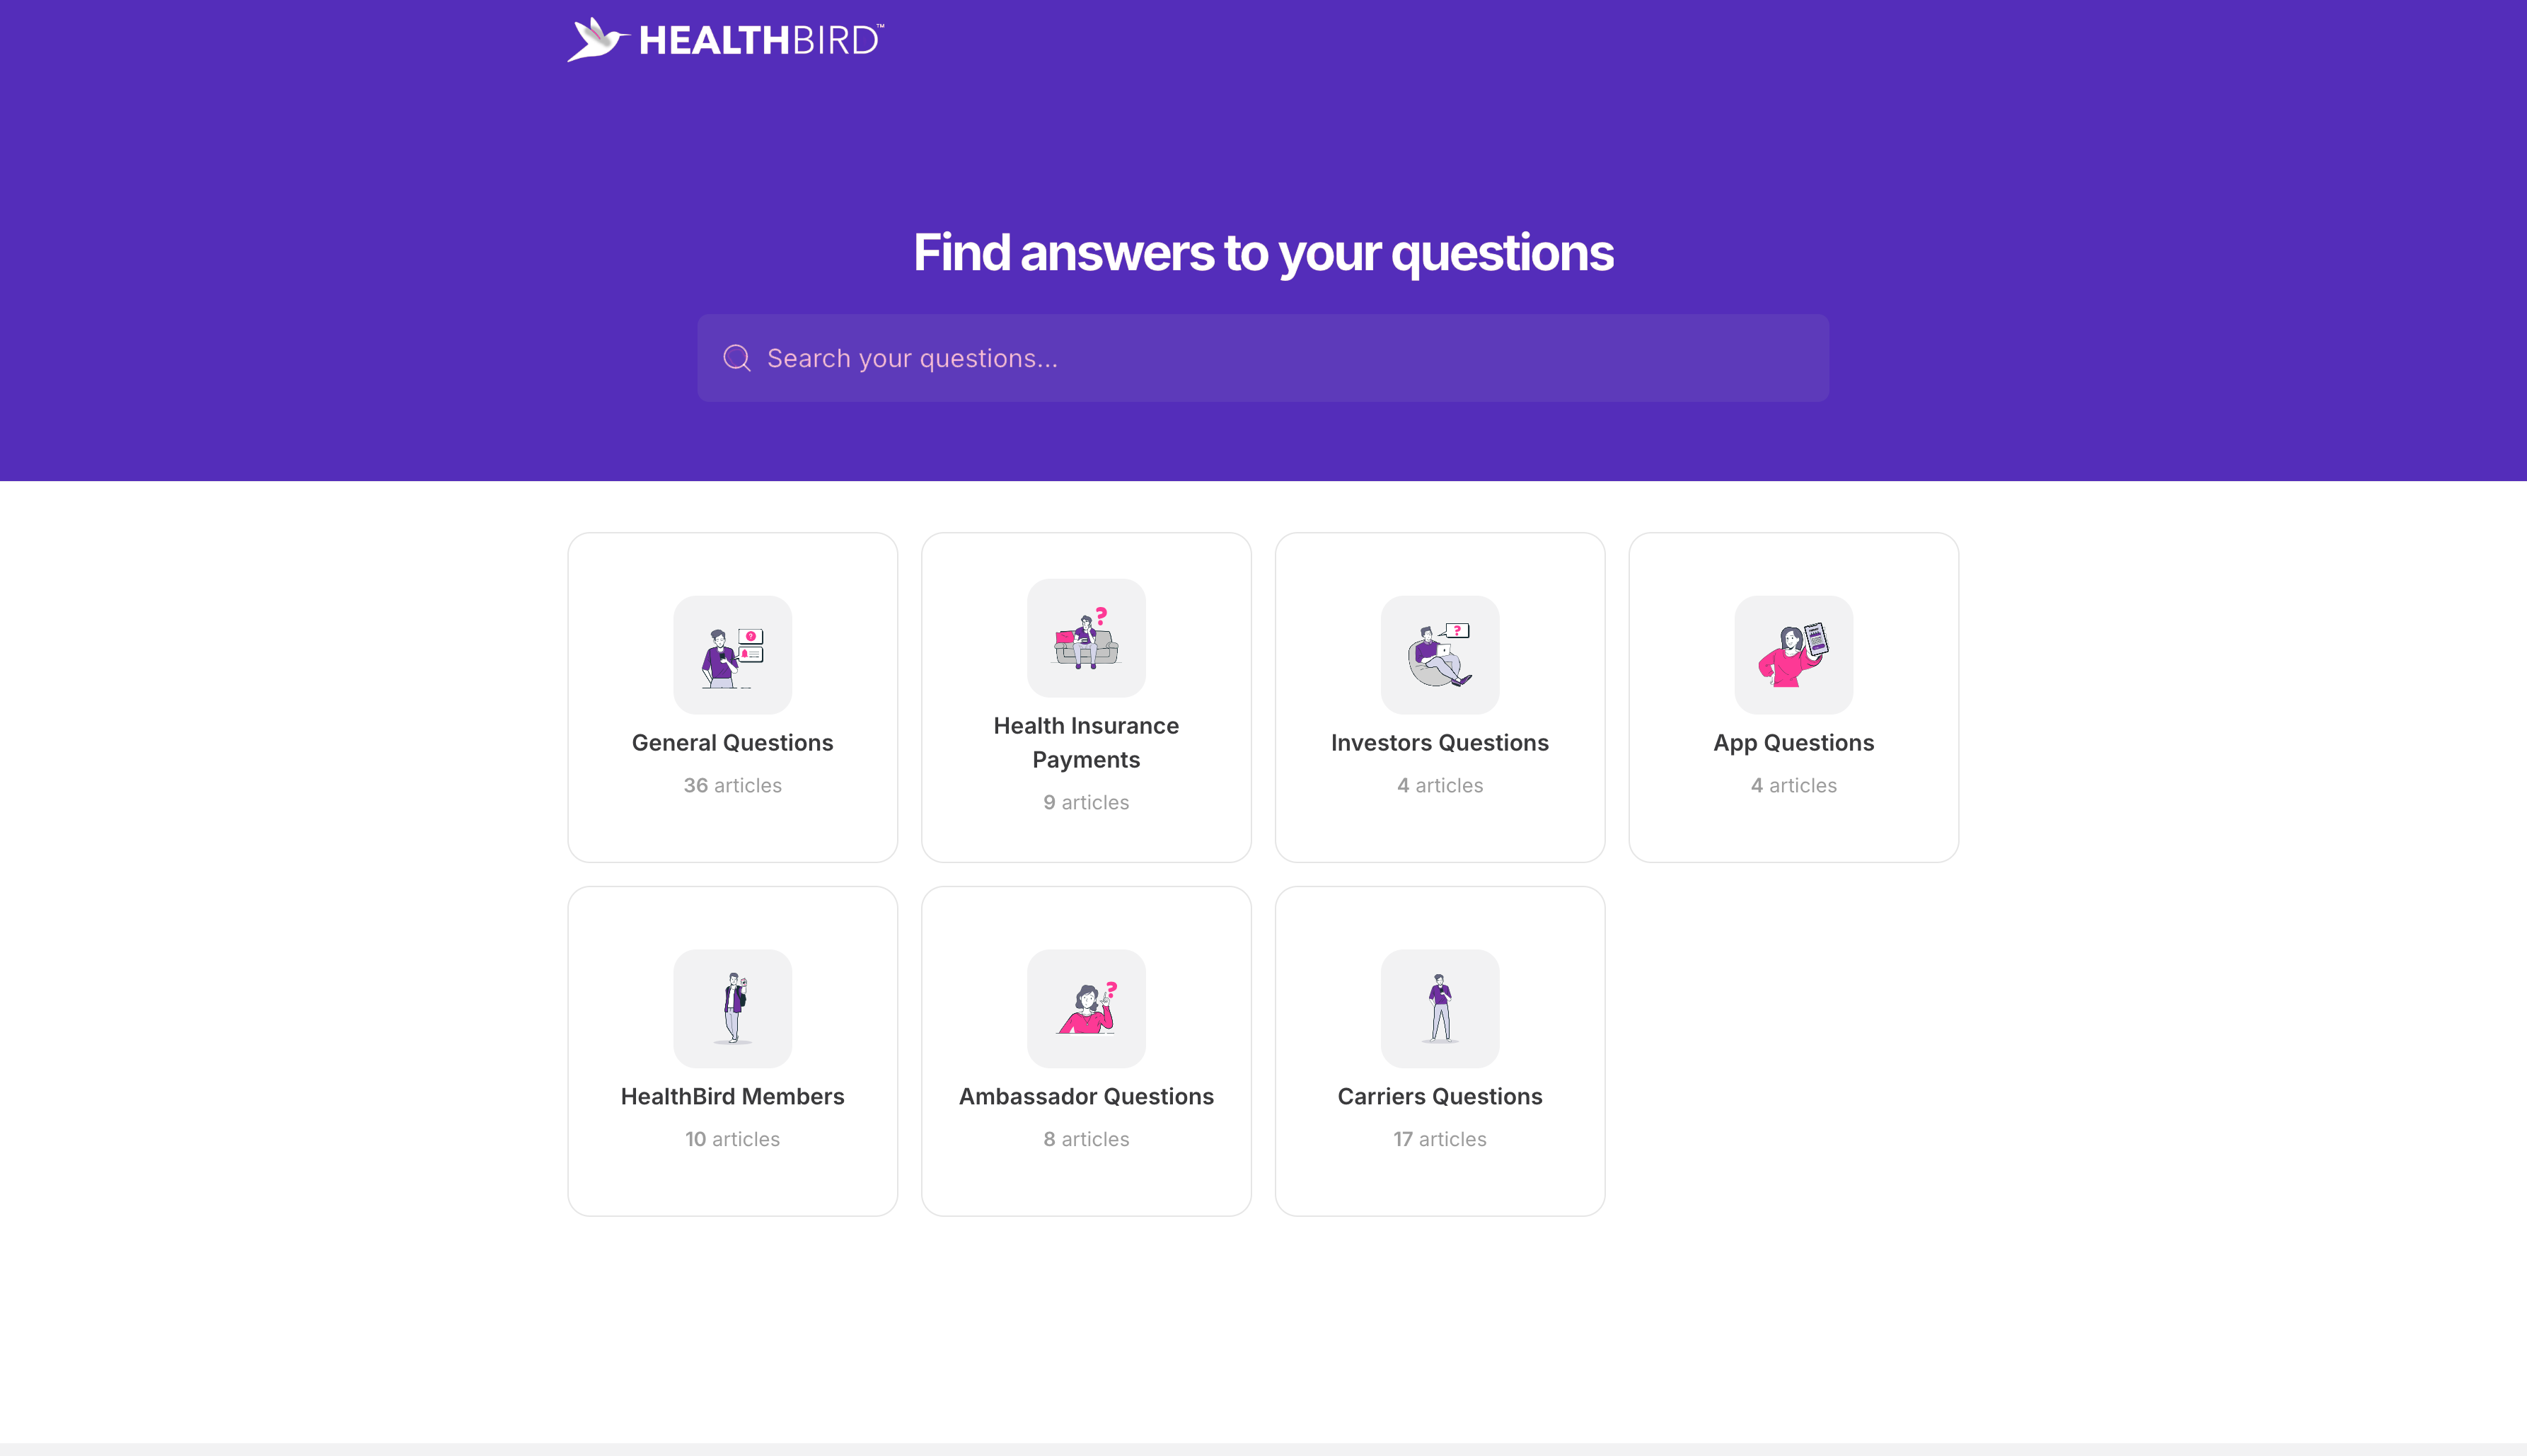
Once you've picked a template, you can customise:
Categories – Group articles based on topics or departments
Themes – Adjust colours, fonts, and layout to match your brand
Settings – Custom Domain, language, analytics, or widget access
This ensures your helpdesk looks and works exactly how you need.
6. Create Articles Quickly
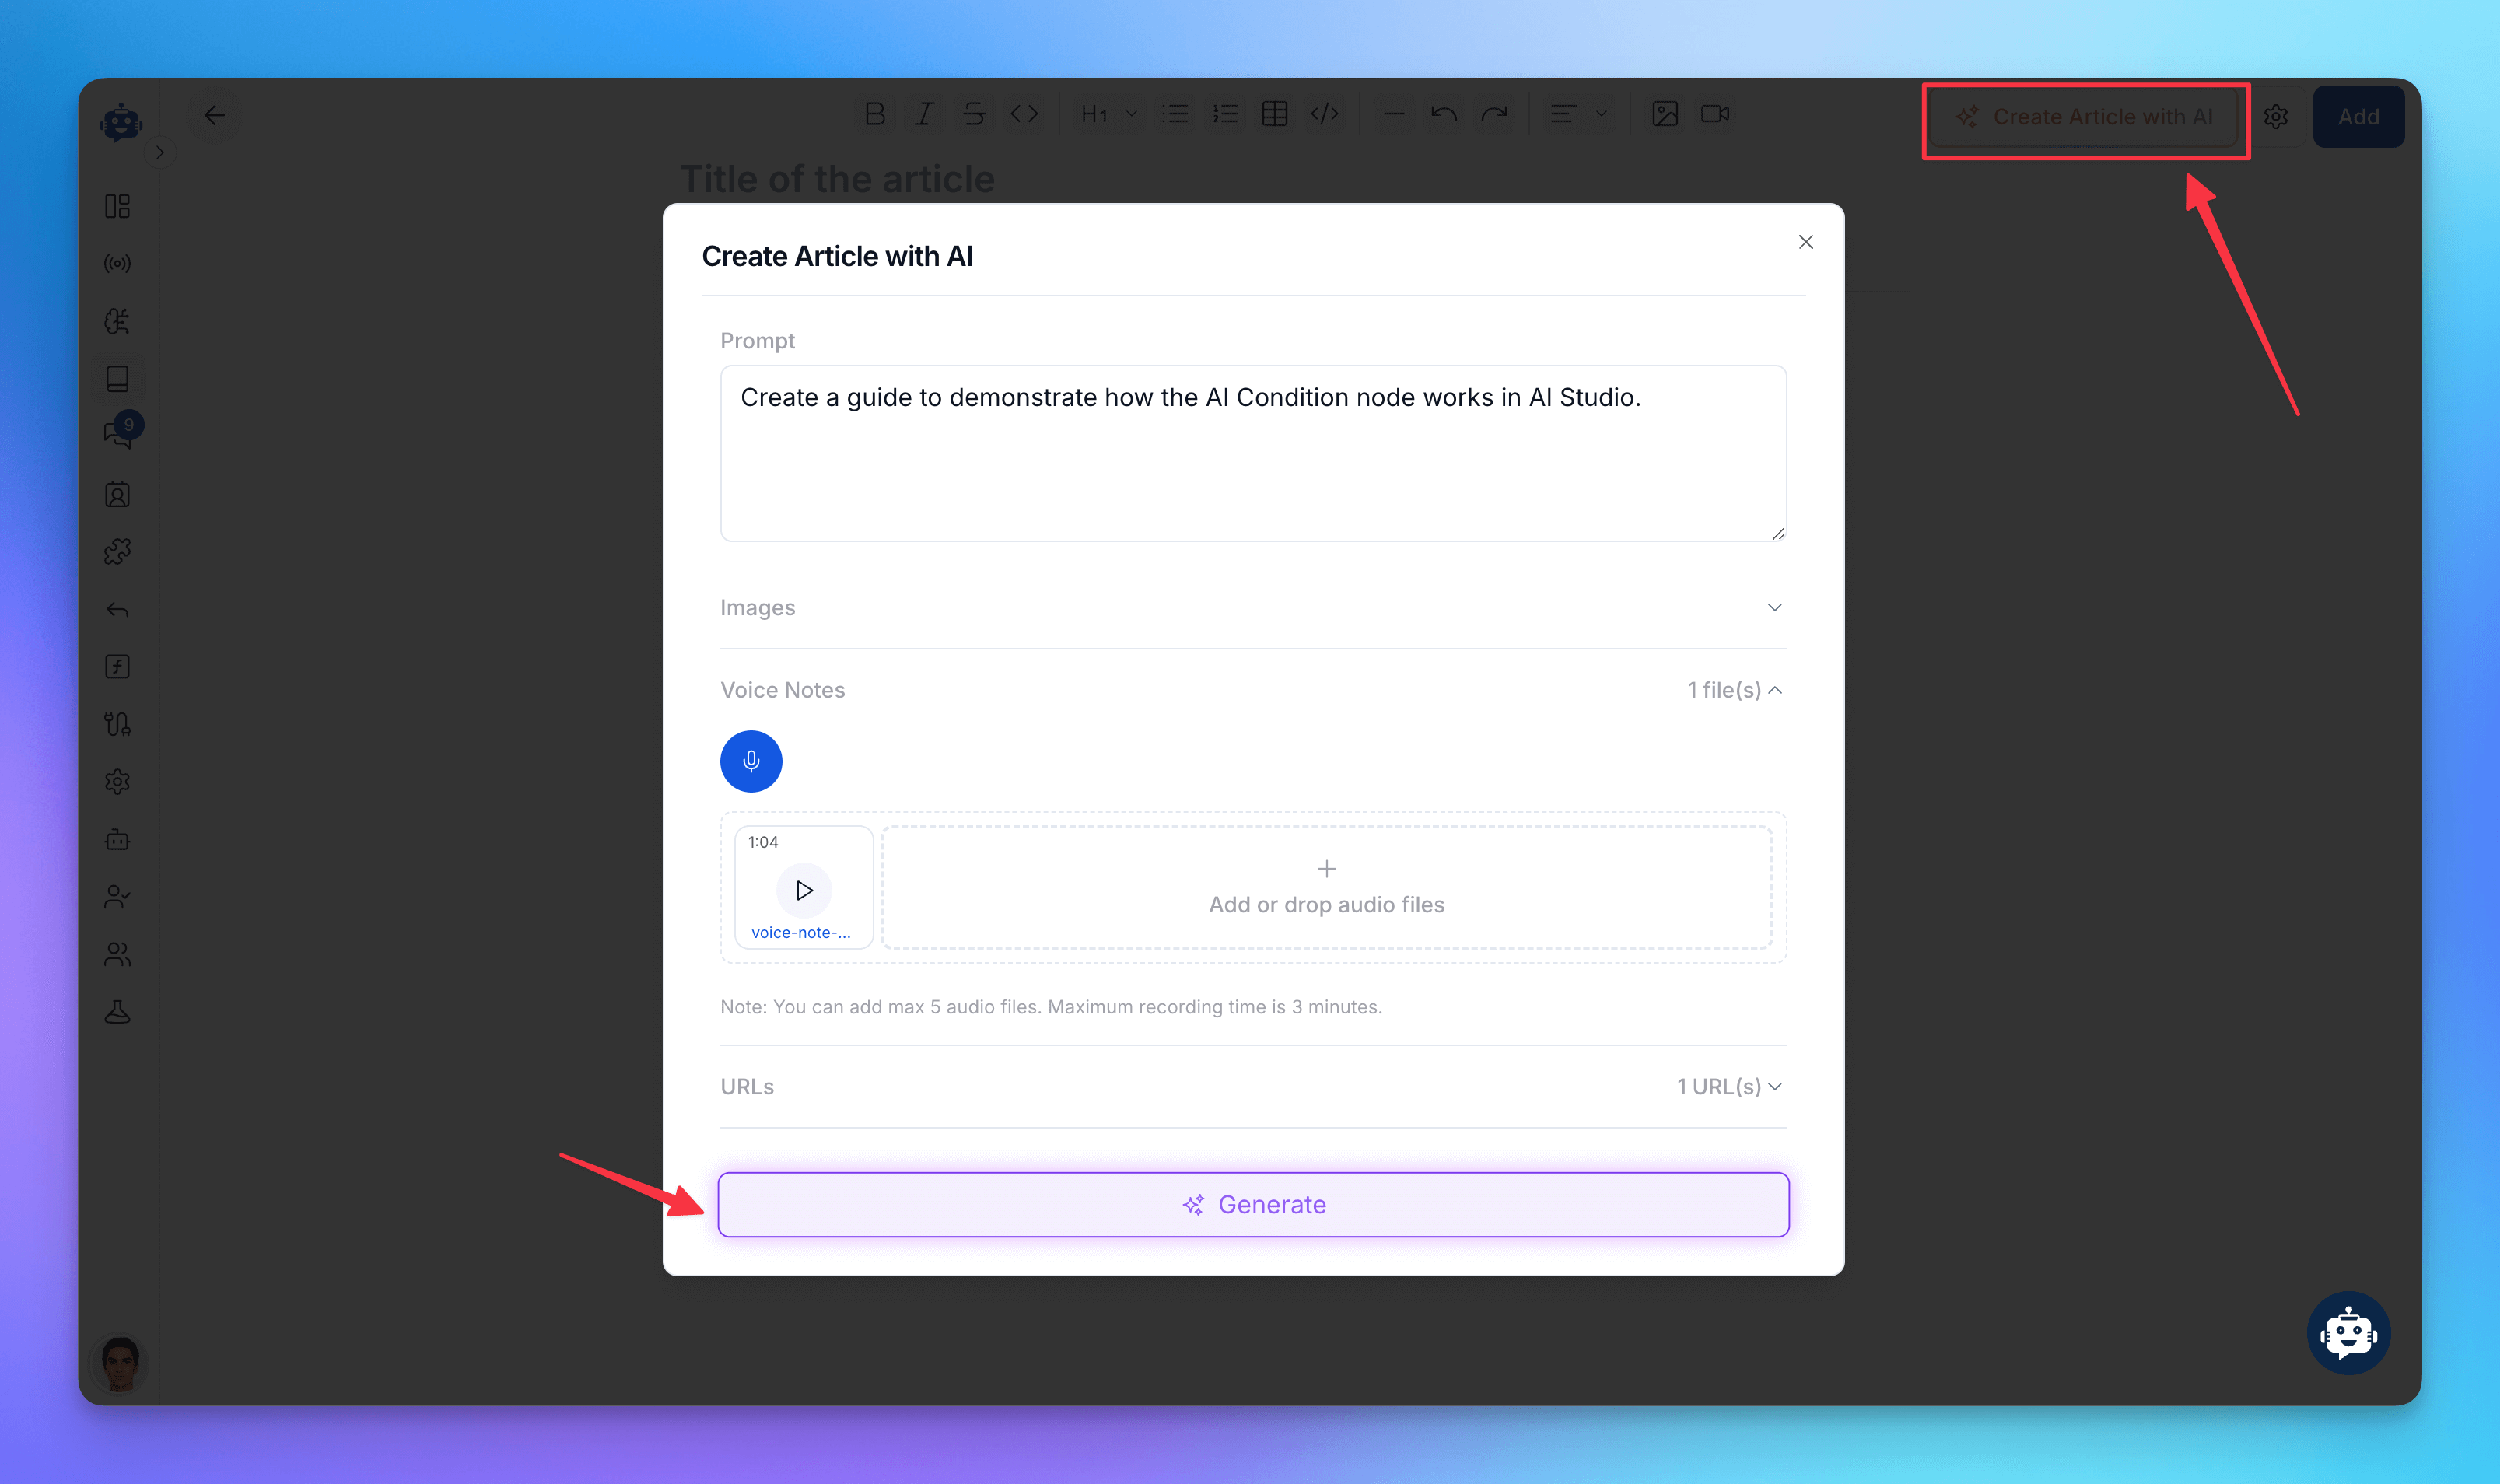
You have multiple quick options to create articles efficiently:
From Link: Paste a URL to automatically generate an article.
From Text: Input existing text to quickly create a new article.
From Image: Upload images, and the system will extract relevant information to form an article.
From Audio: Upload an audio file and the system will transcribe and create a support article from it.
Direct Writing Area: write or edit articles directly with AI in the writing area.
Organise these articles by assigning them to appropriate categories for better customer navigation.
6.1 Write and Edit Articles with Full Control
Inside your helpdesk article, you get a rich editing experience powered by AI.
✍️ Writing Options:

Write from scratch using the AI-powered editor
Paste content from existing documents or FAQs
Use AI suggestions to rephrase or auto-complete sentences
🔧 Editing Tools:

The helpdesk text editor supports the following formatting and layout tools:
Tool | Function |
|---|---|
Bold, Italic, Strikethrough | Highlight key text or mark updates |
Headings (H1, H2, H3) | Structure your content for better readability |
Bullet & Numbered Lists | List down steps, instructions, or features clearly |
Tables | Display structured data, comparisons, or pricing clearly |
Code Block / Inline Code | Add code snippets or command-line instructions |
Horizontal Line | Separate sections neatly |
Undo / Redo | Correct mistakes instantly |
Text Alignment | Left, center, or justify as per visual preference |
Image Upload | Add screenshots or visual references to articles |
Video Upload | Attach videos directly if needed |
🎥 Embed YouTube Videos Instantly
Just paste the YouTube video link into the editor, and it will automatically generate an embedded video.
7. Set Article Settings Correctly
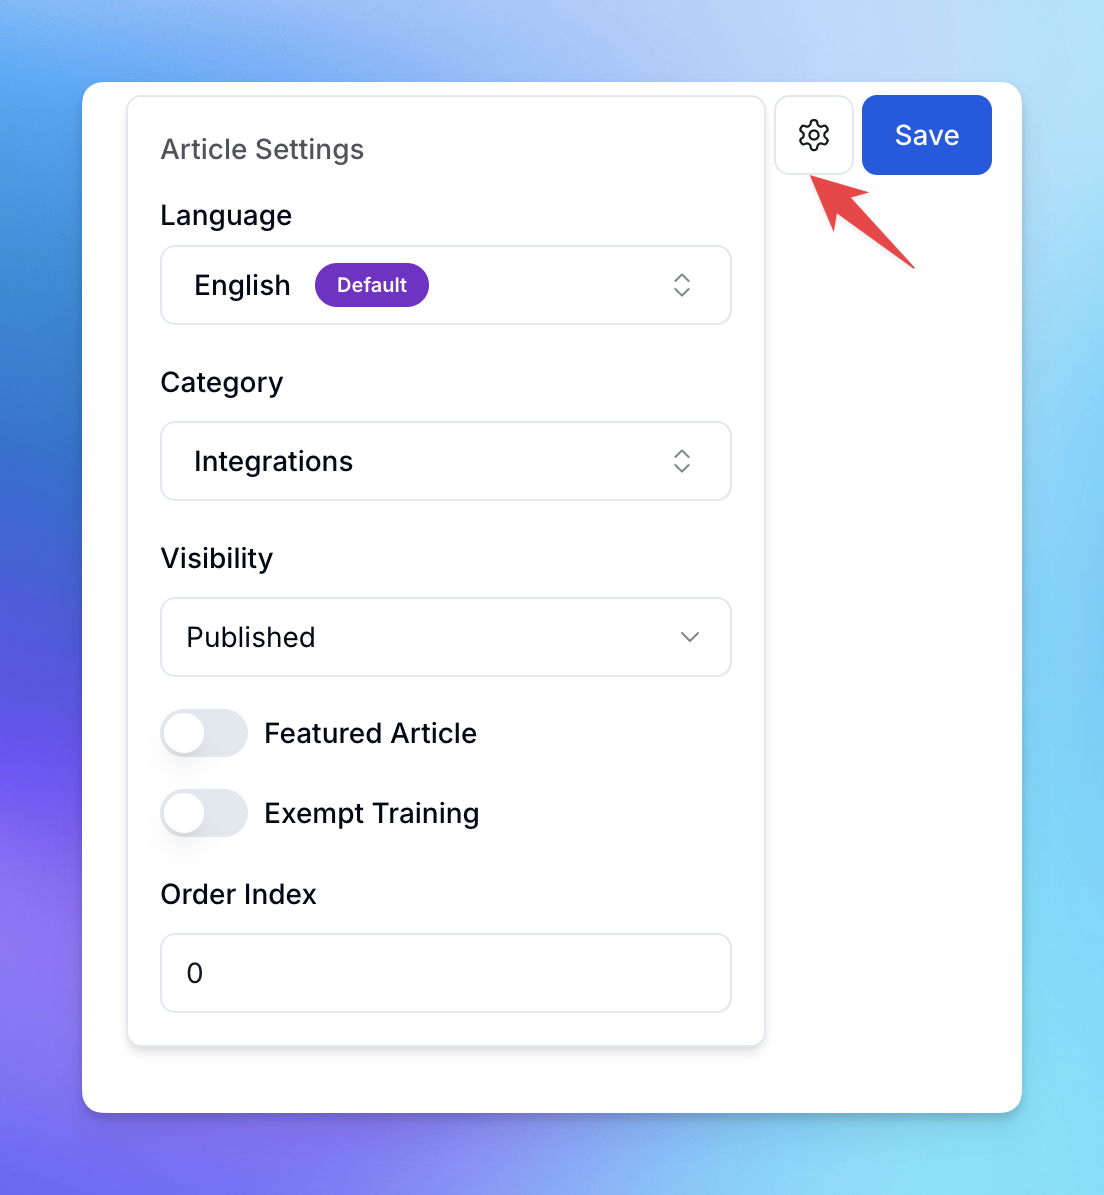
Before publishing any article, review and configure its Article Settings properly to control how it appears in your Helpdesk:
Language: Choose the content language (default is English).
Category: Assign the article to a suitable category like Integrations, Billing, or FAQs.
Visibility: Set to Published to make it live. Drafts stay hidden from customers.
Featured Article: Toggle this on for articles you want highlighted at the top.
Exempt Training: Enable this if the article should not be used to train the AI.
Order Index: Controls display position inside a category. Higher the value, higher the article will be shown.
Configuring these options according to your requirements.
8. Share with Your Customers
Once your AI helpdesk setup is complete, share the link with your customers via your website, email, or connect via chat widget.
Related Articles
How to Set Up Email Integration for Your AI Chatbot
Enable Your AI Agent to Send and Receive Emails Seamlessly with a Custom Domain
MCP Setup Guide for Claude Desktop, Cursor, and Windsurf
How to setup Model Context Protocol
How To Setup Twilio Whatsapp Integration
Easy Setup Twilio for WhatsApp with YourGPT AI chatbot
How to Use Webhooks and Set Them Up in YourGPT AI?
What Is a Webhook, How Does It Work, & How to setup?
How to integrate YourGPT Chatbot widget in a flutter application
Step-by-Step guide to integrate YourGPT widget in a flutter application
How to integrate YourGPT Chat widget in an android application
Step-by-Step guide to integrate YourGPT widget in an android application