
How to Set Up Email Integration for Your AI Chatbot
Email Integration feature enables your AI agent to handle email (send and receive) communications directly through your dashboard. This powerful capability allows you to manage all email interactions from a single platform, available with our Professional plan and above.
When Does Email Happen?
If a user:
Asks to talk to a human, but no team member is available
Gets a reply from an agent, but doesn’t respond for a while
YourGPT will automatically send a follow-up email to keep the conversation going. This way, no support request gets ignored.
Step 1: Access the Email Integration Section
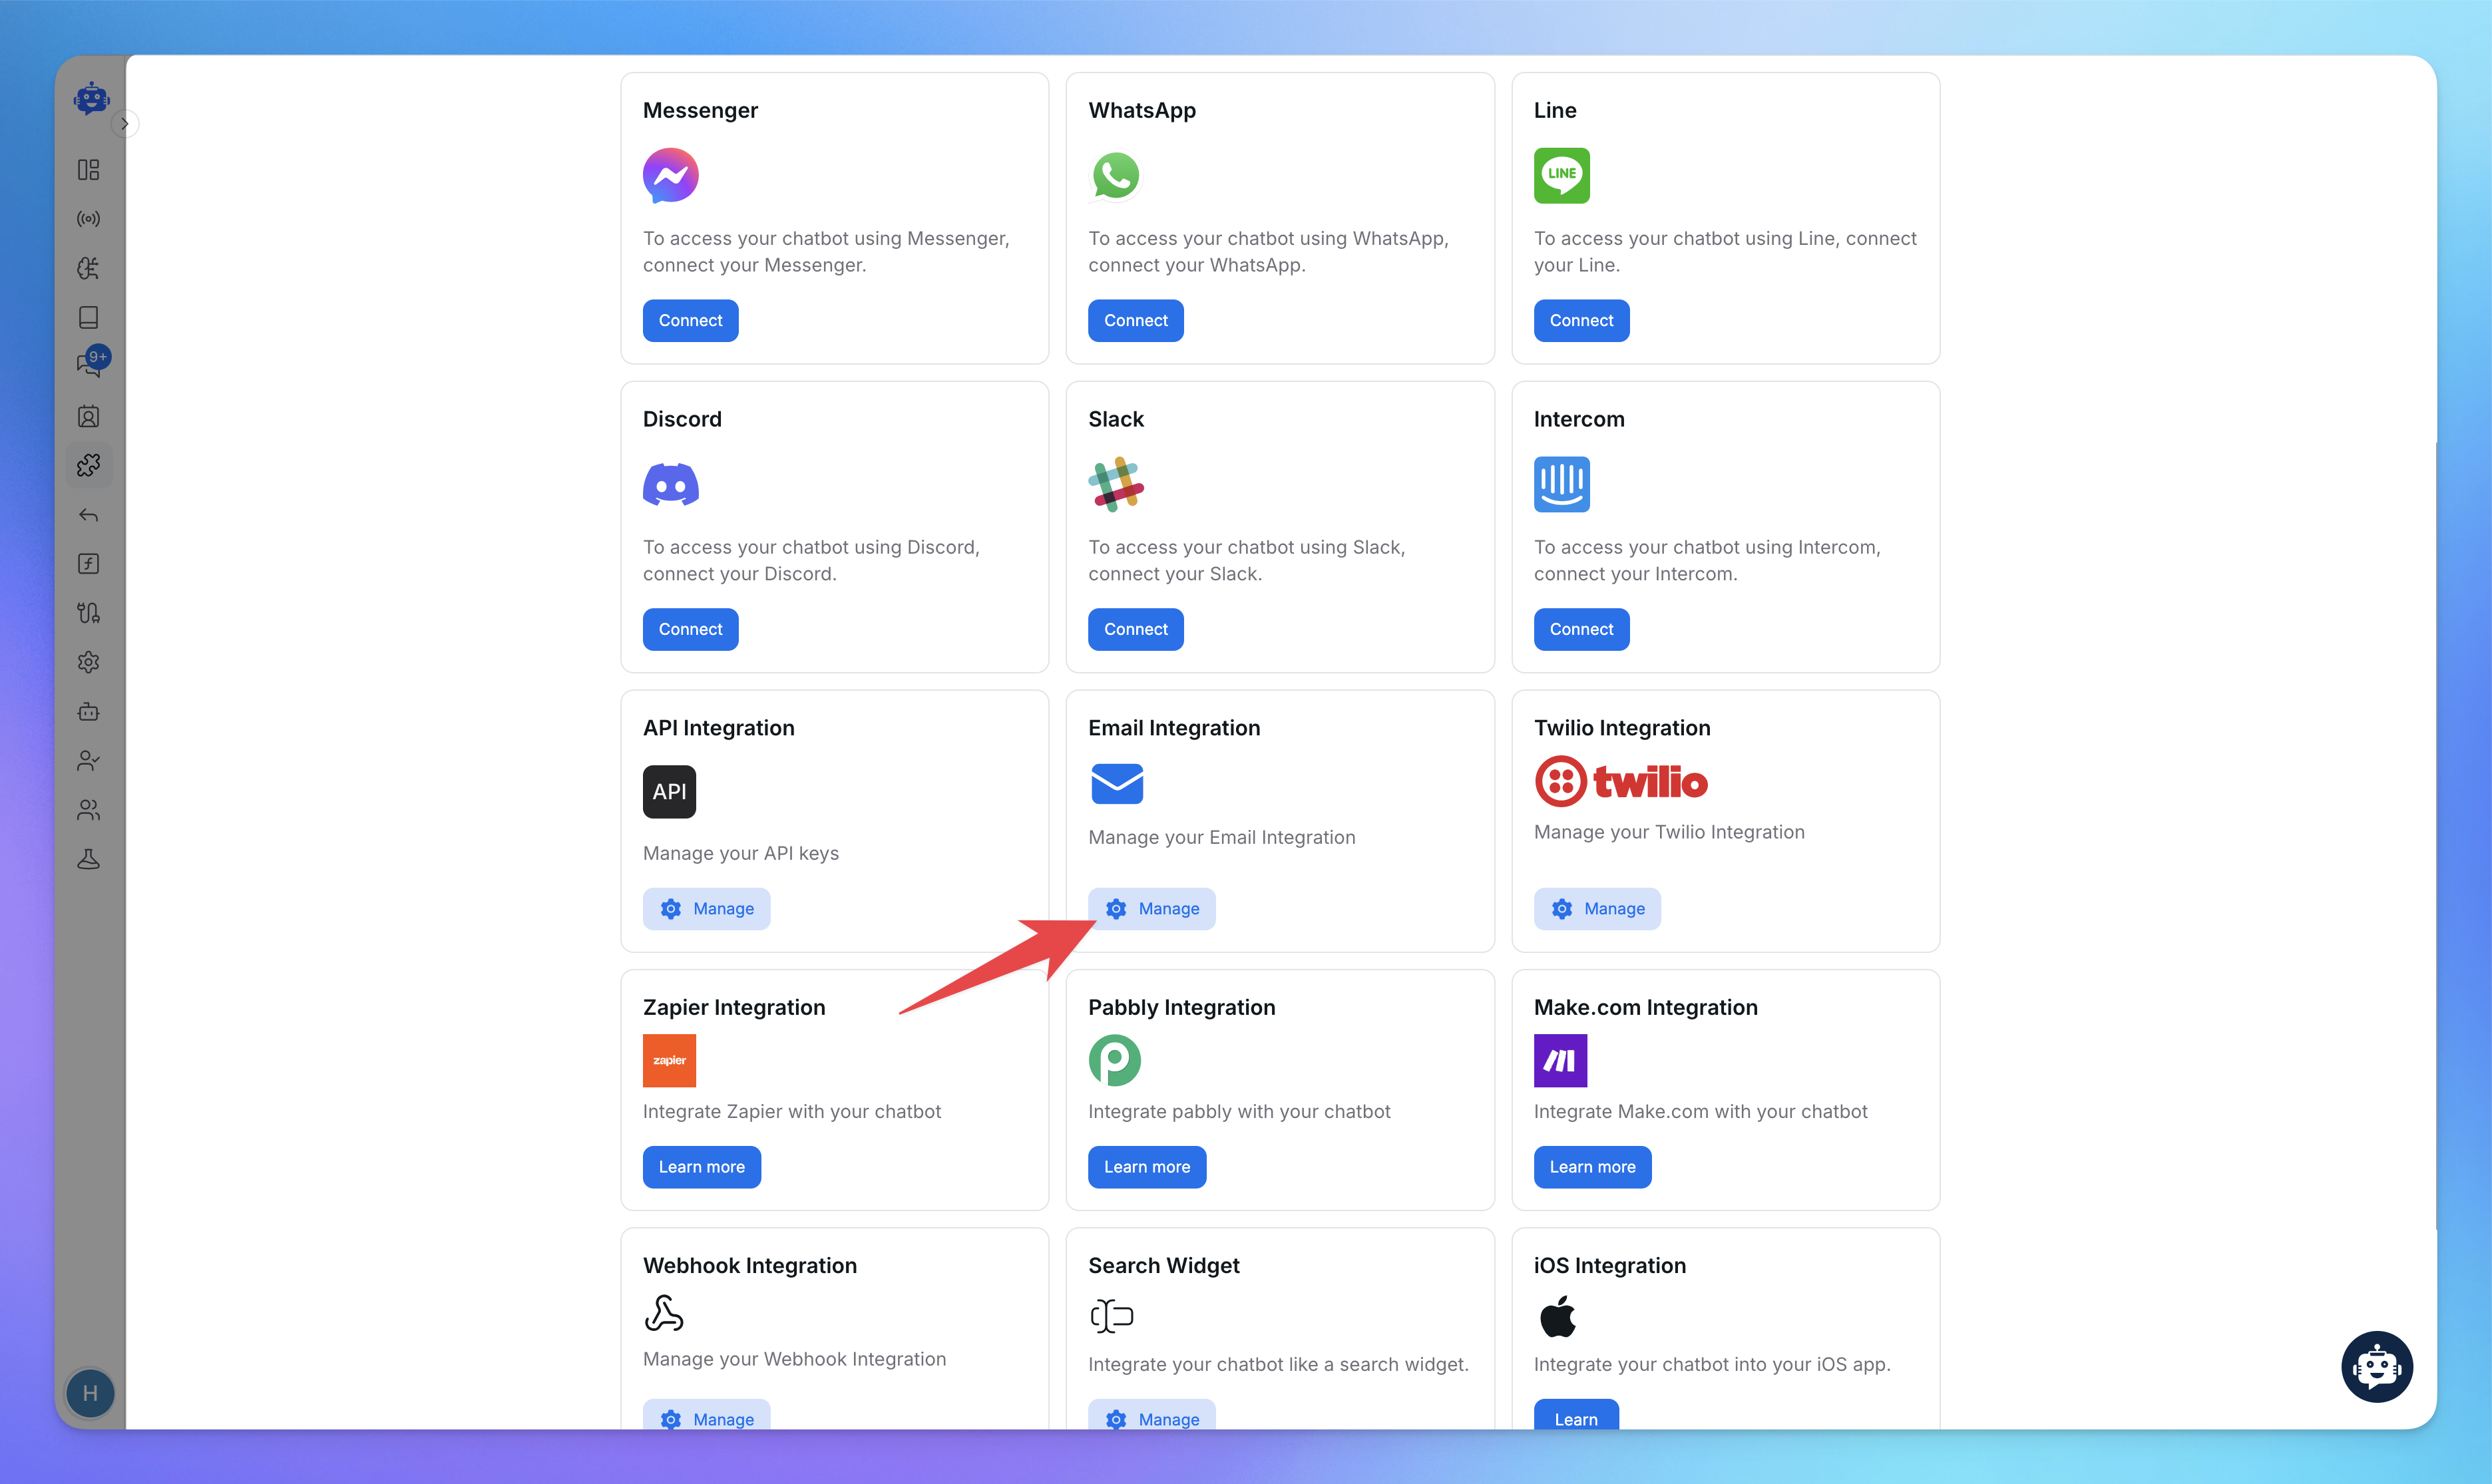
Go to the Integrations tab from the dashboard menu.
Locate the Email Integration card and click on Manage.
Step 2: Create a Workspace (Your Email Identity)
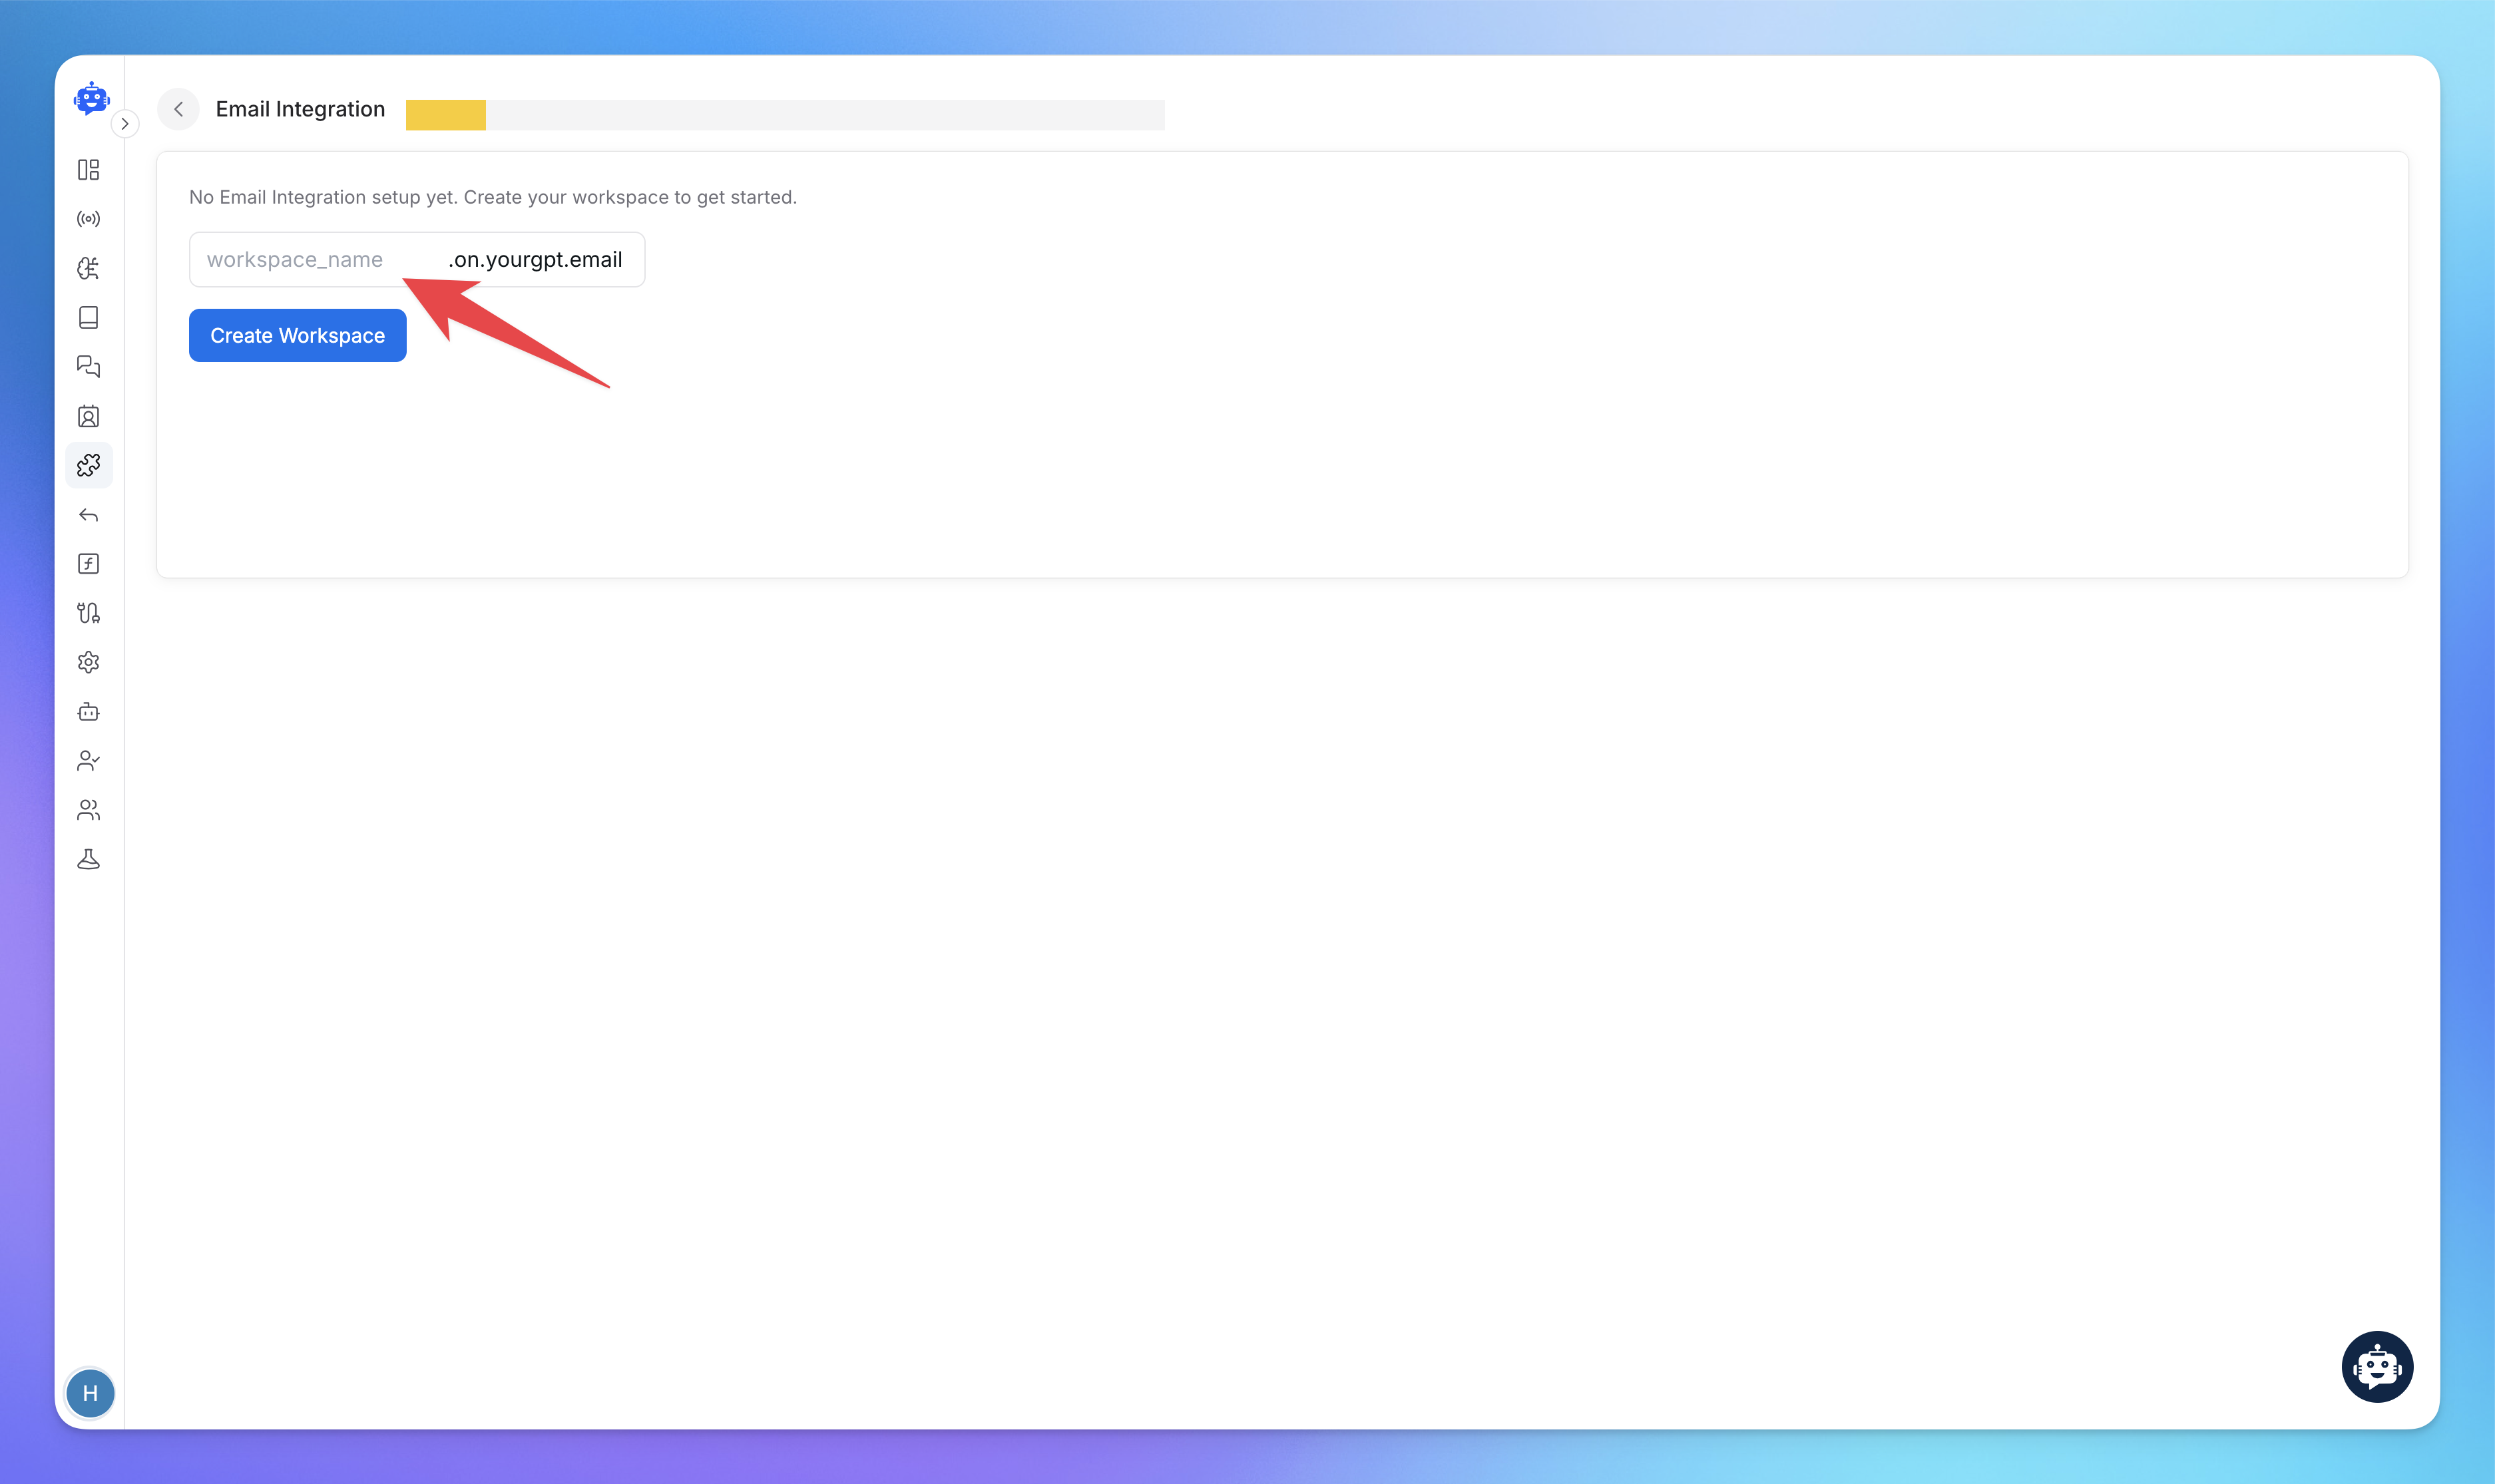
In Email Integration, a Workspace refers to the environment where your AI agent manages email communications.
Enter your preferred workspace name in the text field provided.
The workspace name will form part of your email domain (e.g.,
yourname.on.yourgpt.email).
Click Create Workspace to proceed.
If no email integration is set up, then only you will see the Create Workspace page.
Step 3: Configure Email Settings
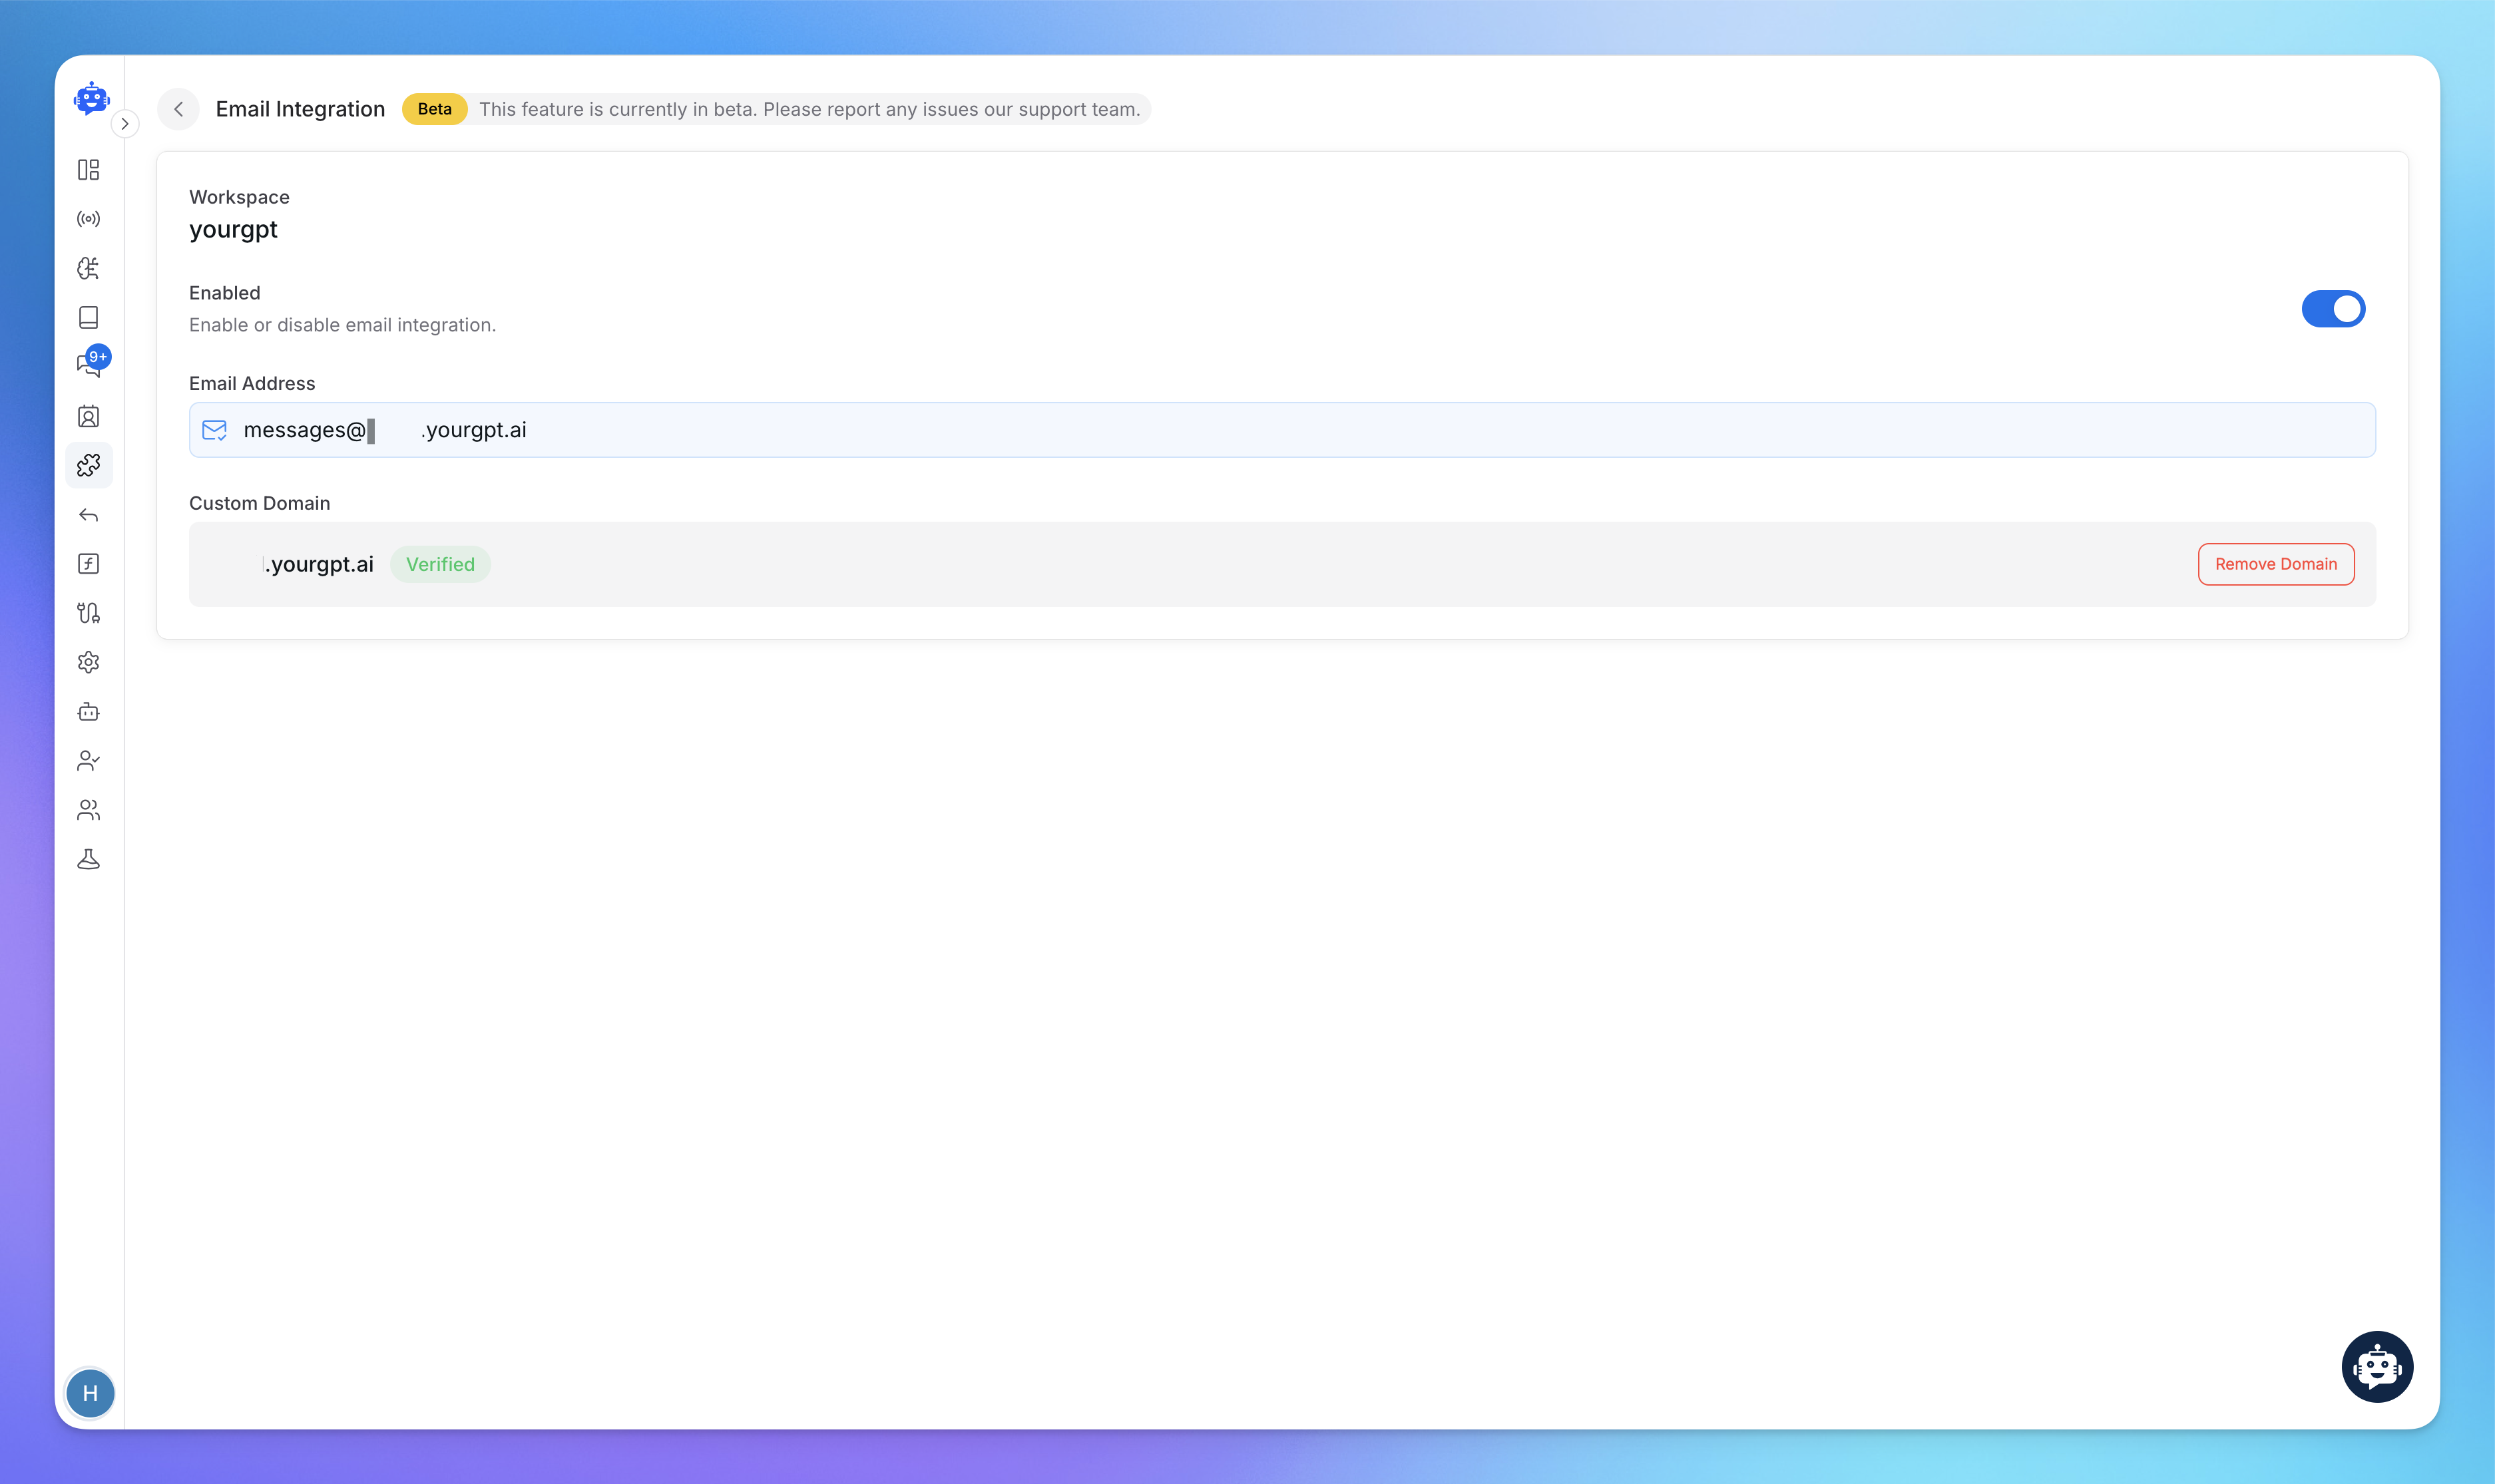
After creating your workspace, you will be redirected to the next page, where you can configure the following details:
Enable or Disable the email integration feature as needed.
Your email address is used for email integration. It is the address from which users will receive emails.
Step 3.1: Adding a Custom Domain (Optional)
A custom domain allows you to send and receive emails using your own domain instead of a email workspace address provided above. Follow these steps to add:
Add Your Custom Domain
Enter your domain (e.g.,
email.yourgpt.ai).
Update DNS Records
Add the required TXT, DKIM, and MX records in your DNS settings.
Verify DNS Changes
Wait for DNS propagation and check if the records are updated.
Complete Setup
Once verified, the custom domain is ready for use.
Step 4: Set Up Email Forwarding (optional)
If you want your Gmail, Outlook, GoDaddy, or Namecheap emails to sync with YourGPT AI chatbot. With this you can manage all the emails from YourGPT Conversation Dashboard. Follow these below mentioned steps to let our AI handle your email communications.
Note: Email Integration requires your existing email provider to support email forwarding functionality
For Gmail / Google Workspace:
Log in to your Gmail account
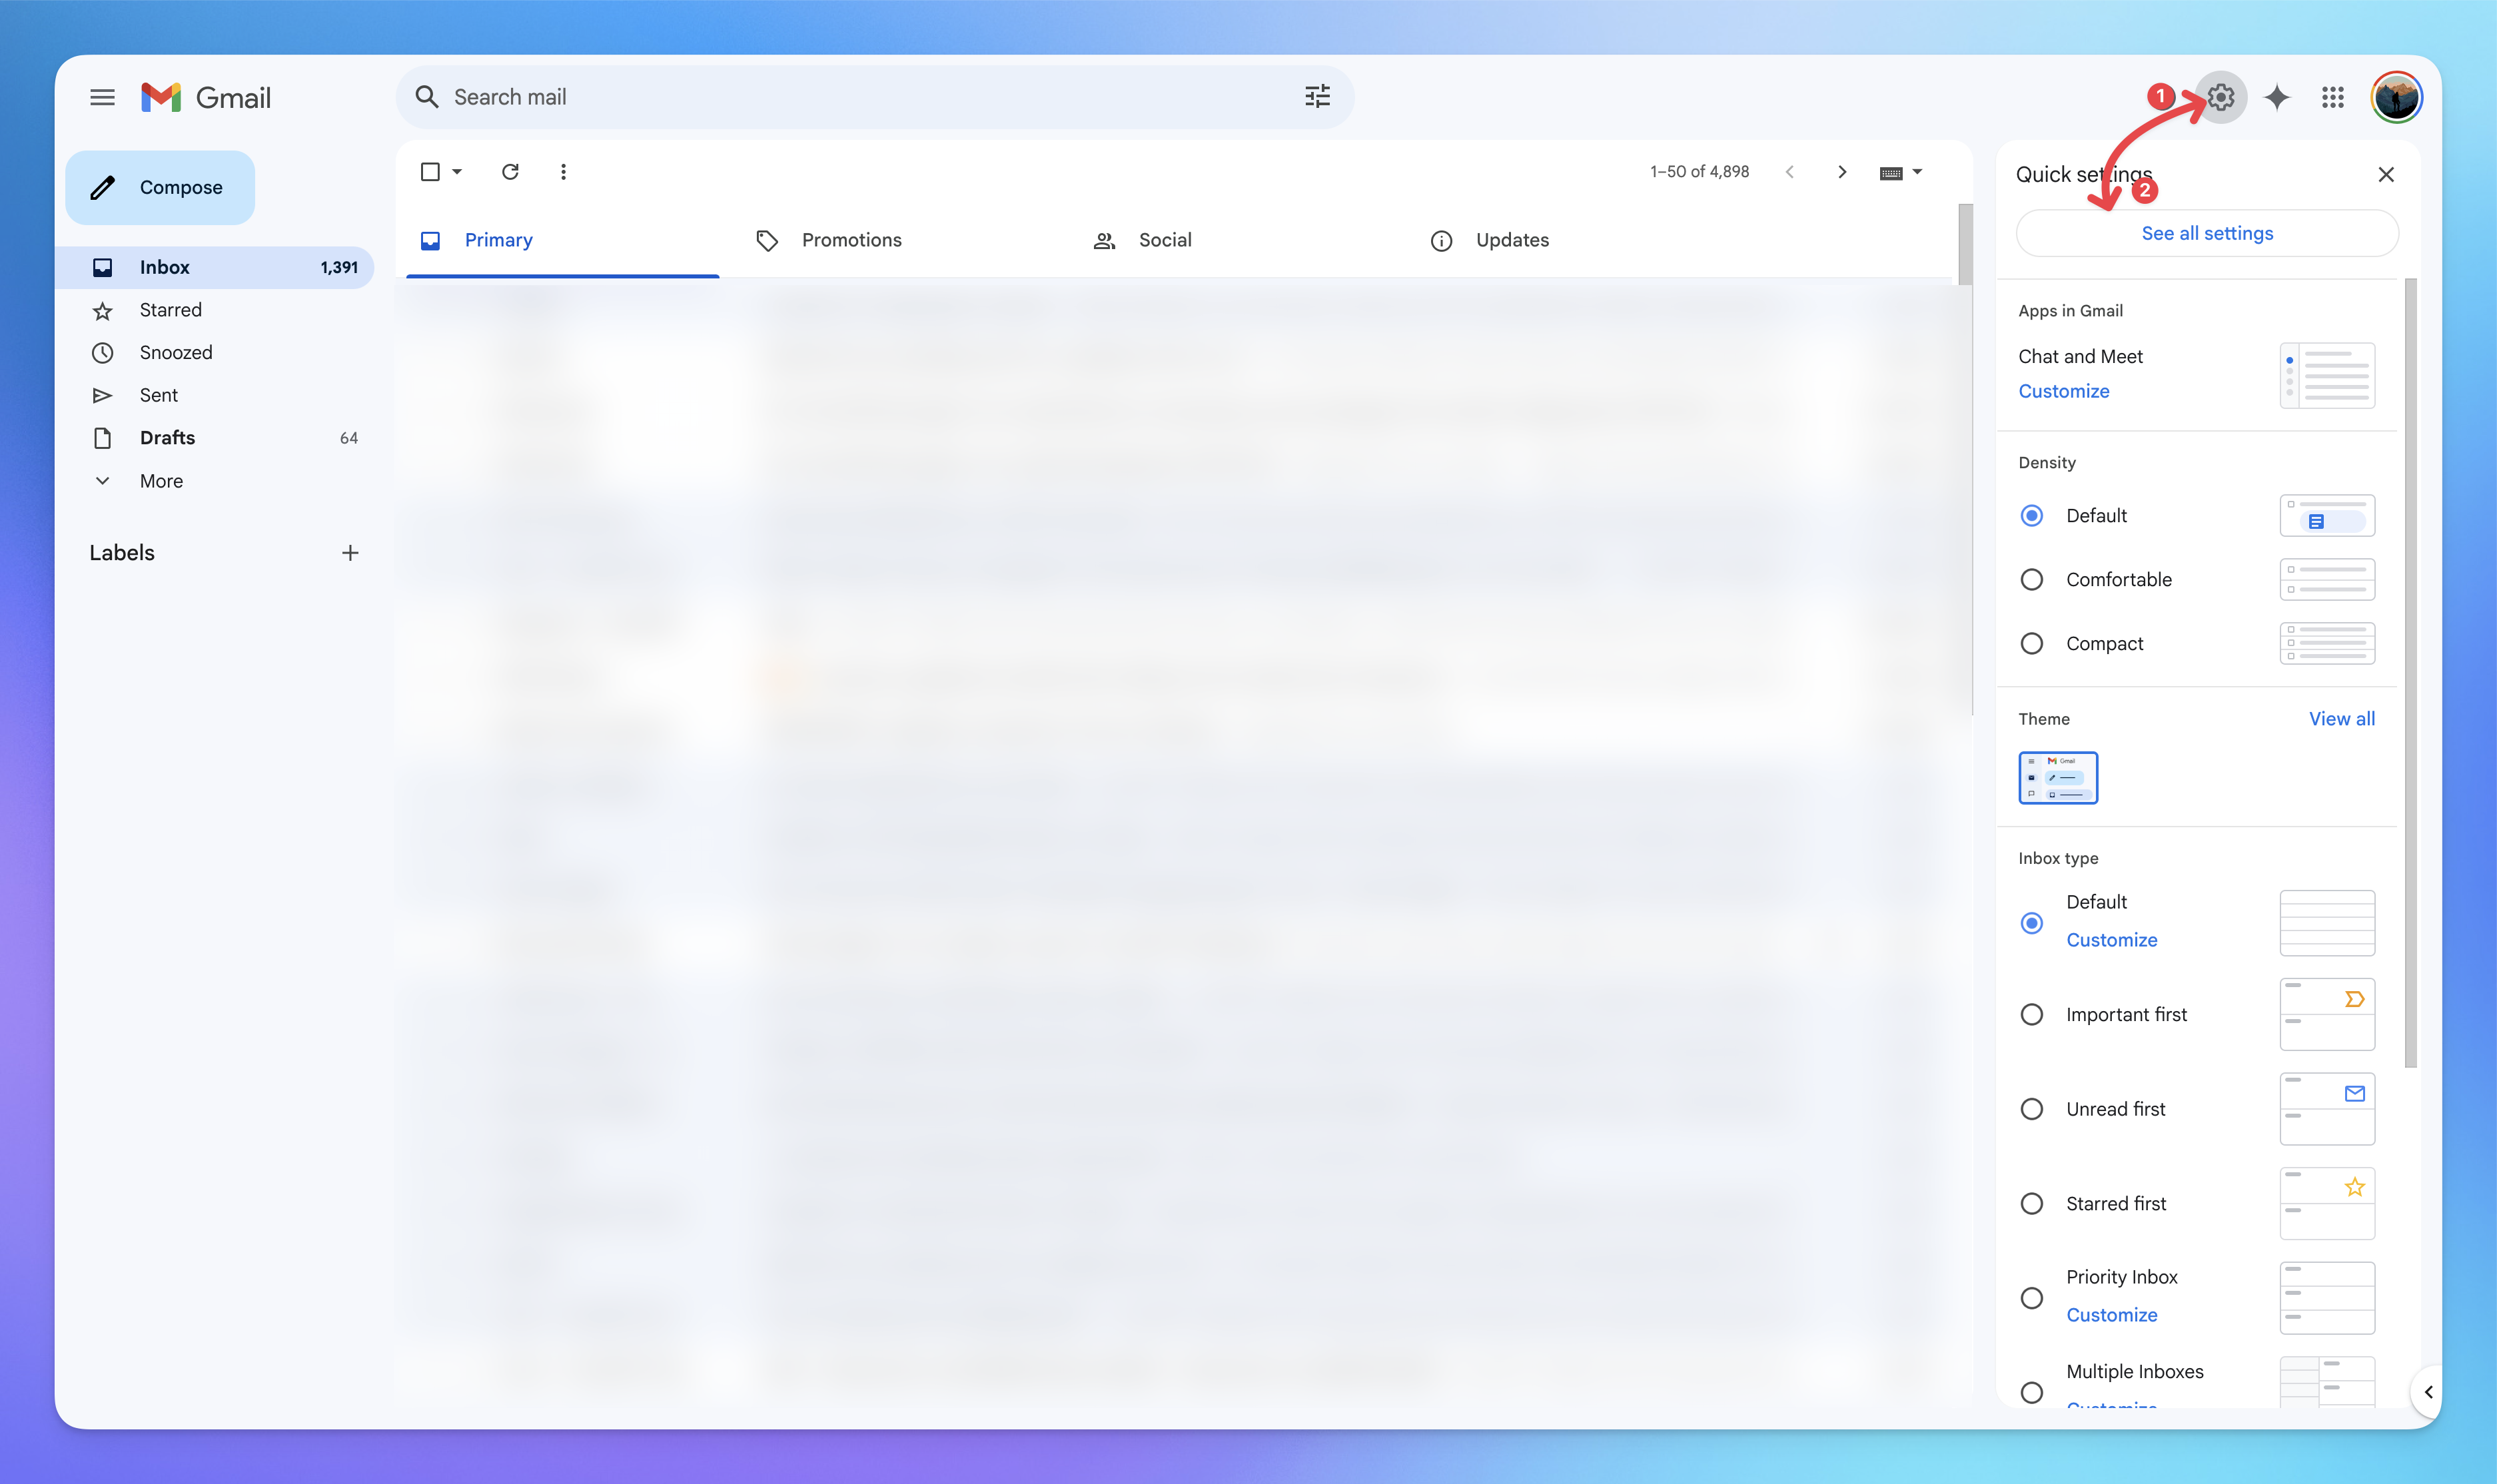
Click the gear icon and select See all settings
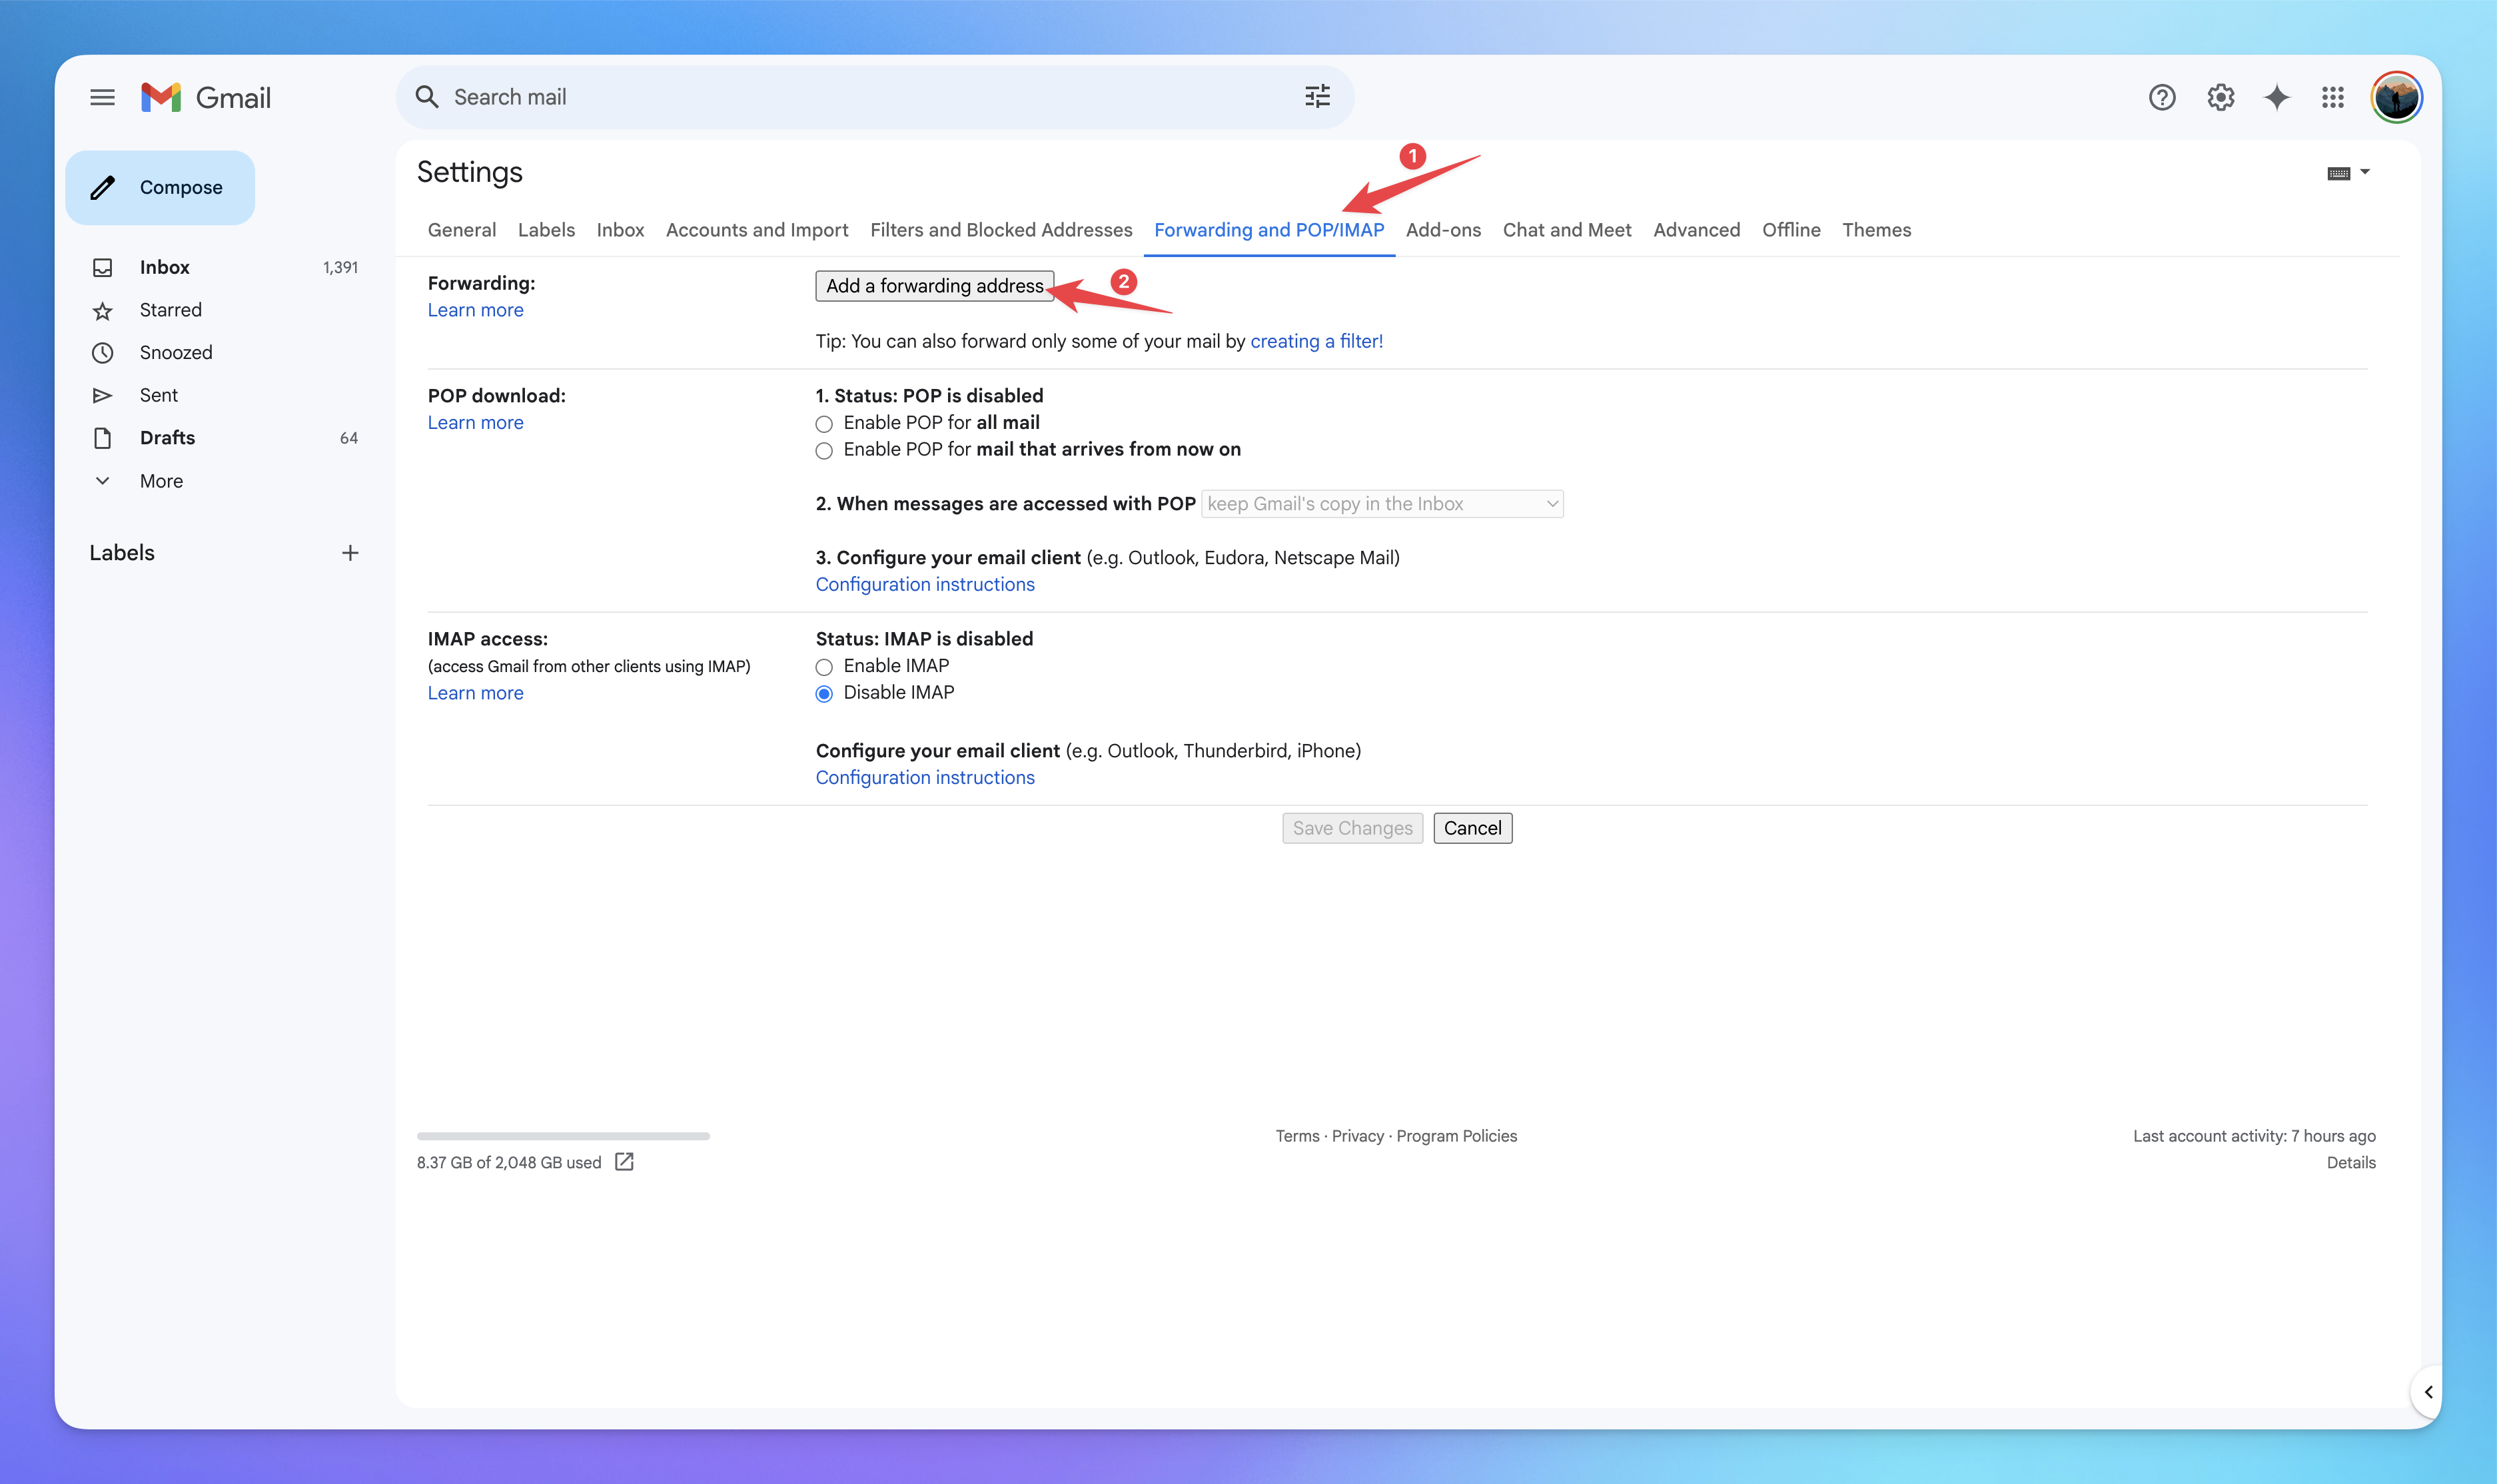
Navigate to the Forwarding and POP/IMAP tab
Click Add a forwarding address
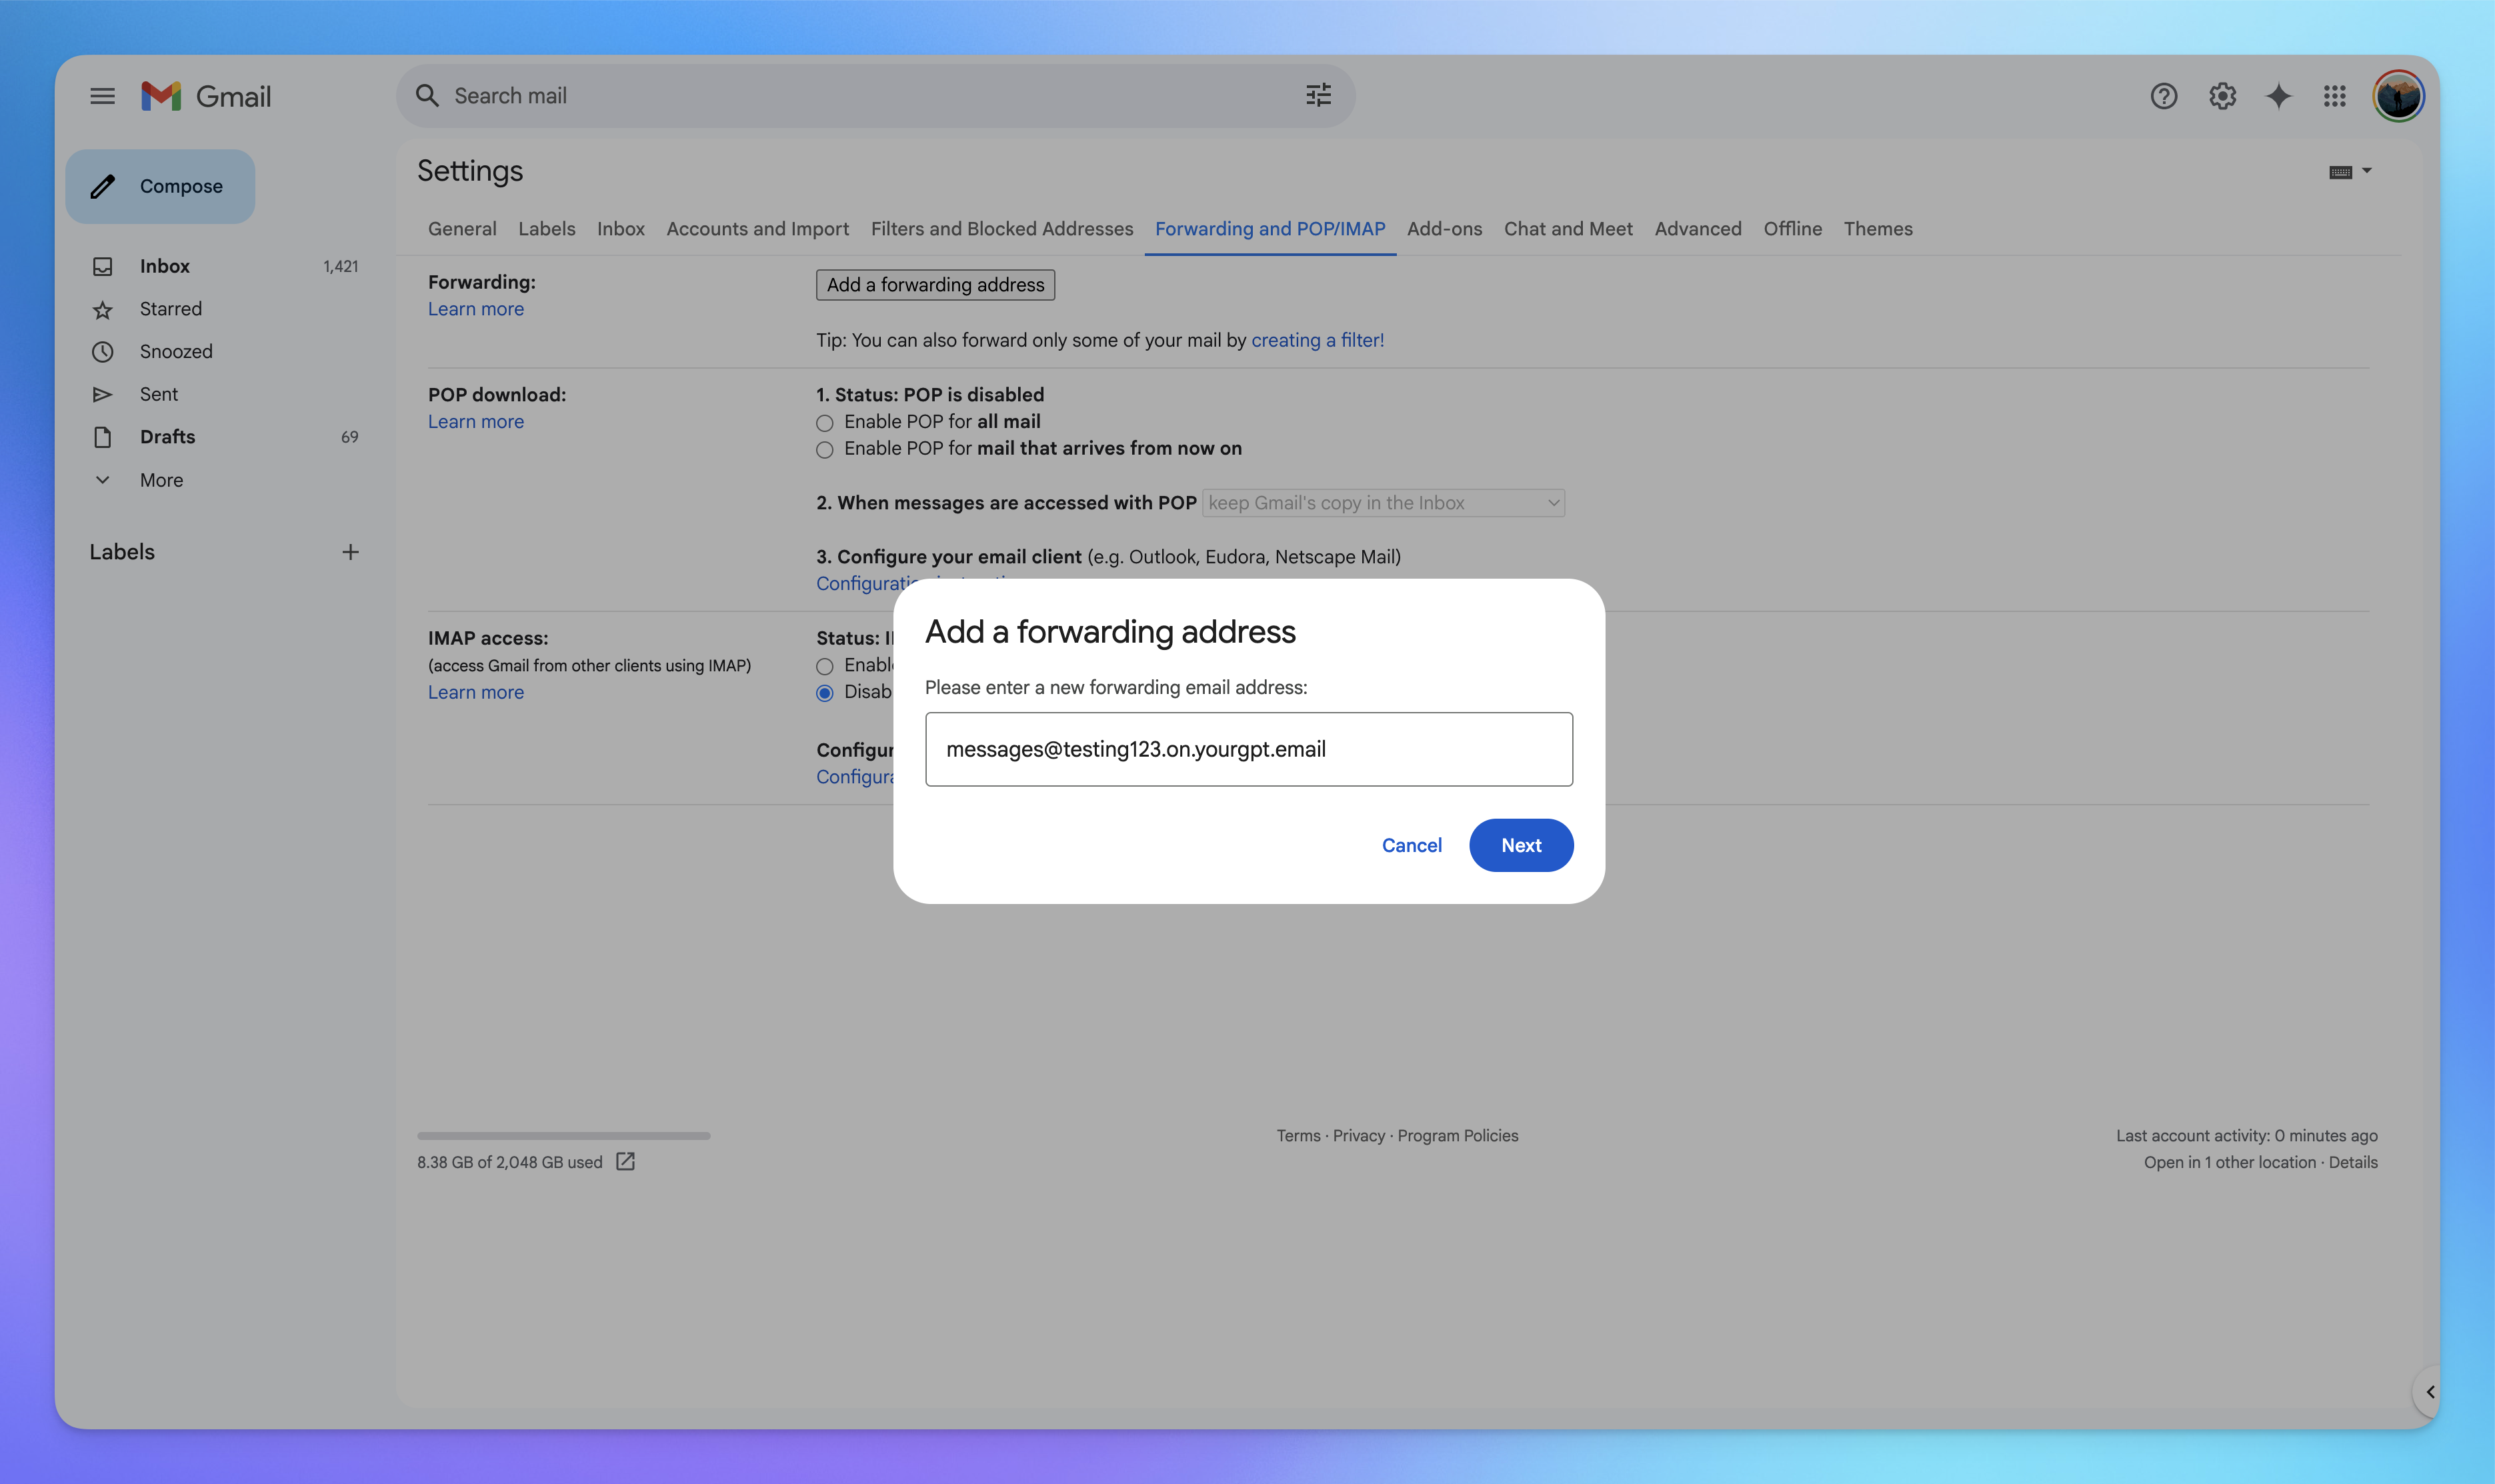
Enter your YourGPT email address (e.g.,
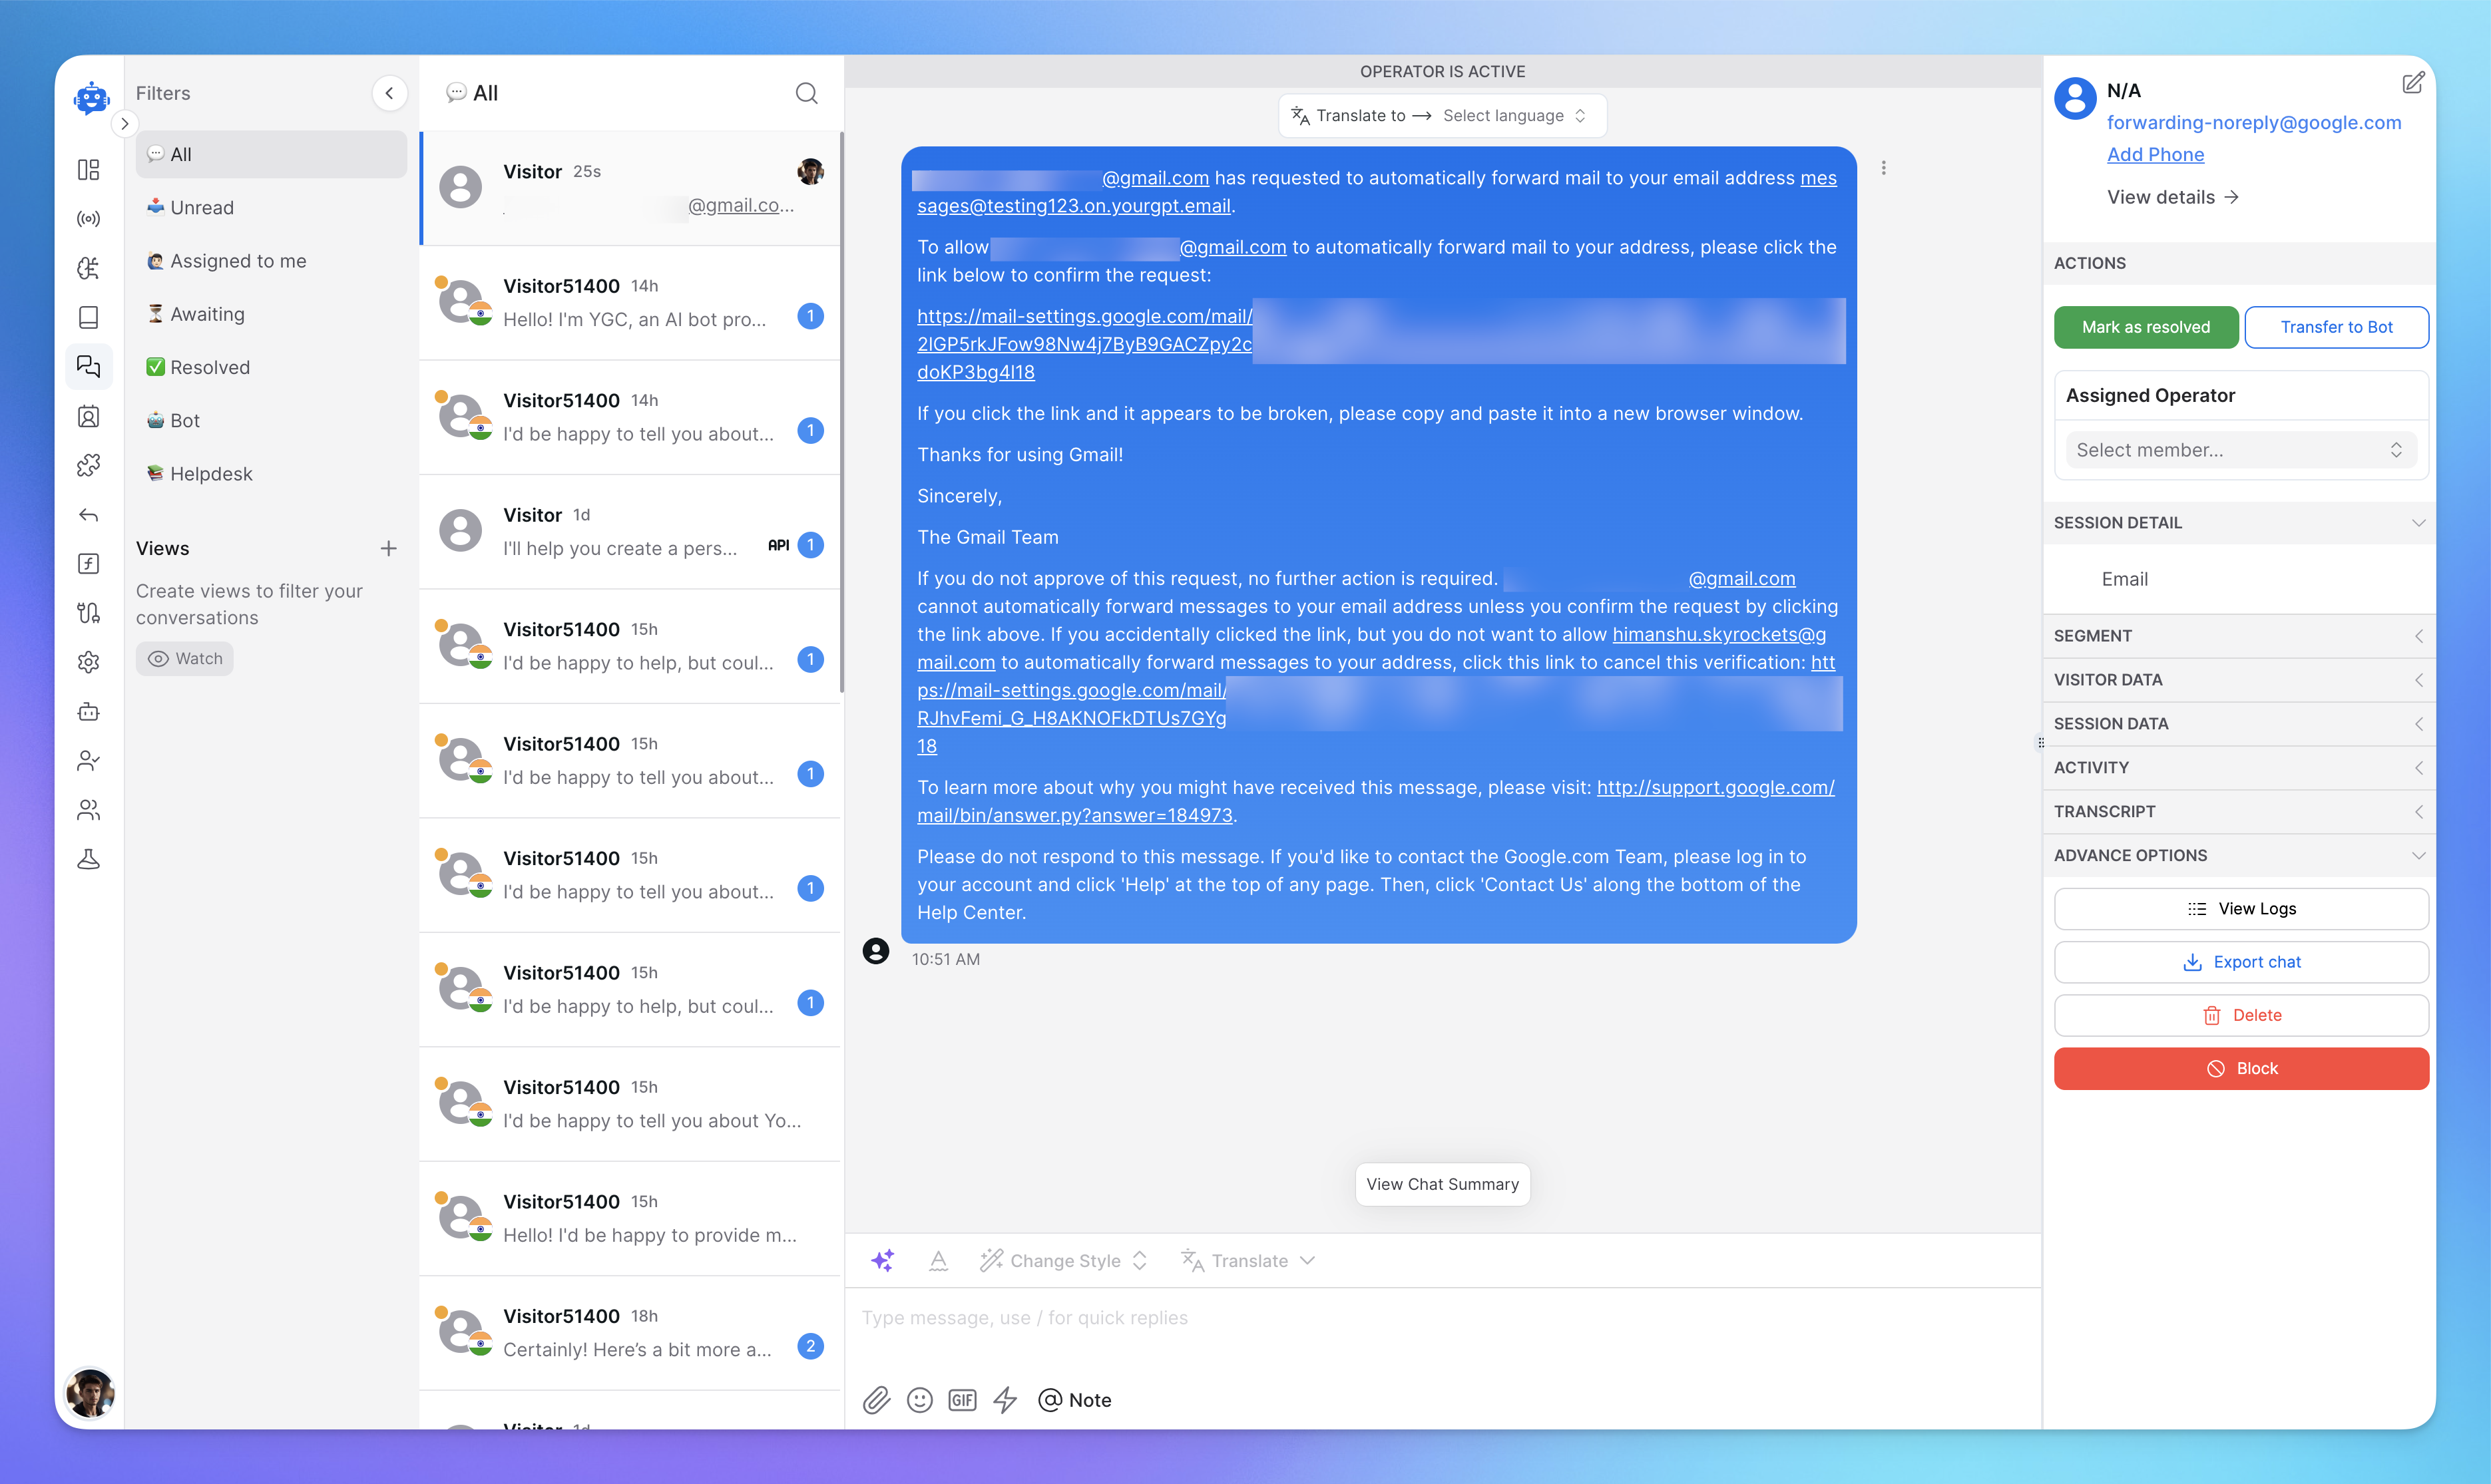
yourname.on.yourgpt.email)Follow the verification steps sent to your YourGPT email
Return to Gmail settings and select
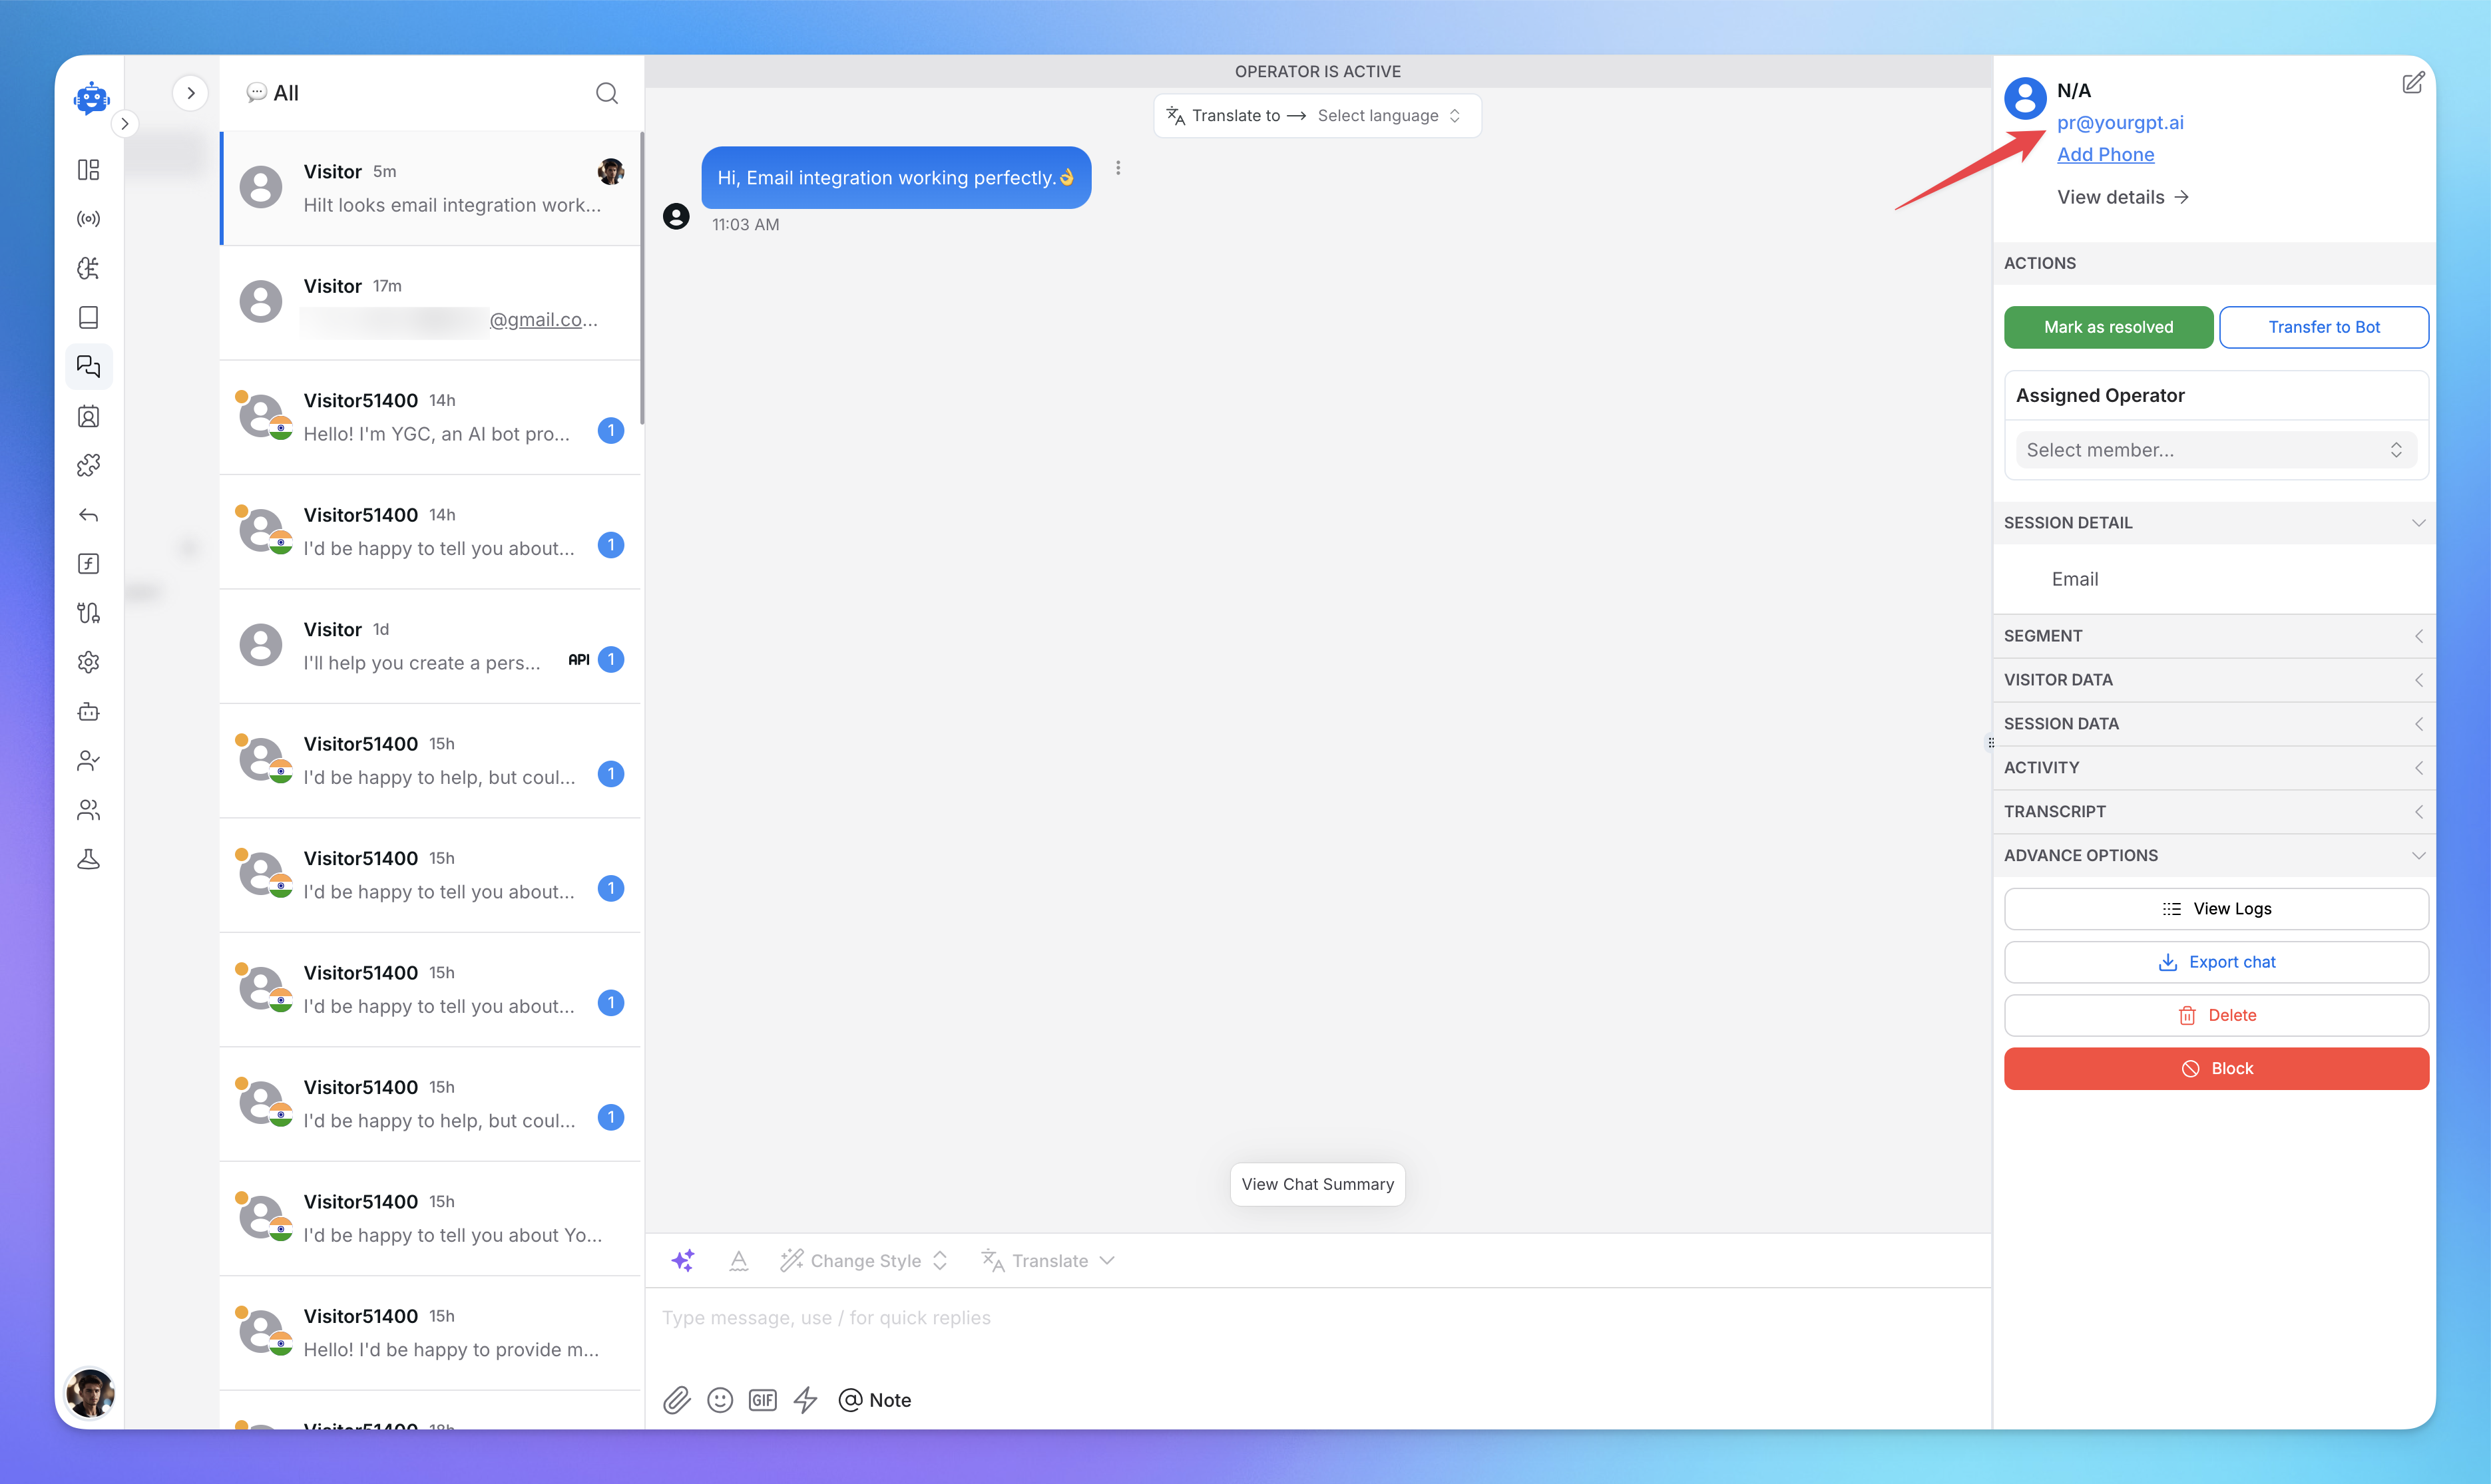
Forward a copy of incoming mailyou can create a filter.Here is the email integration working
For Microsoft 365 / Outlook:
Sign in to your Microsoft 365 admin center
Go to Settings > Mail > Rules
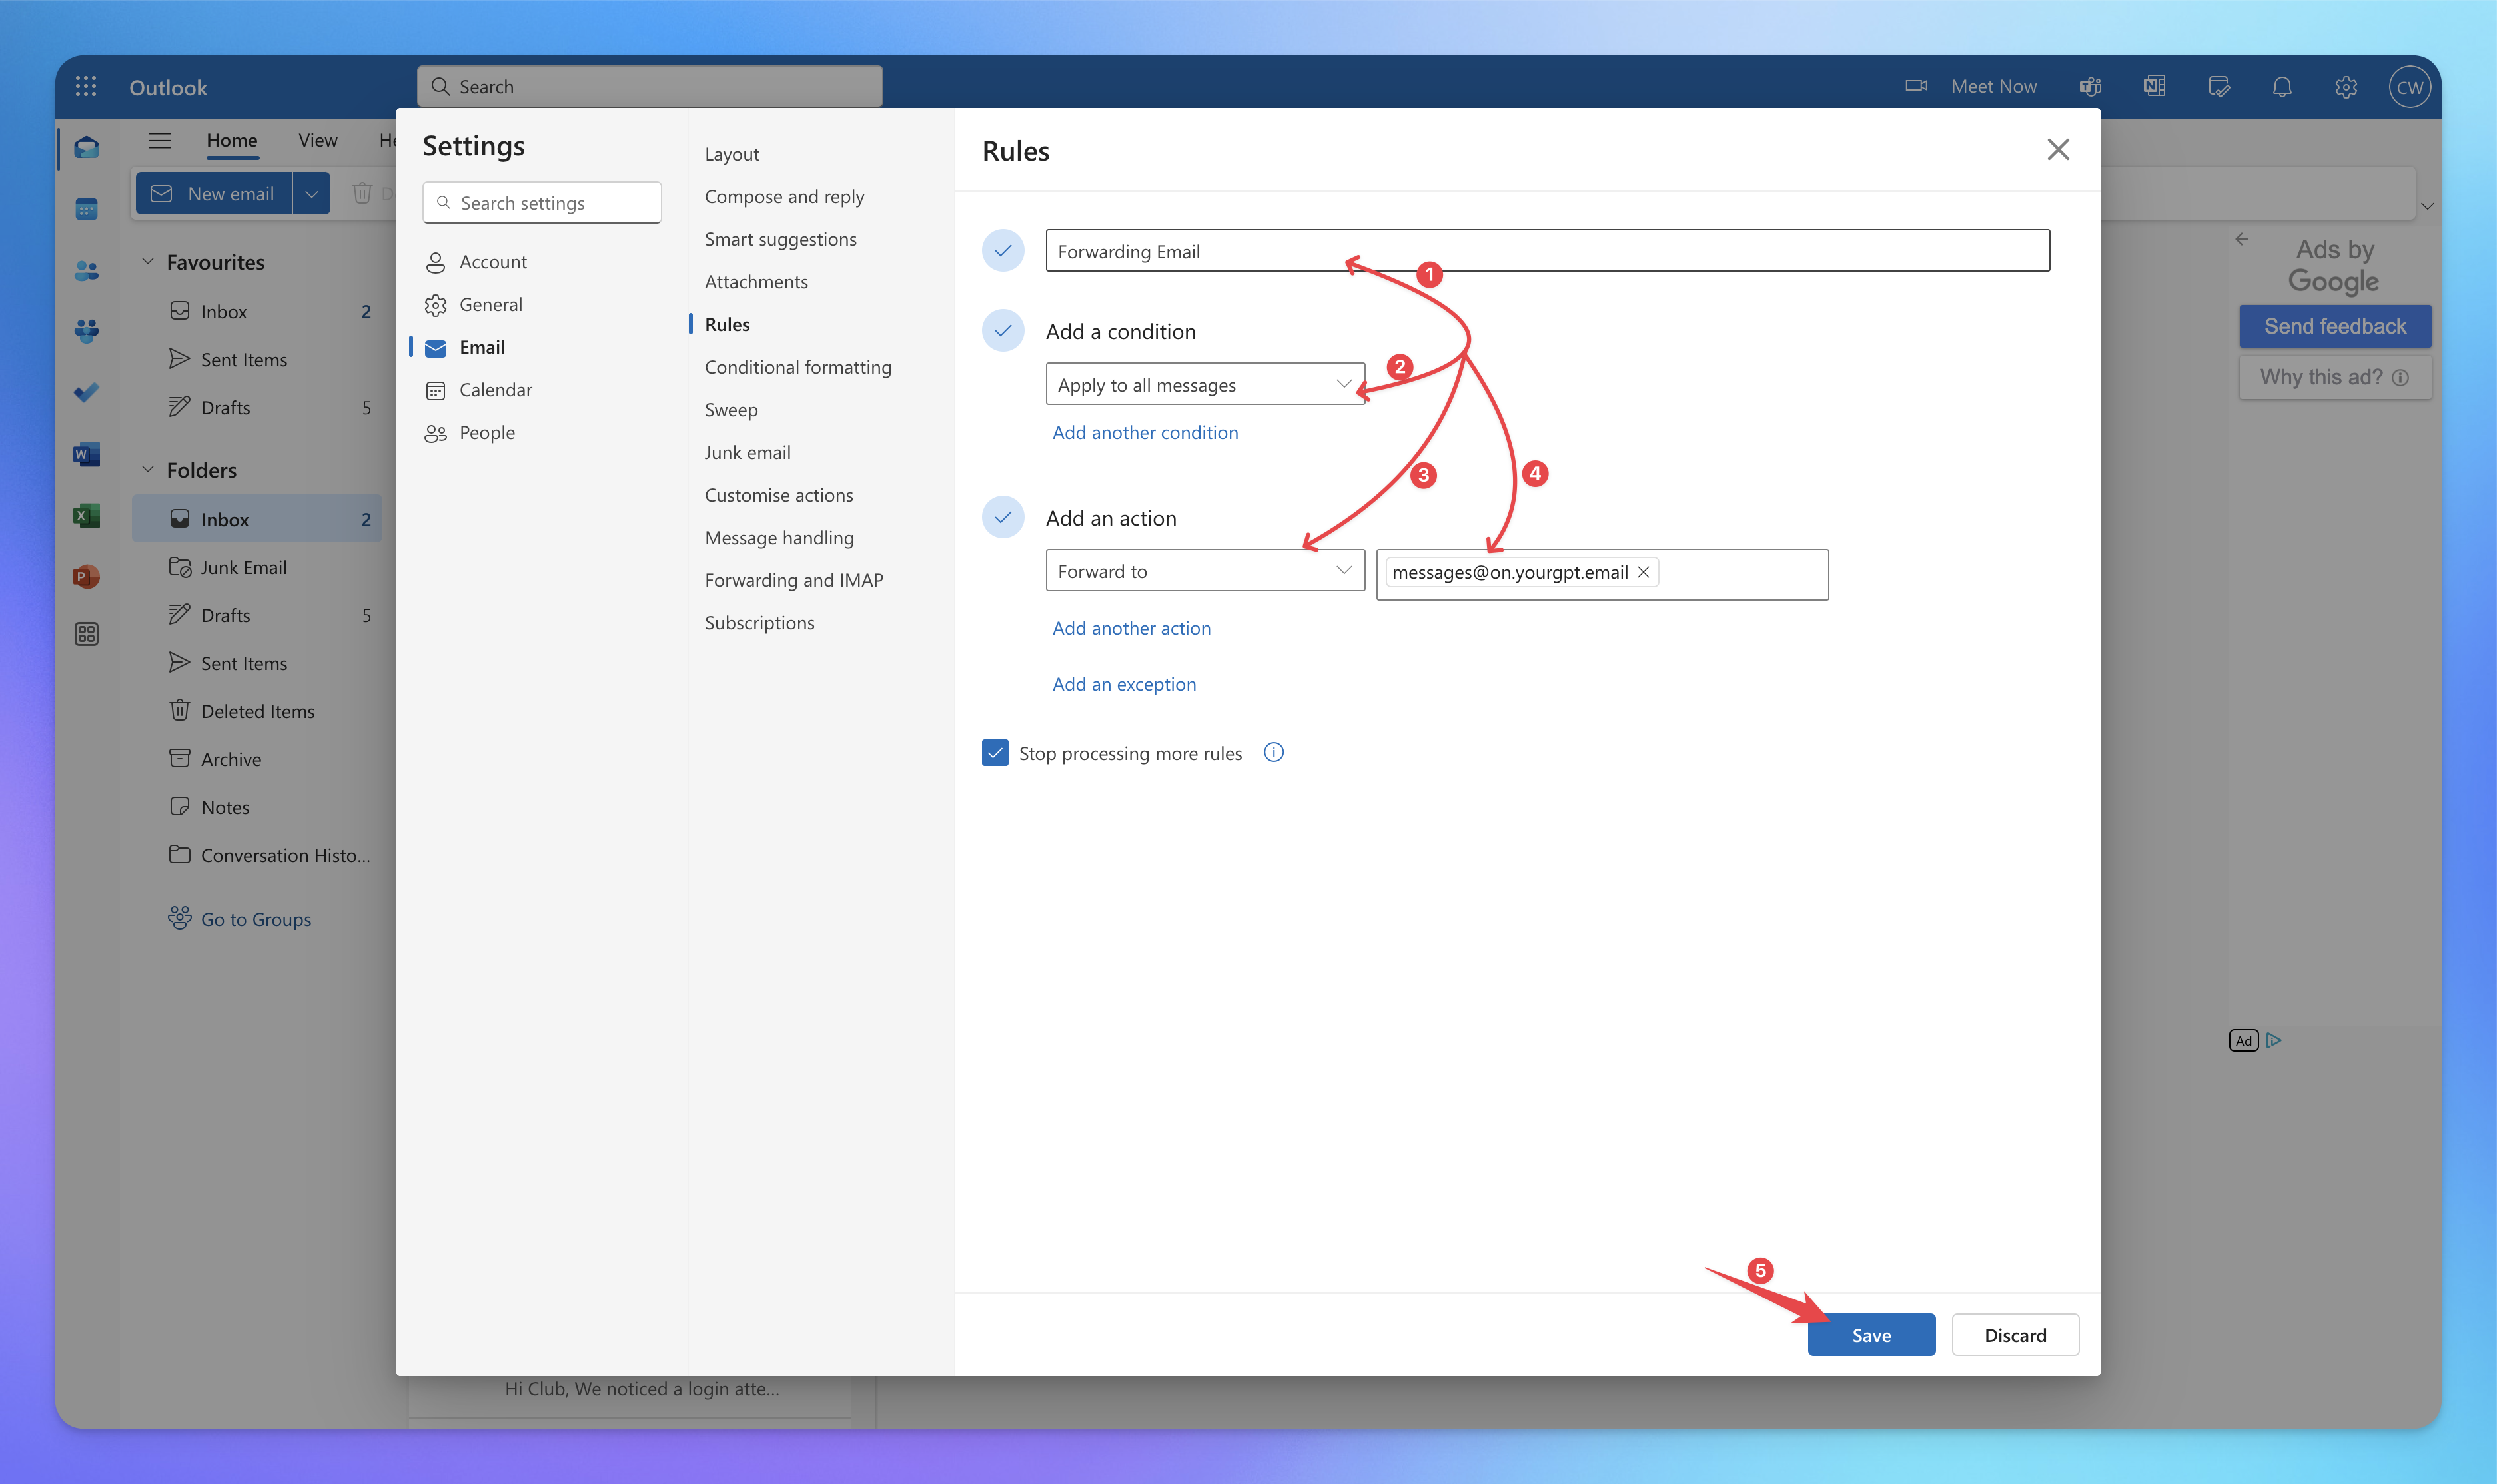
Click + New rule
Set the condition to Apply to all messages
Add an action to Forward the message to
Enter your YourGPT email address
Save the rule and wait for it to take effect
For GoDaddy Email:
Log in to your GoDaddy account
Go to Email & Office
Select the email account to forward
Click Manage > Forwarding
Enter your YourGPT email address
Choose whether to keep a copy of forwarded emails
Save your settings
For Namecheap Email:
Log in to your Namecheap account
Go to Domain List > select your domain
Click Manage next to Private Email
Select the email address to forward
Click Manage > Forwarding
Add your YourGPT email address
Save the forwarding settings
You can also forward emails to other service providers.
💡Tip: Email forwarding is optional—but if your users already reach out via Gmail, Outlook, or other inboxes, forwarding helps you manage and reply to all emails directly from your YourGPT dashboard.
Managing Your Integration
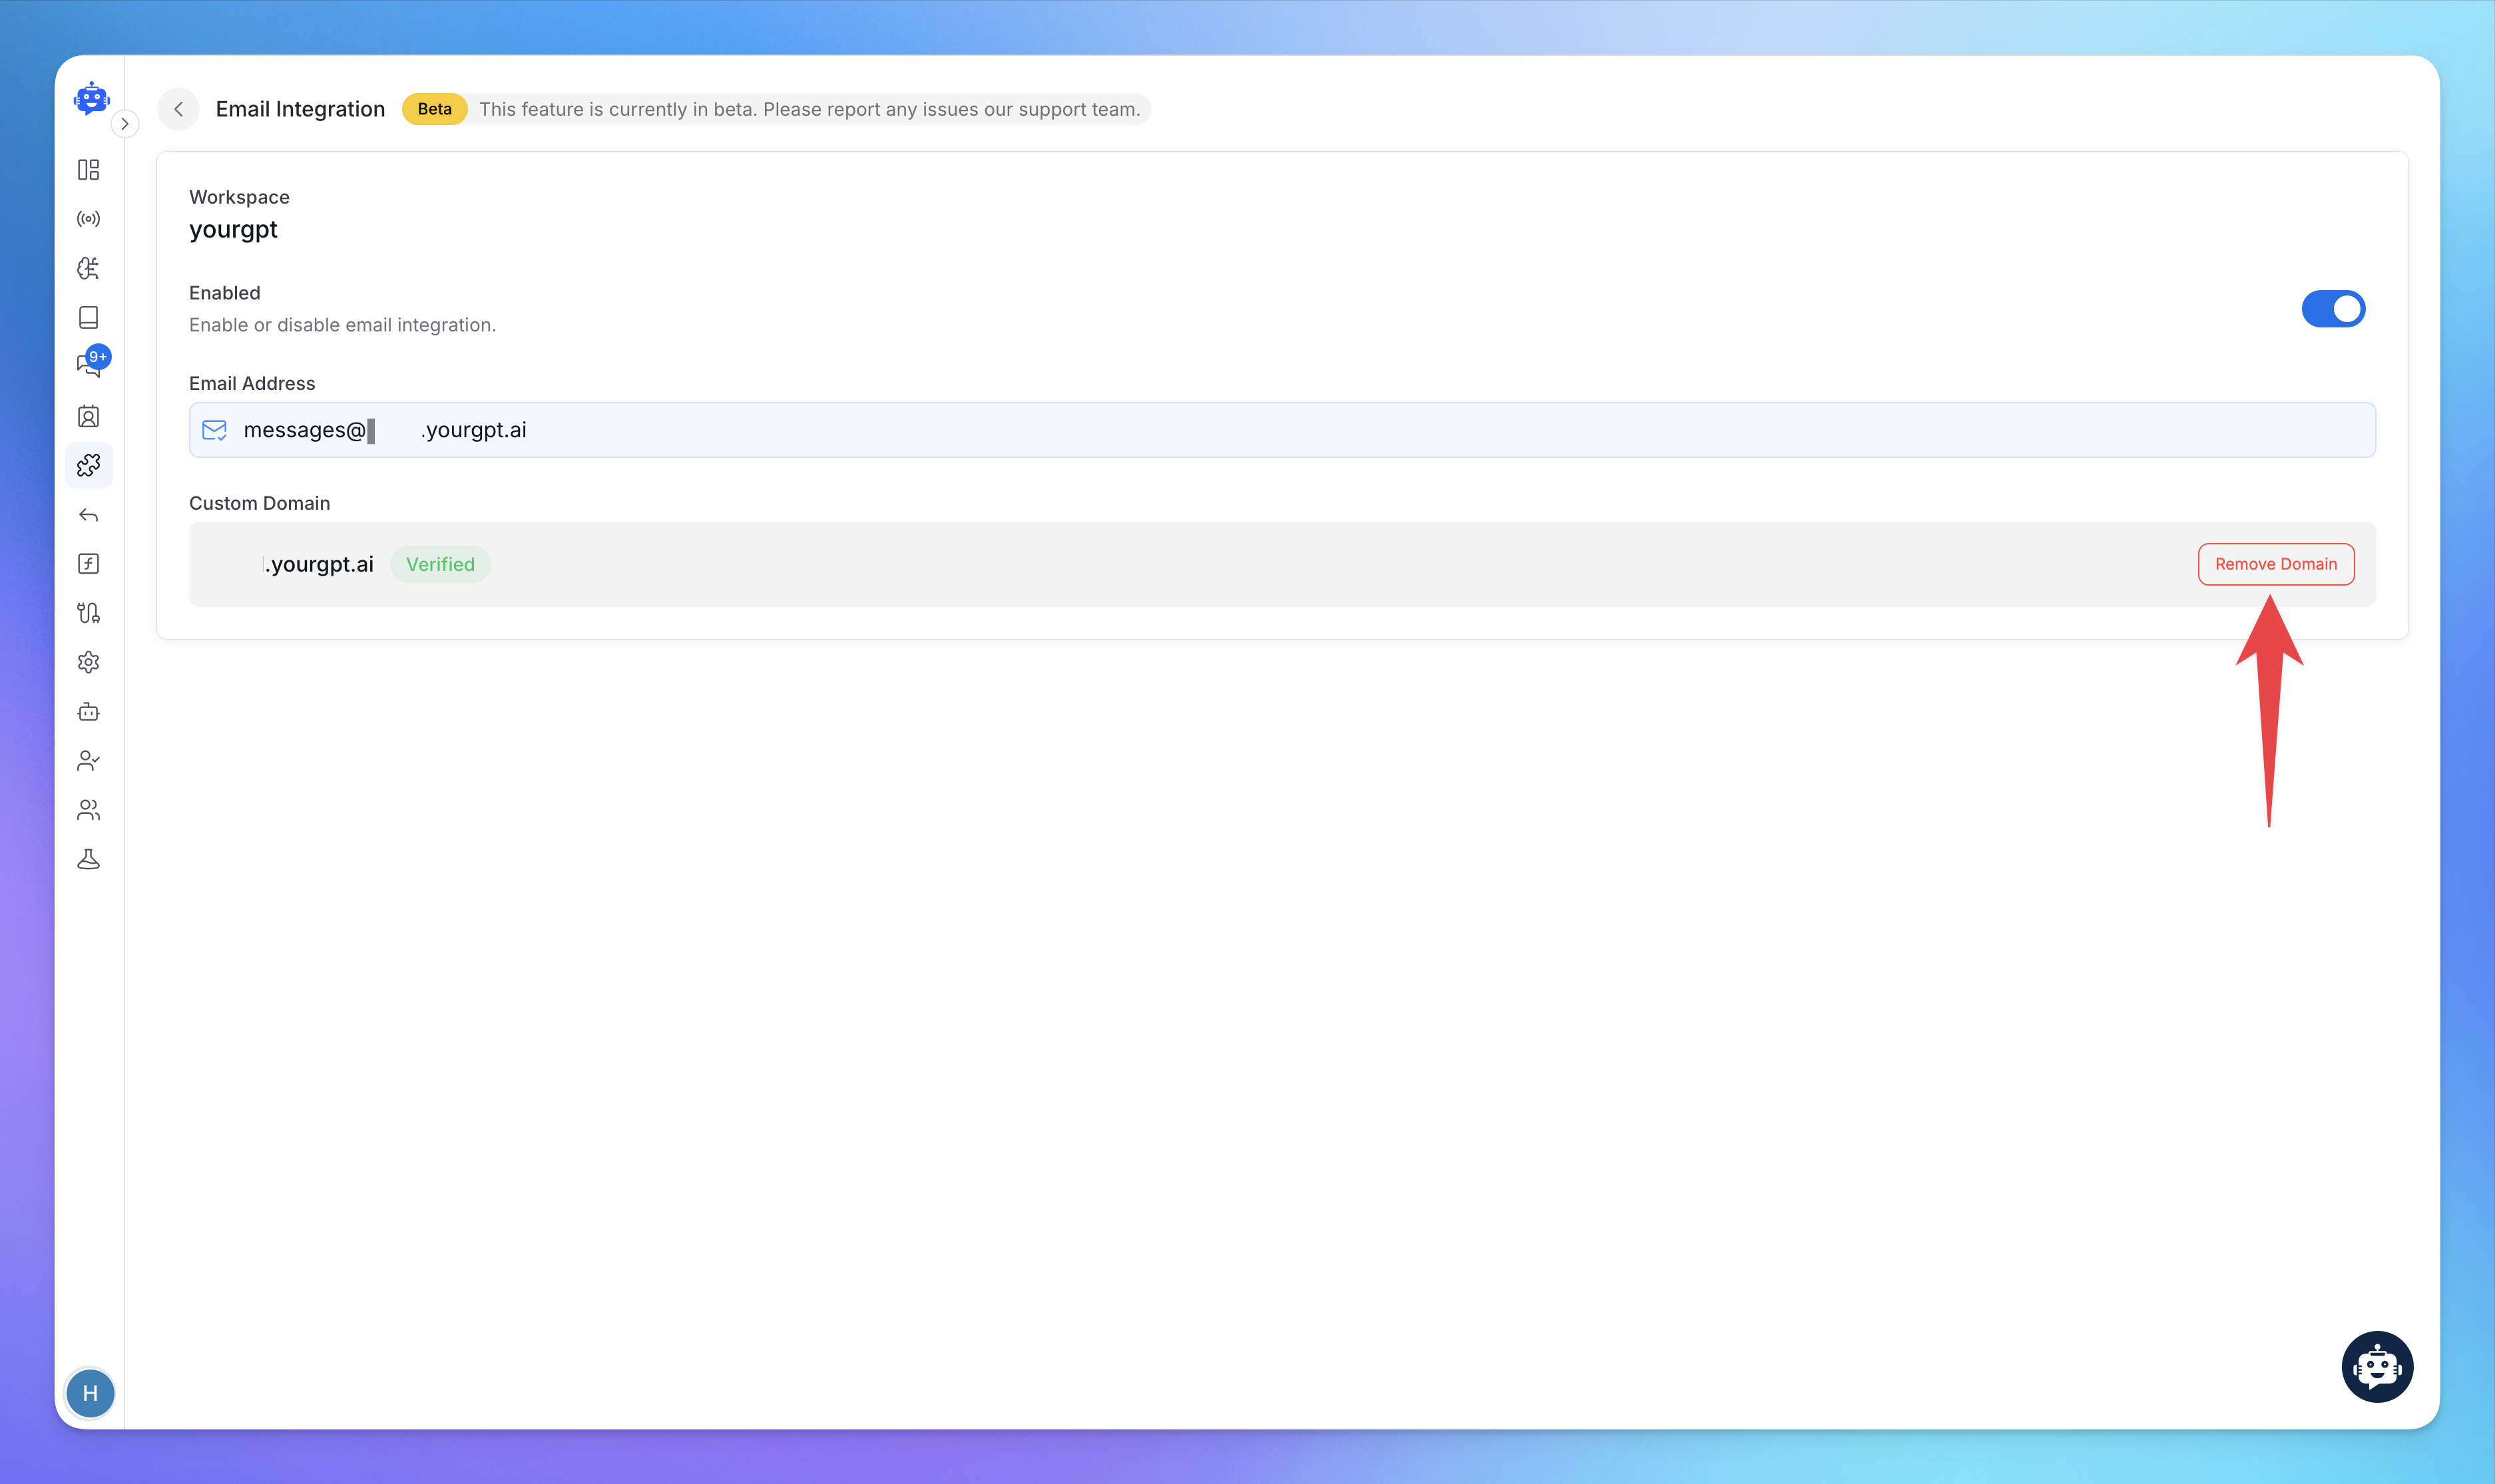
To update or remove your domain, use the Remove Domain button in the custom domain section.
Ensure all changes are saved to avoid any interruptions in service.
Related Articles
MCP Setup Guide for Claude Desktop, Cursor, and Windsurf
How to setup Model Context Protocol
How To Create a AI Helpdesk?
A step-by-step guide to create, customise, and launch your AI helpdesk
How To Setup Twilio Whatsapp Integration
Easy Setup Twilio for WhatsApp with YourGPT AI chatbot
How to Use Webhooks and Set Them Up in YourGPT AI?
What Is a Webhook, How Does It Work, & How to setup?
How to integrate YourGPT Chatbot widget in a flutter application
Step-by-Step guide to integrate YourGPT widget in a flutter application
How to integrate YourGPT Chat widget in an android application
Step-by-Step guide to integrate YourGPT widget in an android application