
MCP Setup Guide for Claude Desktop, Cursor, and Windsurf
The Model Context Protocol (MCP) lets you connect your YourGPT chatbot as a knowledgebase inside tools like Claude Desktop, Cursor, and Windsurf.
This guide help you through two main parts:
Setting up MCP inside YourGPT
Connecting it with your tool (Claude Desktop, Cursor, or Windsurf)
1. Configure MCP in YourGPT
Before connecting with any tool, you must activate the MCP server from your YourGPT dashboard.
Step 1: Open the MCP Integration
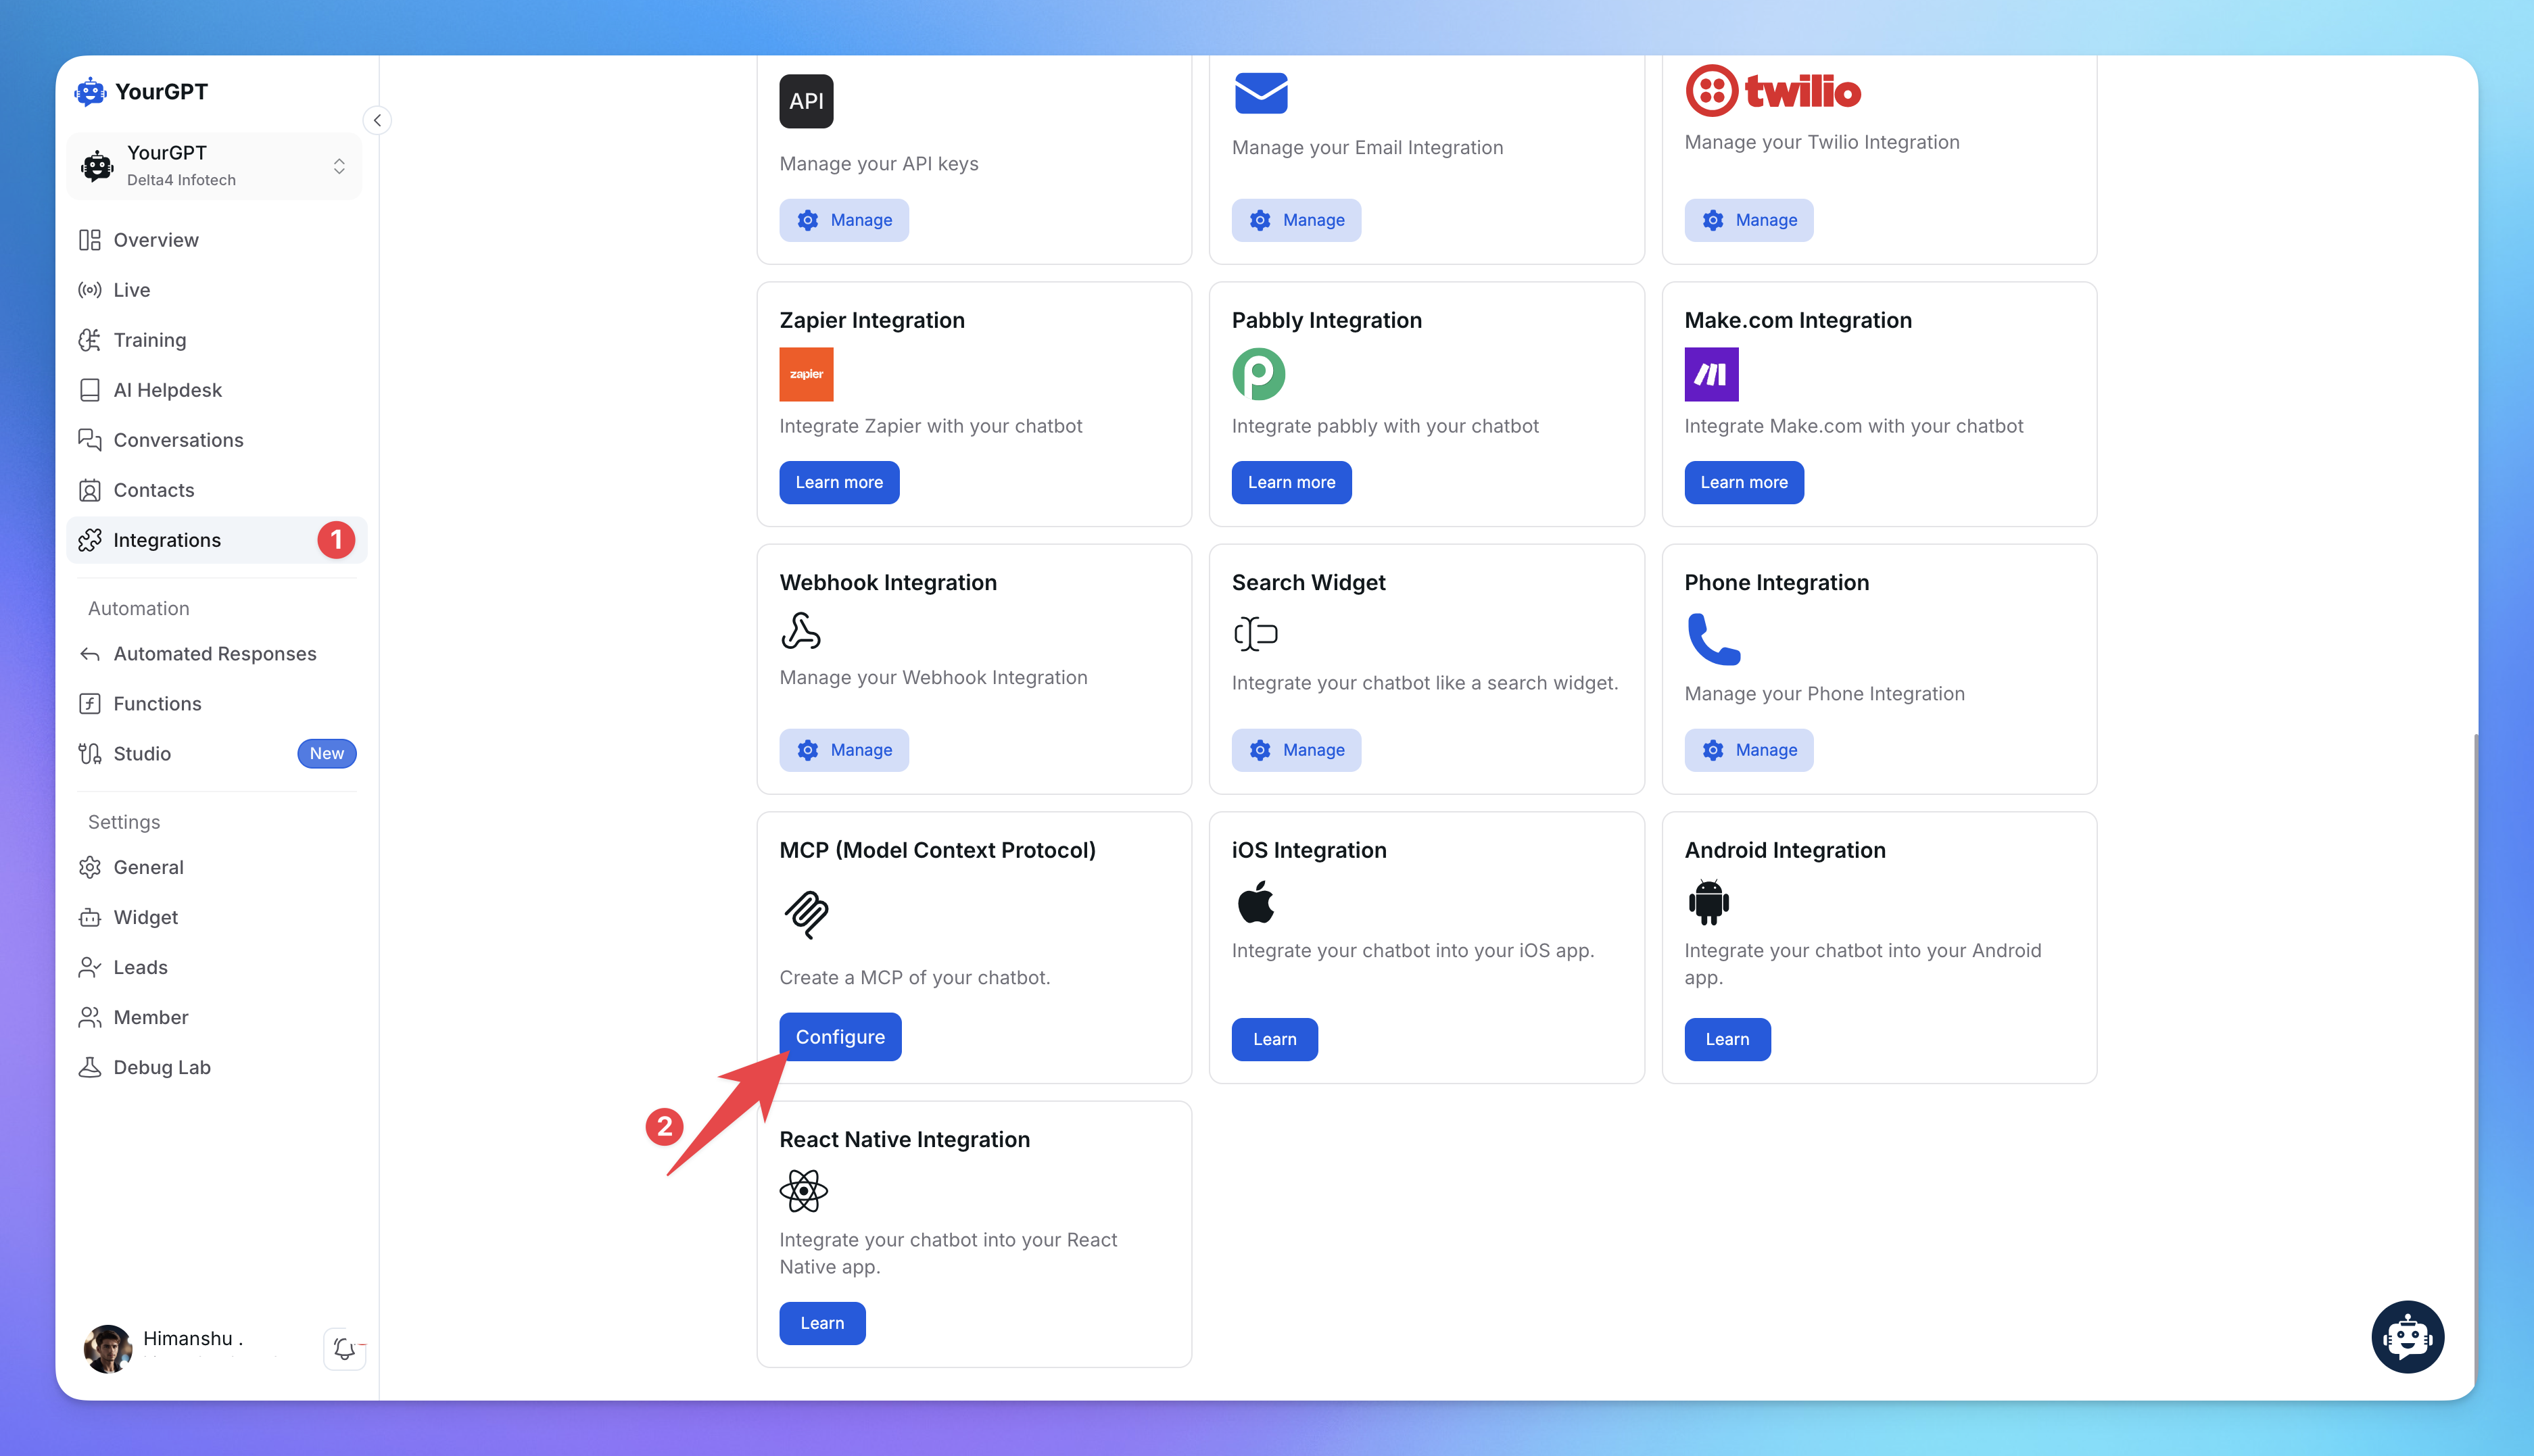
Go to YourGPT Dashboard:
Then Integrations → MCP (Model Context Protocol)
Click Configure.
Step 2: Create MCP Server
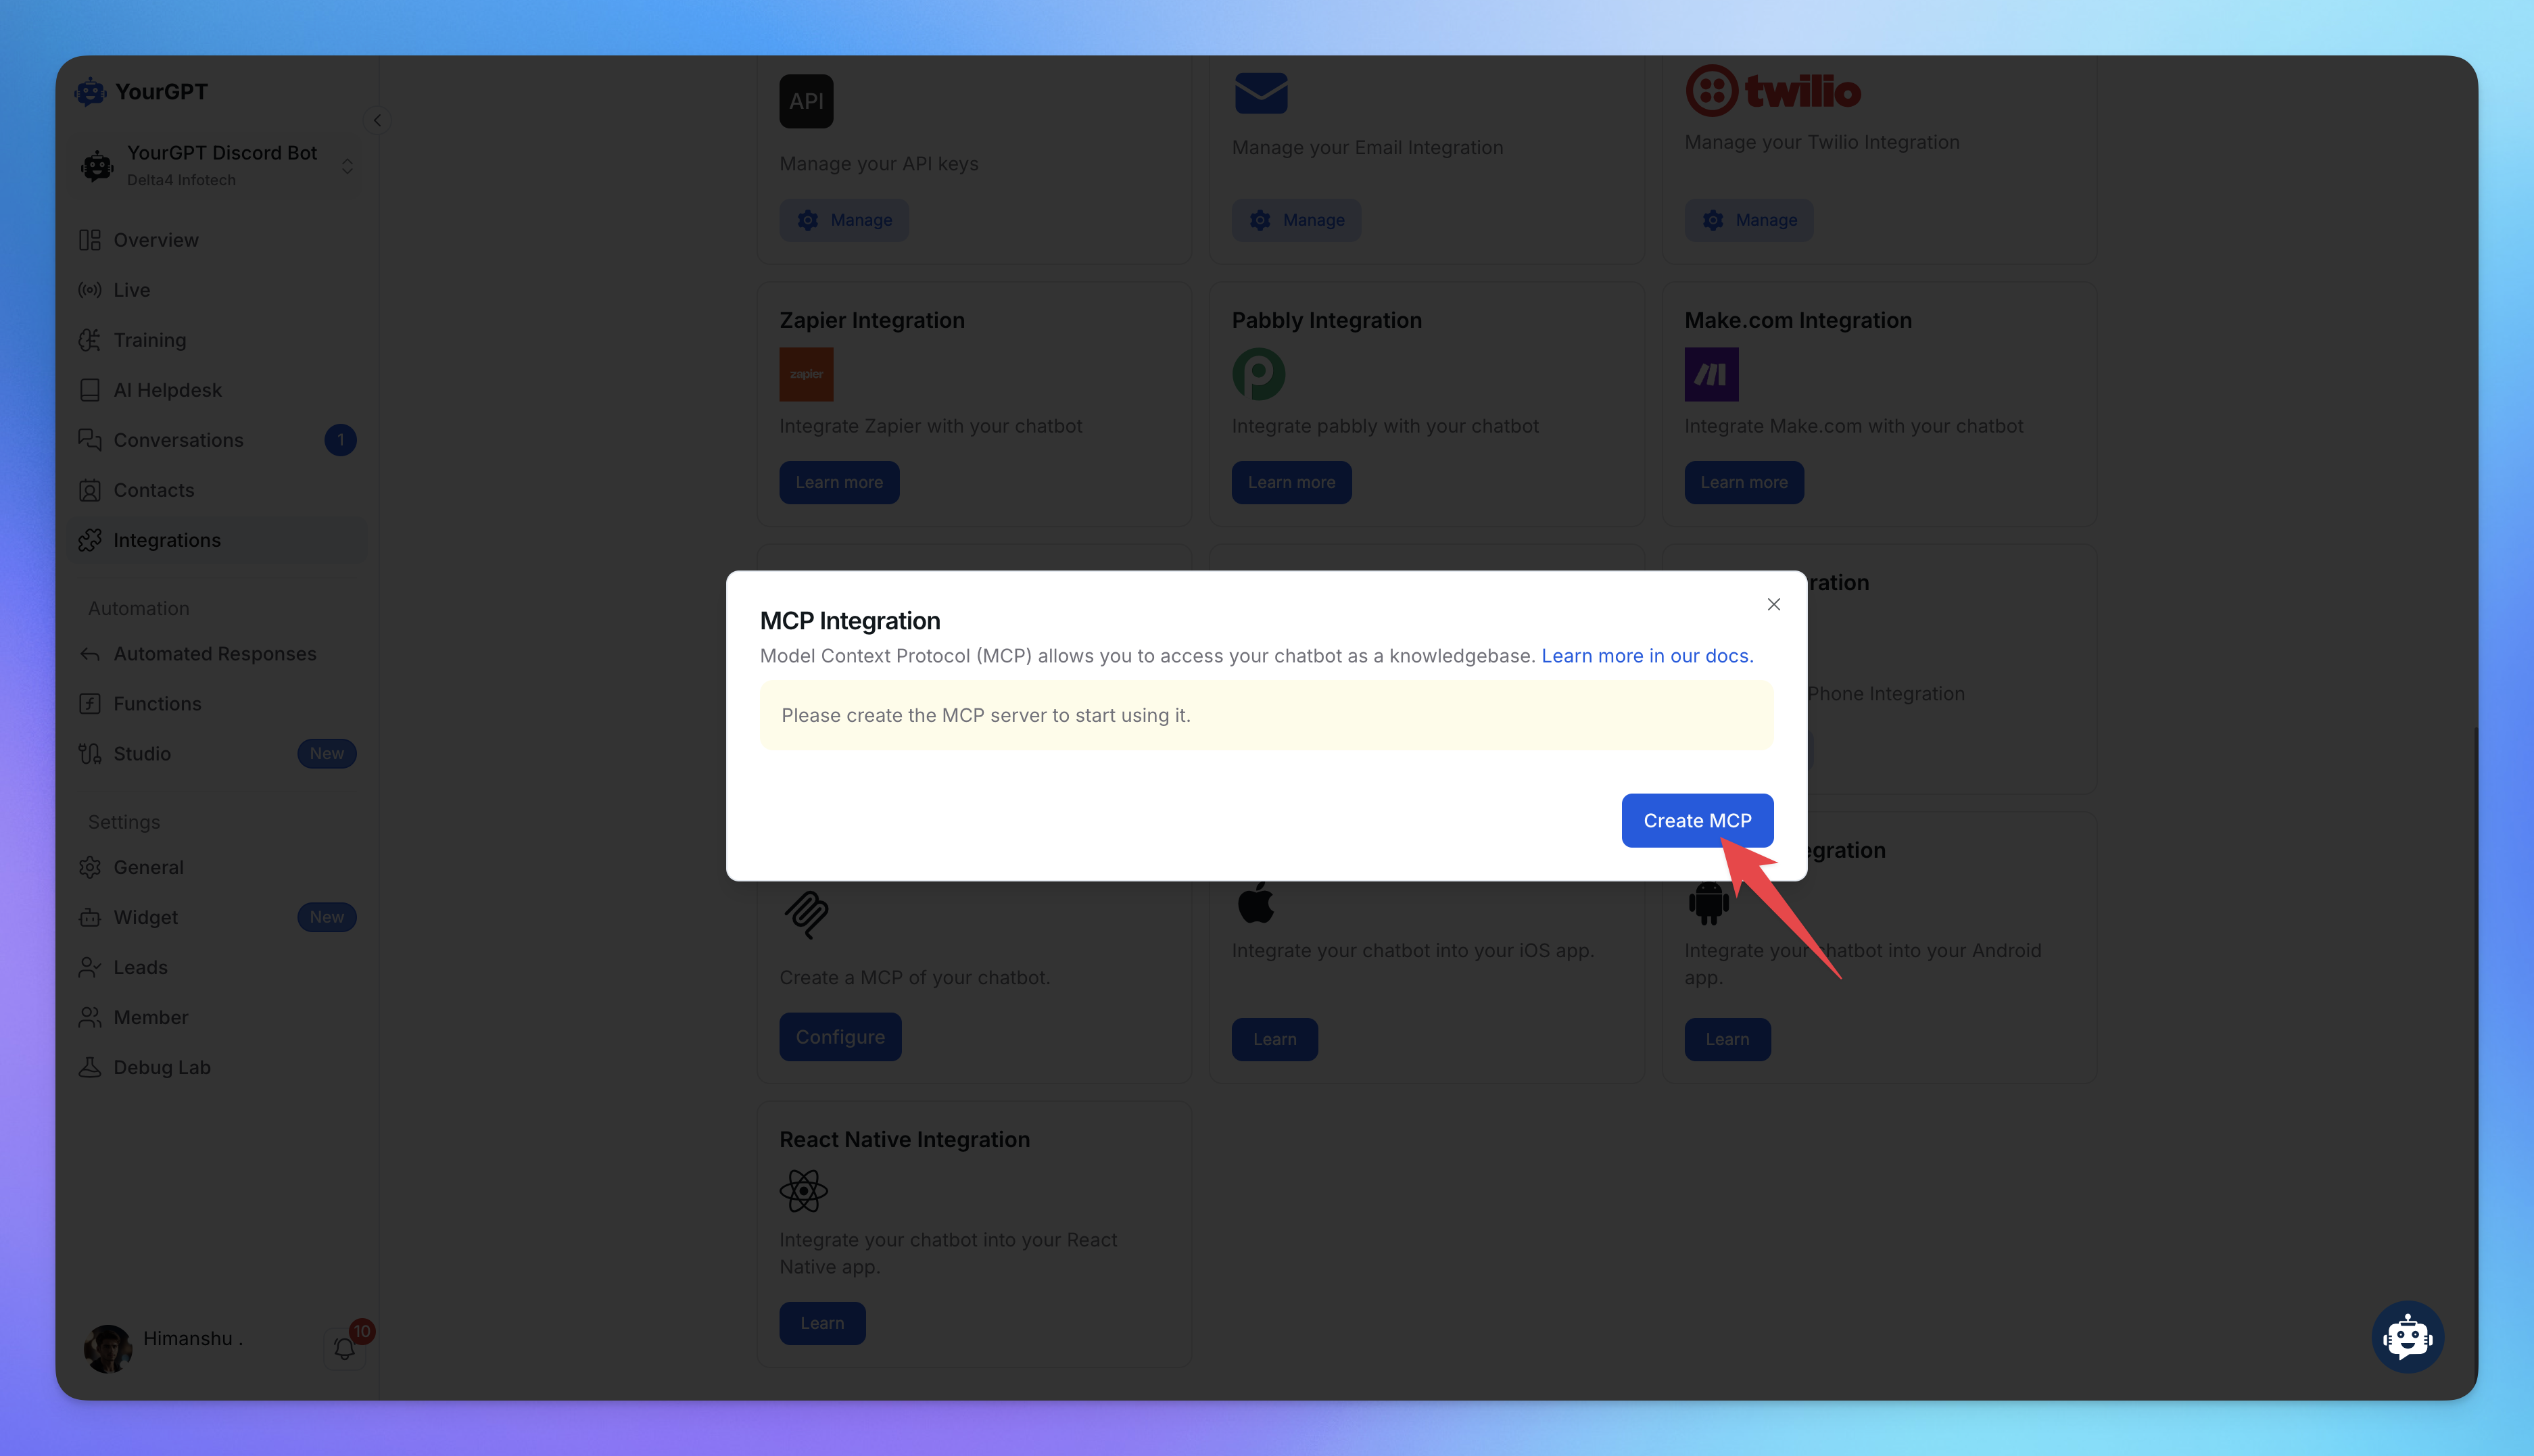
Click on Create MCP to generate your chatbot’s MCP configuration.
Step 3: Select Your Target Tool
After the server is created, you’ll see a configuration screen with tool-specific tabs for:
Claude Desktop
Cursor
Windsurf
Each tab gives you a JSON block to copy, along with instructions on where to place it.
Part 2: Connect MCP with Your Tool
Now that your chatbot is MCP-ready, here’s how to connect it with each tool.
2.1 Claude Desktop

Step 1: Open Claude Settings
Click Claude in your menu bar and select Settings.
Step 2: Enable Developer Mode
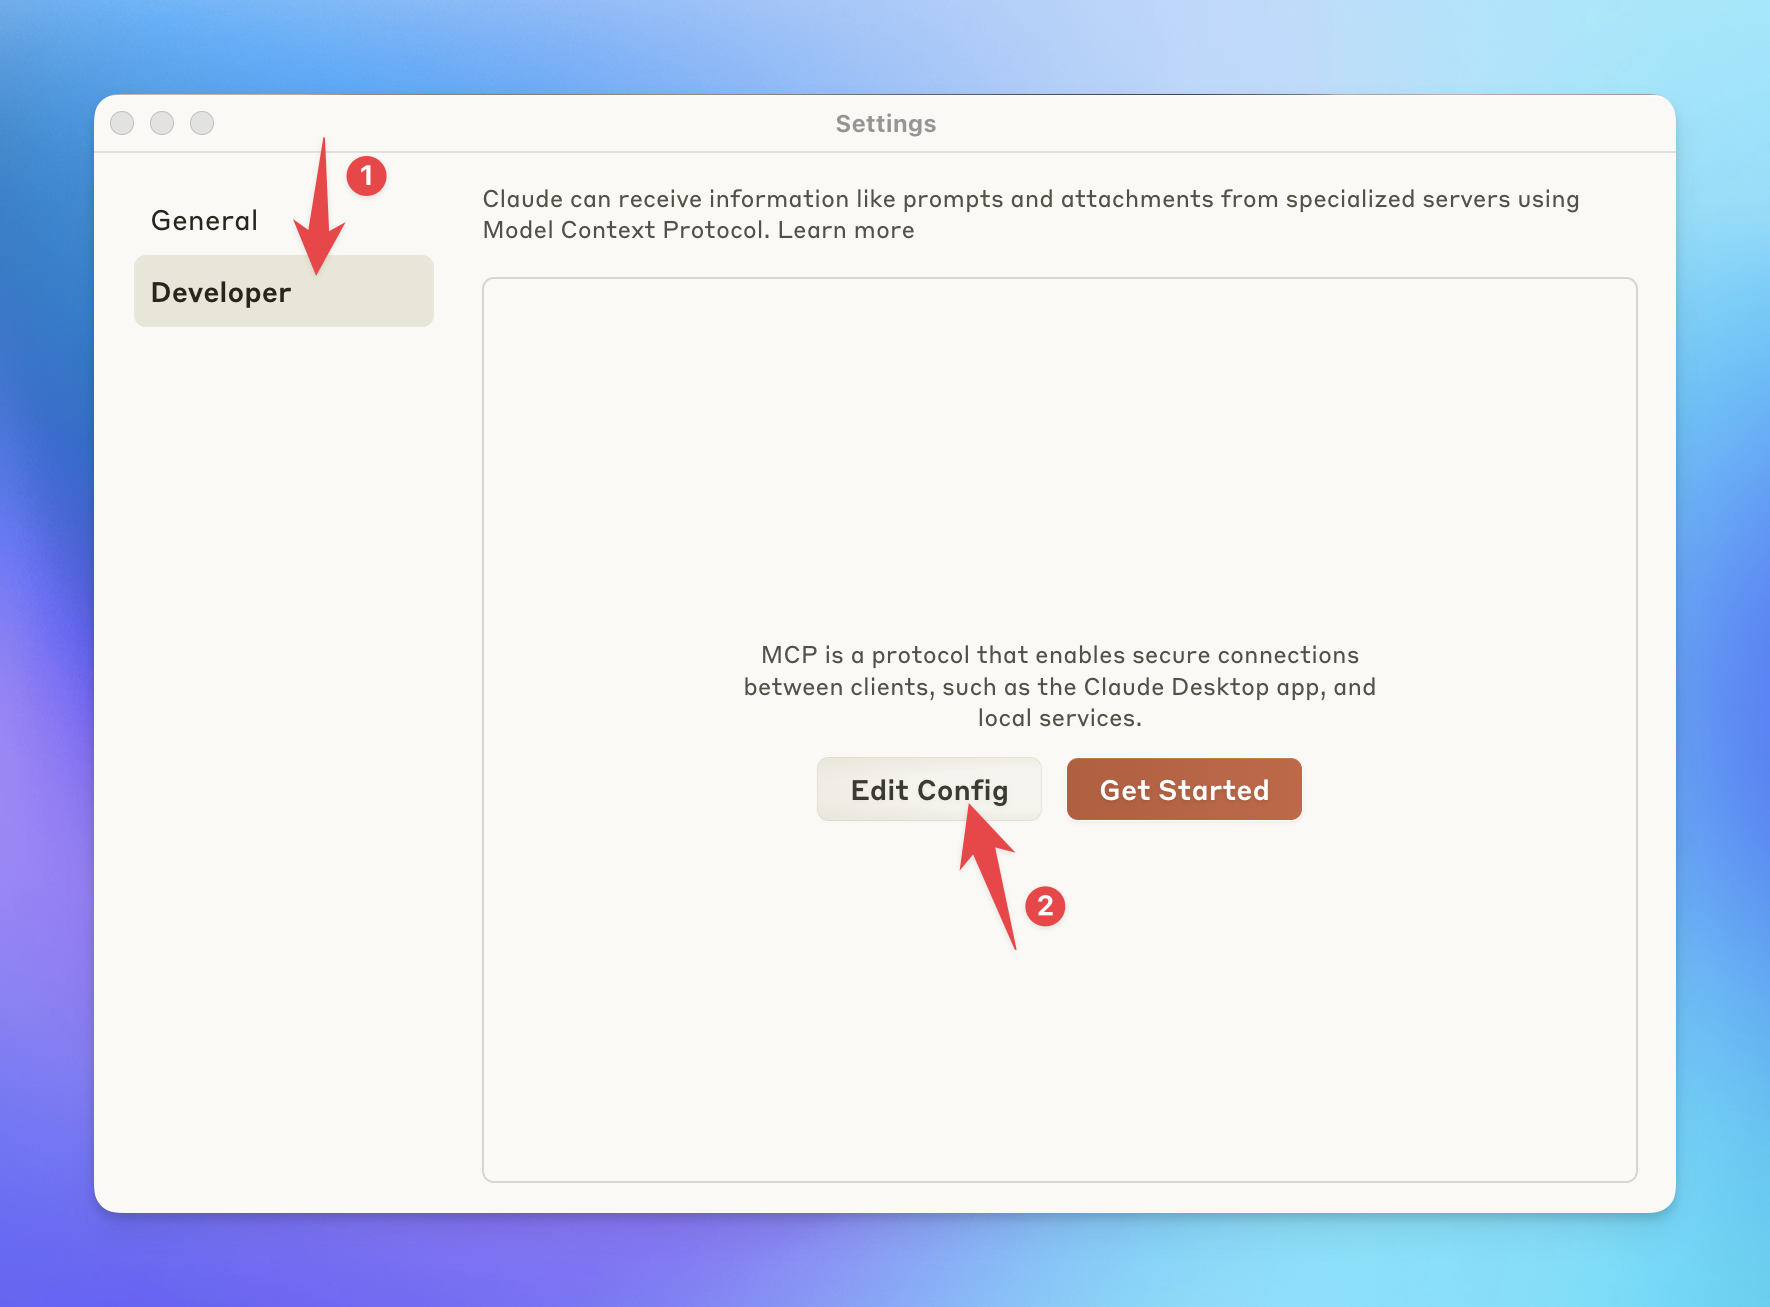
From the settings sidebar, go to Developer and click Edit Config.
Step 3: Locate Configuration File
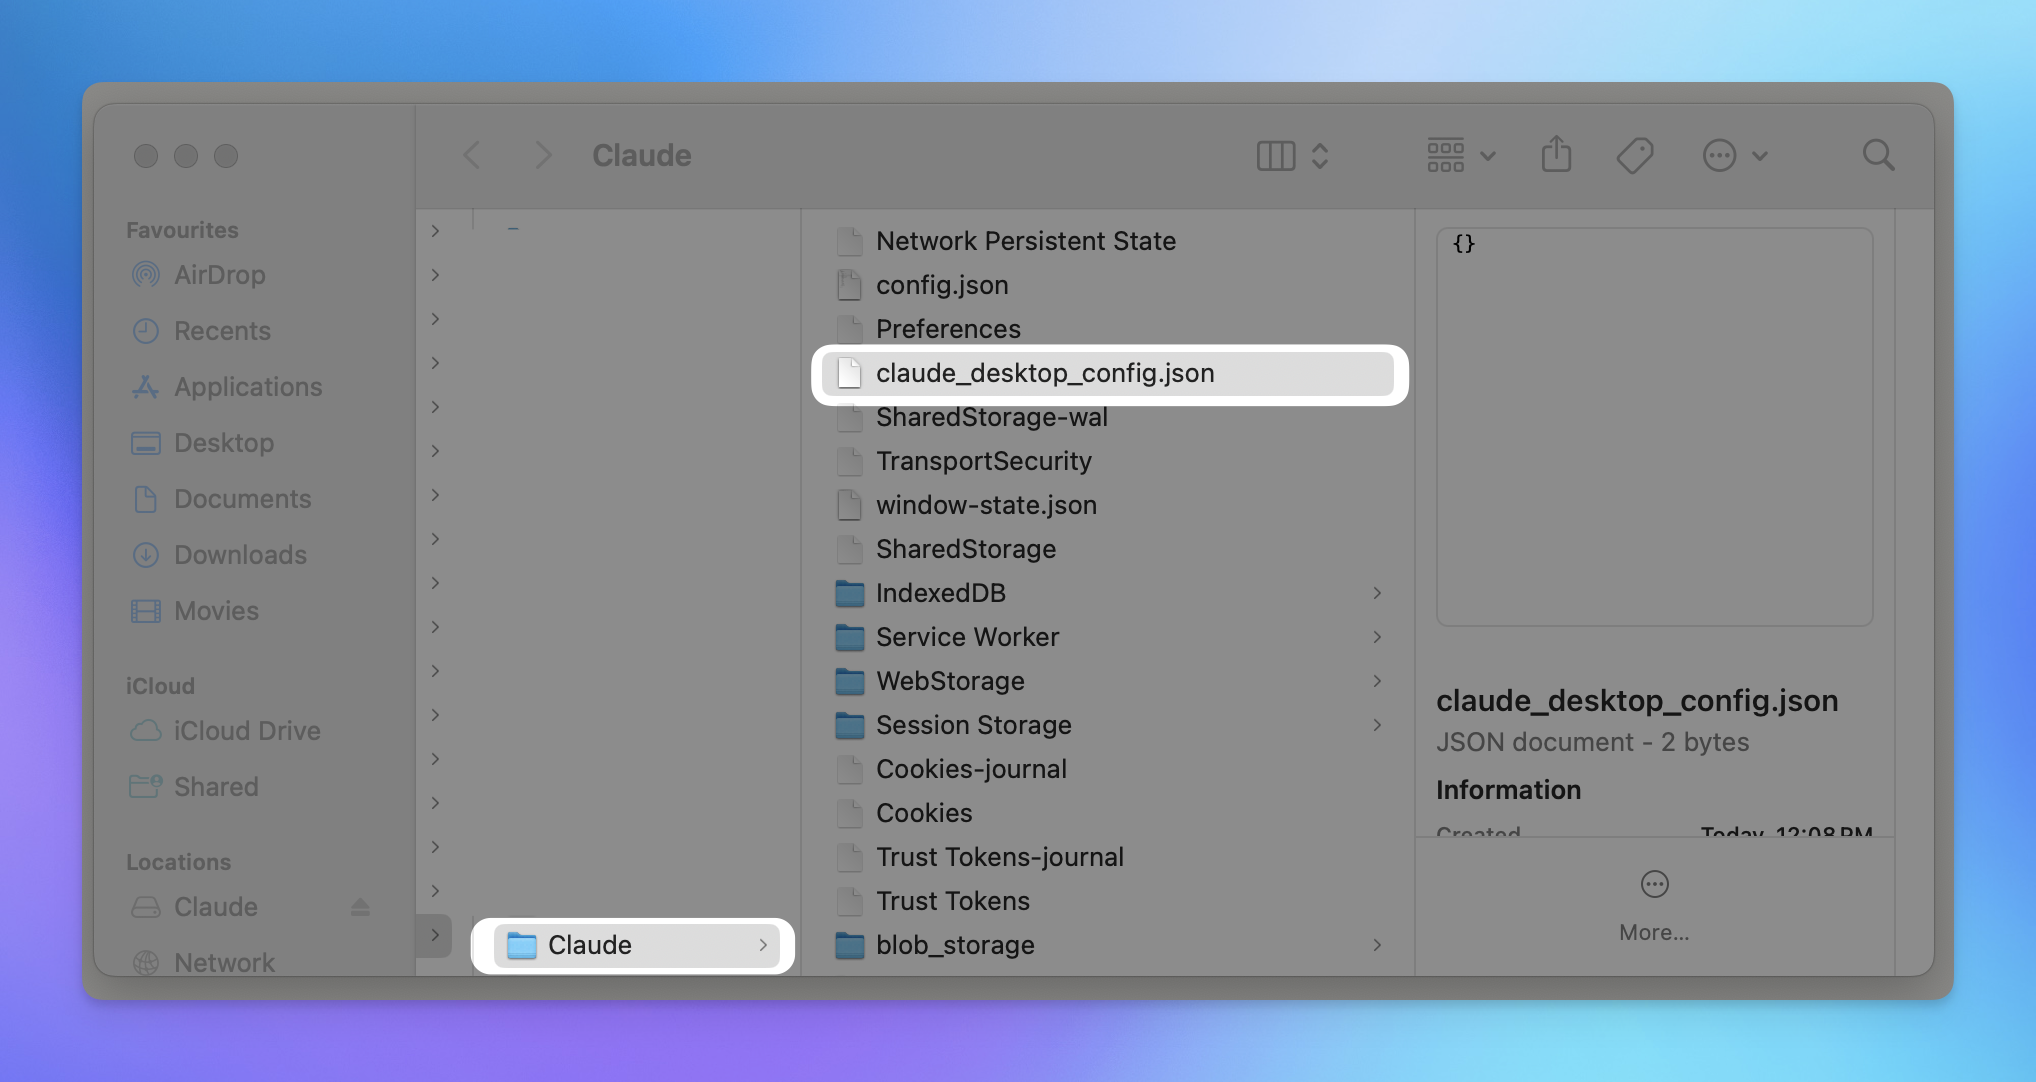
On macOS, go to:
~/Library/Application Support/Claude/claude_desktop_config.json
If it’s not there, relaunch Claude or check permissions.
Step 4: Add Your MCP Configuration
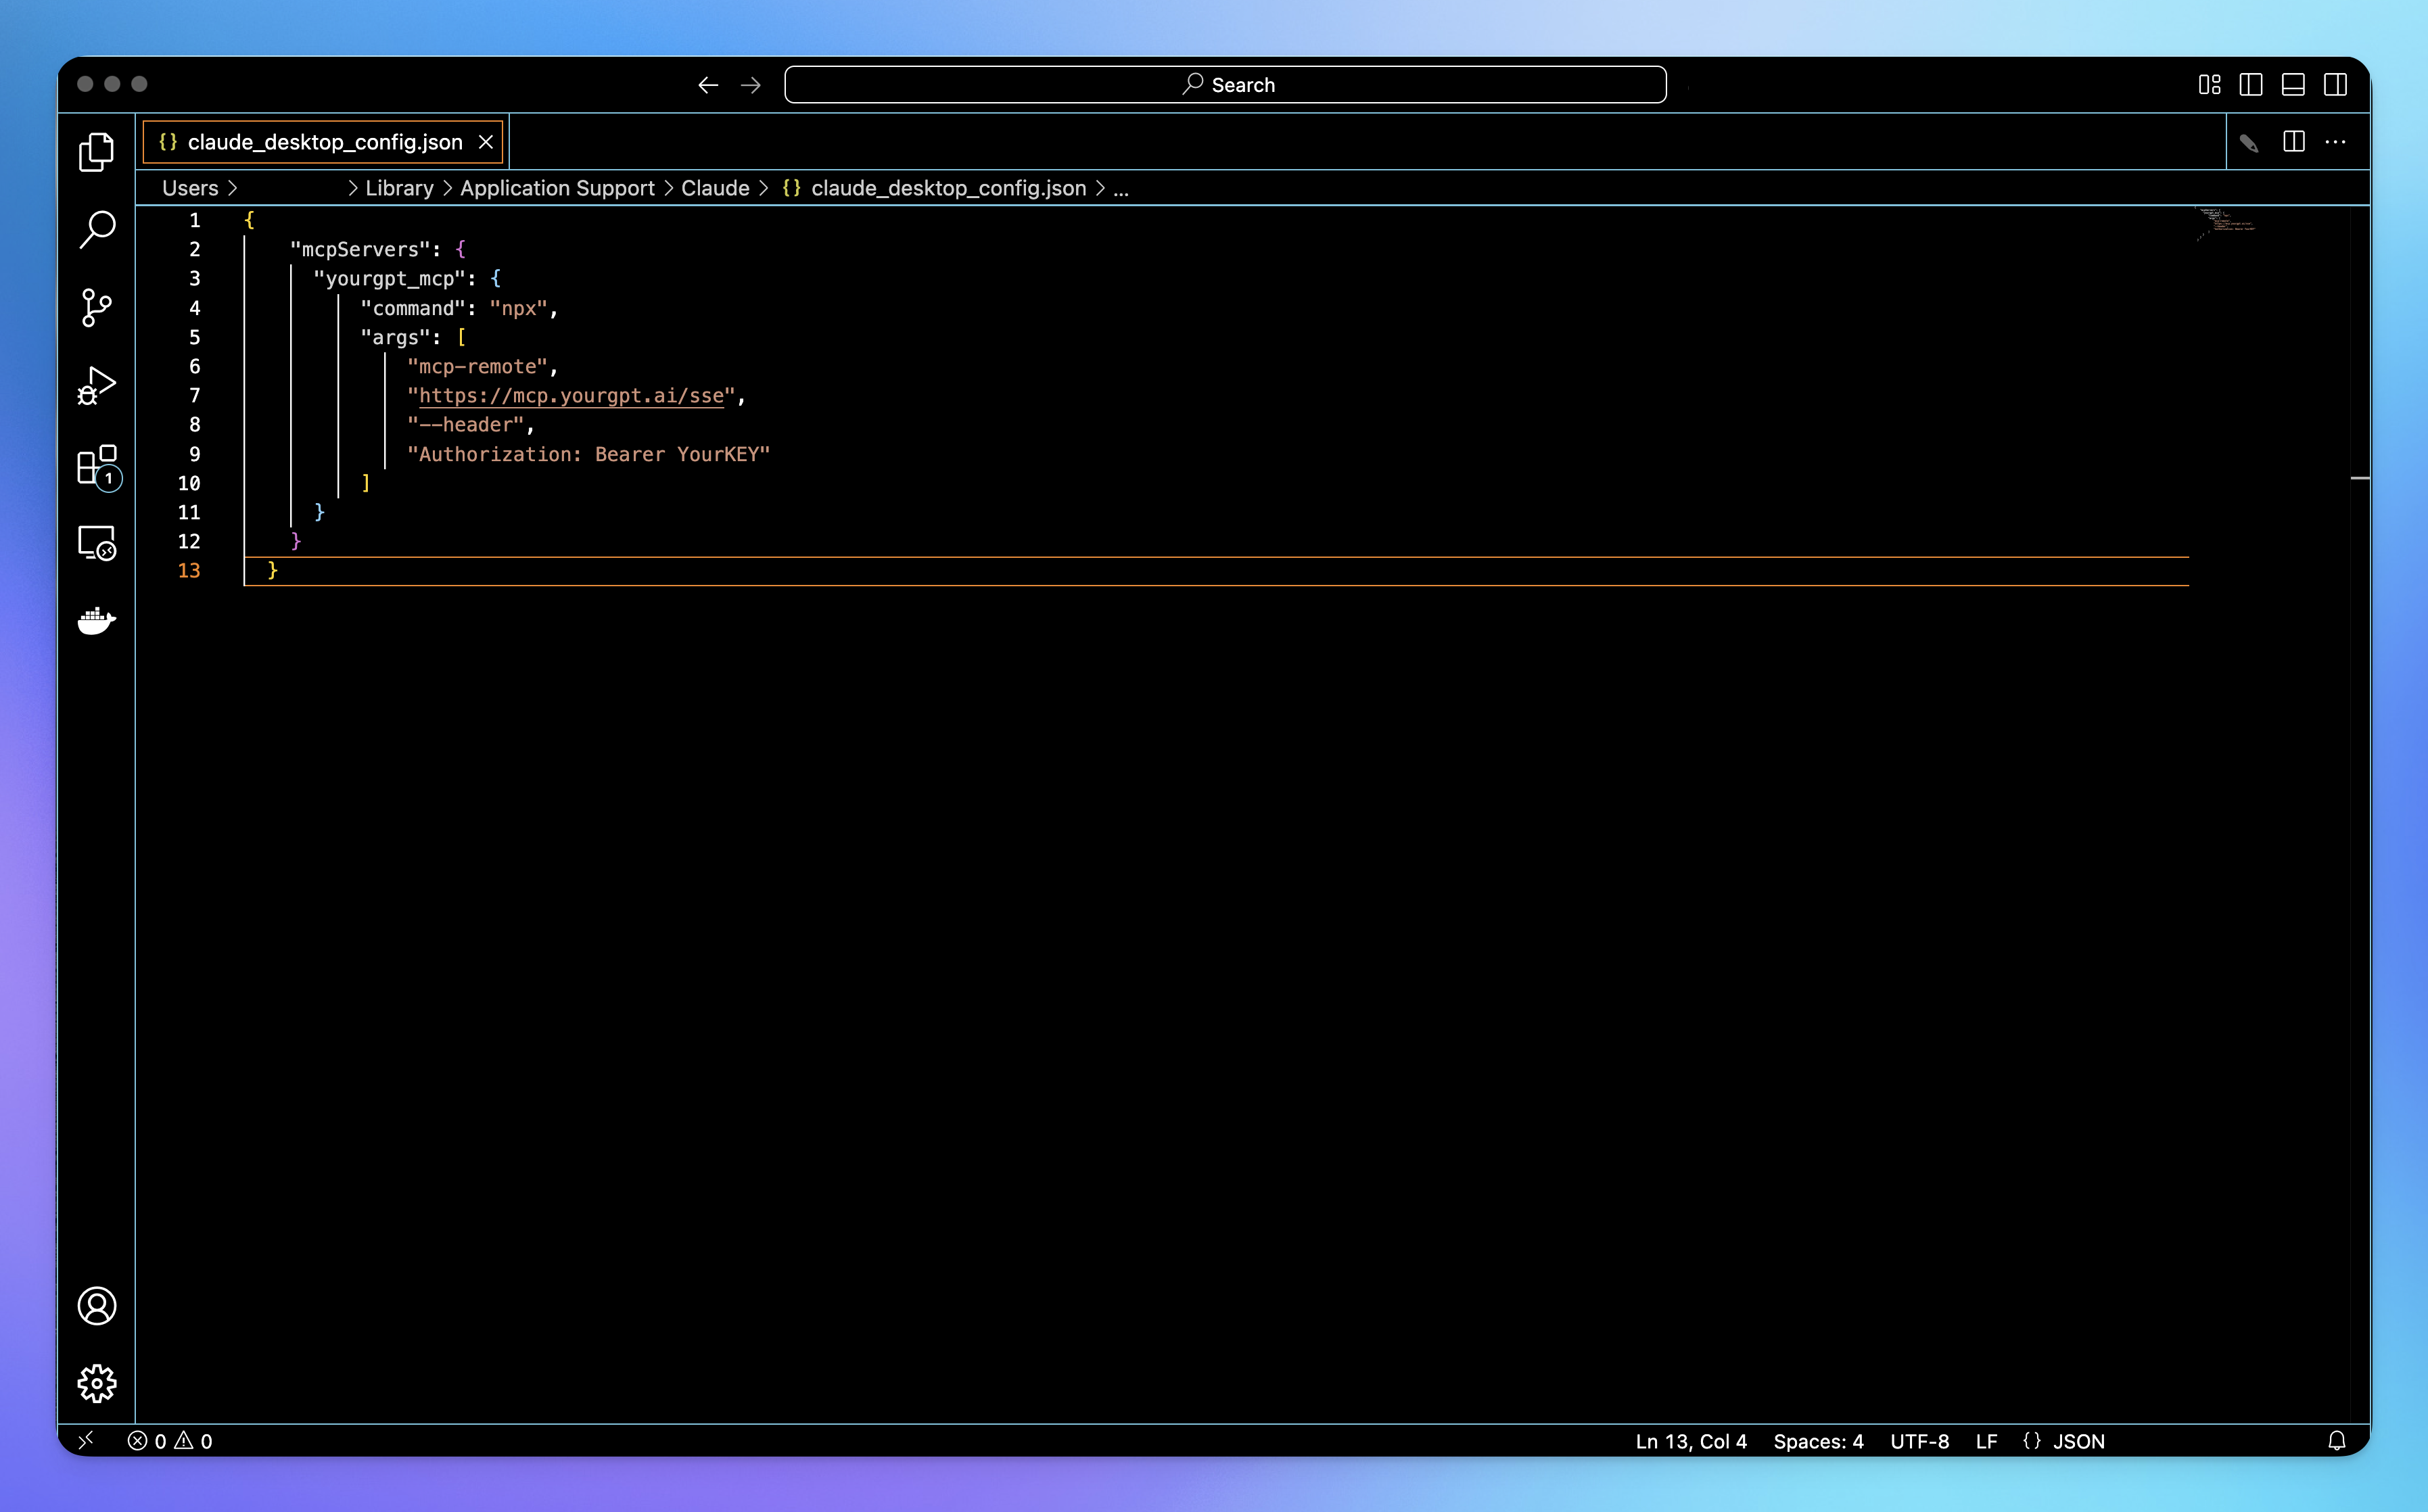
Open the config file in any text editor or IDE, and paste the code provided in YourGPT.
Paste the configuration block provided by YourGPT. It should look like this:
{
  "mcpServers": {
    "yourgpt_mcp": {
      "command": "npx",
      "args": [
        "mcp-remote",
        "https://mcp.yourgpt.ai/sse",
        "--header",
        "Authorization: Bearer YOUR_KEY"
      ]
    }
  }
}
Step 5: Restart Claude and Confirm
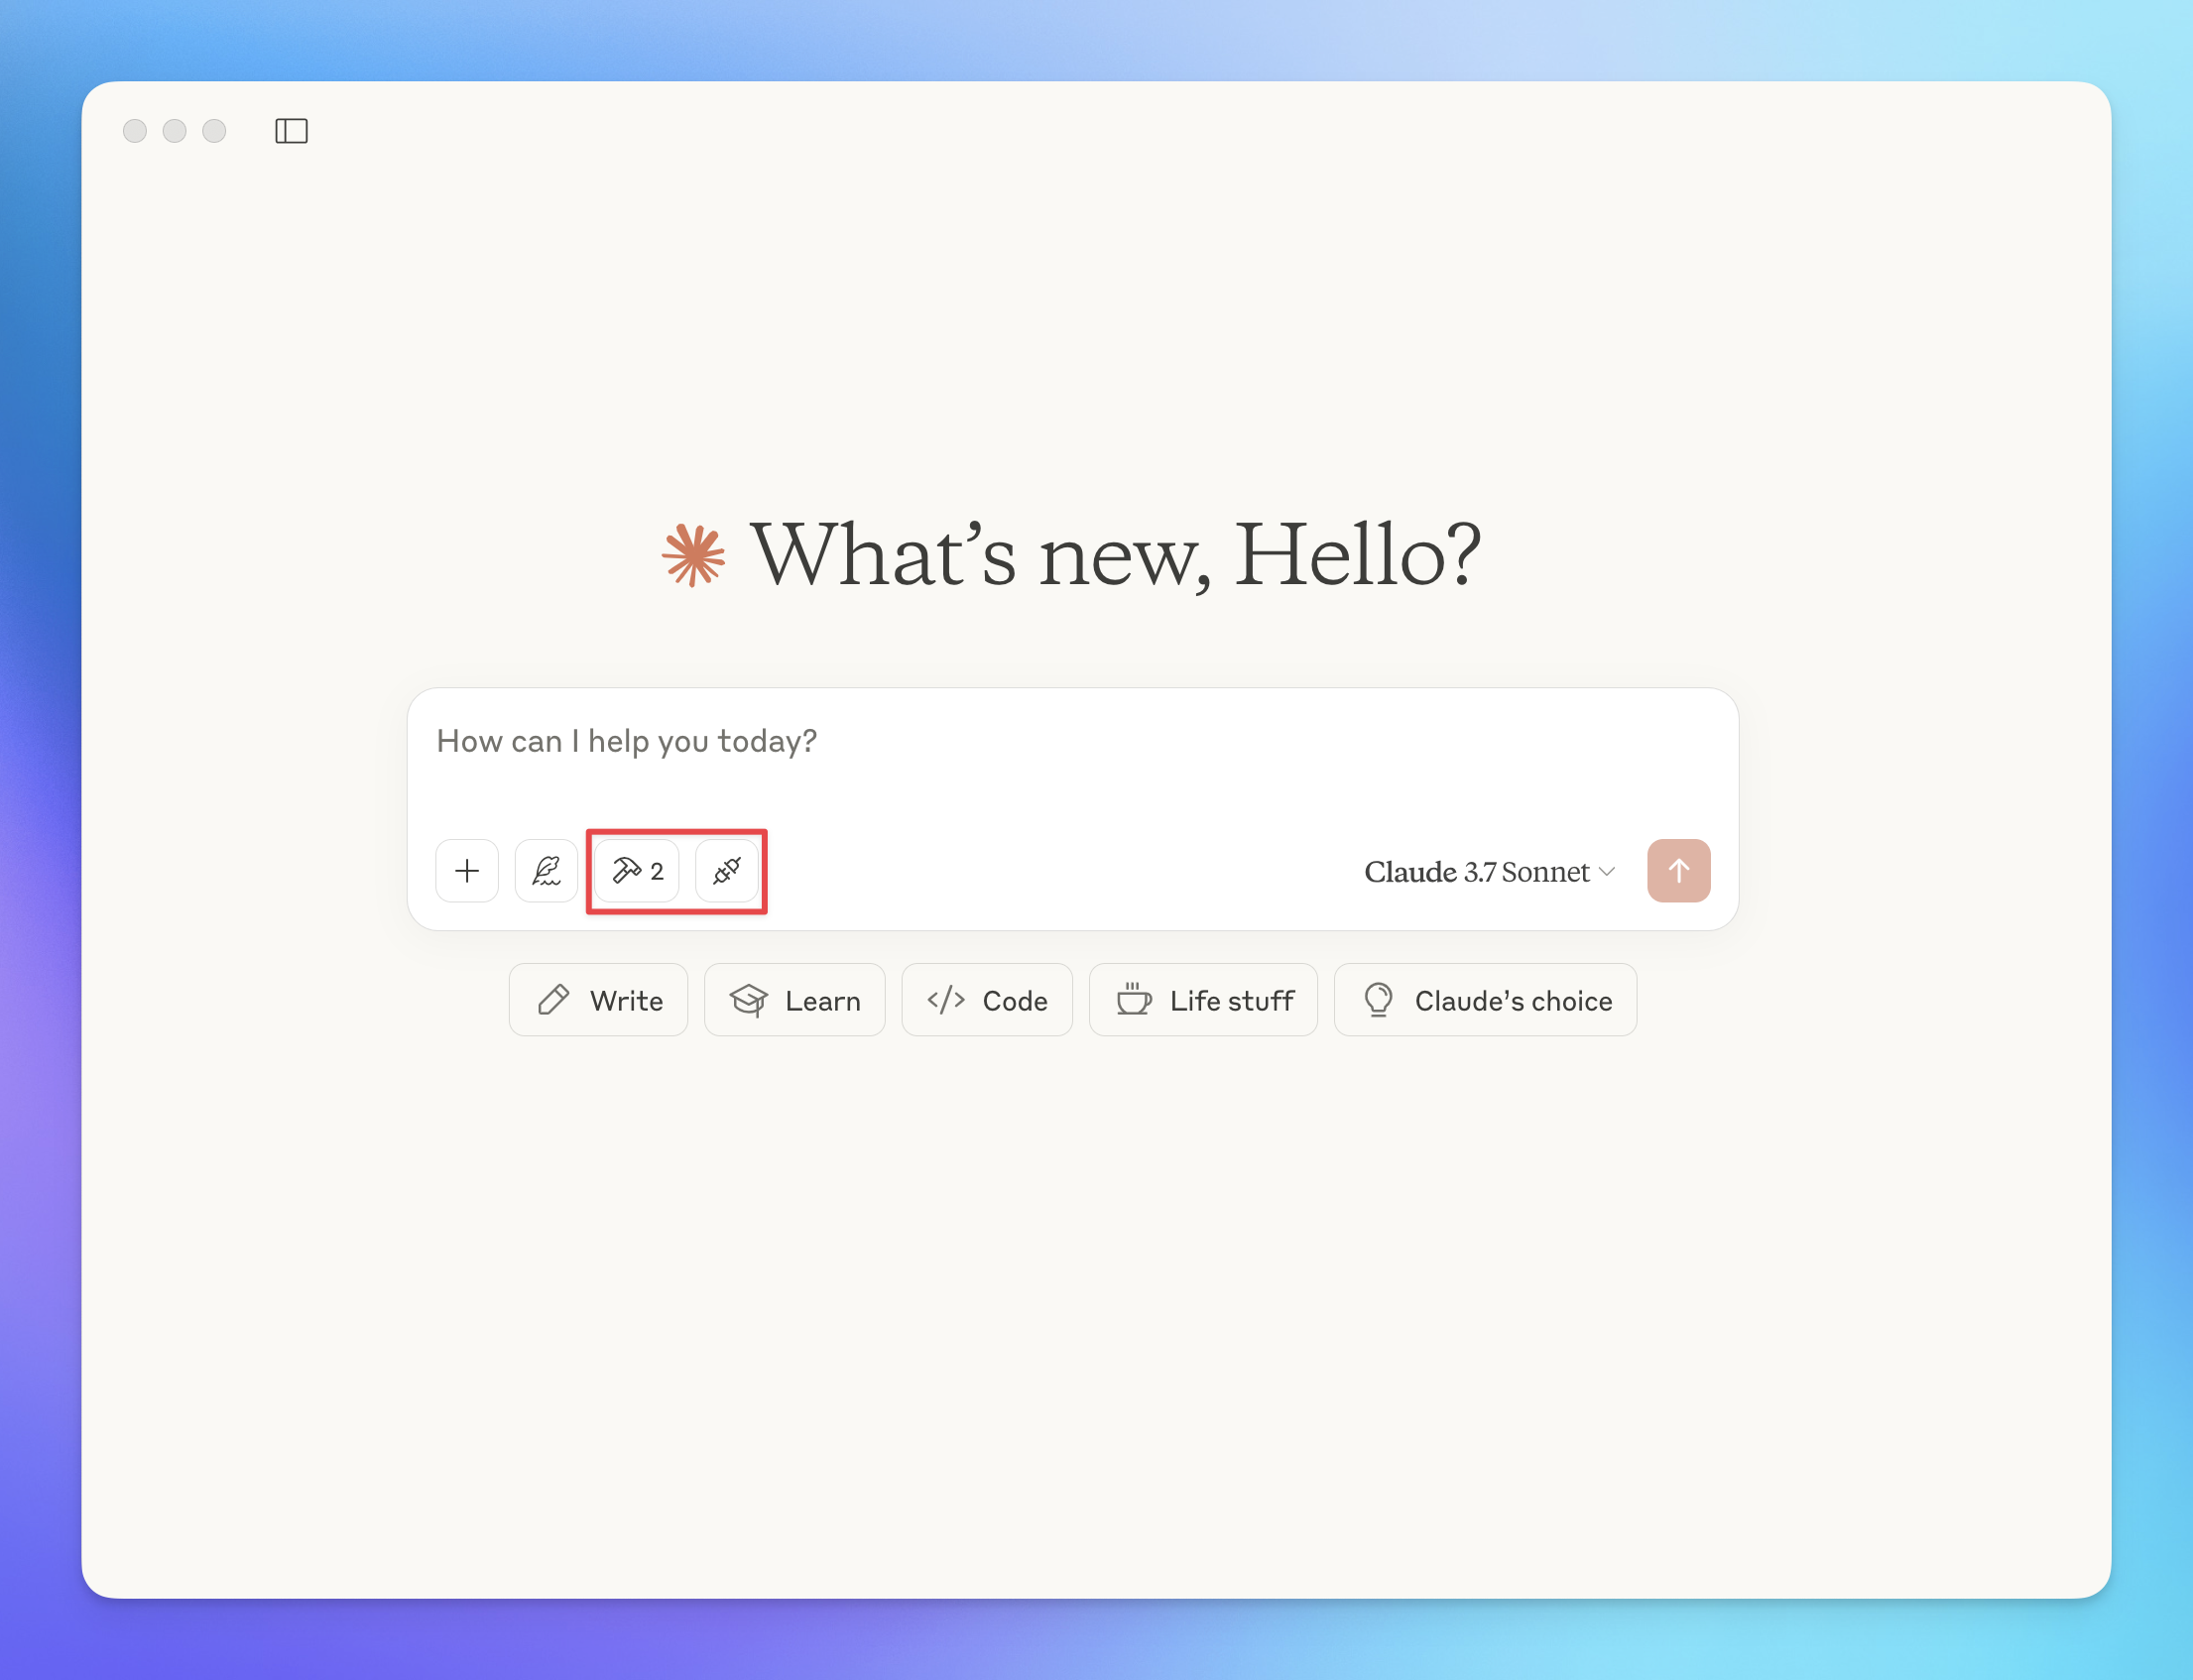
Save your changes, Restart Claude Desktop.
If MCP is working correctly, you’ll see a hammer icon in the bottom-right corner.
2.2 Cursor Setup
Cursor setup is much simpler.
Look for Cursor Settings, then click on MCP, the add new global MCP server

Locate or create the file:
~/.cursor/mcp.jsonPaste your MCP config JSON into this file.
Save and restart Cursor.
Test Your MCP.
2.3 Windsurf Setup
For Windsurf, follow the same approach.
Step 1: Locate the MCP Config File
~/.codeium/windsurf/mcp_config.jsonStep 2: Paste Your Configuration
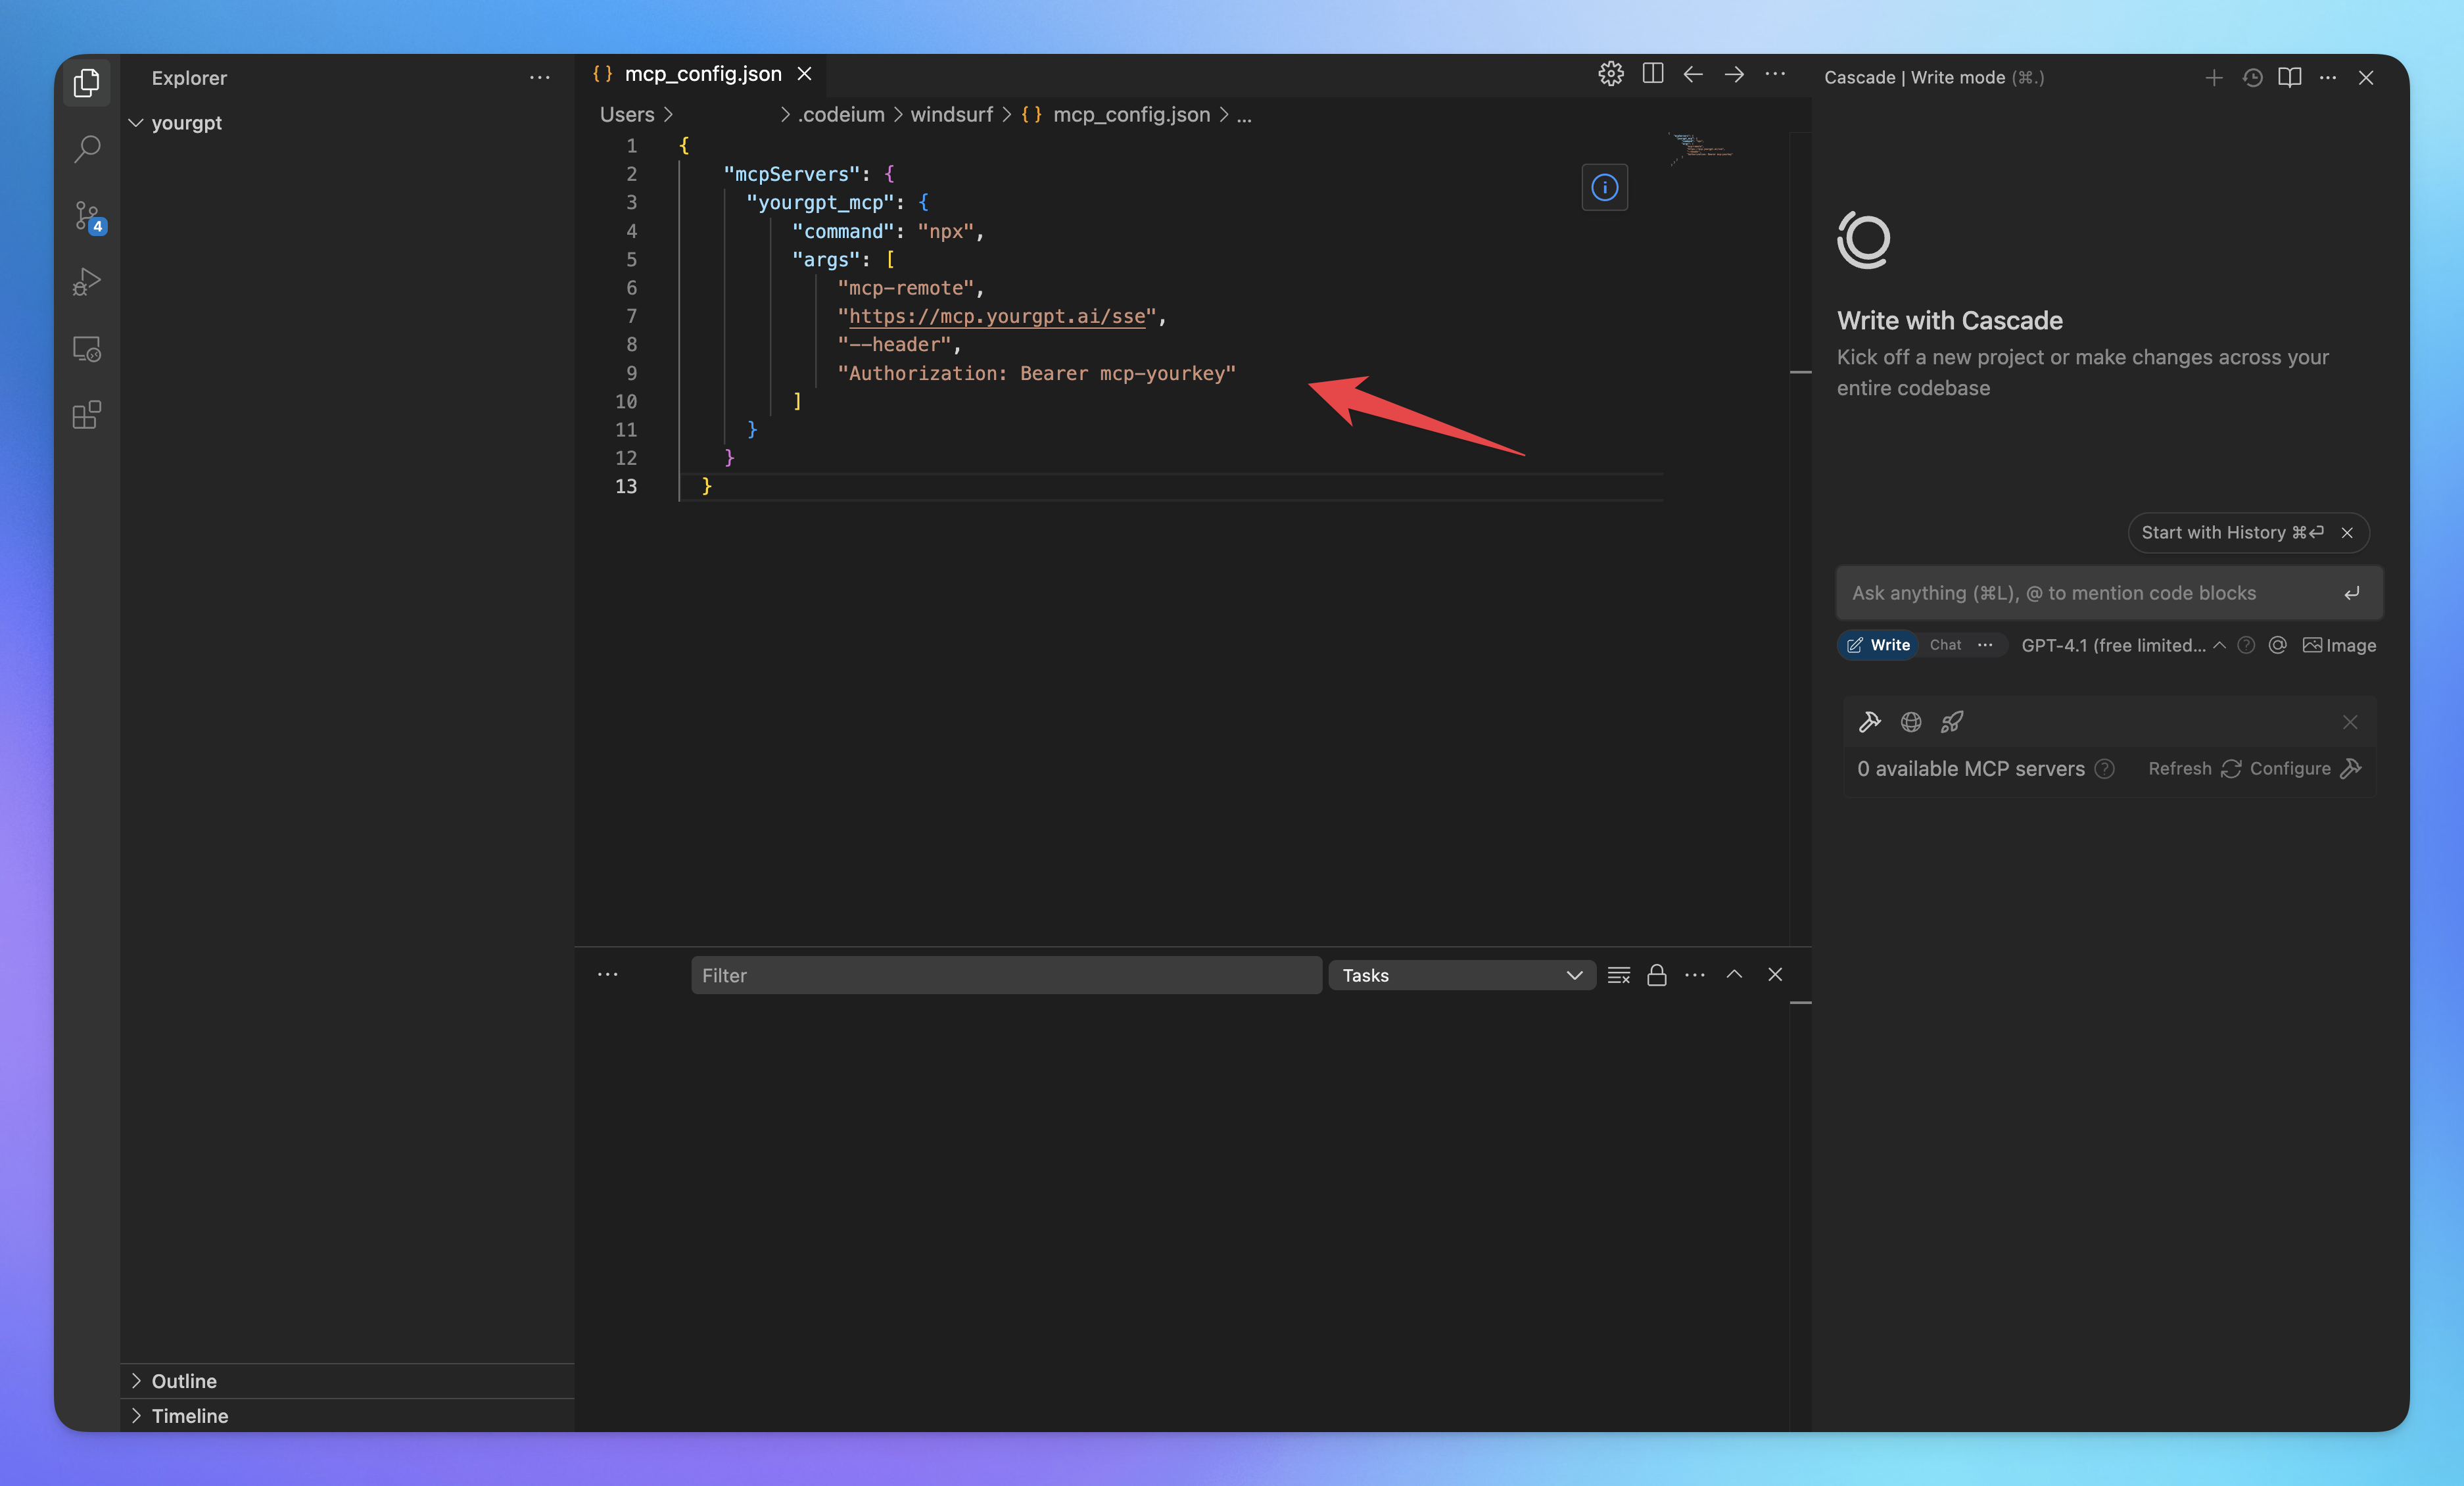
Use the config you got from YourGPT. It should look like this:
{
  "mcpServers": {
    "yourgpt_mcp": {
        "command":"npx",
        "args": [
            "mcp-remote",
            "https://mcp.yourgpt.ai/sse",
            "--header",
            "Authorization: Bearer YourKEY"
        ]
    }
  }
}
Paste it into mcp_config.json using your editor.
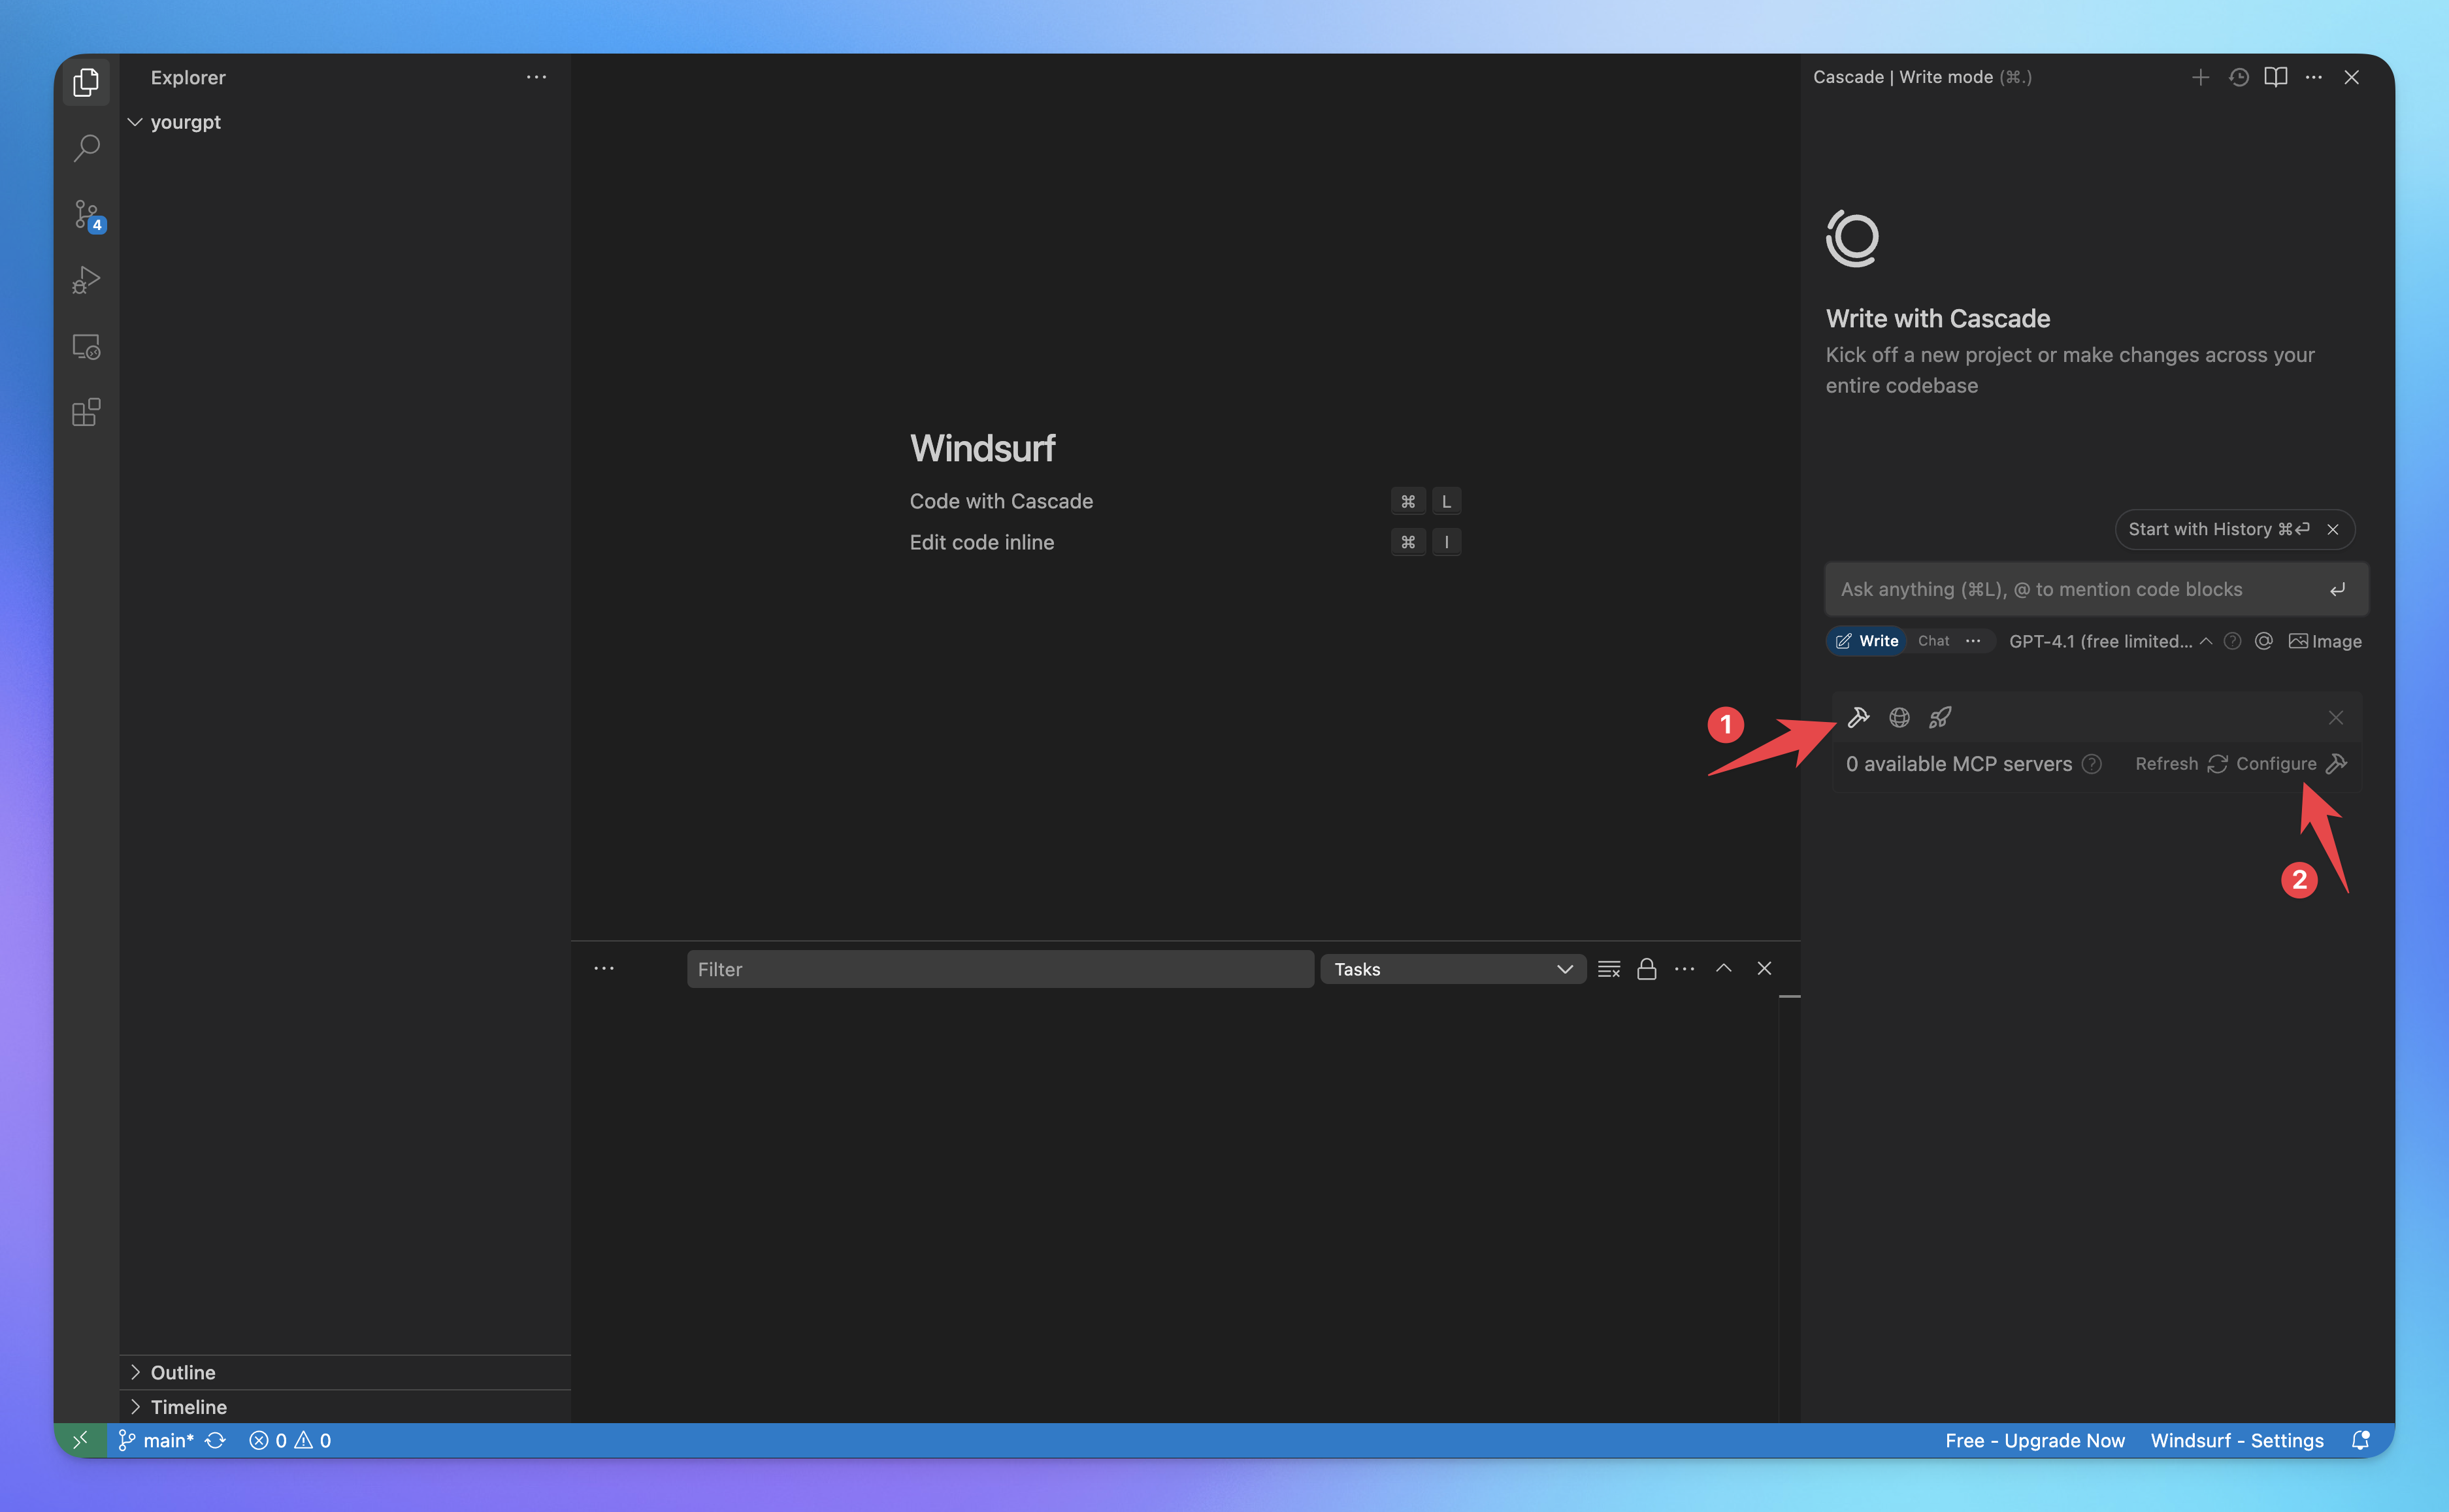
Step 3: Refresh Windsurf MCP & Test
Open Windsurf and look for the MCP section in the right panel. Click on Refresh.
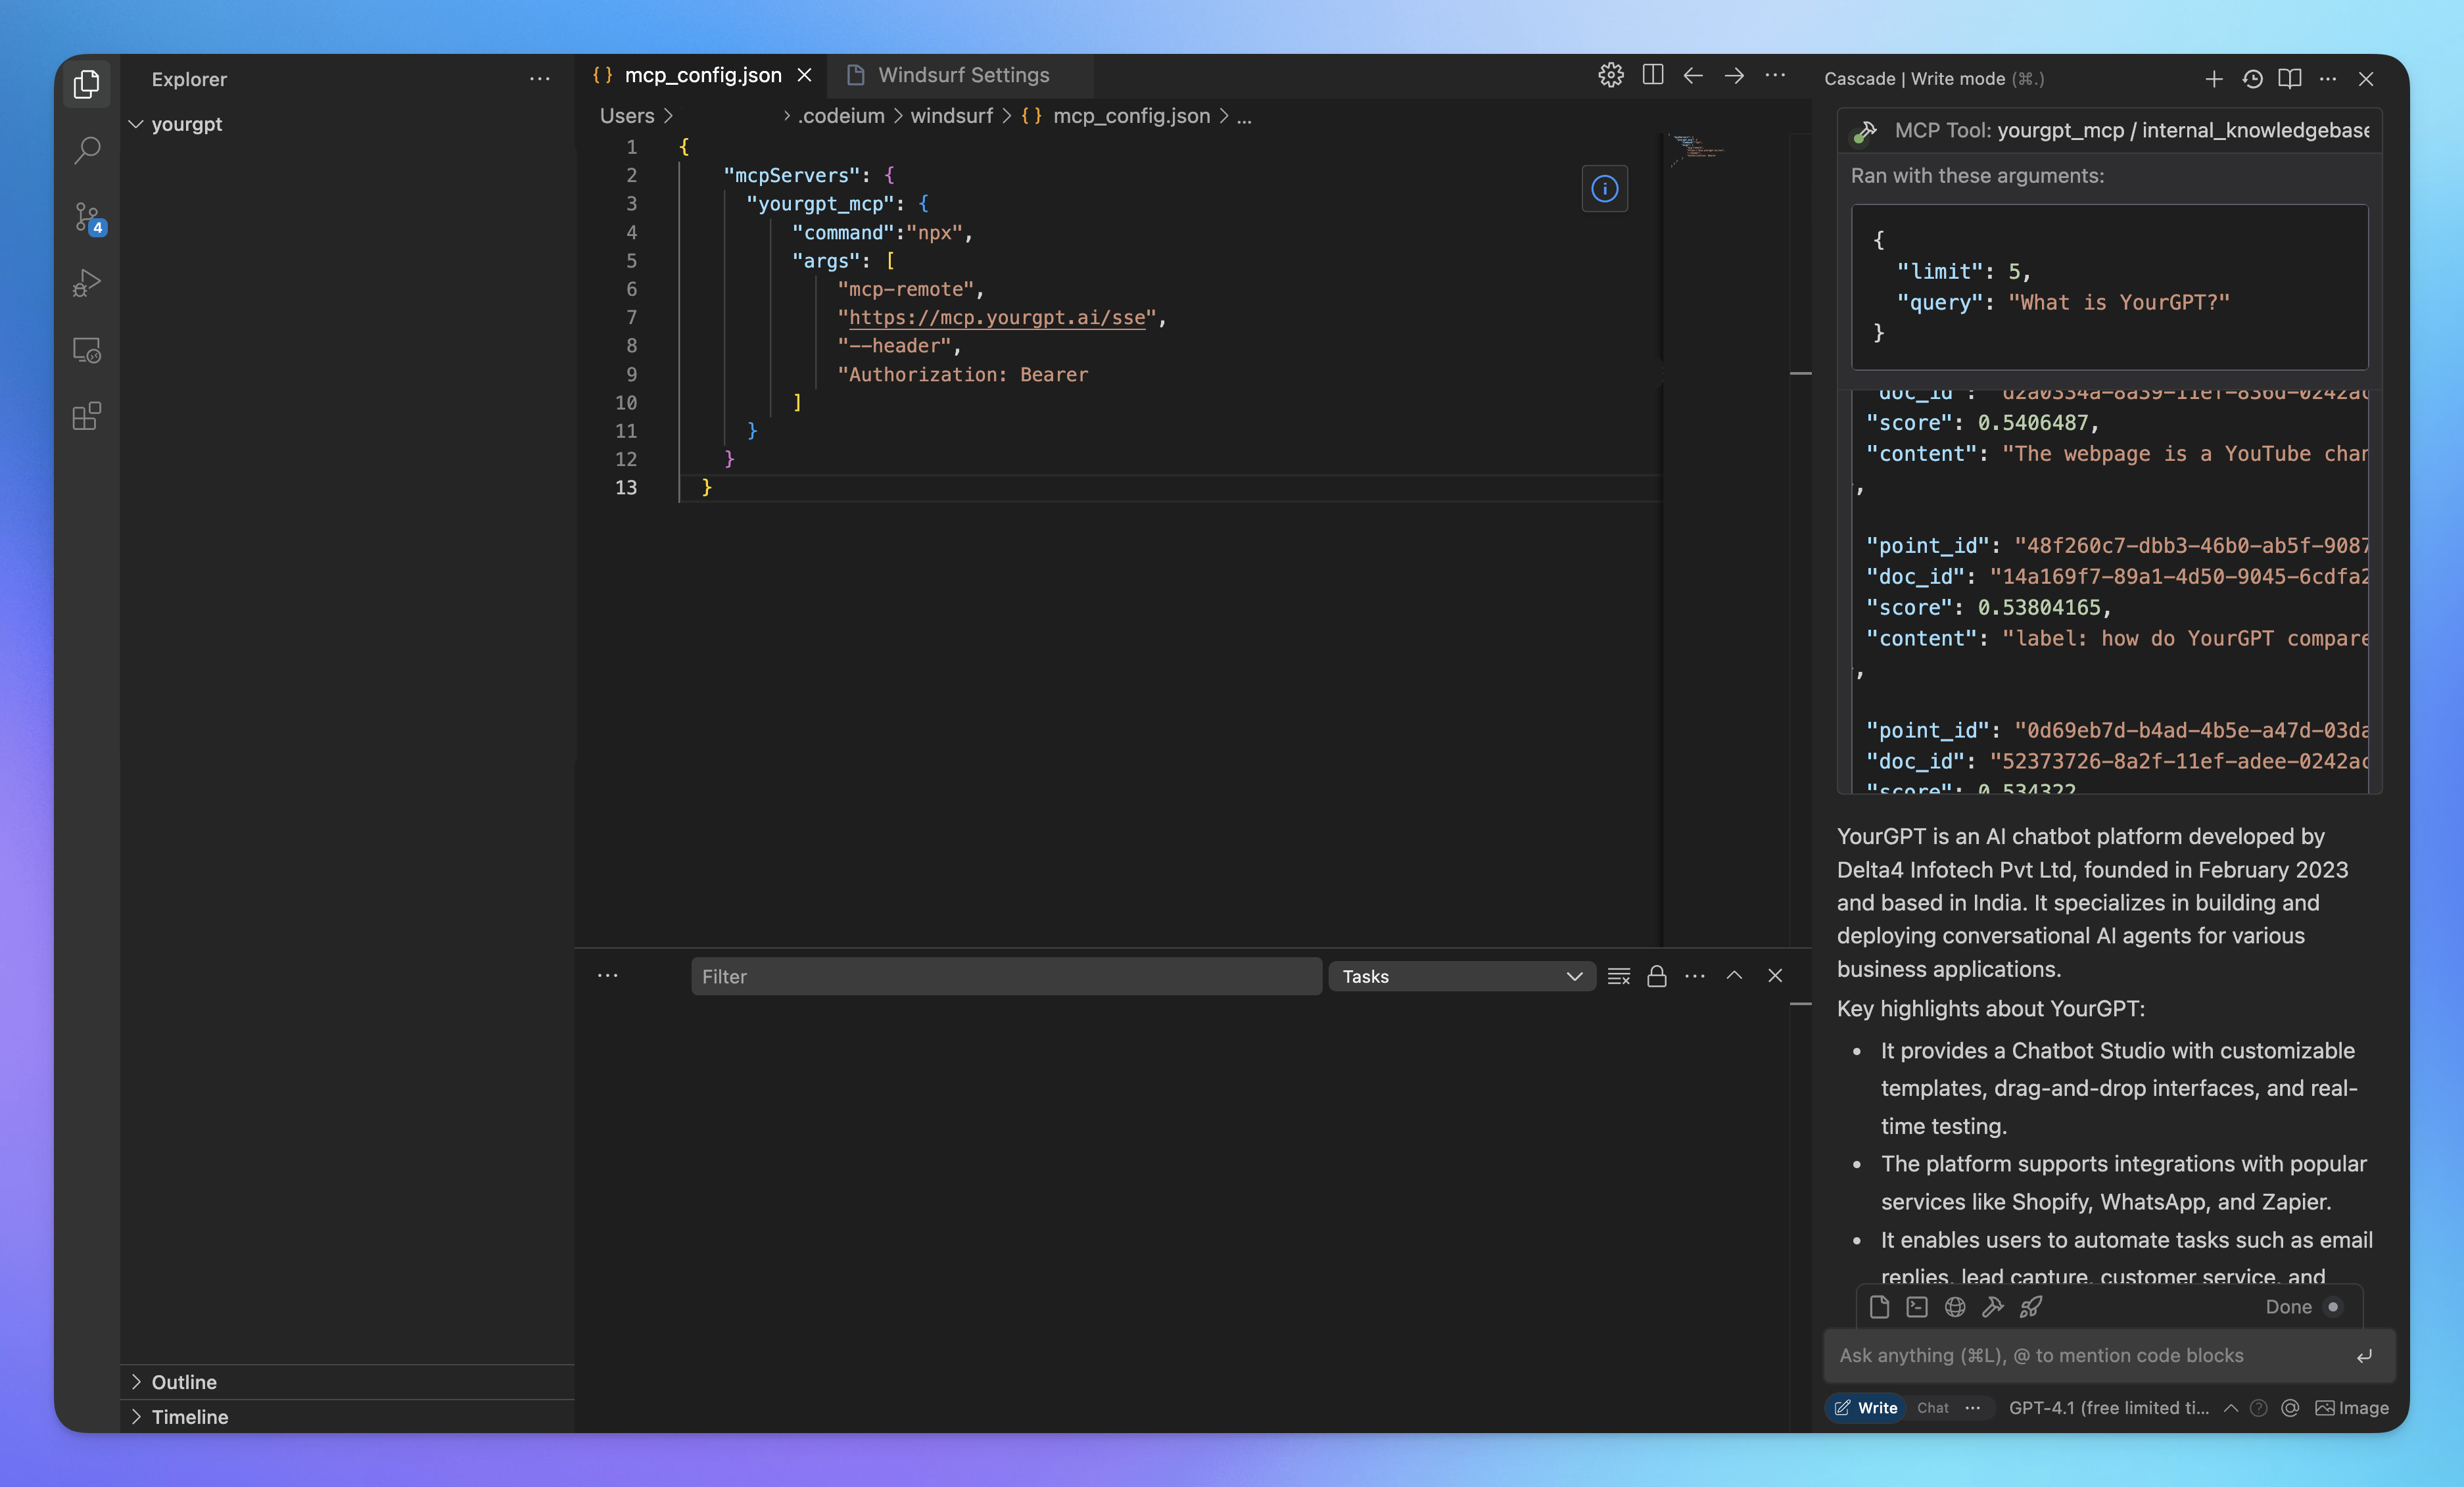
Once it connects, your AI will appear under “available MCP servers”.
Additional Notes
Keep your Bearer token private.
You can remove and regenerate your MCP config from the YourGPT dashboard at any time.
Each chatbot in YourGPT can have its own MCP setup.
If you have any questions about the integration, feel free to join our Discord community — our technical team is there and ready to help you directly.