How to Customize YourGPT Chat Widget?
This article helps you address all your queries about customizing the YourGPT Chat widget.
Follow these steps to customise your chatbot widget to match your branding and enhance user engagement.
In Your Chatbot Dashboard, Navigate to Widget Section
How Can I Set the Widget Layout & Theme?
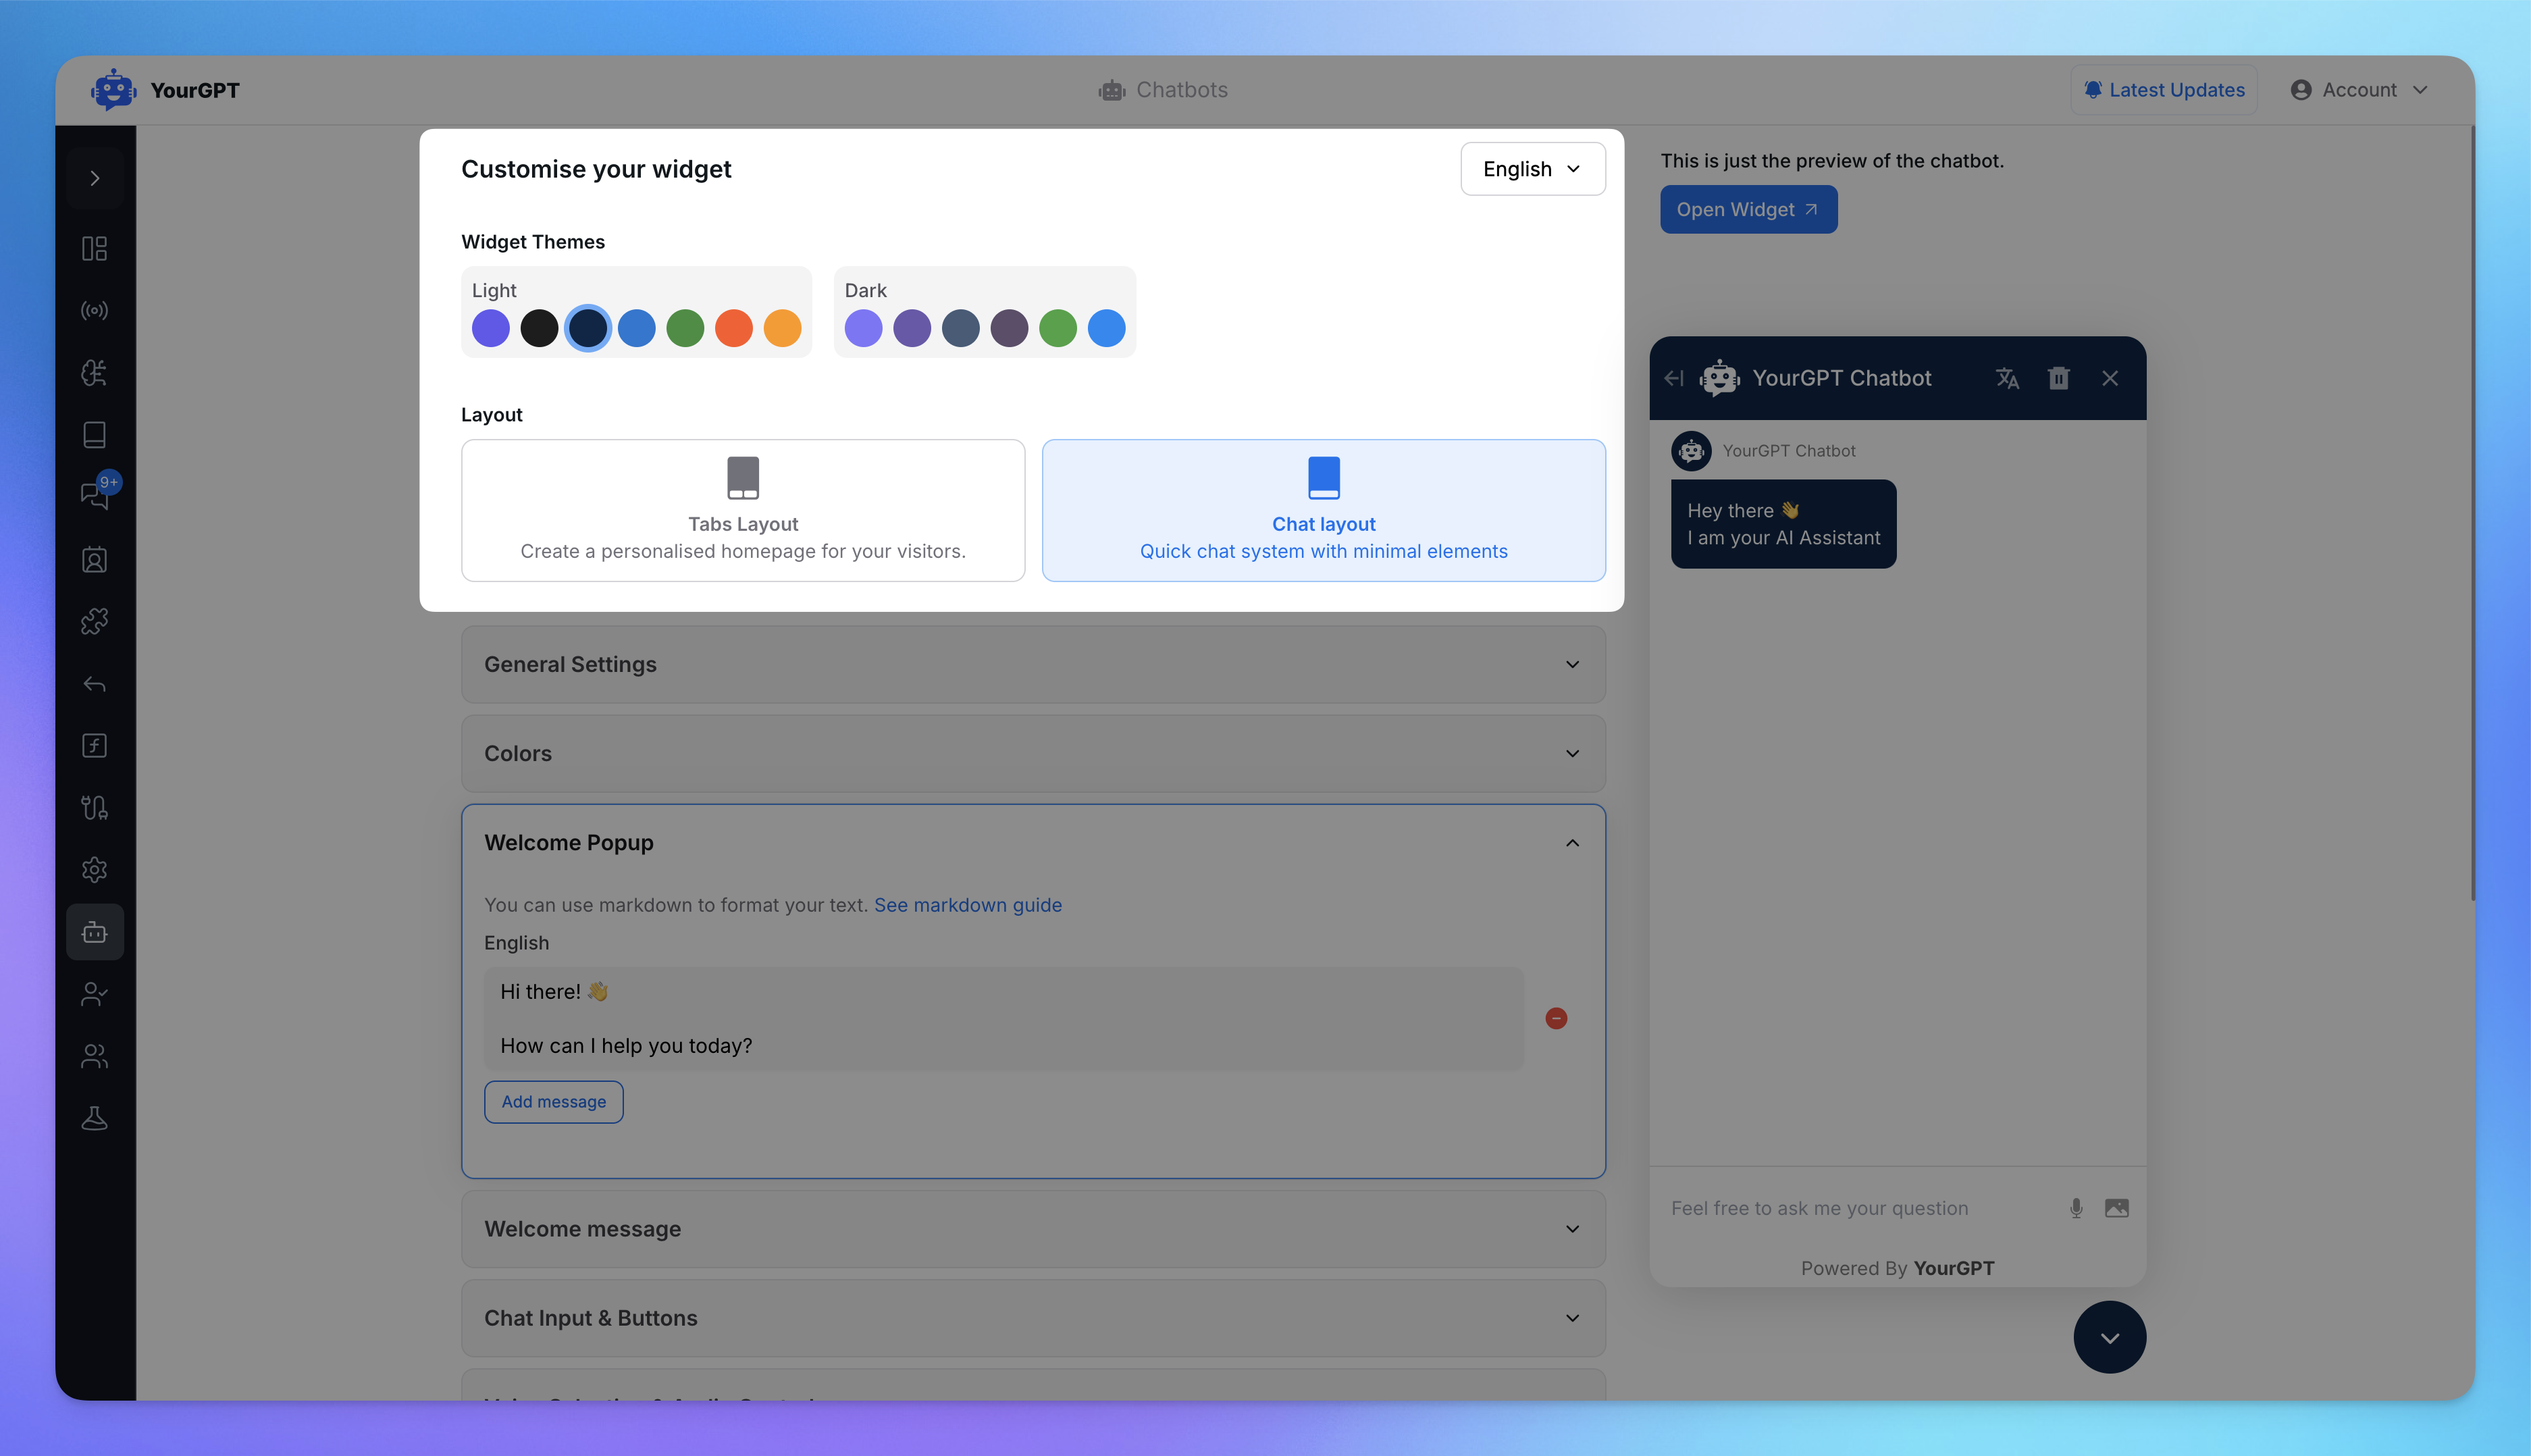
The Widget Layout and Themes define how your chatbot looks and your users interact.
Themes:
Themes allow you to adjust the widget’s overall look to align with your brand.
Choose Light or Dark mode for the base theme.
Customize the Primary Color and Text Color for a unique branded appearance.
Widget Layout:
The widget layout determines how the chatbot appears to users. You can choose from two options:
Tabs Layout: Organize content neatly with a tabbed homepage for a personalized feel.
Chat Layout: A minimalist design for direct, simple conversations.
Select your preferred theme & layout, click on save.
How Can I Add a Welcome Popup?
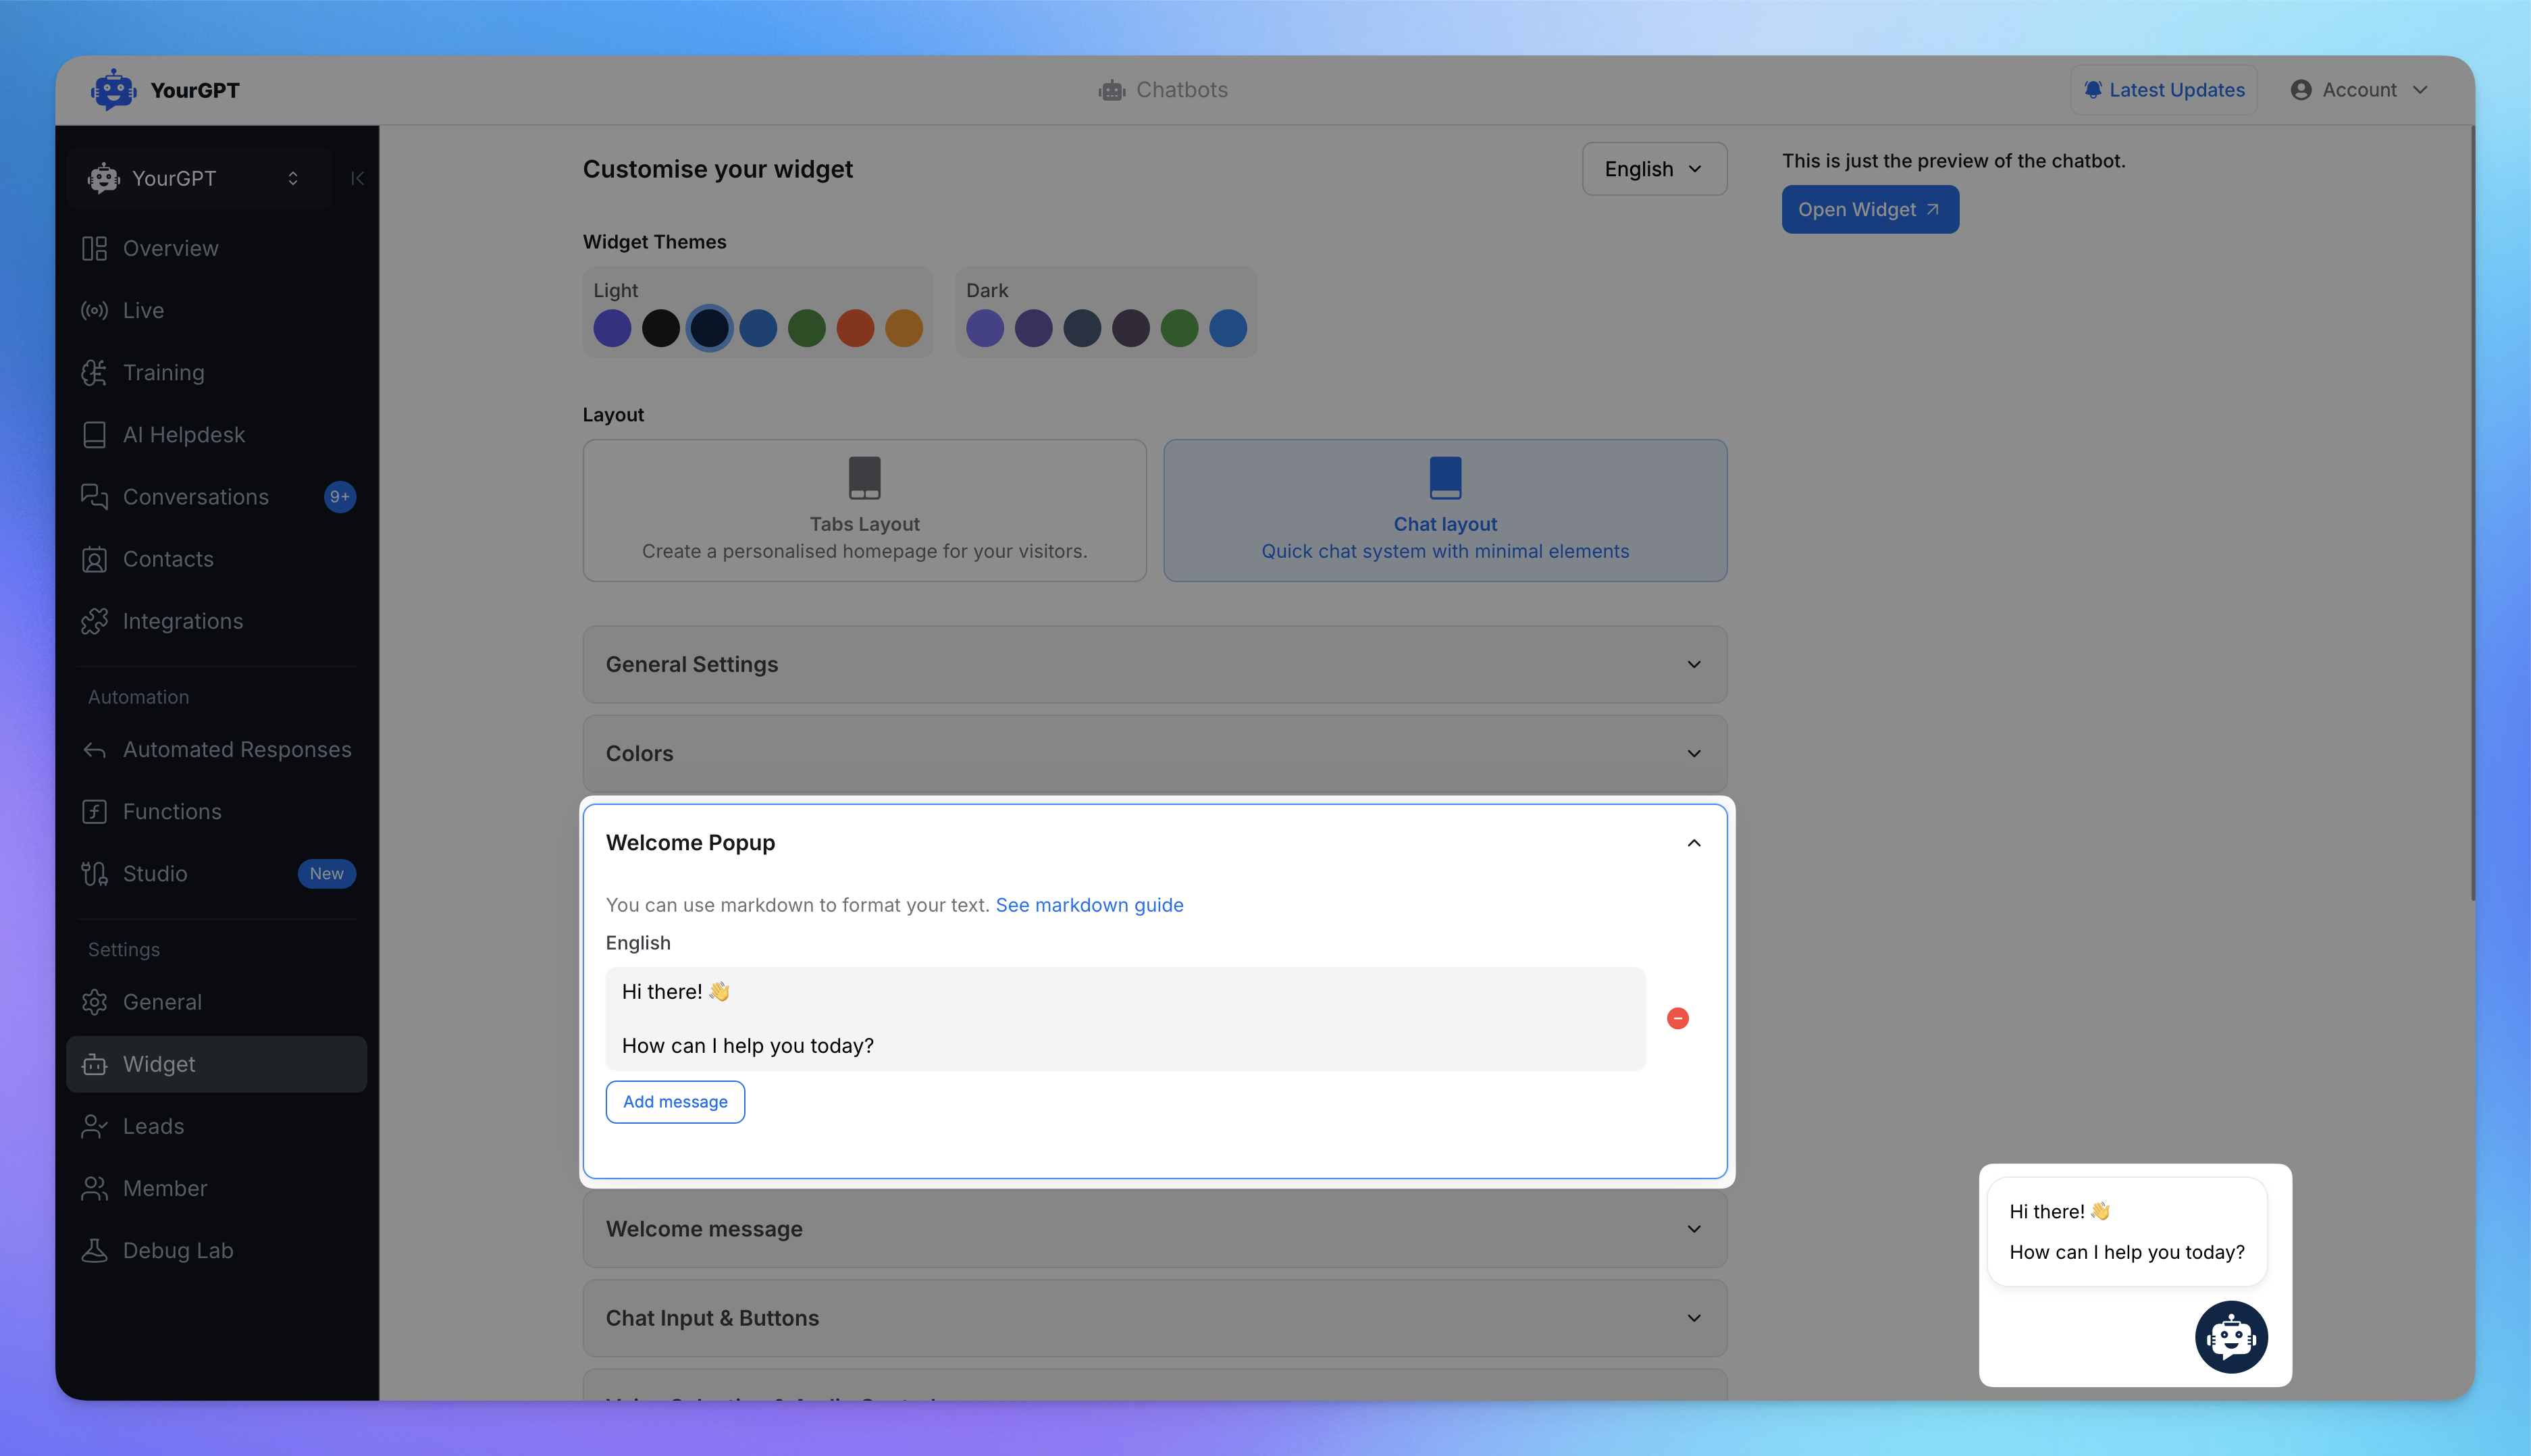
Welcome popups introduce your chatbot to users and provide an initial greeting.
Add a message (e.g., "Hi there! 👋 How can I assist you today?").
Use markdown formatting to style your text professionally.
Once your message is set, save it.
How Do I Edit the Default Welcome Message?
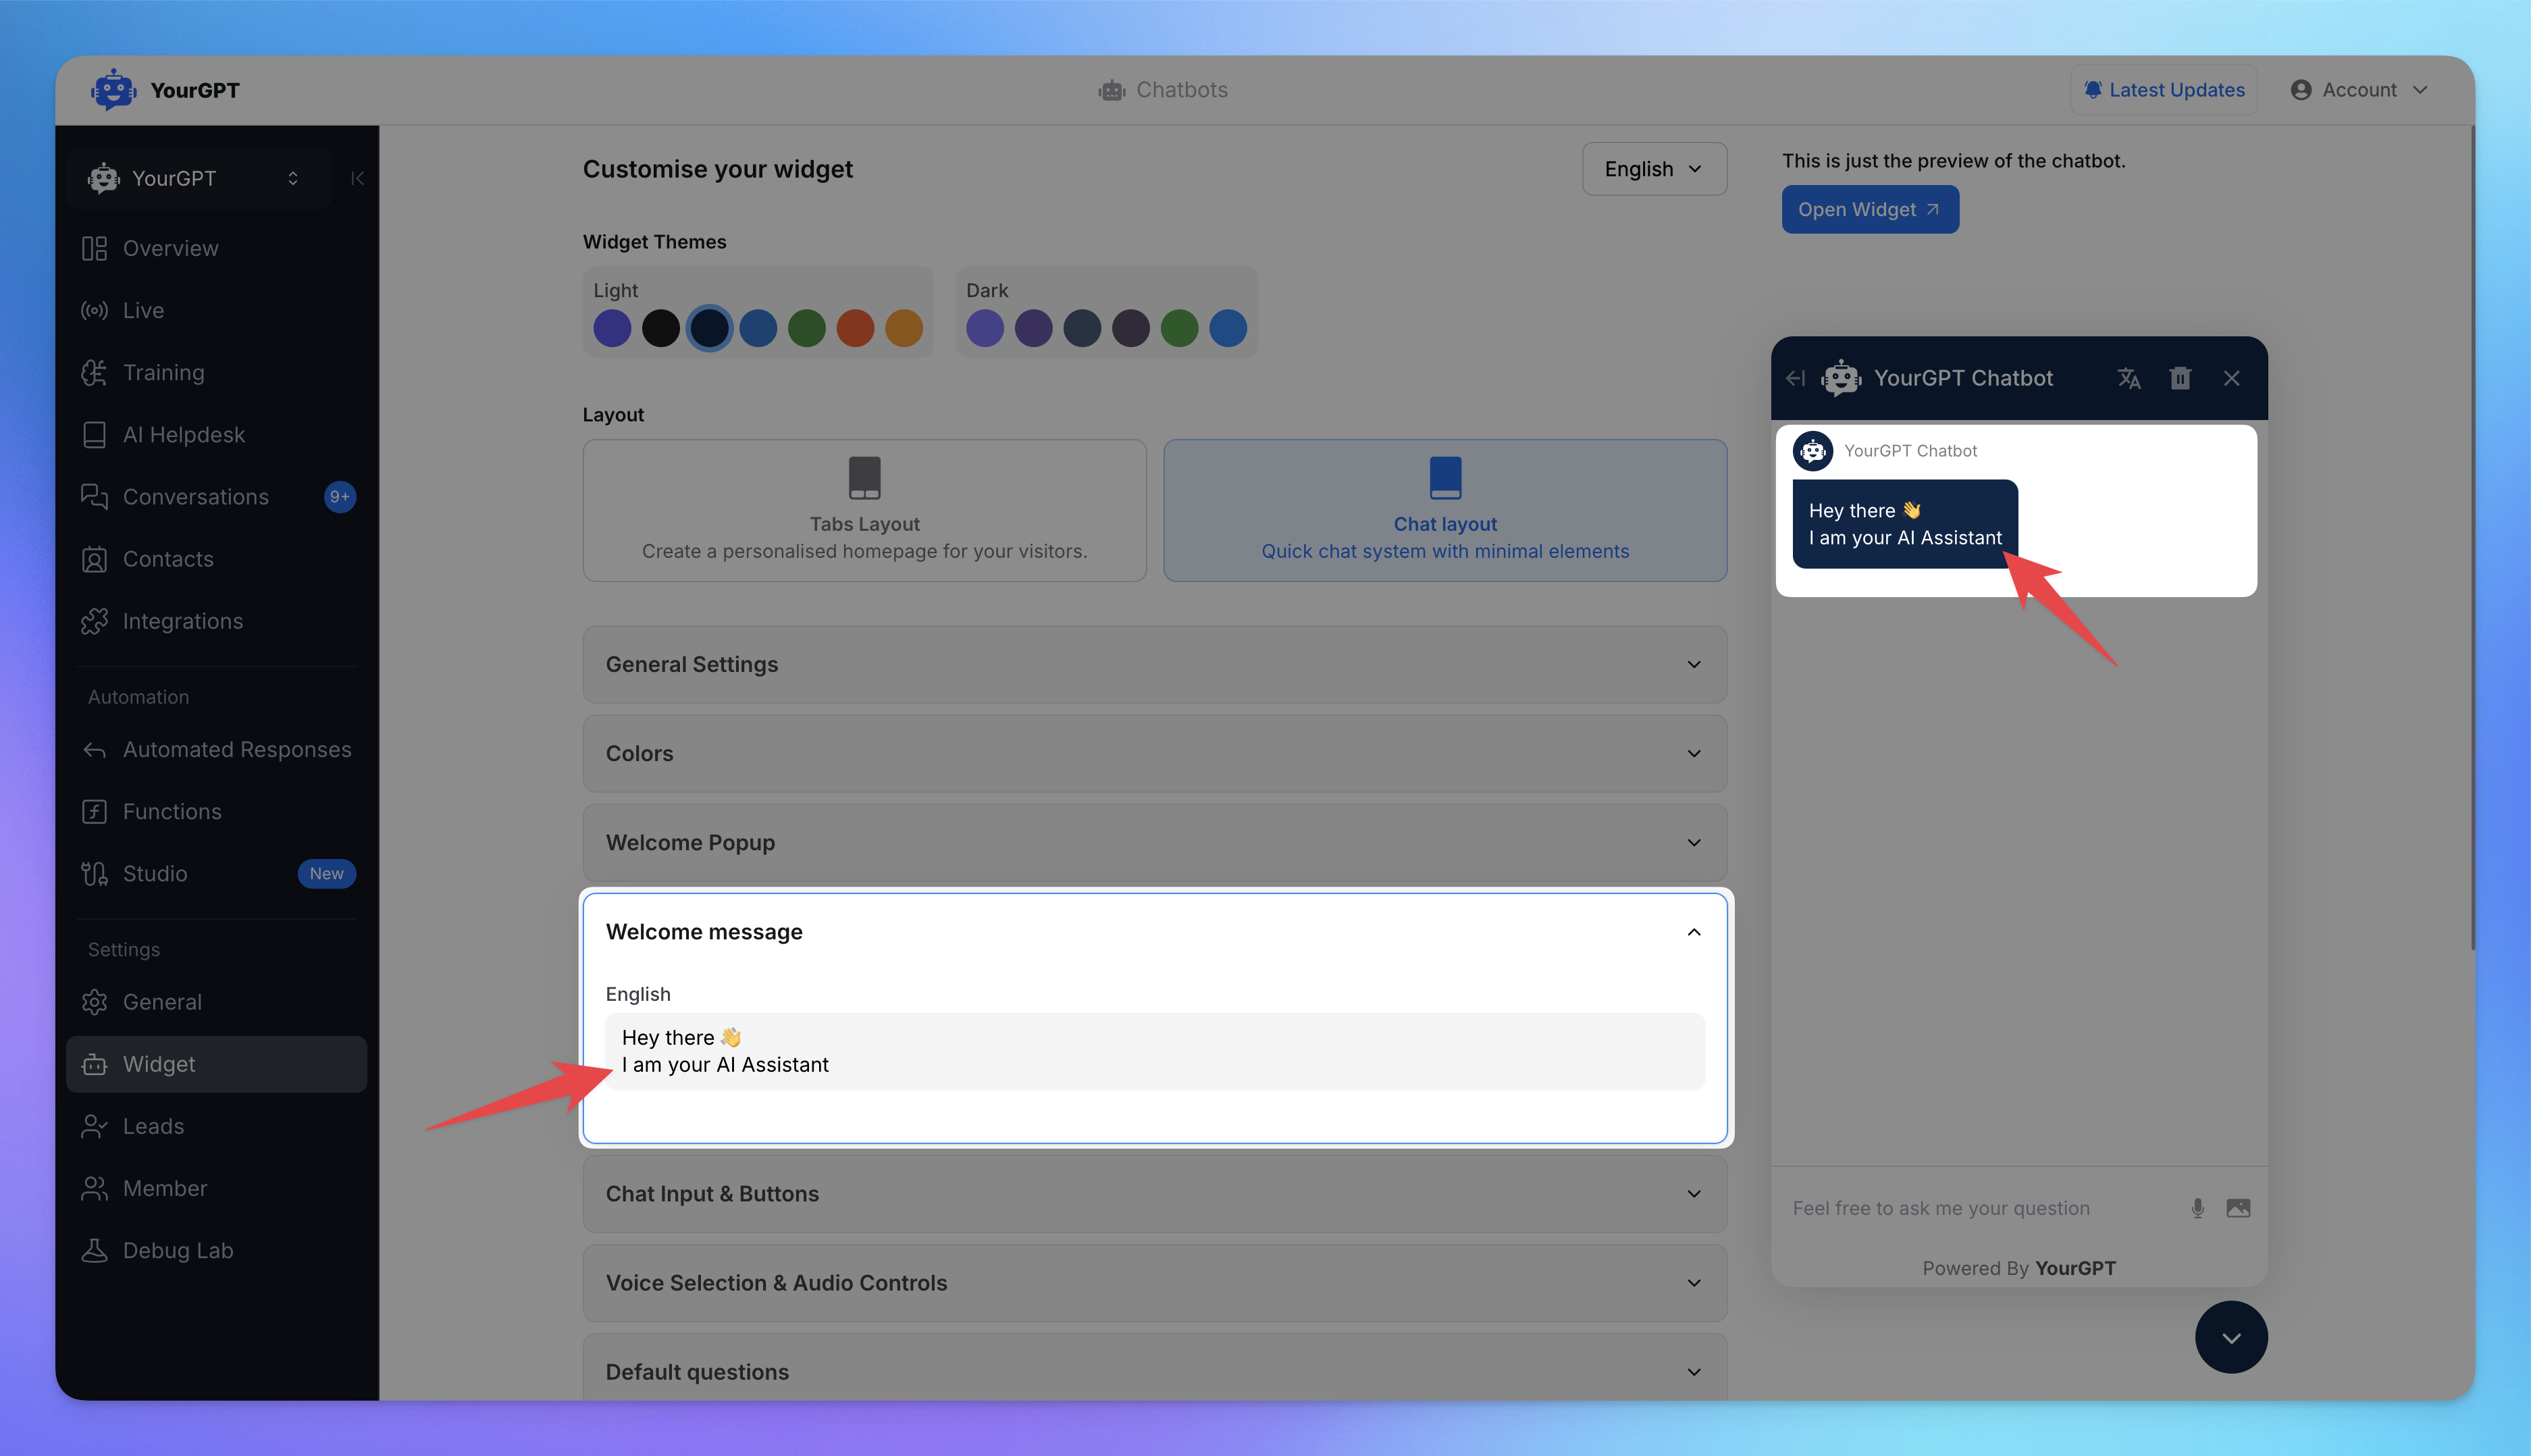
The default welcome message is what users see when they start interacting with your chatbot.
Enter a personalized greeting like "Hey there 👋 I’m your AI Assistant."
Save the message under the Welcome Message section.
How Can I Add Social Media Links or External Links?
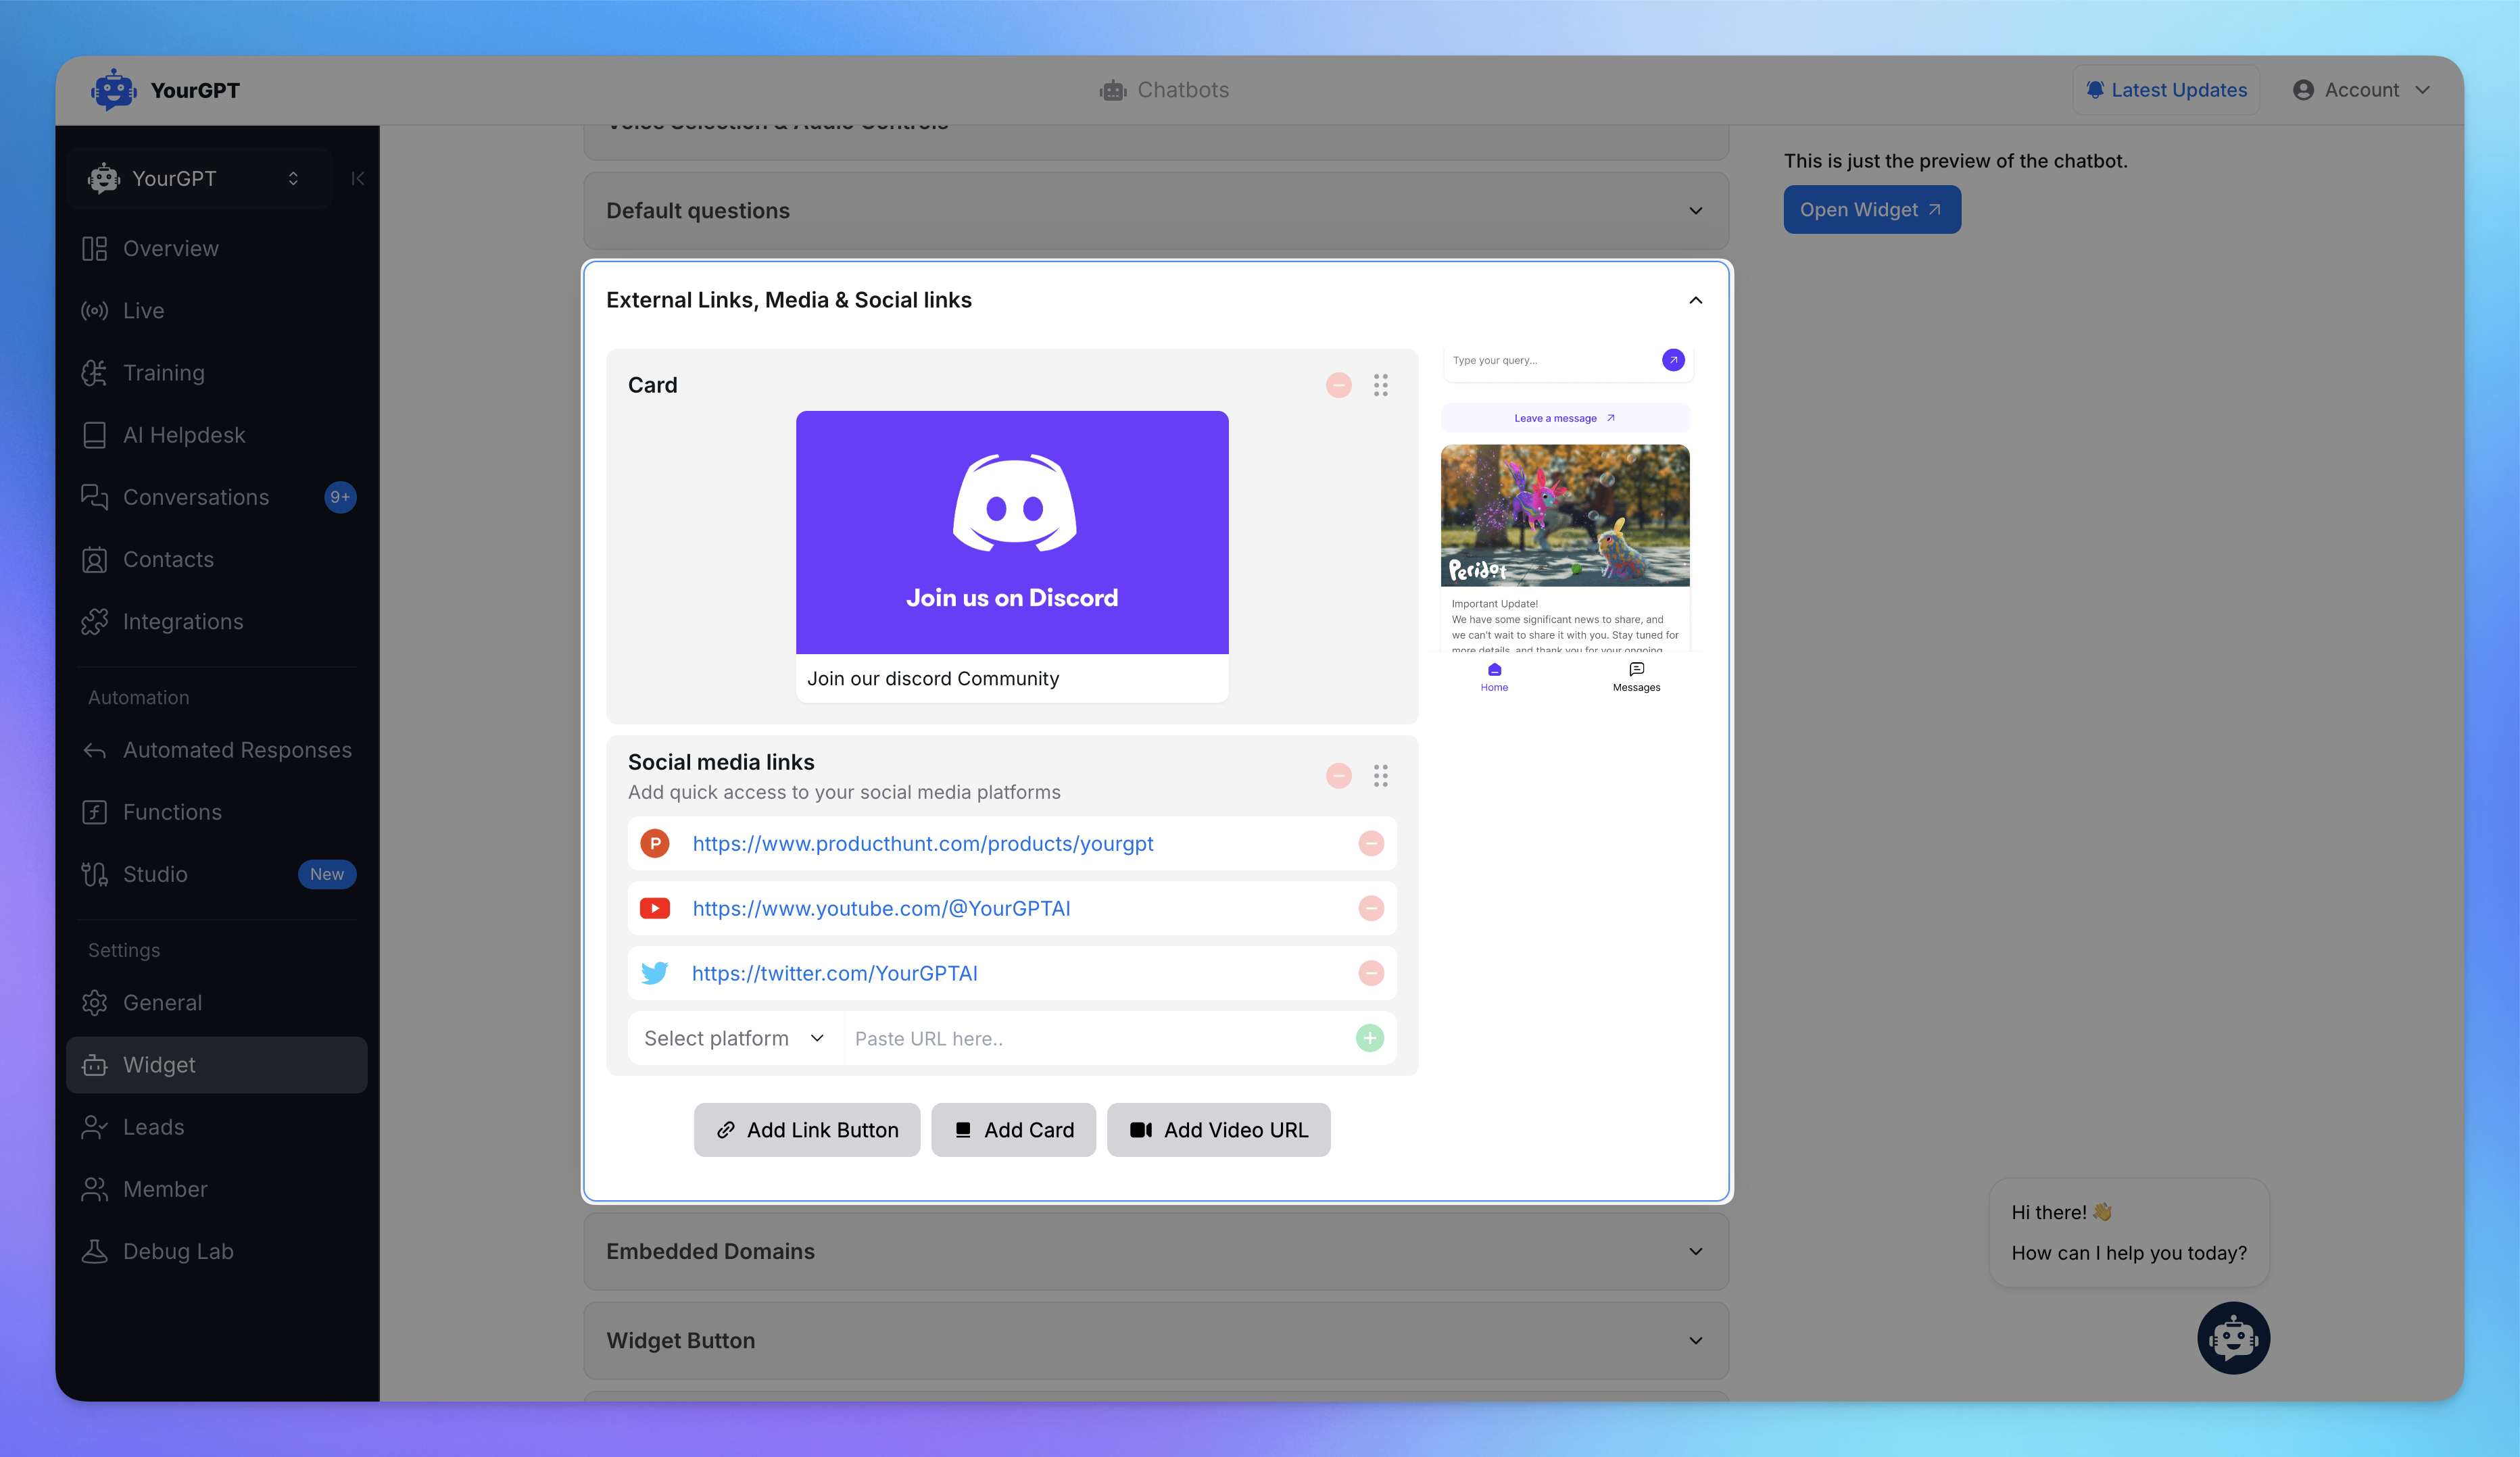
Adding external links and social media platforms to your widget helps users connect with your brand and access additional resources directly from the chatbot. Here’s how you can configure these features:
Select platforms like Discord, YouTube, or Twitter.
Paste the URLs into the provided fields.
Save the changes to display these links in the widget.
Note: This does only supports Tabs Layout.
How Can I Customize Buttons and Chat Input?
Buttons and chat inputs let you tailor how users interact with your chatbot.
Edit the chat input field (e.g., "Feel free to ask me a question.").
Add interactive buttons, like Voice Selection or Default Questions, and display them as a list, dropdown, or slider.
Save your updates to enable these options.
How Do I Adjust the Widget Button Placement?
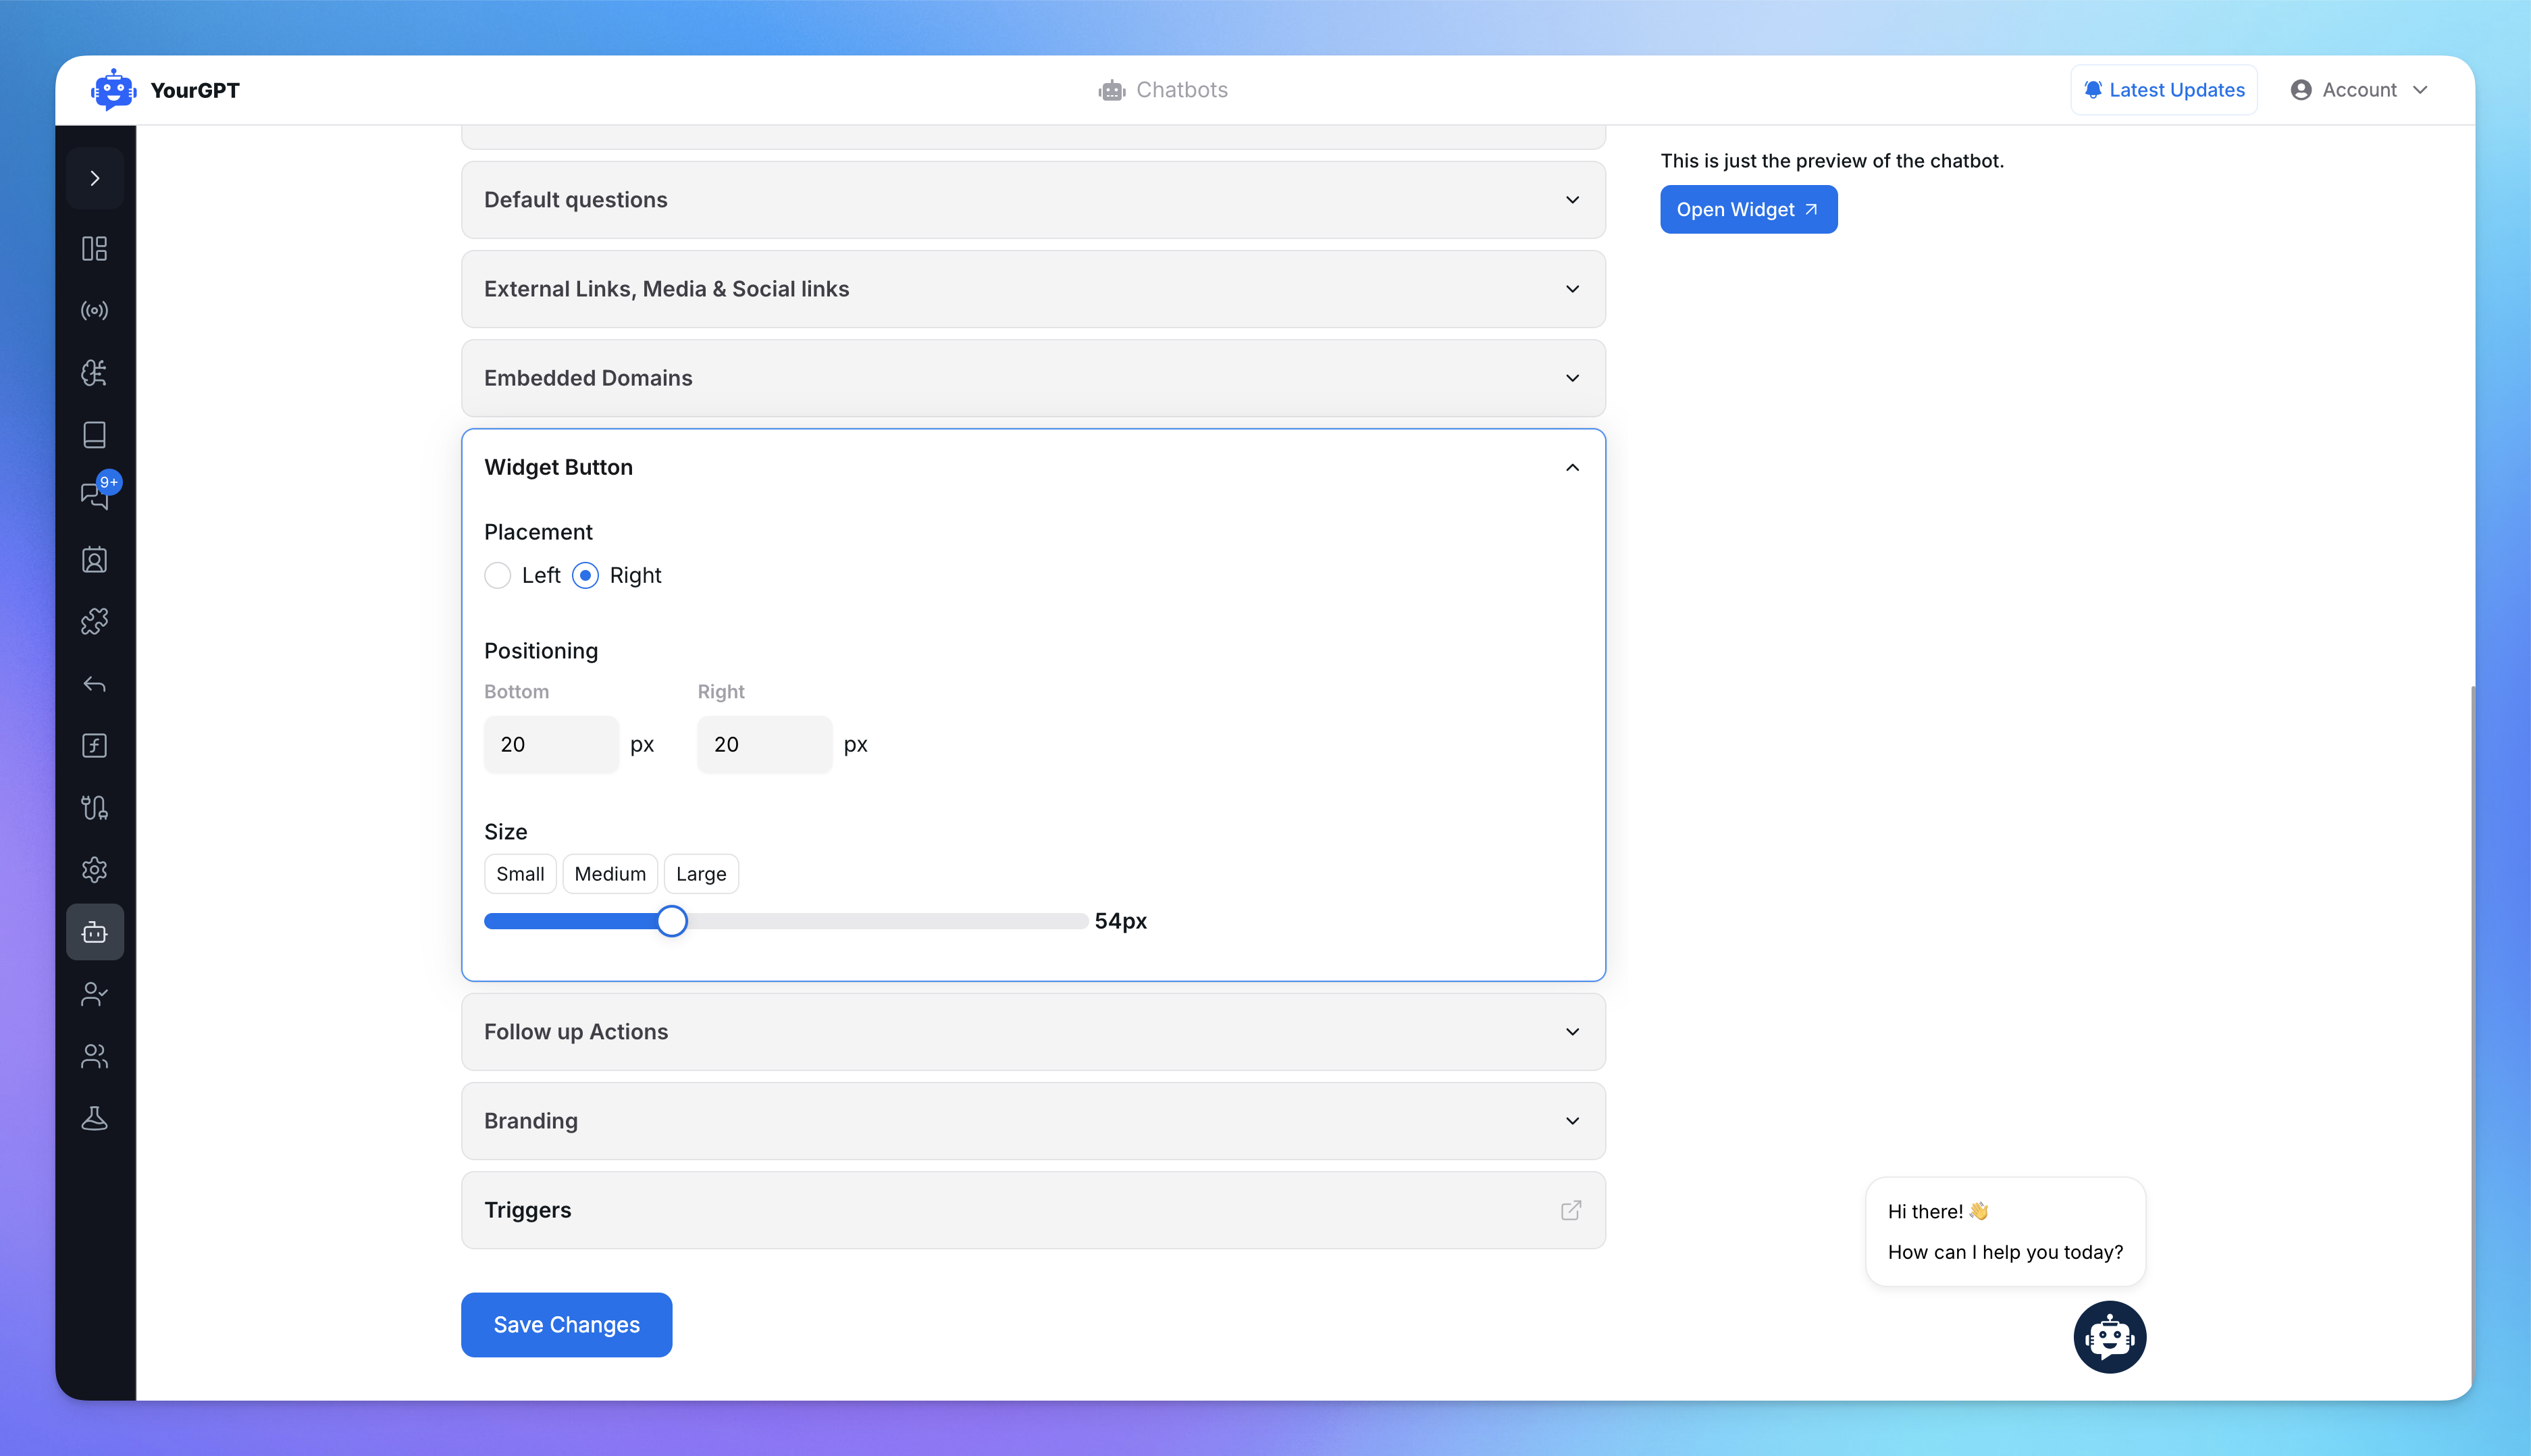
Position the widget button for better visibility and accessibility.
Set padding values for Bottom and Right in pixels (e.g., 20px).
Choose from Small, Medium, or Large button sizes.
Save your settings to finalize the placement.
How Do I Add Embedded Domains?
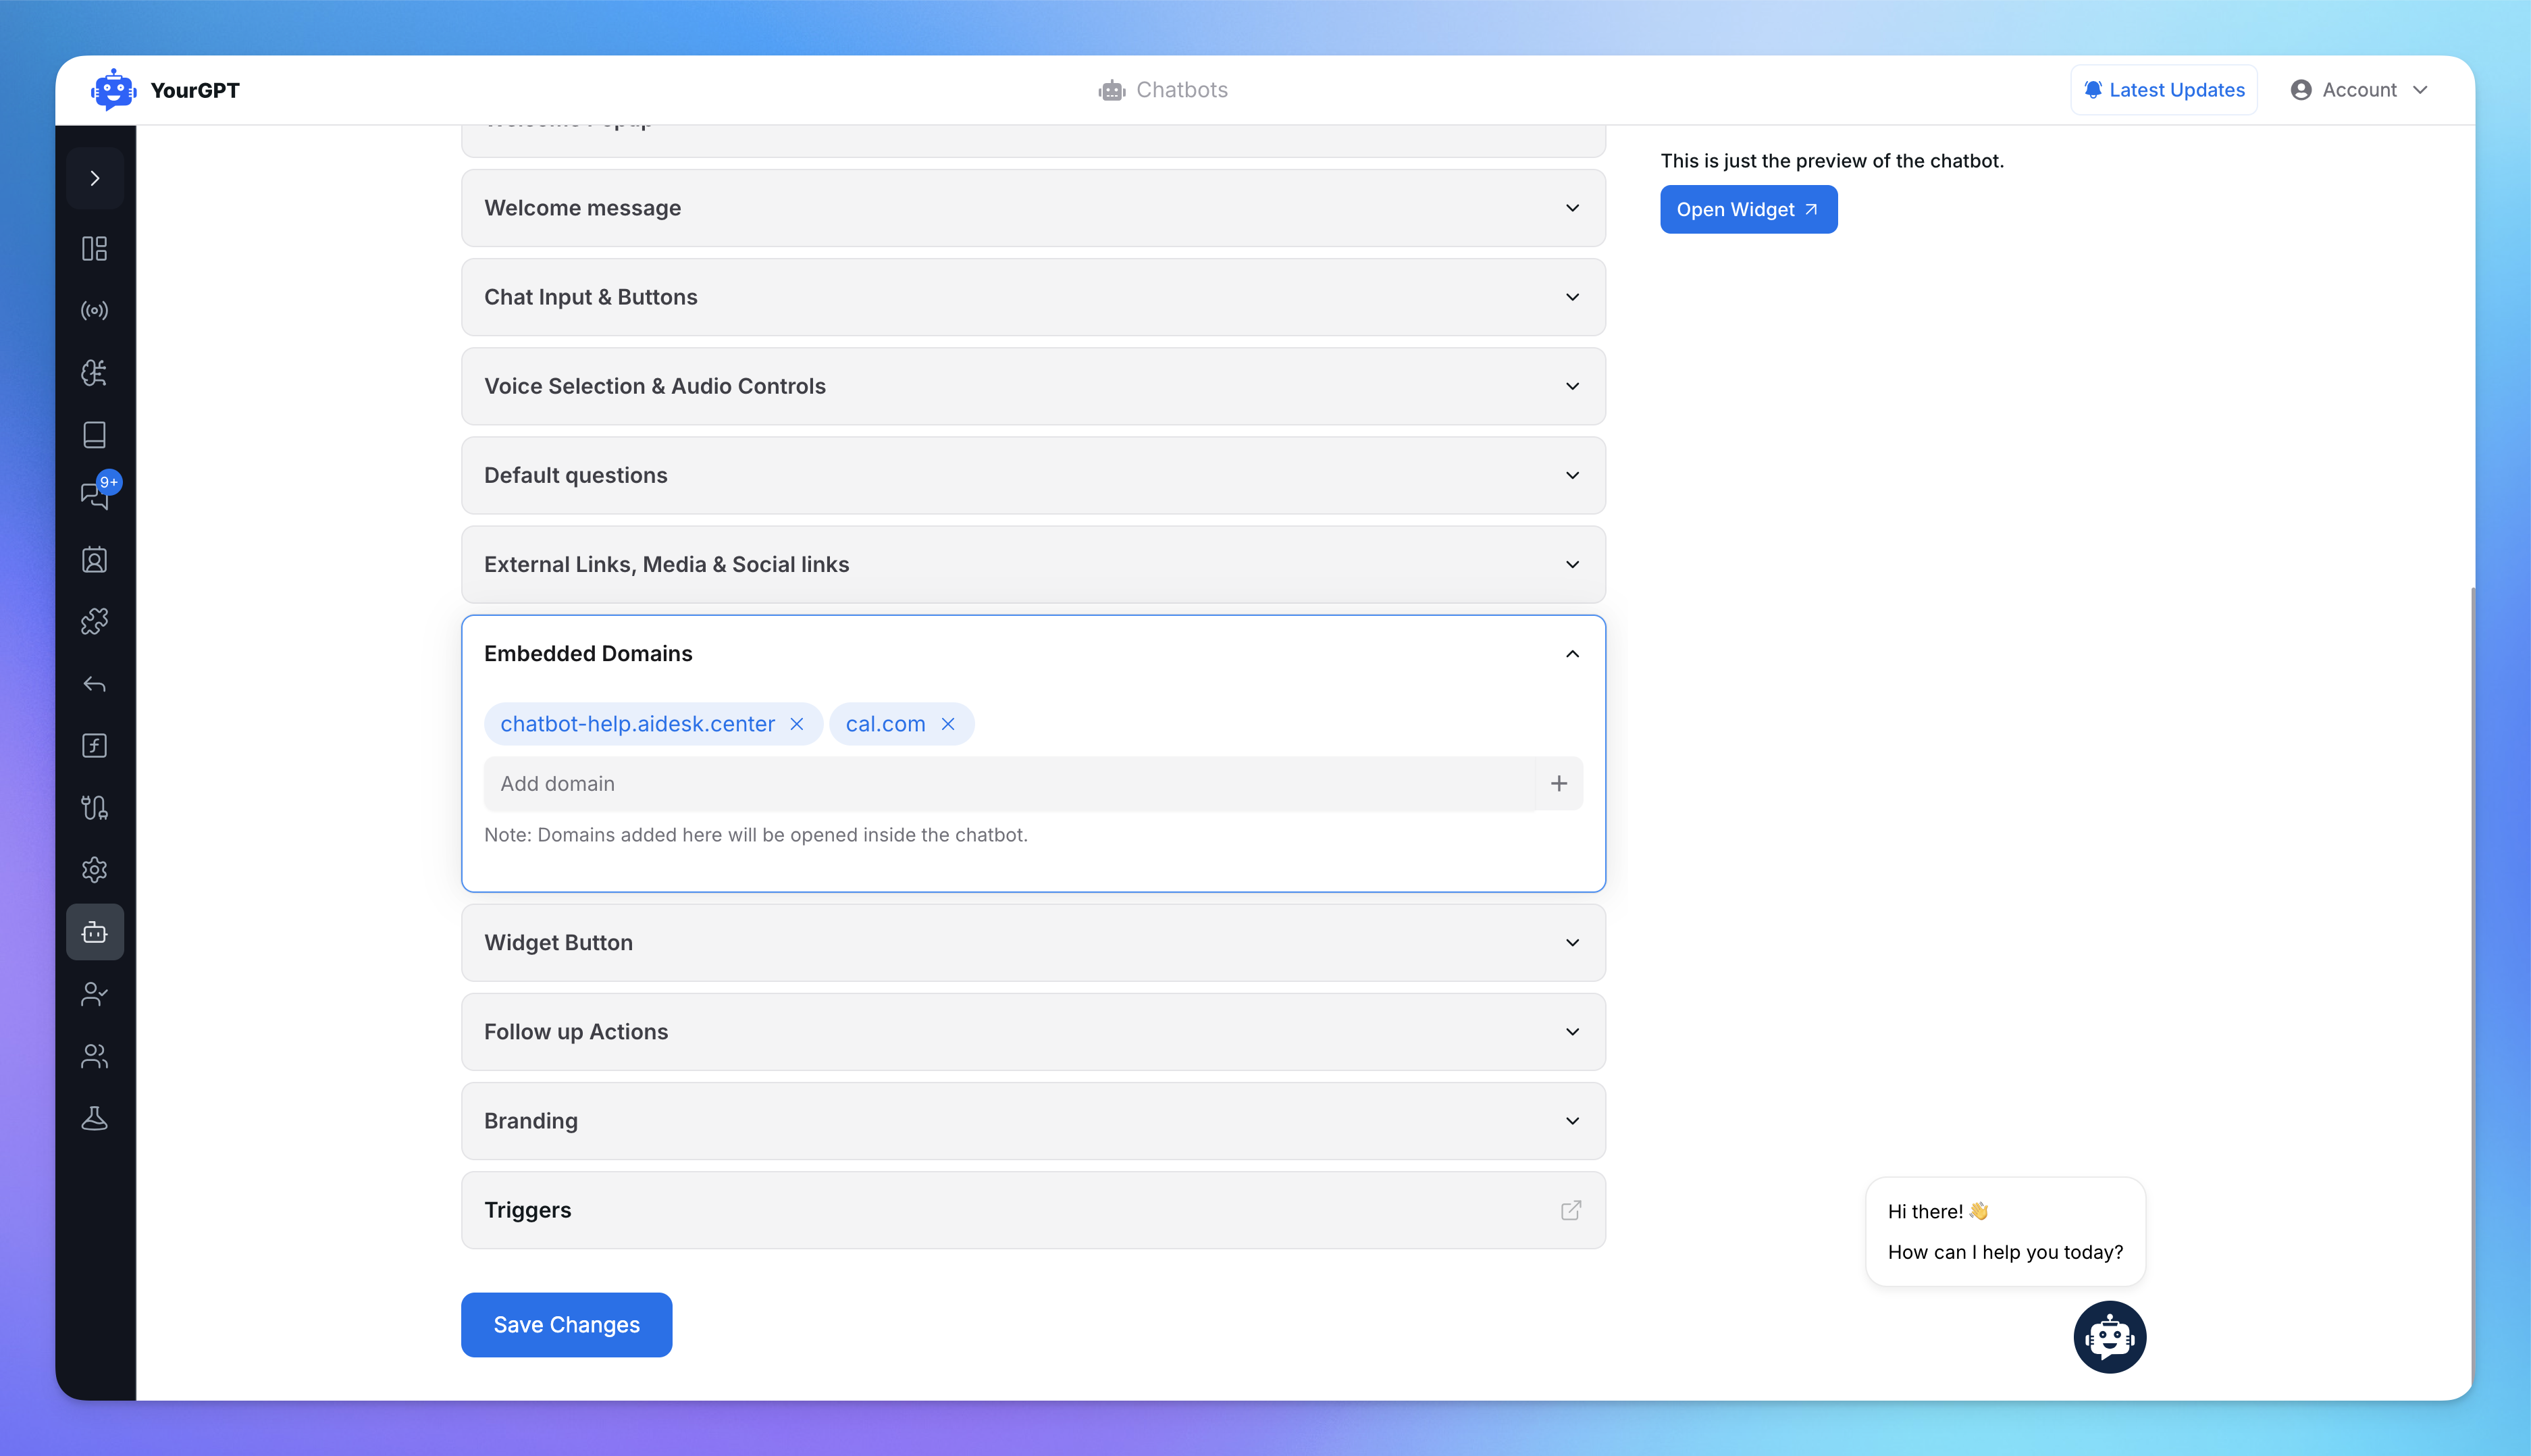
Embedded domains let your chatbot open specific websites or pages directly within the widget, creating a seamless user experience. Follow these steps to set it up:
Add Domains
Navigate to the "Embedded Domains" section in your chatbot settings. Enter the URLs you want to embed (e.g.,helpdesk.example.com) in the input field and press Enter. To remove a domain, click the "x" next to it.Save Changes
Once you’ve added or updated your embedded domains, click Save Changes to apply your settings.
This feature allows users to access tools like help desks or booking systems directly within the chatbot, enhancing engagement and convenience.
How Do I Enable Follow-up Actions?
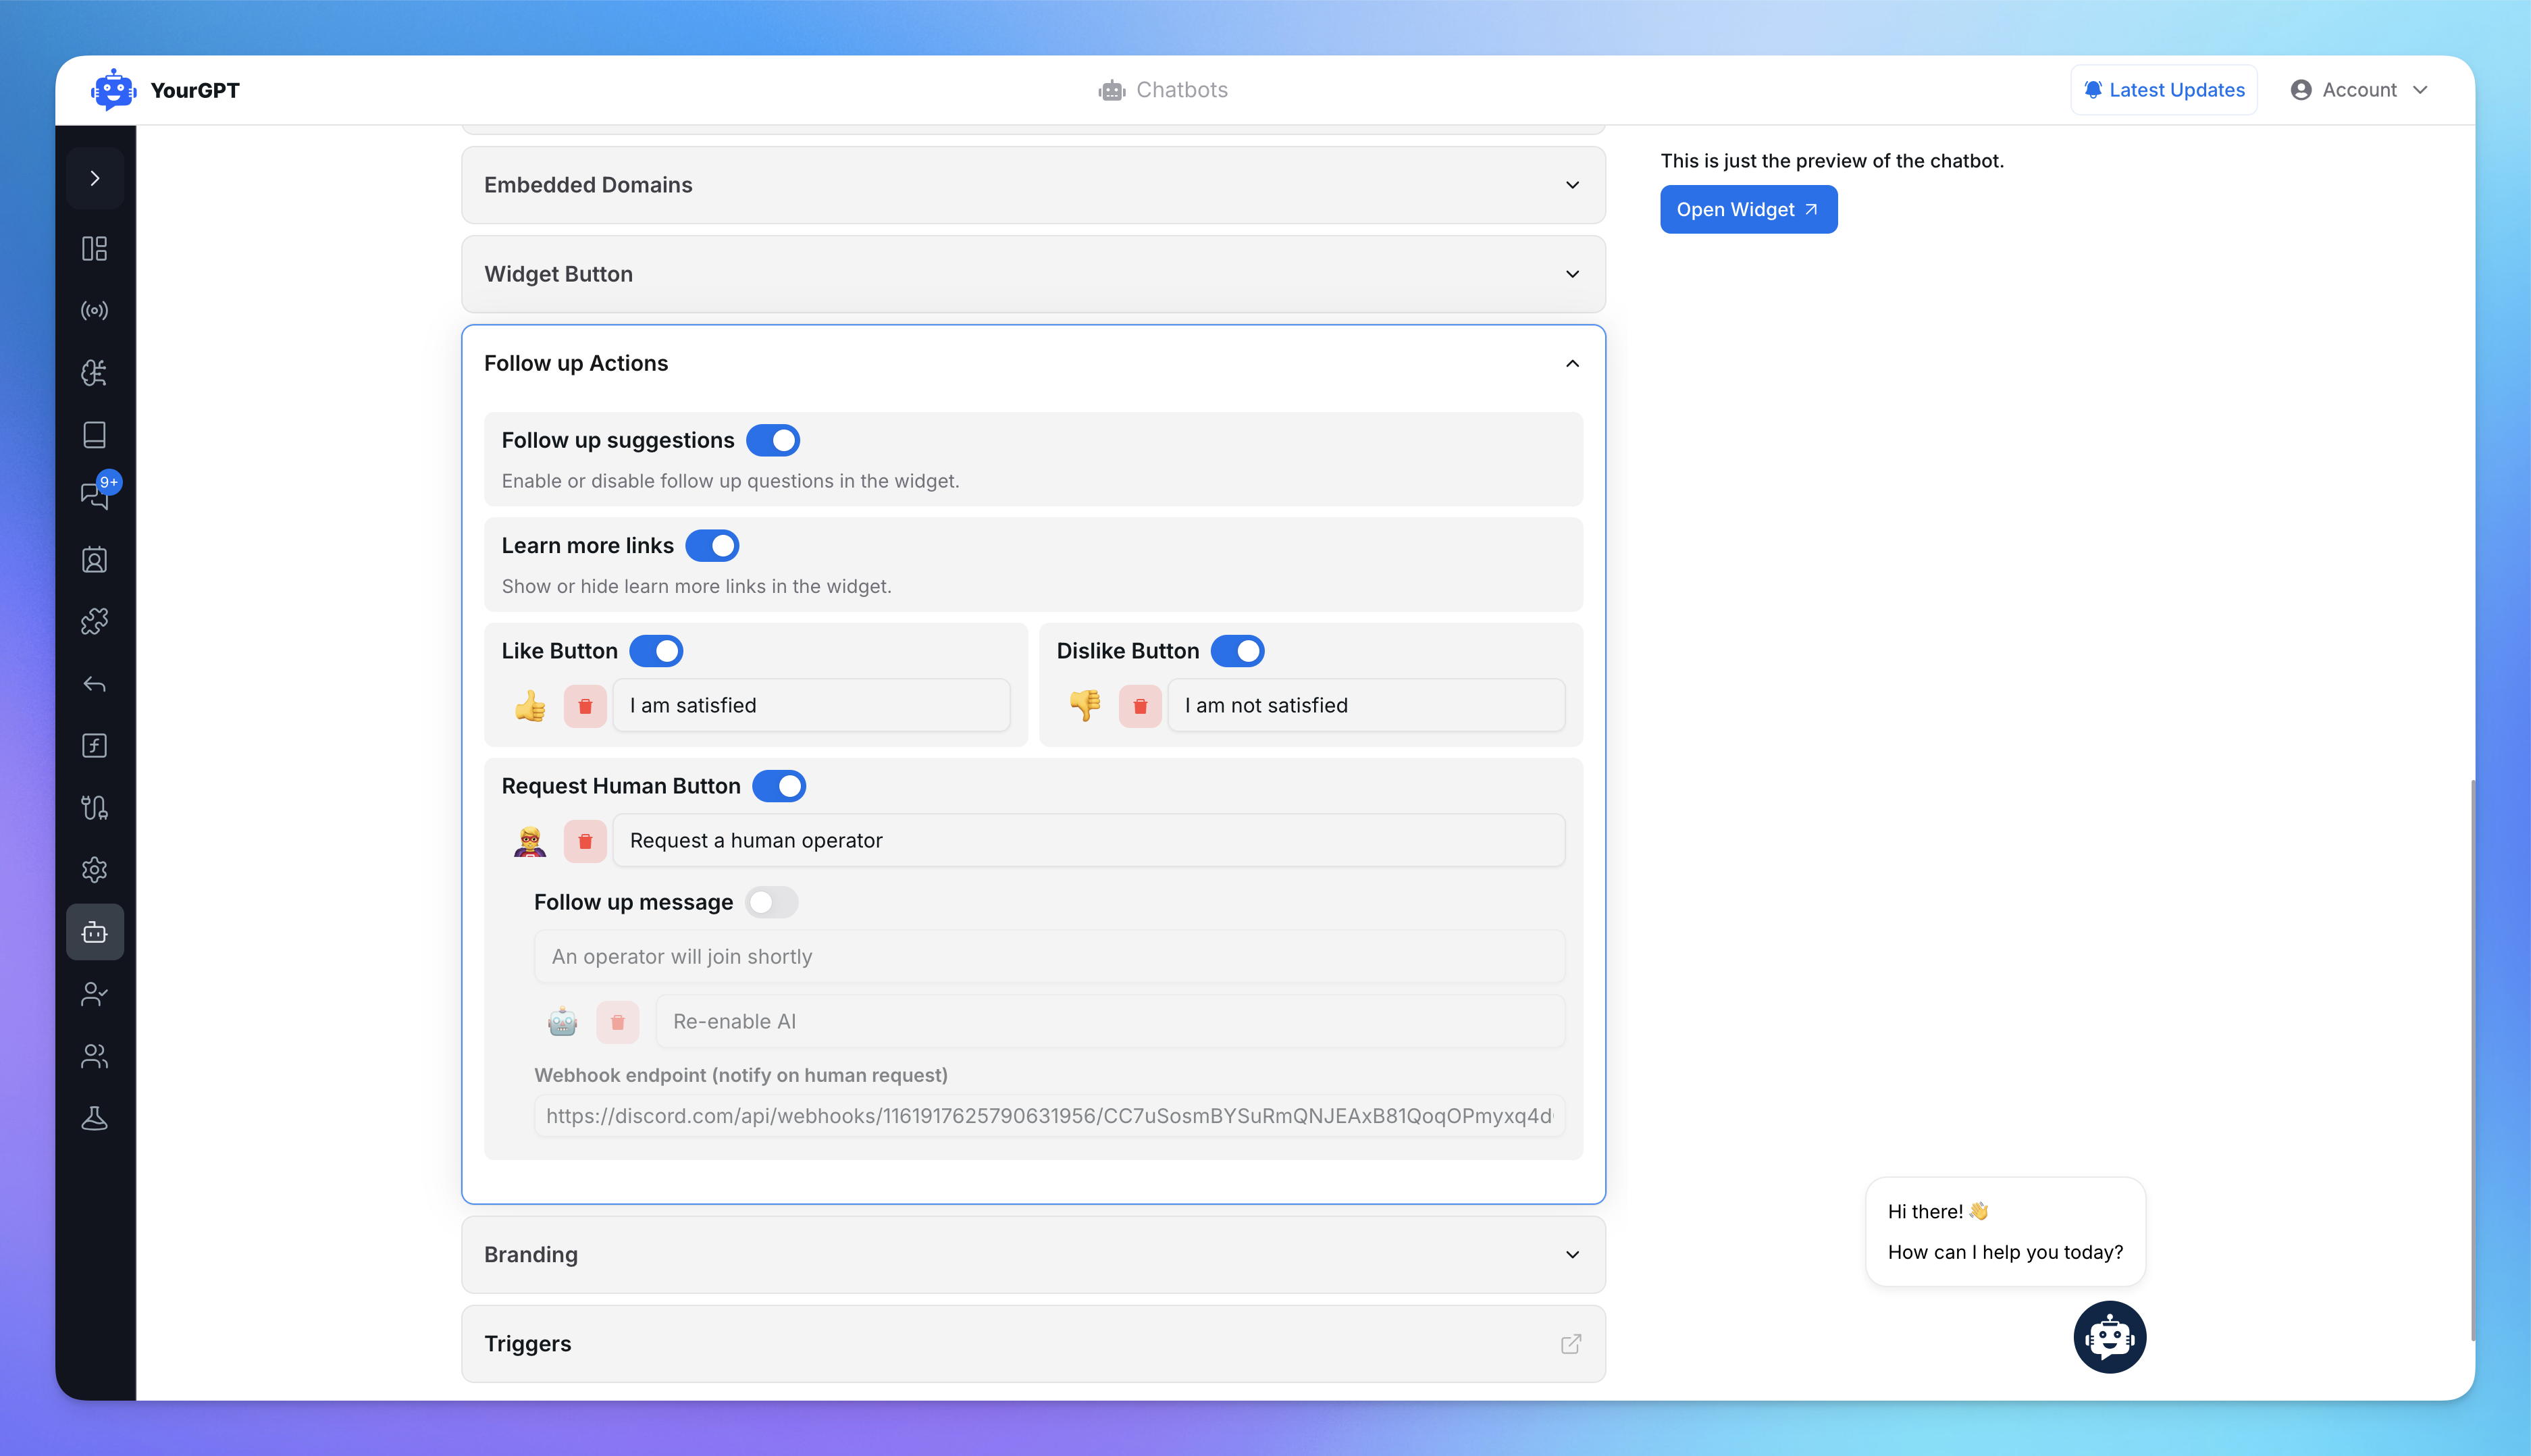
Follow-up actions improve user engagement by offering helpful suggestions.
Toggle settings to enable follow-up questions, "Learn More" links, and like/dislike buttons.
Customize the "Request Human Button" with follow-up messages like "An operator will join shortly." You can also add a webhook endpoint to notify on whenever a human requested.
Save your configuration once completed.
How to Add Branding, Custom Code, Custom Domain, and Widget Sounds?
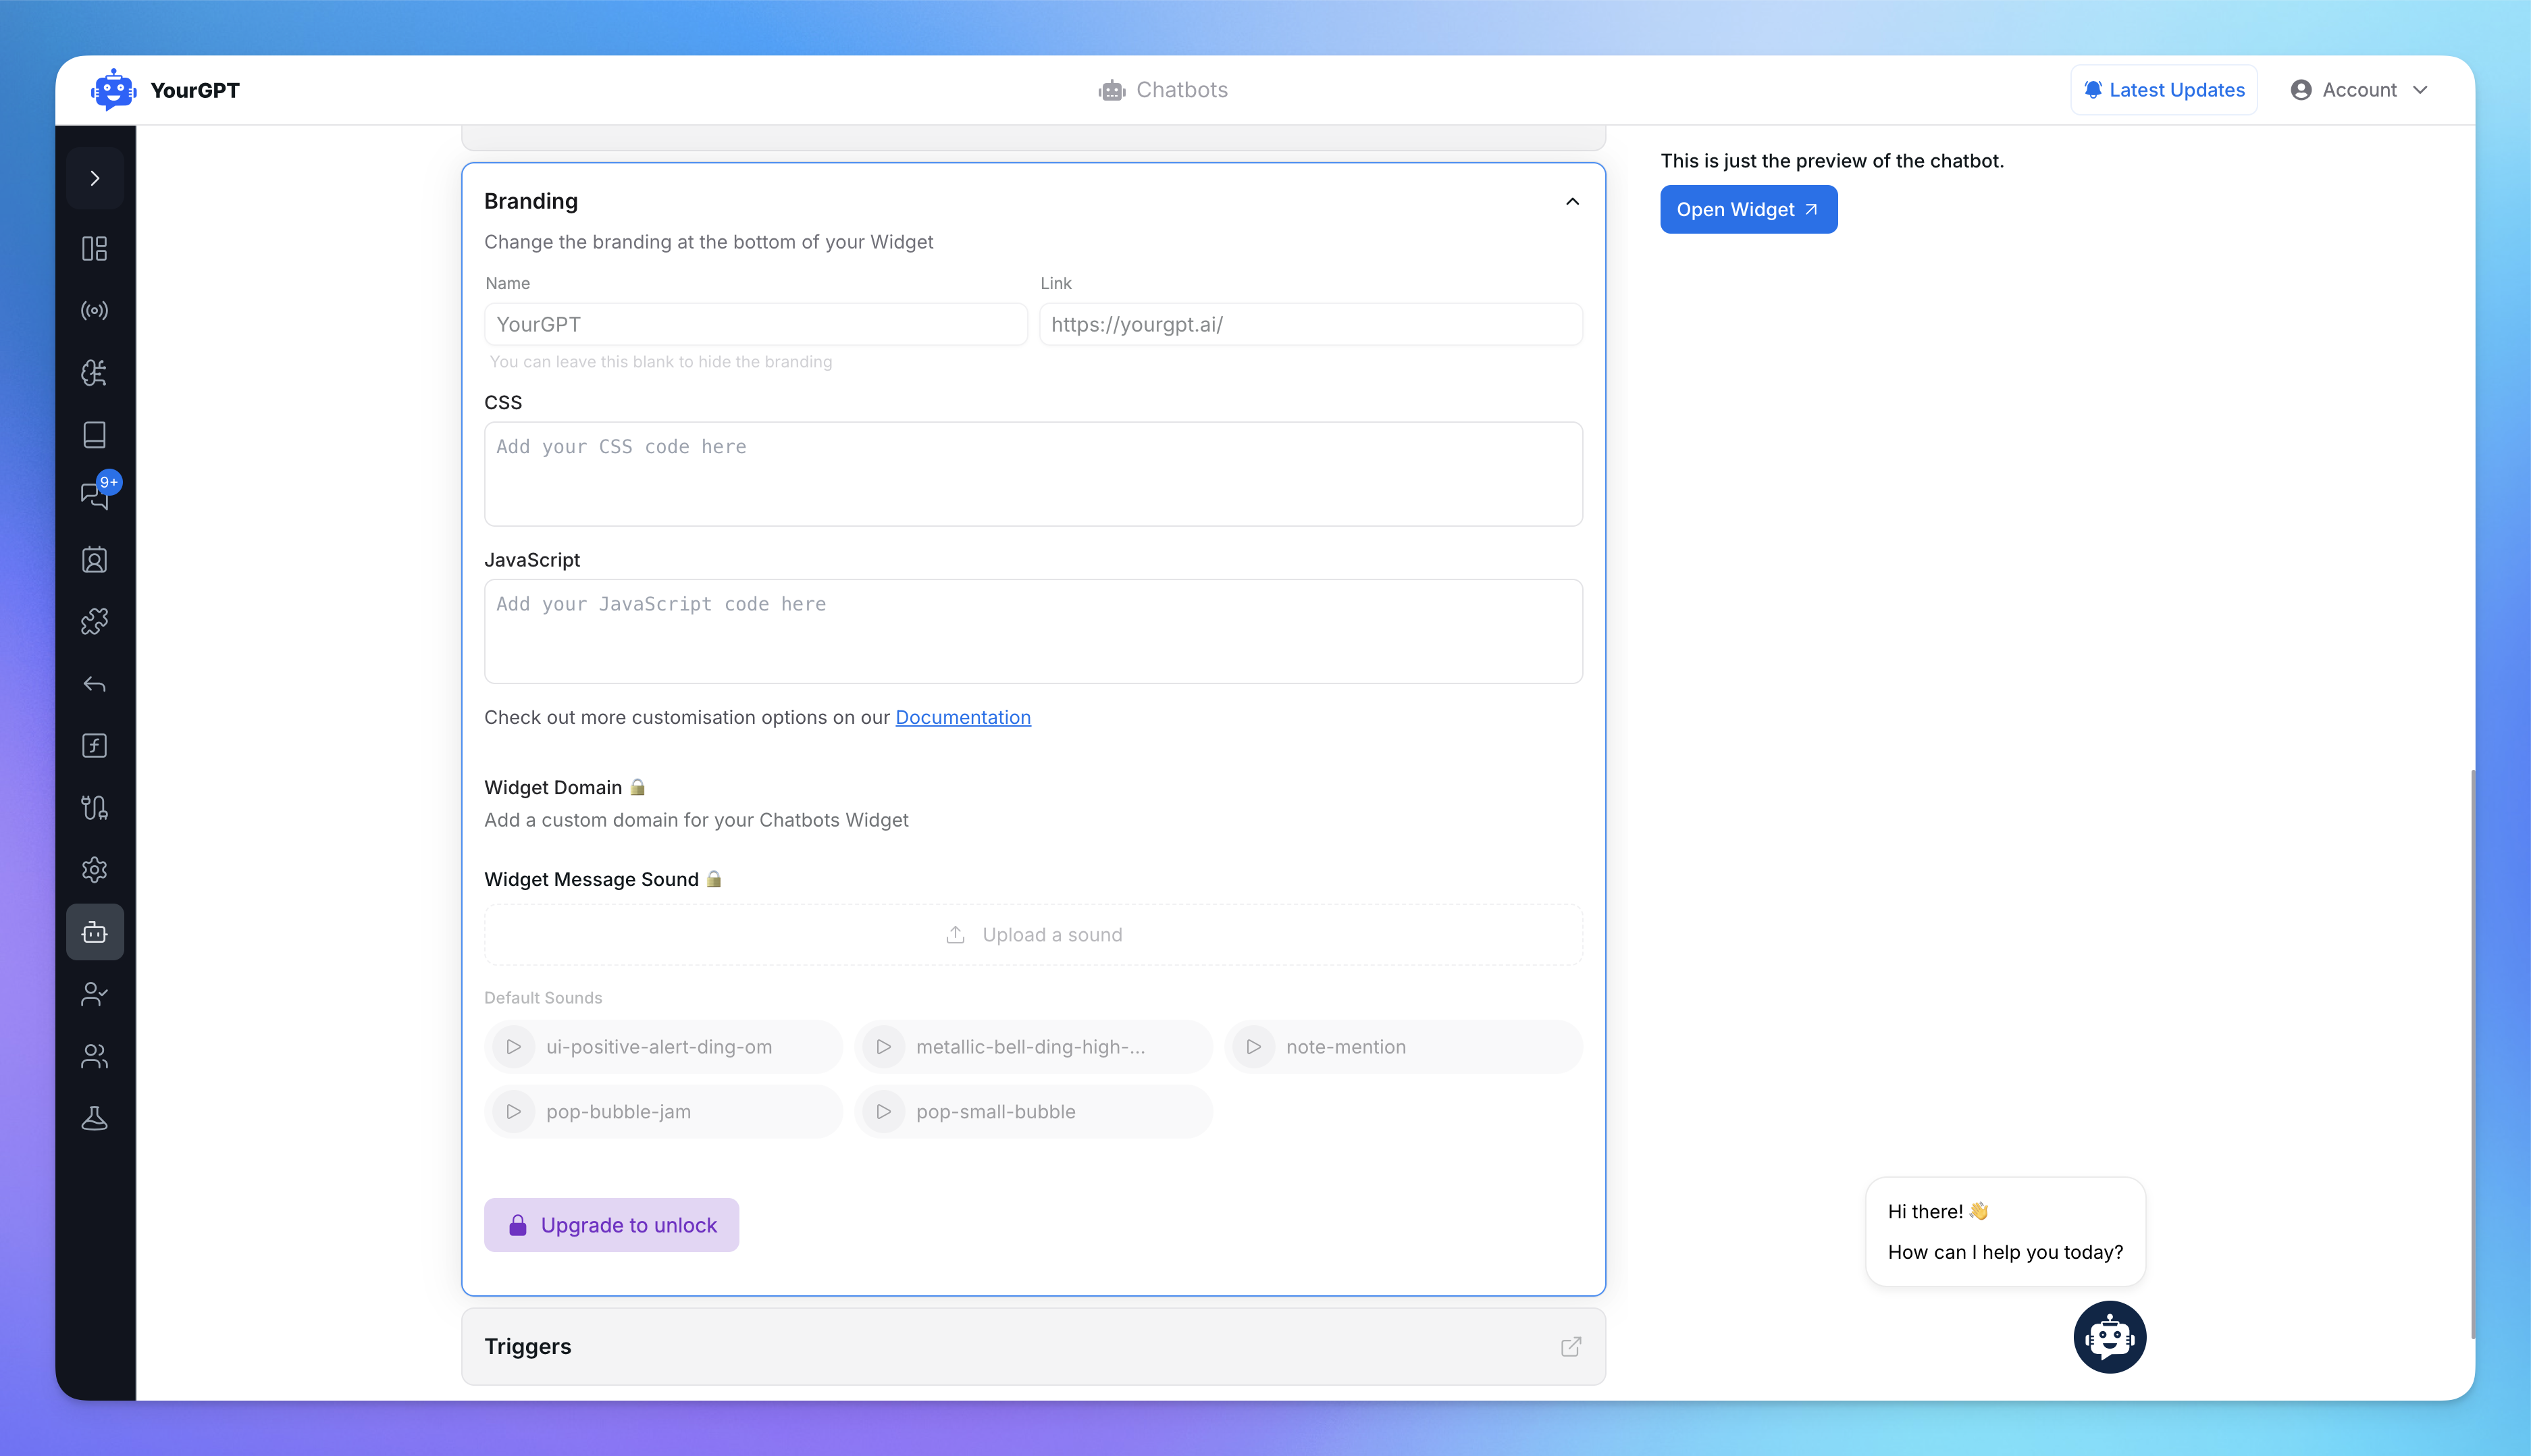
Enhance your widget’s functionality and personalization by configuring branding, custom code, custom domains, and widget sounds. Here’s how:
1. Add Branding or Custom Code
Personalize your widget with branding and custom design.
Add a branding name and a clickable link, or leave it blank to hide branding.
Insert CSS or JavaScript code to modify the widget’s design or behavior.
Save your changes to apply them.
2. Add a Custom Domain
Set up a unique domain for your chatbot.
Enter the custom domain in the Widget Domain section.
Save the changes to activate your domain.
3. Customize Widget Sounds
Make interactions more engaging with custom sounds.
Upload your sound file or choose from default options like "pop-bubble-jam."
Save your sound selection to enable it.
Note: This is available for Advanced, Agency users or if you have Branding Addon.
How Can I Preview My Widget?
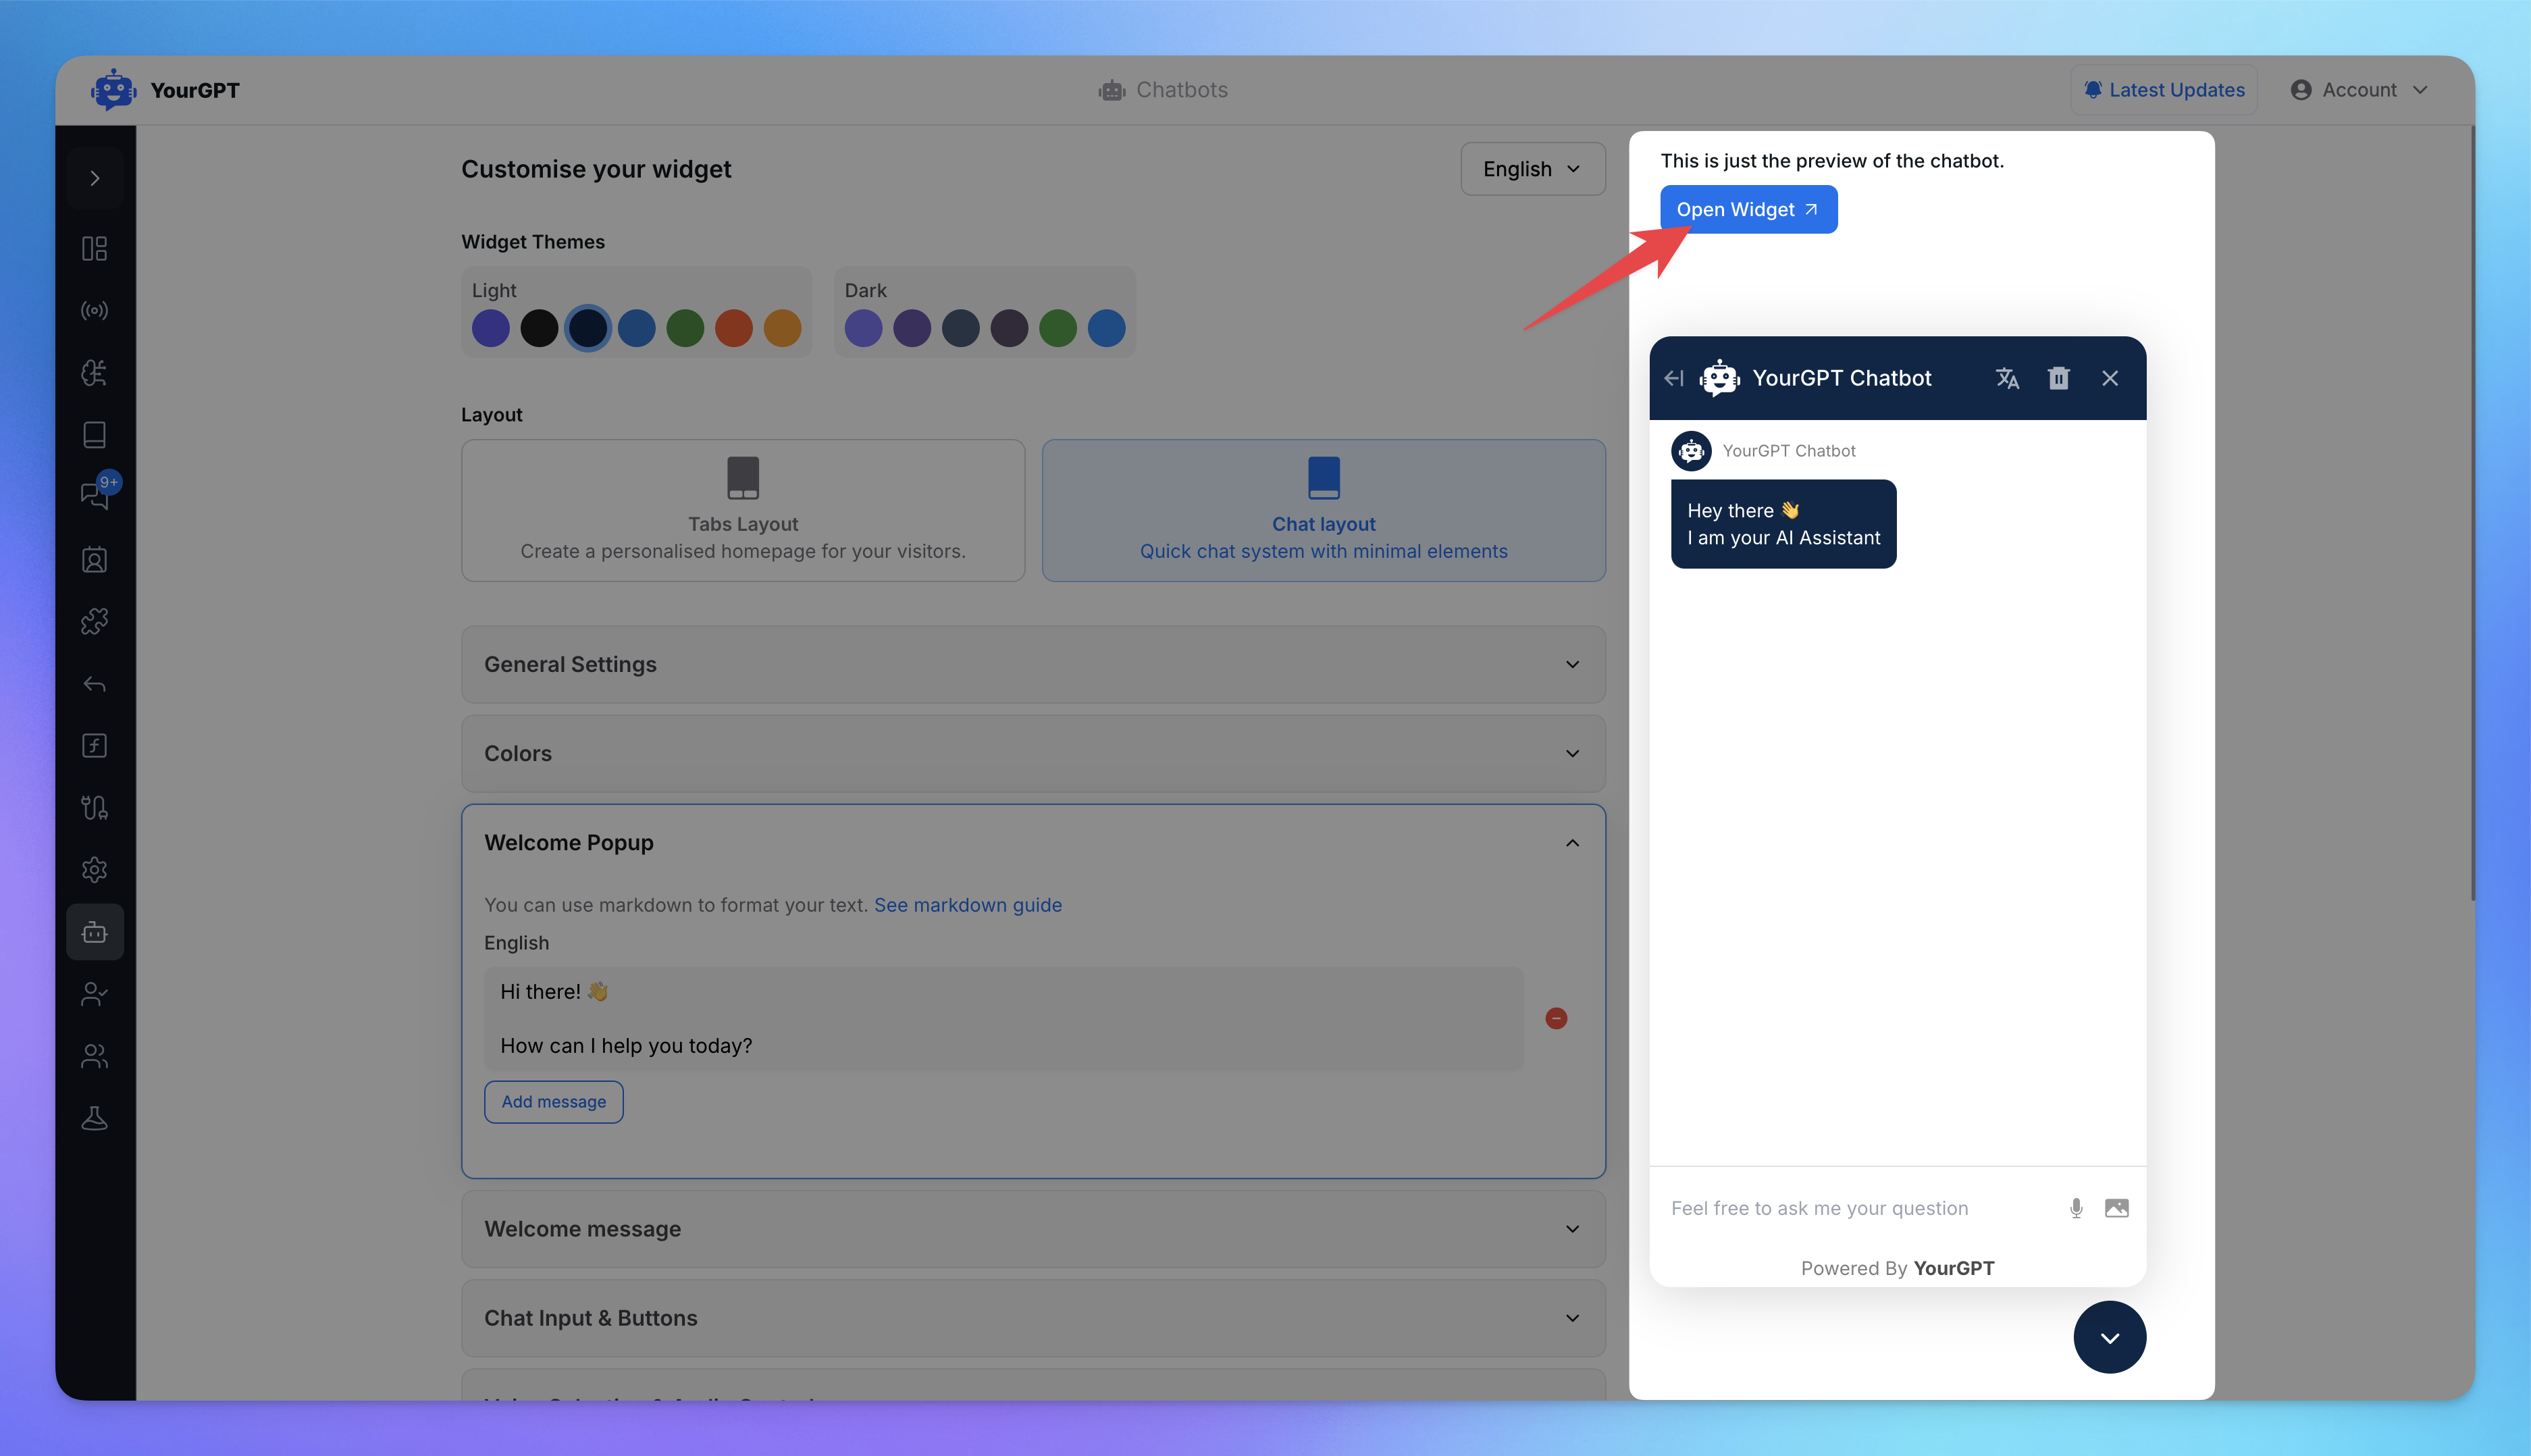
Previewing lets you see how the widget looks and functions before publishing.
Click Open Widget at the top-right of the customization page to test in realtime.
Test its appearance and features to ensure everything is set.
Related Articles
How to invite Team Members to Your AI Agent?
Add teammates, assign roles, and collaborate from chatbot settings.
How to Temporarily Disable AI Responses
Disable bot responses for maintenance, testing, or manual handling
How To enable Image Understanding for Your AI
AI agent to process images and answer on them
What is the Difference Between Chat Mode & Agent Mode?
A Practical Guide to choose between Chat Mode and Agent Mode in YourGPT
How to Add an AI Helpdesk to Your Website Widget With Optional Password Access
Embed an AI Helpdesk in Your Widget and Secure It in Minutes
Anywhere, Anytime Access to YourGPT Support Inbox
Instant Live Support from Your Phone with the YourGPT Mobile App
How to Clone Your AI Agent
Set Up Separate Bots for Staging, Production with Duplicate Bot
