
How to Install YourGPT with Google Tag Manager
This guide walks you through setting up a Google Tag Manager container and deploying the YourGPT widget on your website. By using Google Tag Manager, you can install and manage the YourGPT tracking script without modifying your site’s source code directly.
The process involves two main stages. First, you will create a Google Tag Manager account and container for your website. Second, you will configure a new Custom HTML tag inside your container and add the YourGPT chat widget script to it.
Follow the steps below to complete the setup and publish the changes to your site.
How to create a Google Tag Manager container
You’ll need a GTM account and container to add tags that load the YourGPT widget on your website.
Sign in to your Google account. Go to the Google Tag Manager home and click the Create Account button on the right.
Enter the account and container name. Choose the target platform as Web and click on the Continue button.
Read through the GTM Terms of Service, then click Yes to accept them.
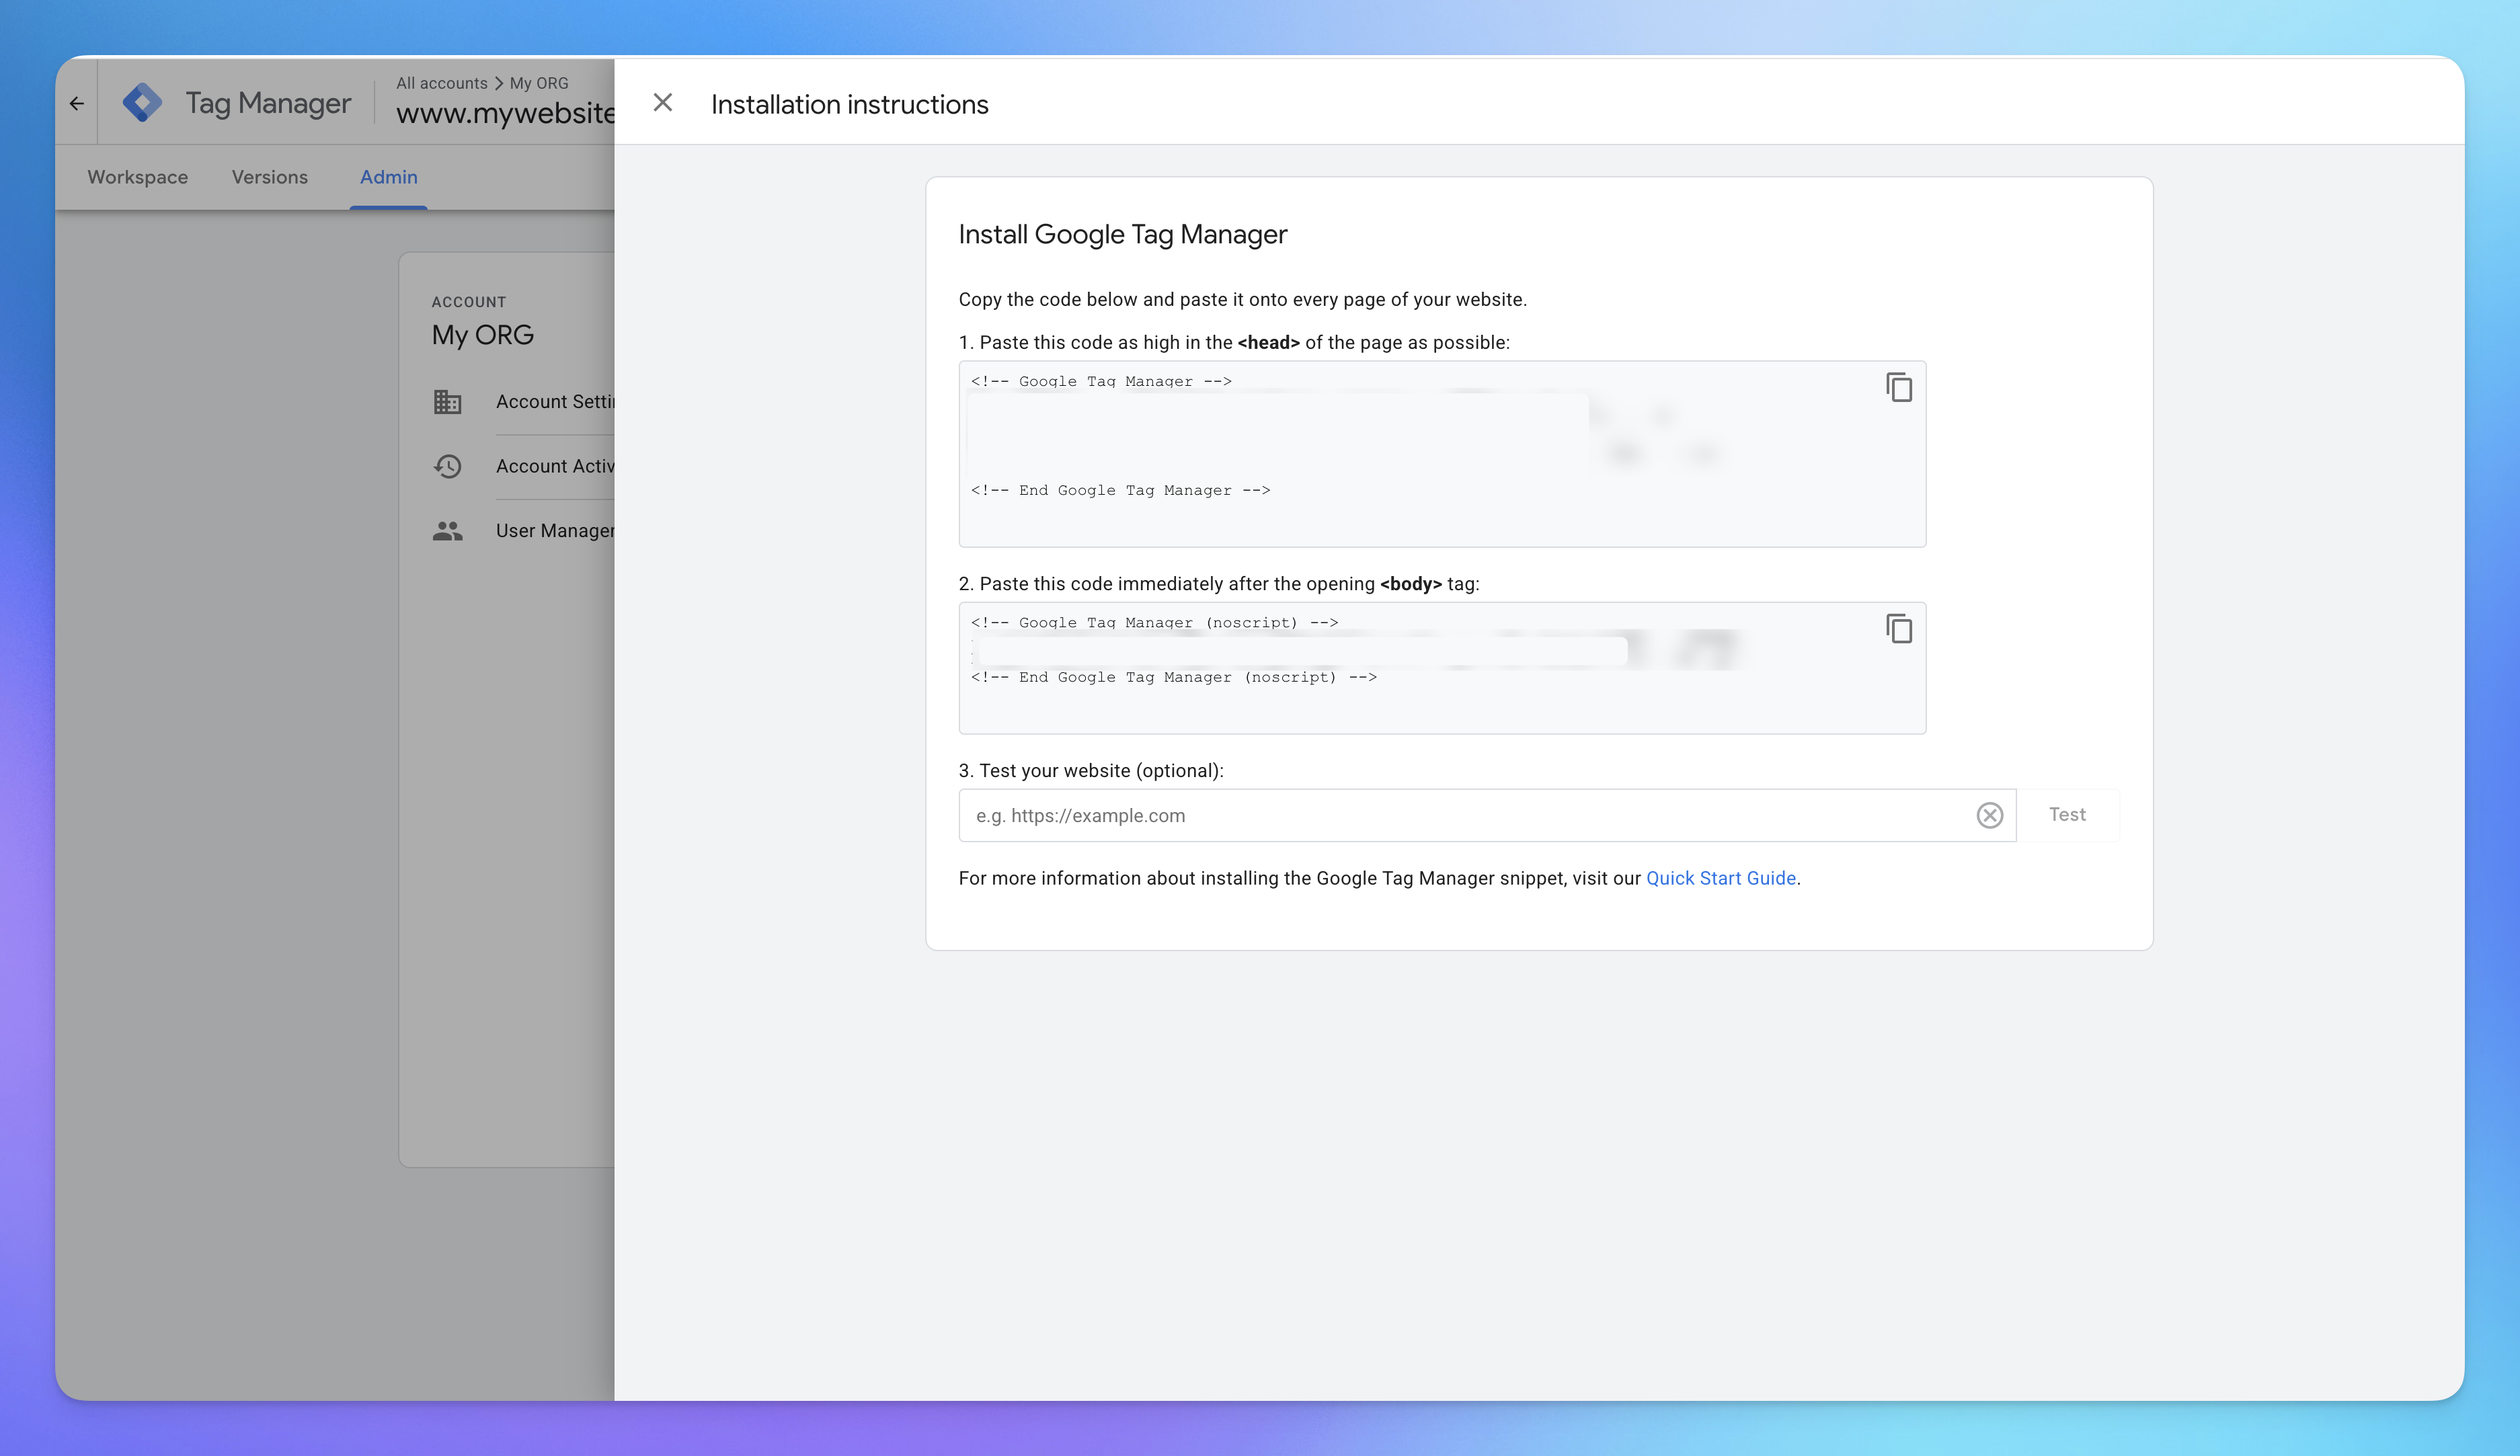
You’ll get a container with a code snippet. Copy the code and paste it into every site page in the recommended places. Click Ok to close the code snippet box.
How to add the YourGPT tag to your website
Once you’re logged into your account with the container, it’s time to add a new tag with the YourGPT tracking code inside it. To do so, follow these steps.
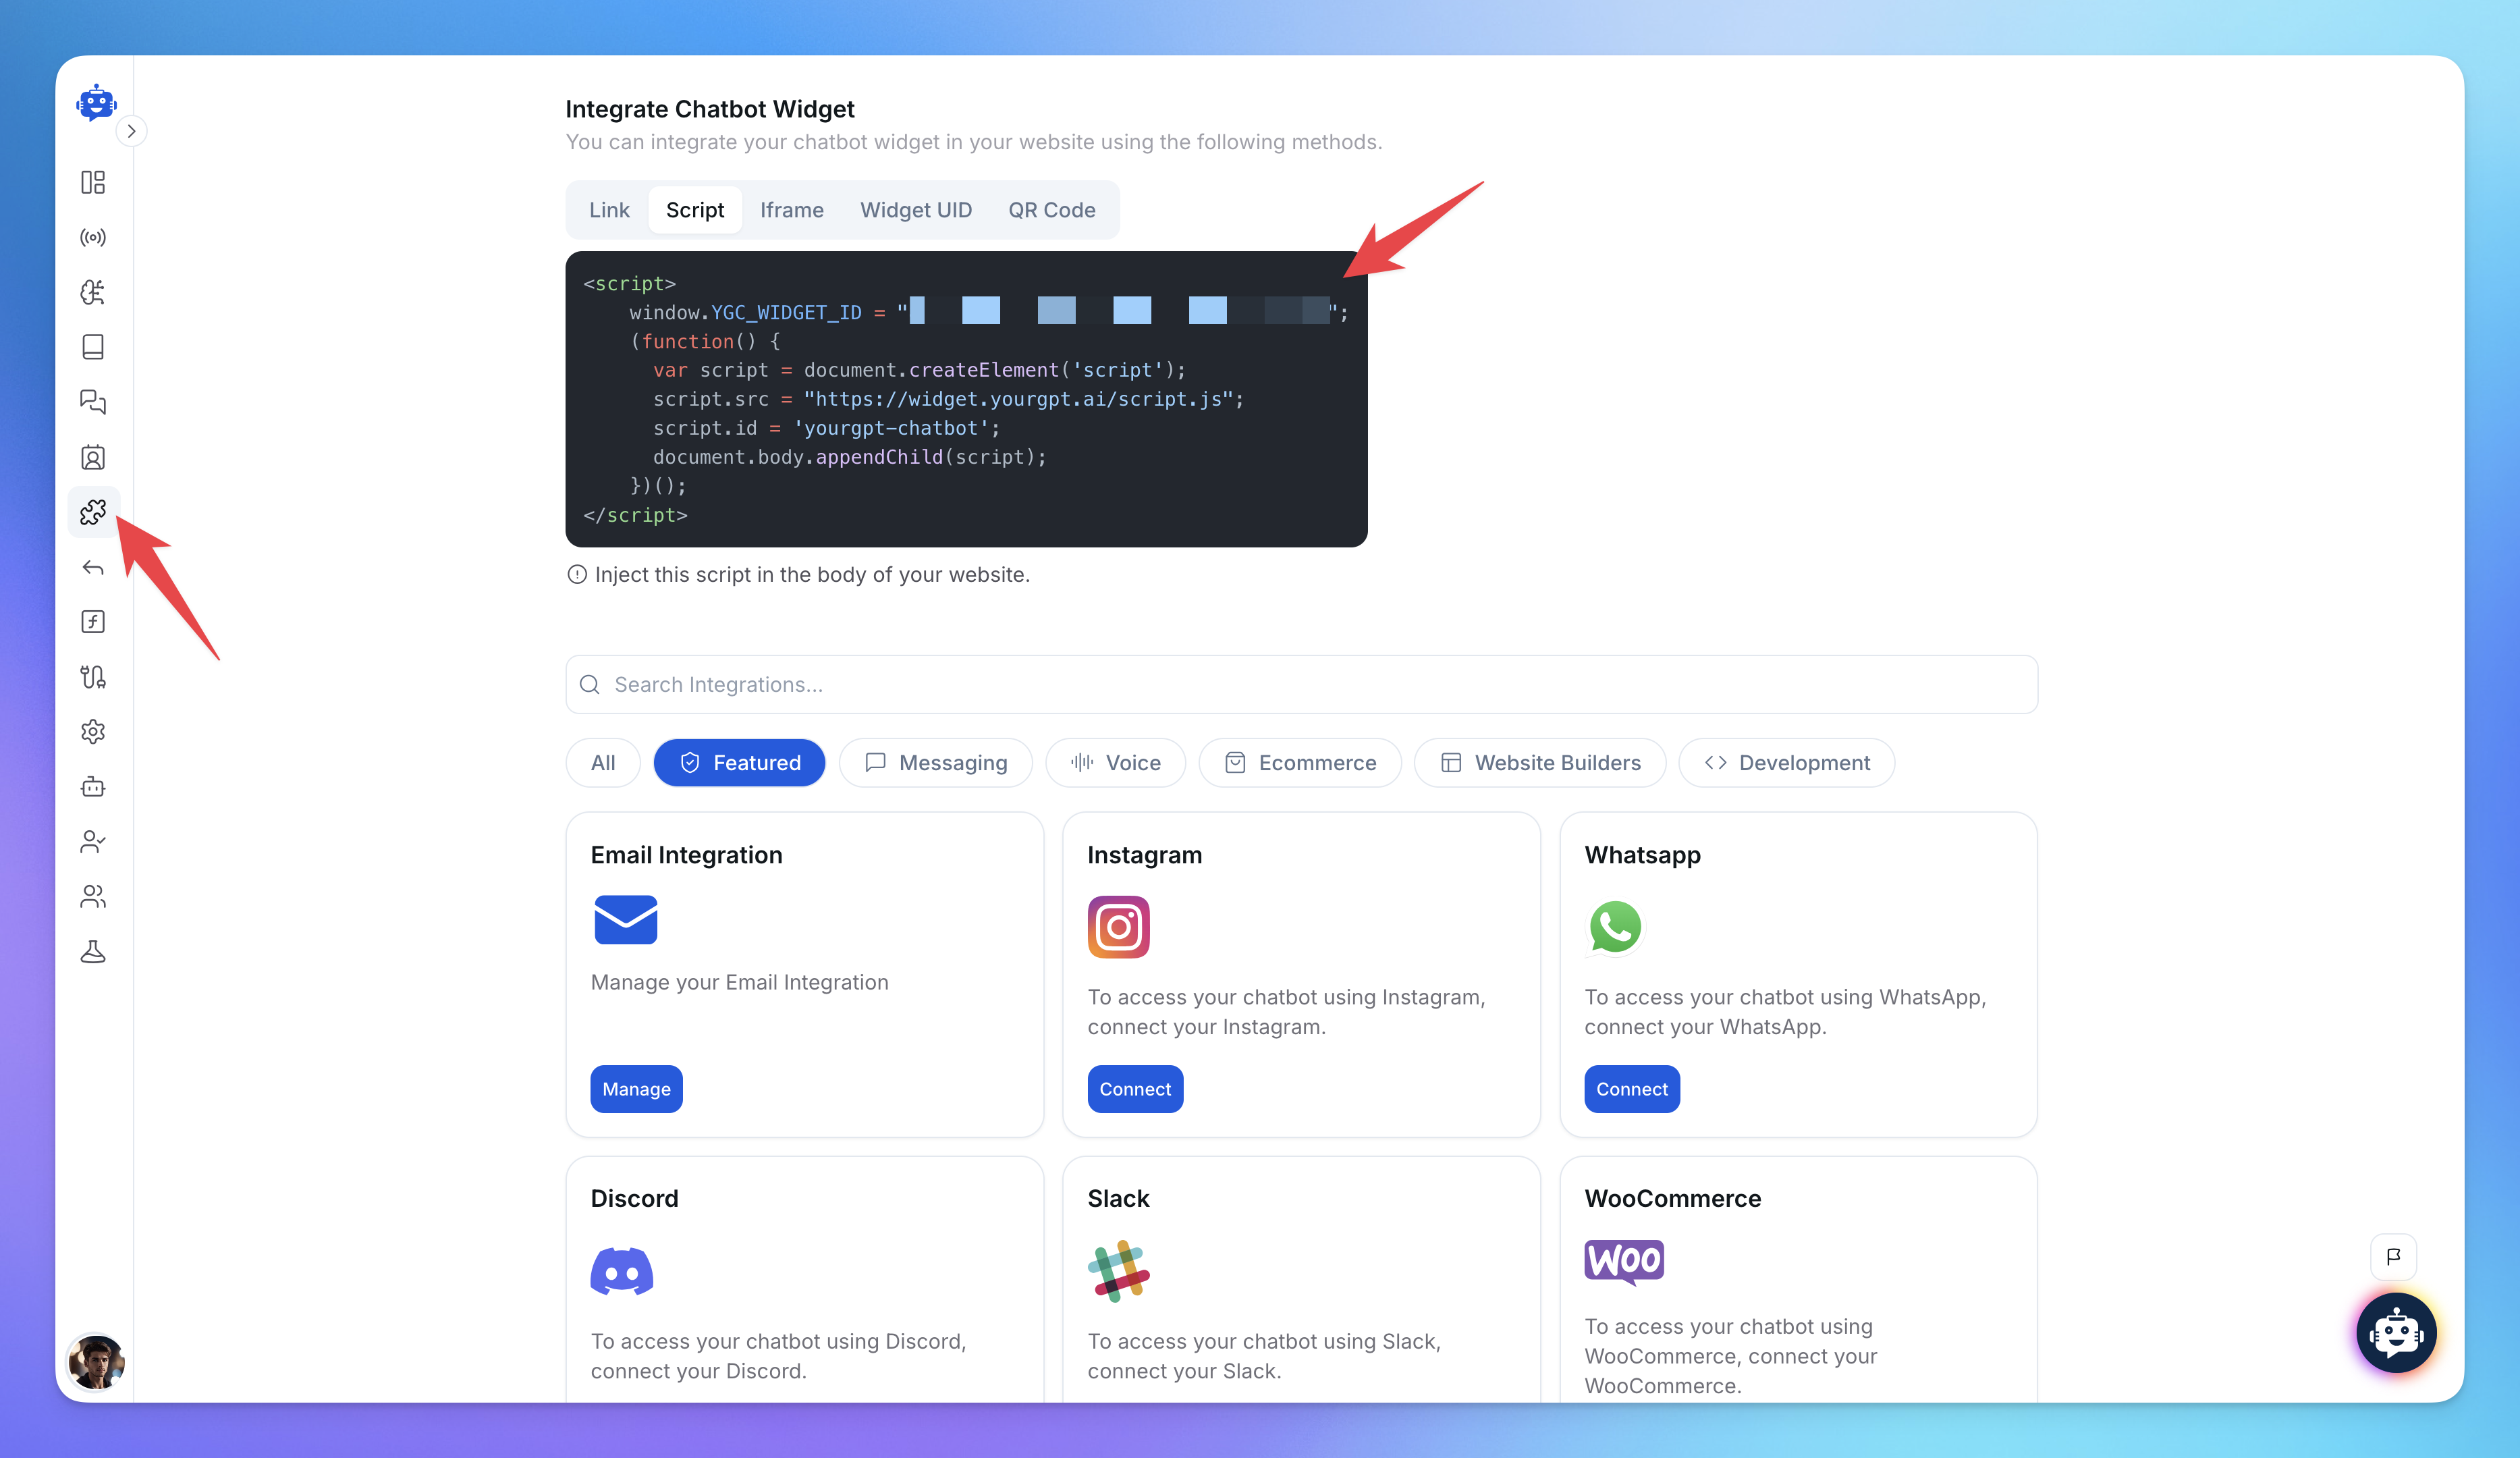
Open your YourGPT dashboard and navigate to the Integrations section.
Locate the Chat Widget script and copy the code to your clipboard.
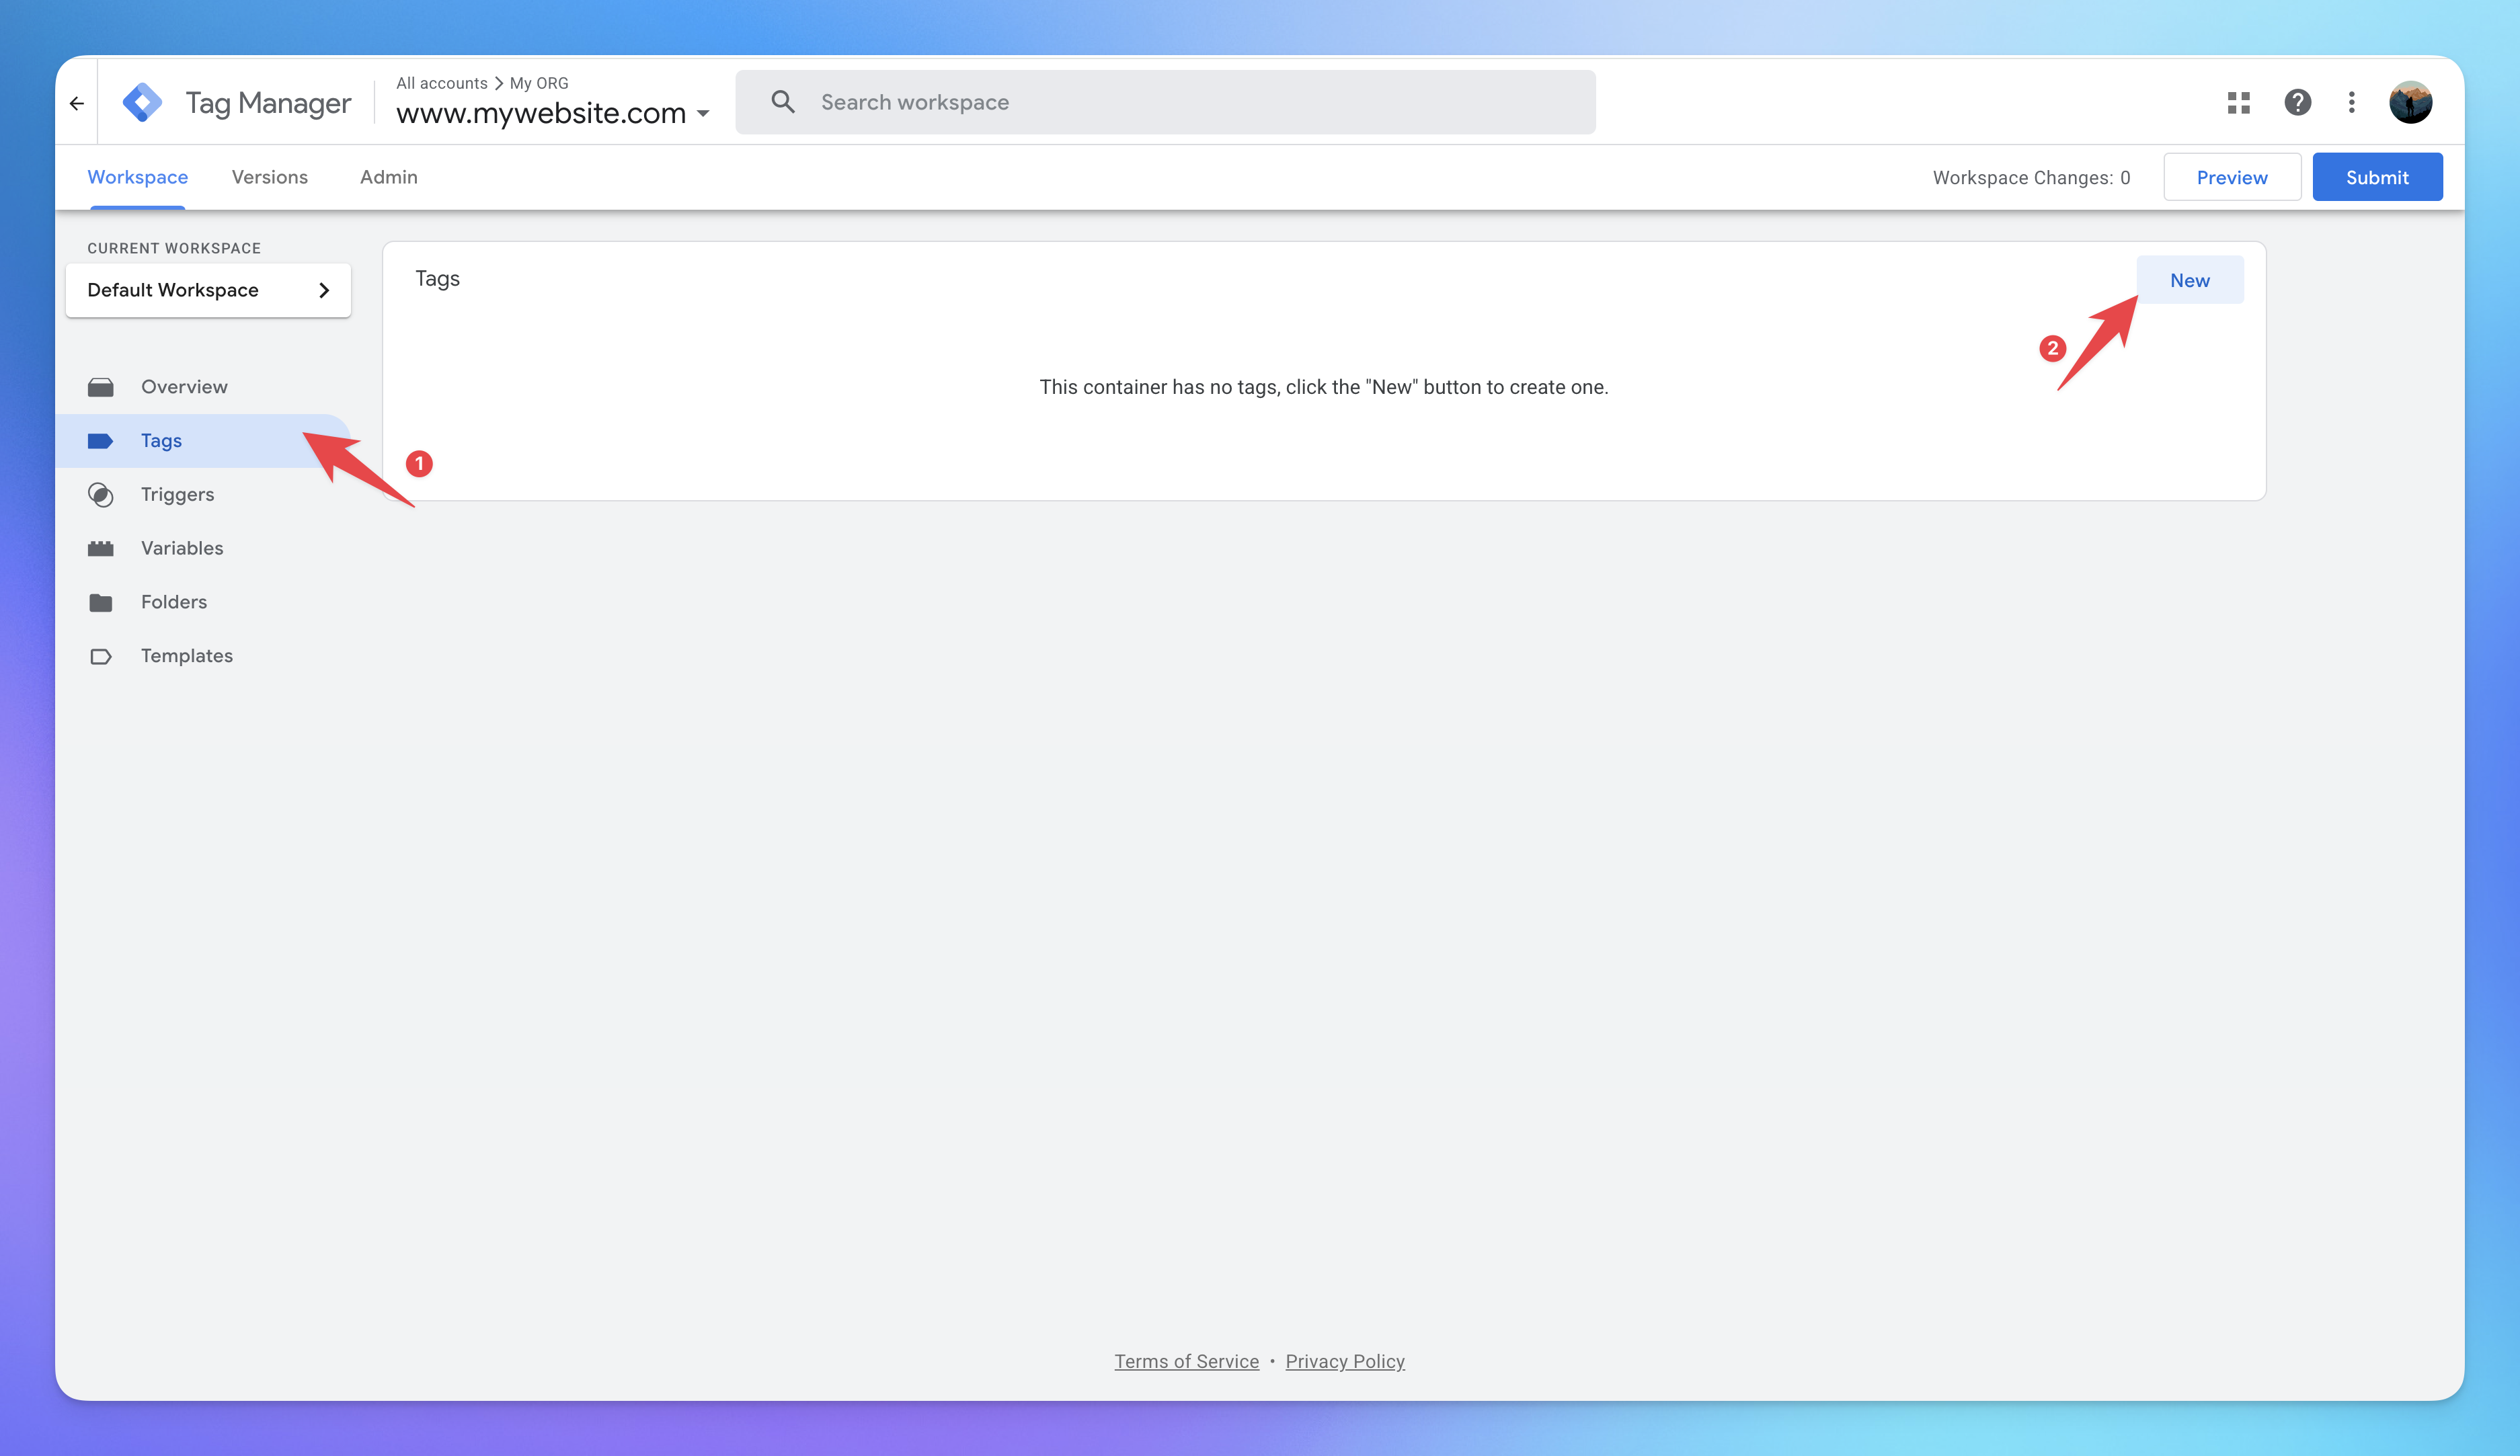
In the Google Tag Manager Home, click on the New Tag tile.
Click on the Tag Configuration tile and select Custom HTML from the tags list.
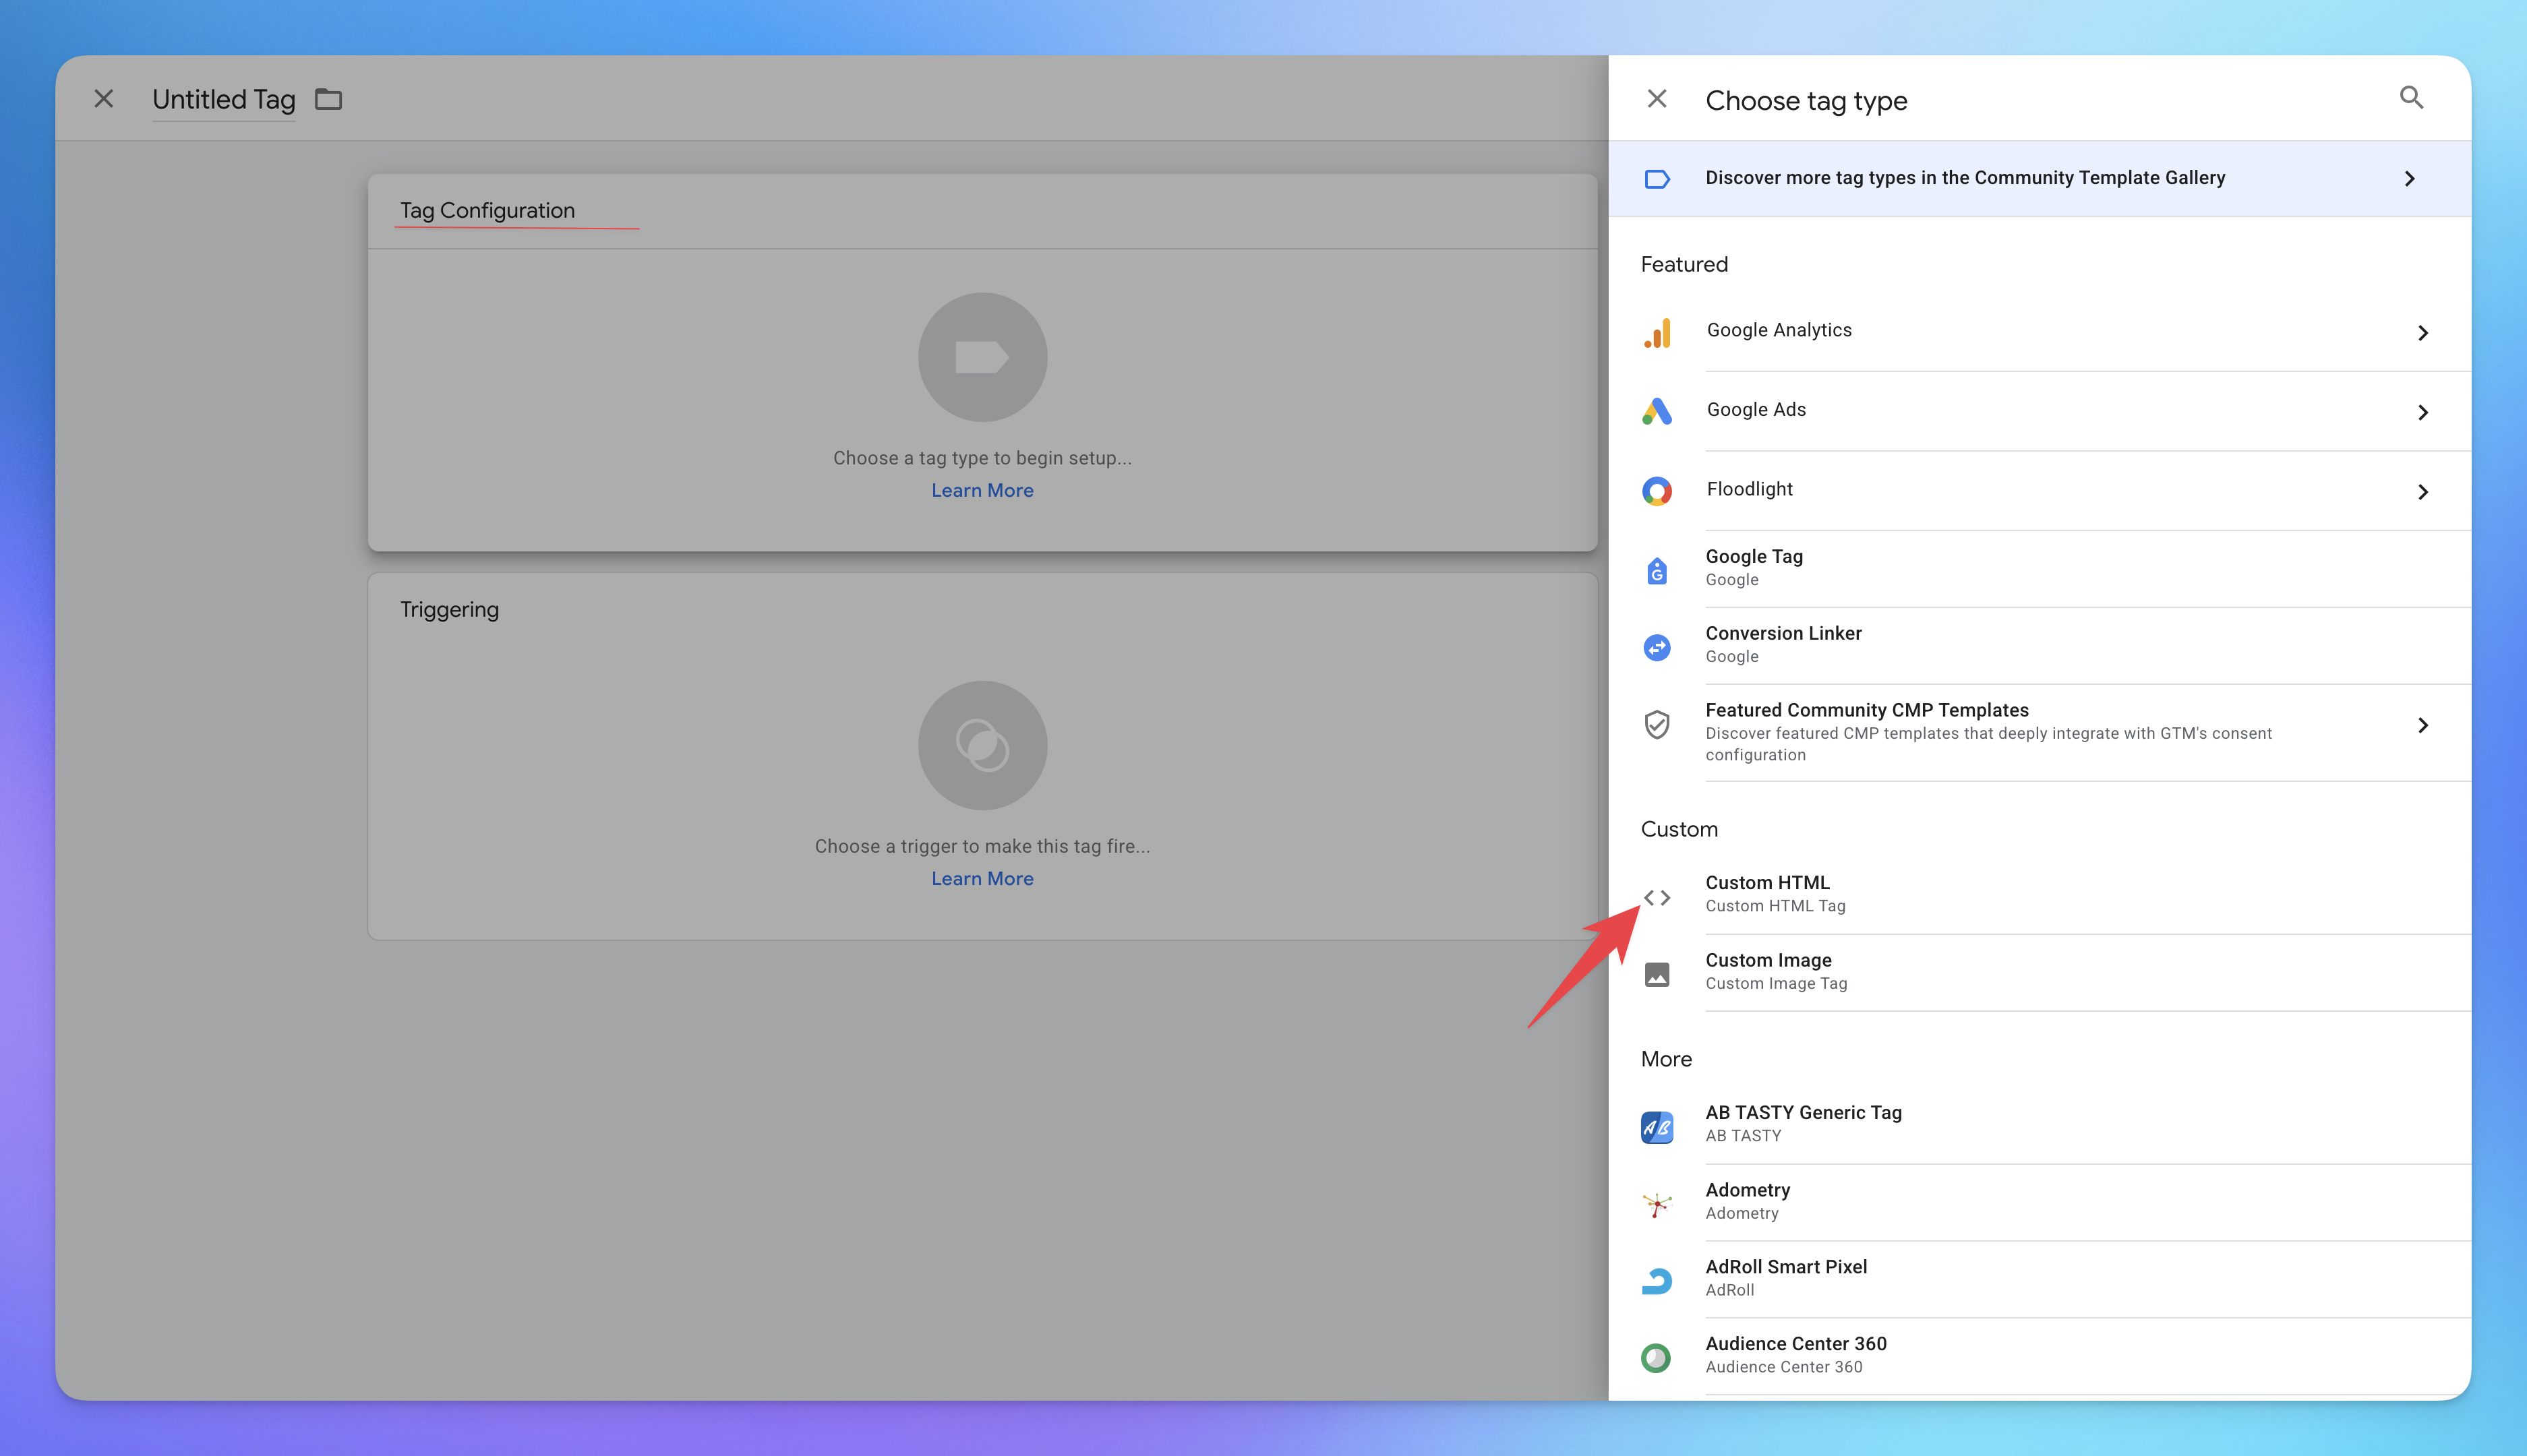
Paste the YourGPT tracking code into the HTML field.
Click on the Triggering tile and select All pages from the tags list. After you add the trigger, hit the Save button on the right.
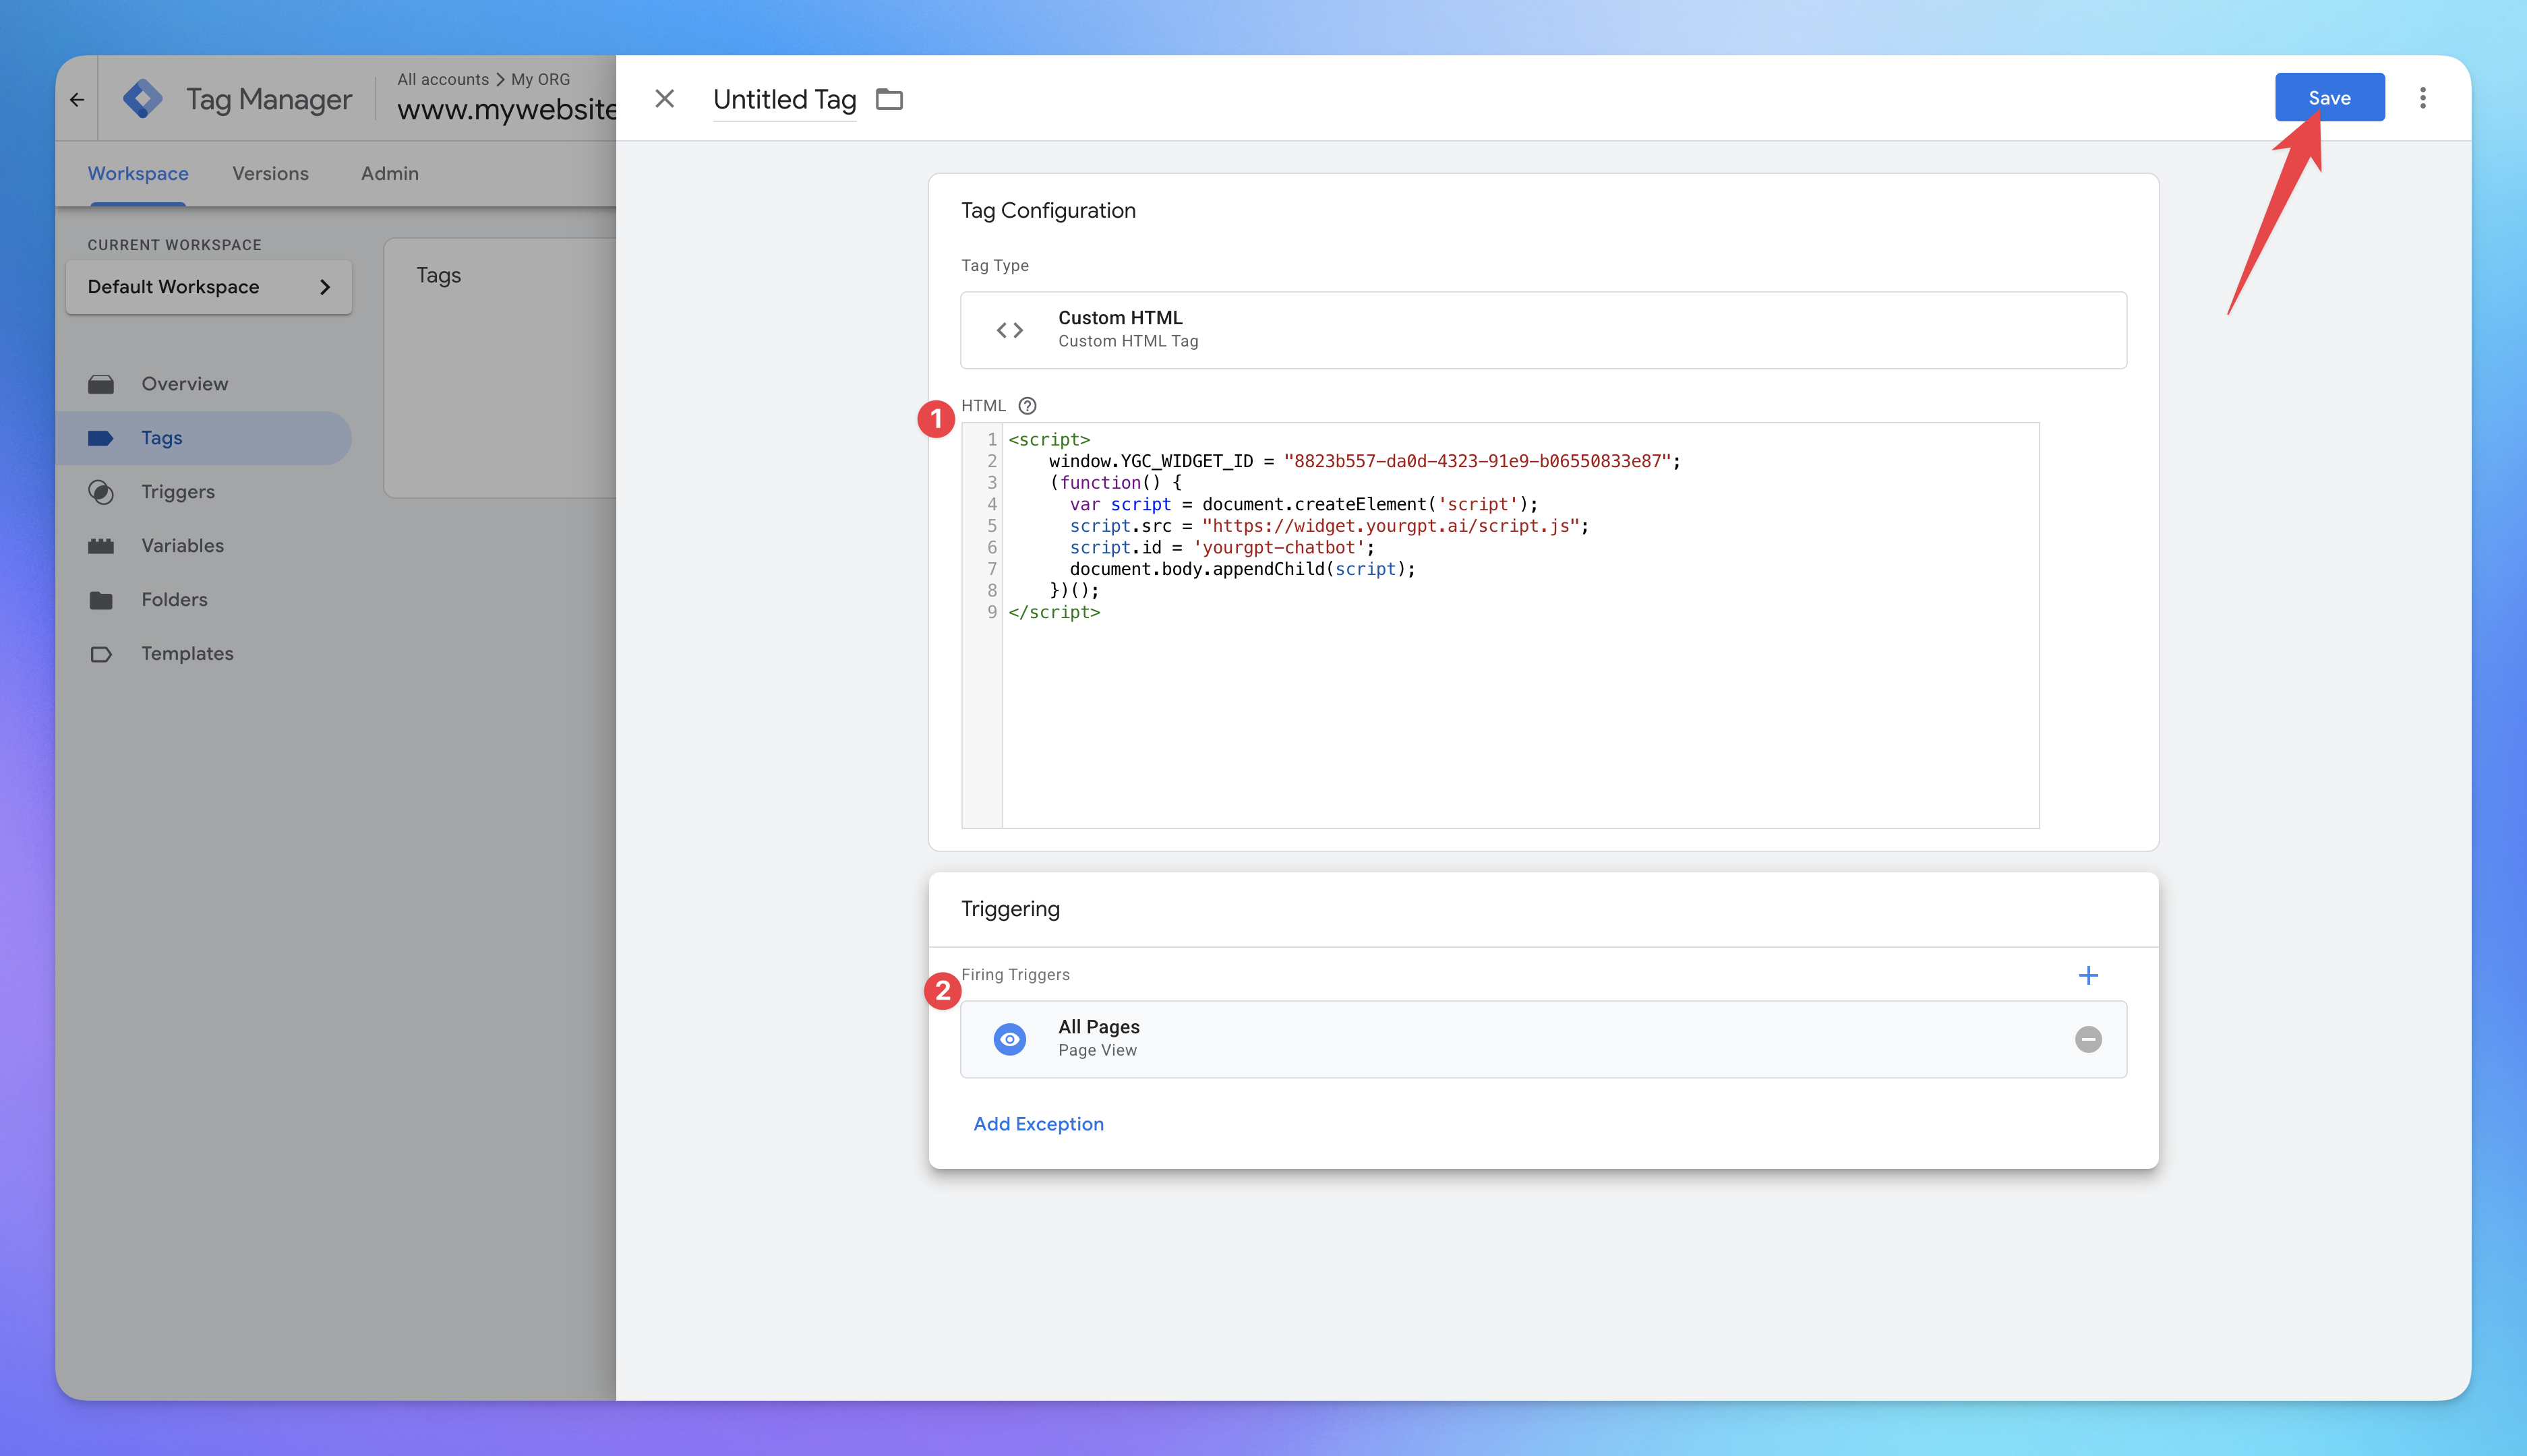
Name your tag (e.g., "YourGPT Widget") and click Save.
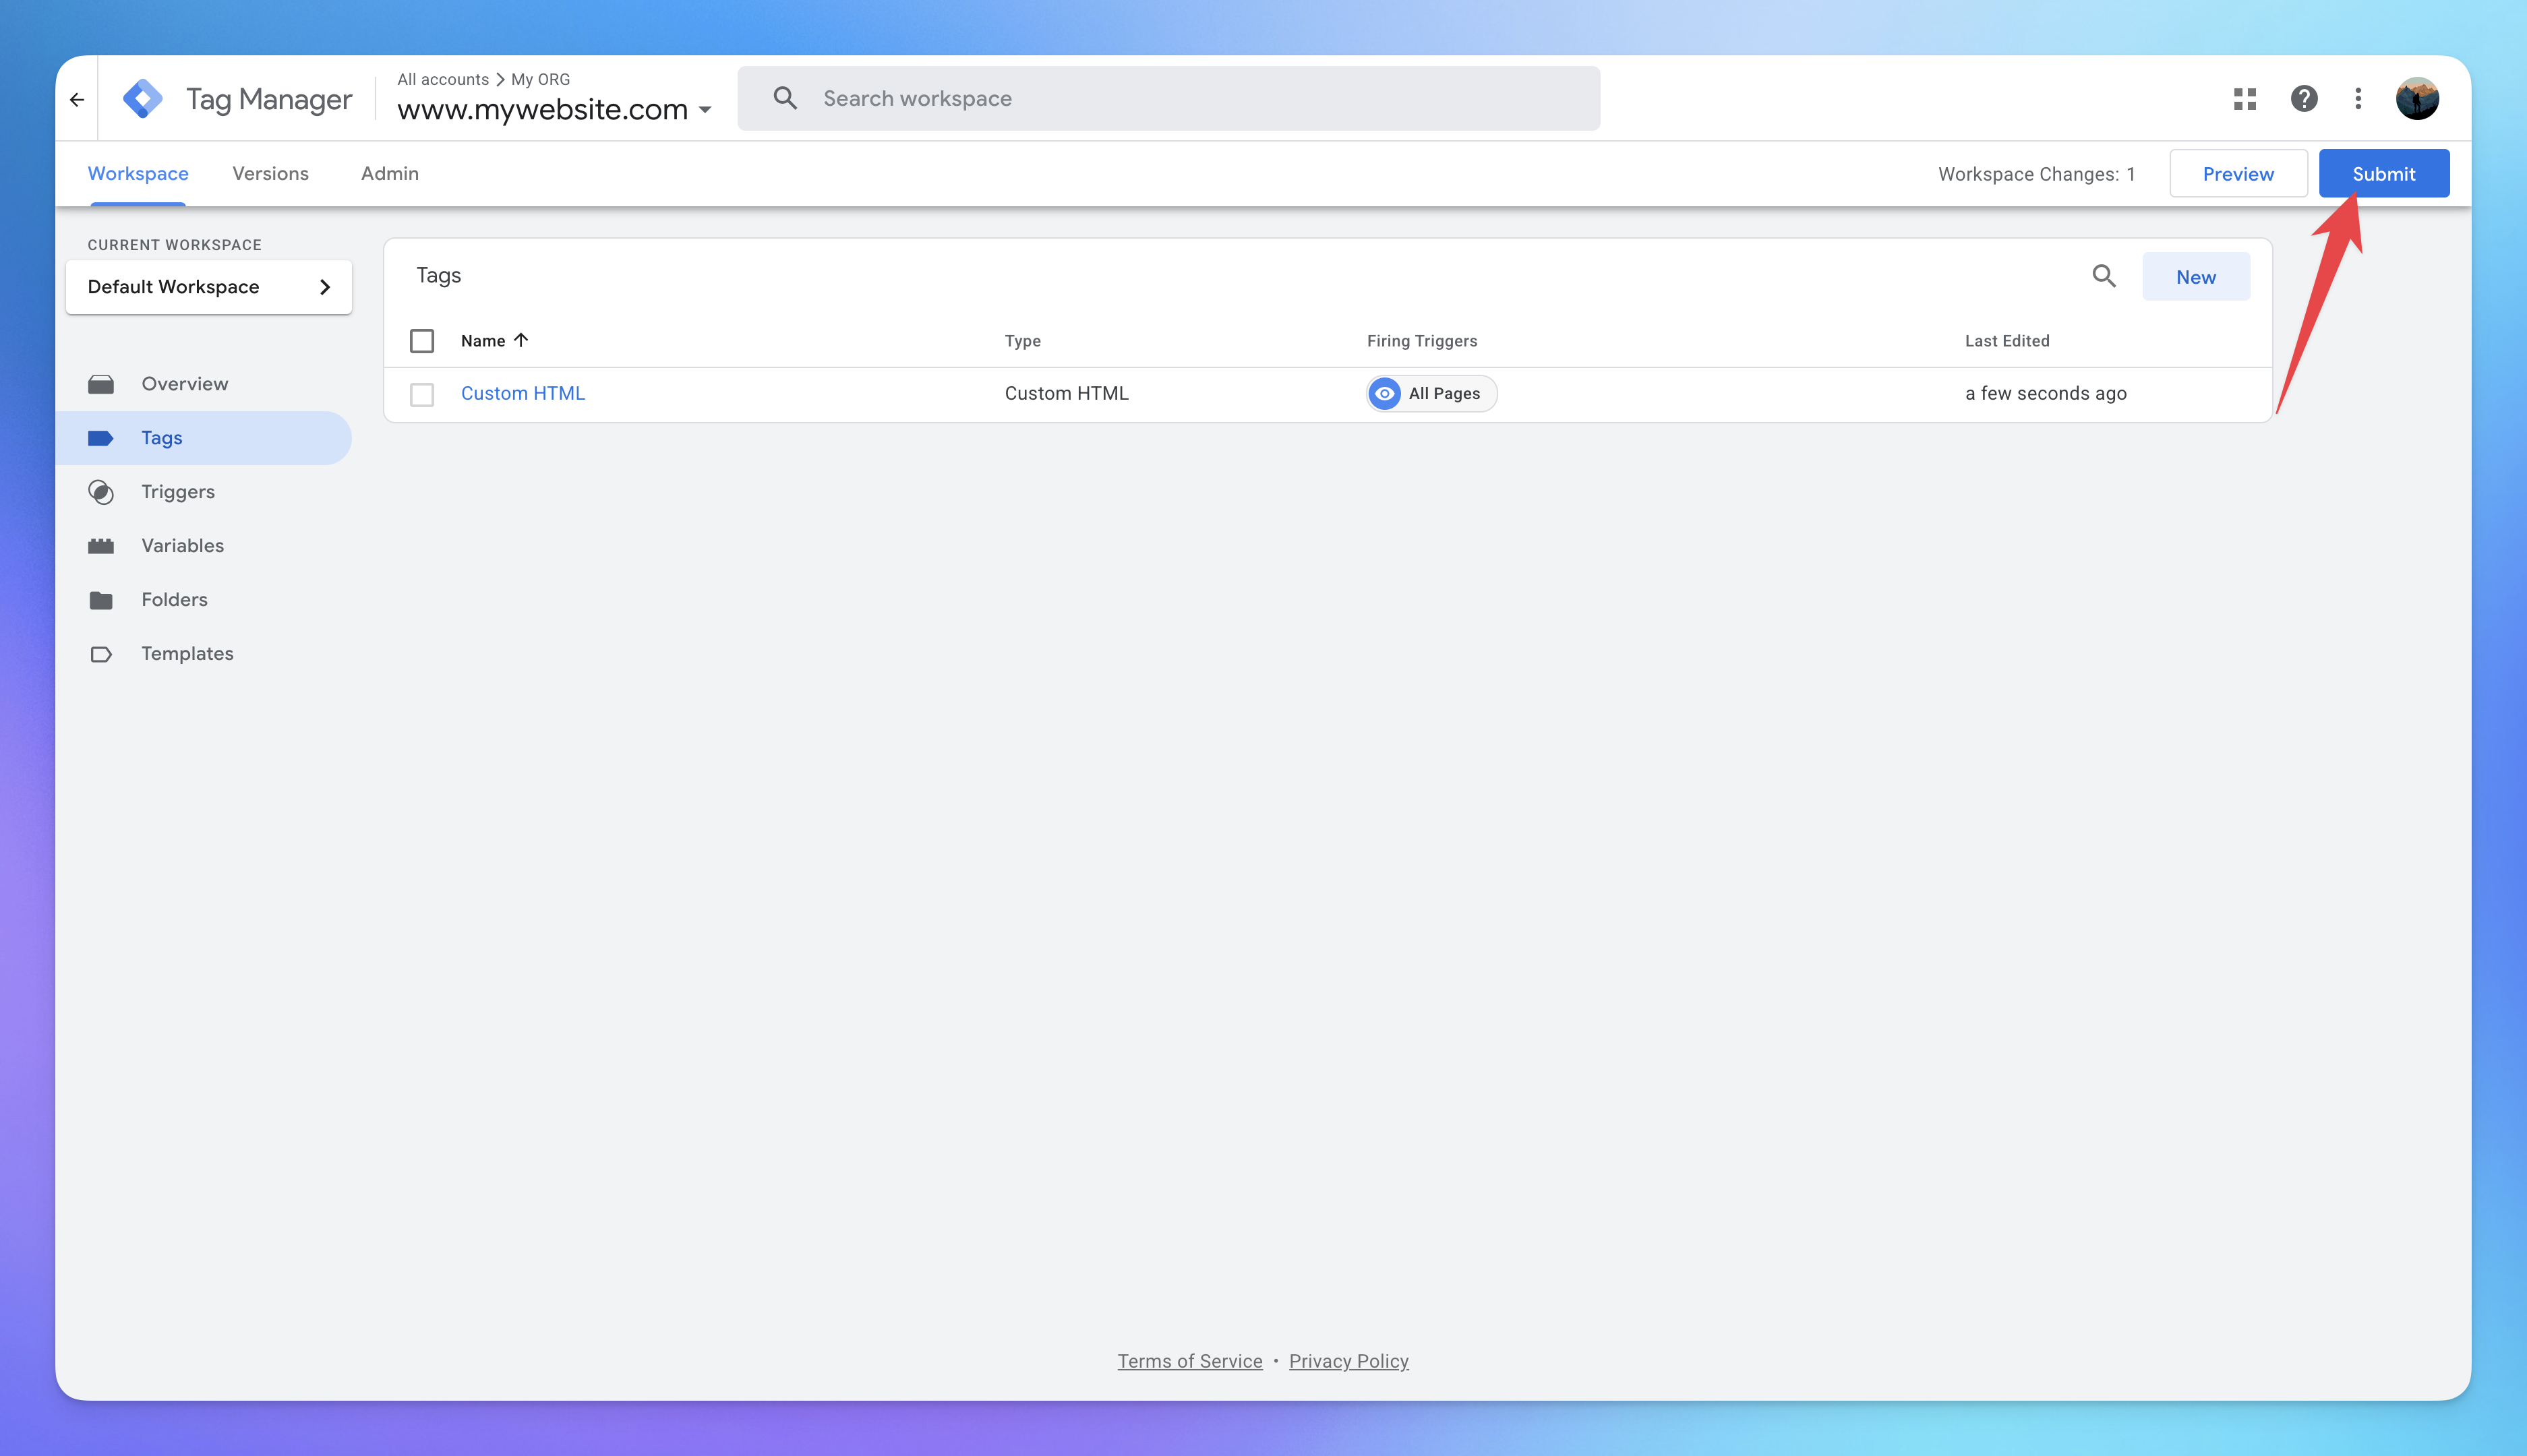
Once you’re back in GTM’s home, click the Submit button to apply the changes.
Note: Make sure that you have a general trigger set up on your workspace (e.g., on page view). Otherwise, none of the tags will be triggered.
Related Articles
How to invite Team Members to Your AI Agent?
Add teammates, assign roles, and collaborate from chatbot settings.
How to Temporarily Disable AI Responses
Disable bot responses for maintenance, testing, or manual handling
How To enable Image Understanding for Your AI
AI agent to process images and answer on them
What is the Difference Between Chat Mode & Agent Mode?
A Practical Guide to choose between Chat Mode and Agent Mode in YourGPT
How to Add an AI Helpdesk to Your Website Widget With Optional Password Access
Embed an AI Helpdesk in Your Widget and Secure It in Minutes
Anywhere, Anytime Access to YourGPT Support Inbox
Instant Live Support from Your Phone with the YourGPT Mobile App